In the closing years of the 1950s Rover were acutely aware that the P4 really was getting towards the end of its run and was going to need to be replaced.
With how iterative car design has become over the last 20-30 years, and especially in the last decade (yes I realise there are a handful of exceptions), how sharply the resulting clean-slate design contrasted the outgoing P4 it seems almost unbelievable that they were launched by the same company.
This is not me belittling the P4 by the way. Looking at this car in 2023 it's very easy to forget that when this was launched in 1949 that the P4 was a very modern design. It was also a very, very well engineered car through and through - which is why it survived all the way through to 1963 with relatively few changes to the core design. It's astonishing how well it drives, and the 110 version with the silky smooth 2.6 litre IoE straight six engine has a turn of pace which must have been quite something in its day. While it's not a quick car off the mark, it gathers pace with authority and is quite content to howl along in the outside lane of the motorway even today without breaking a sweat - even if it does seem to confuse some other drives when this sails past them.
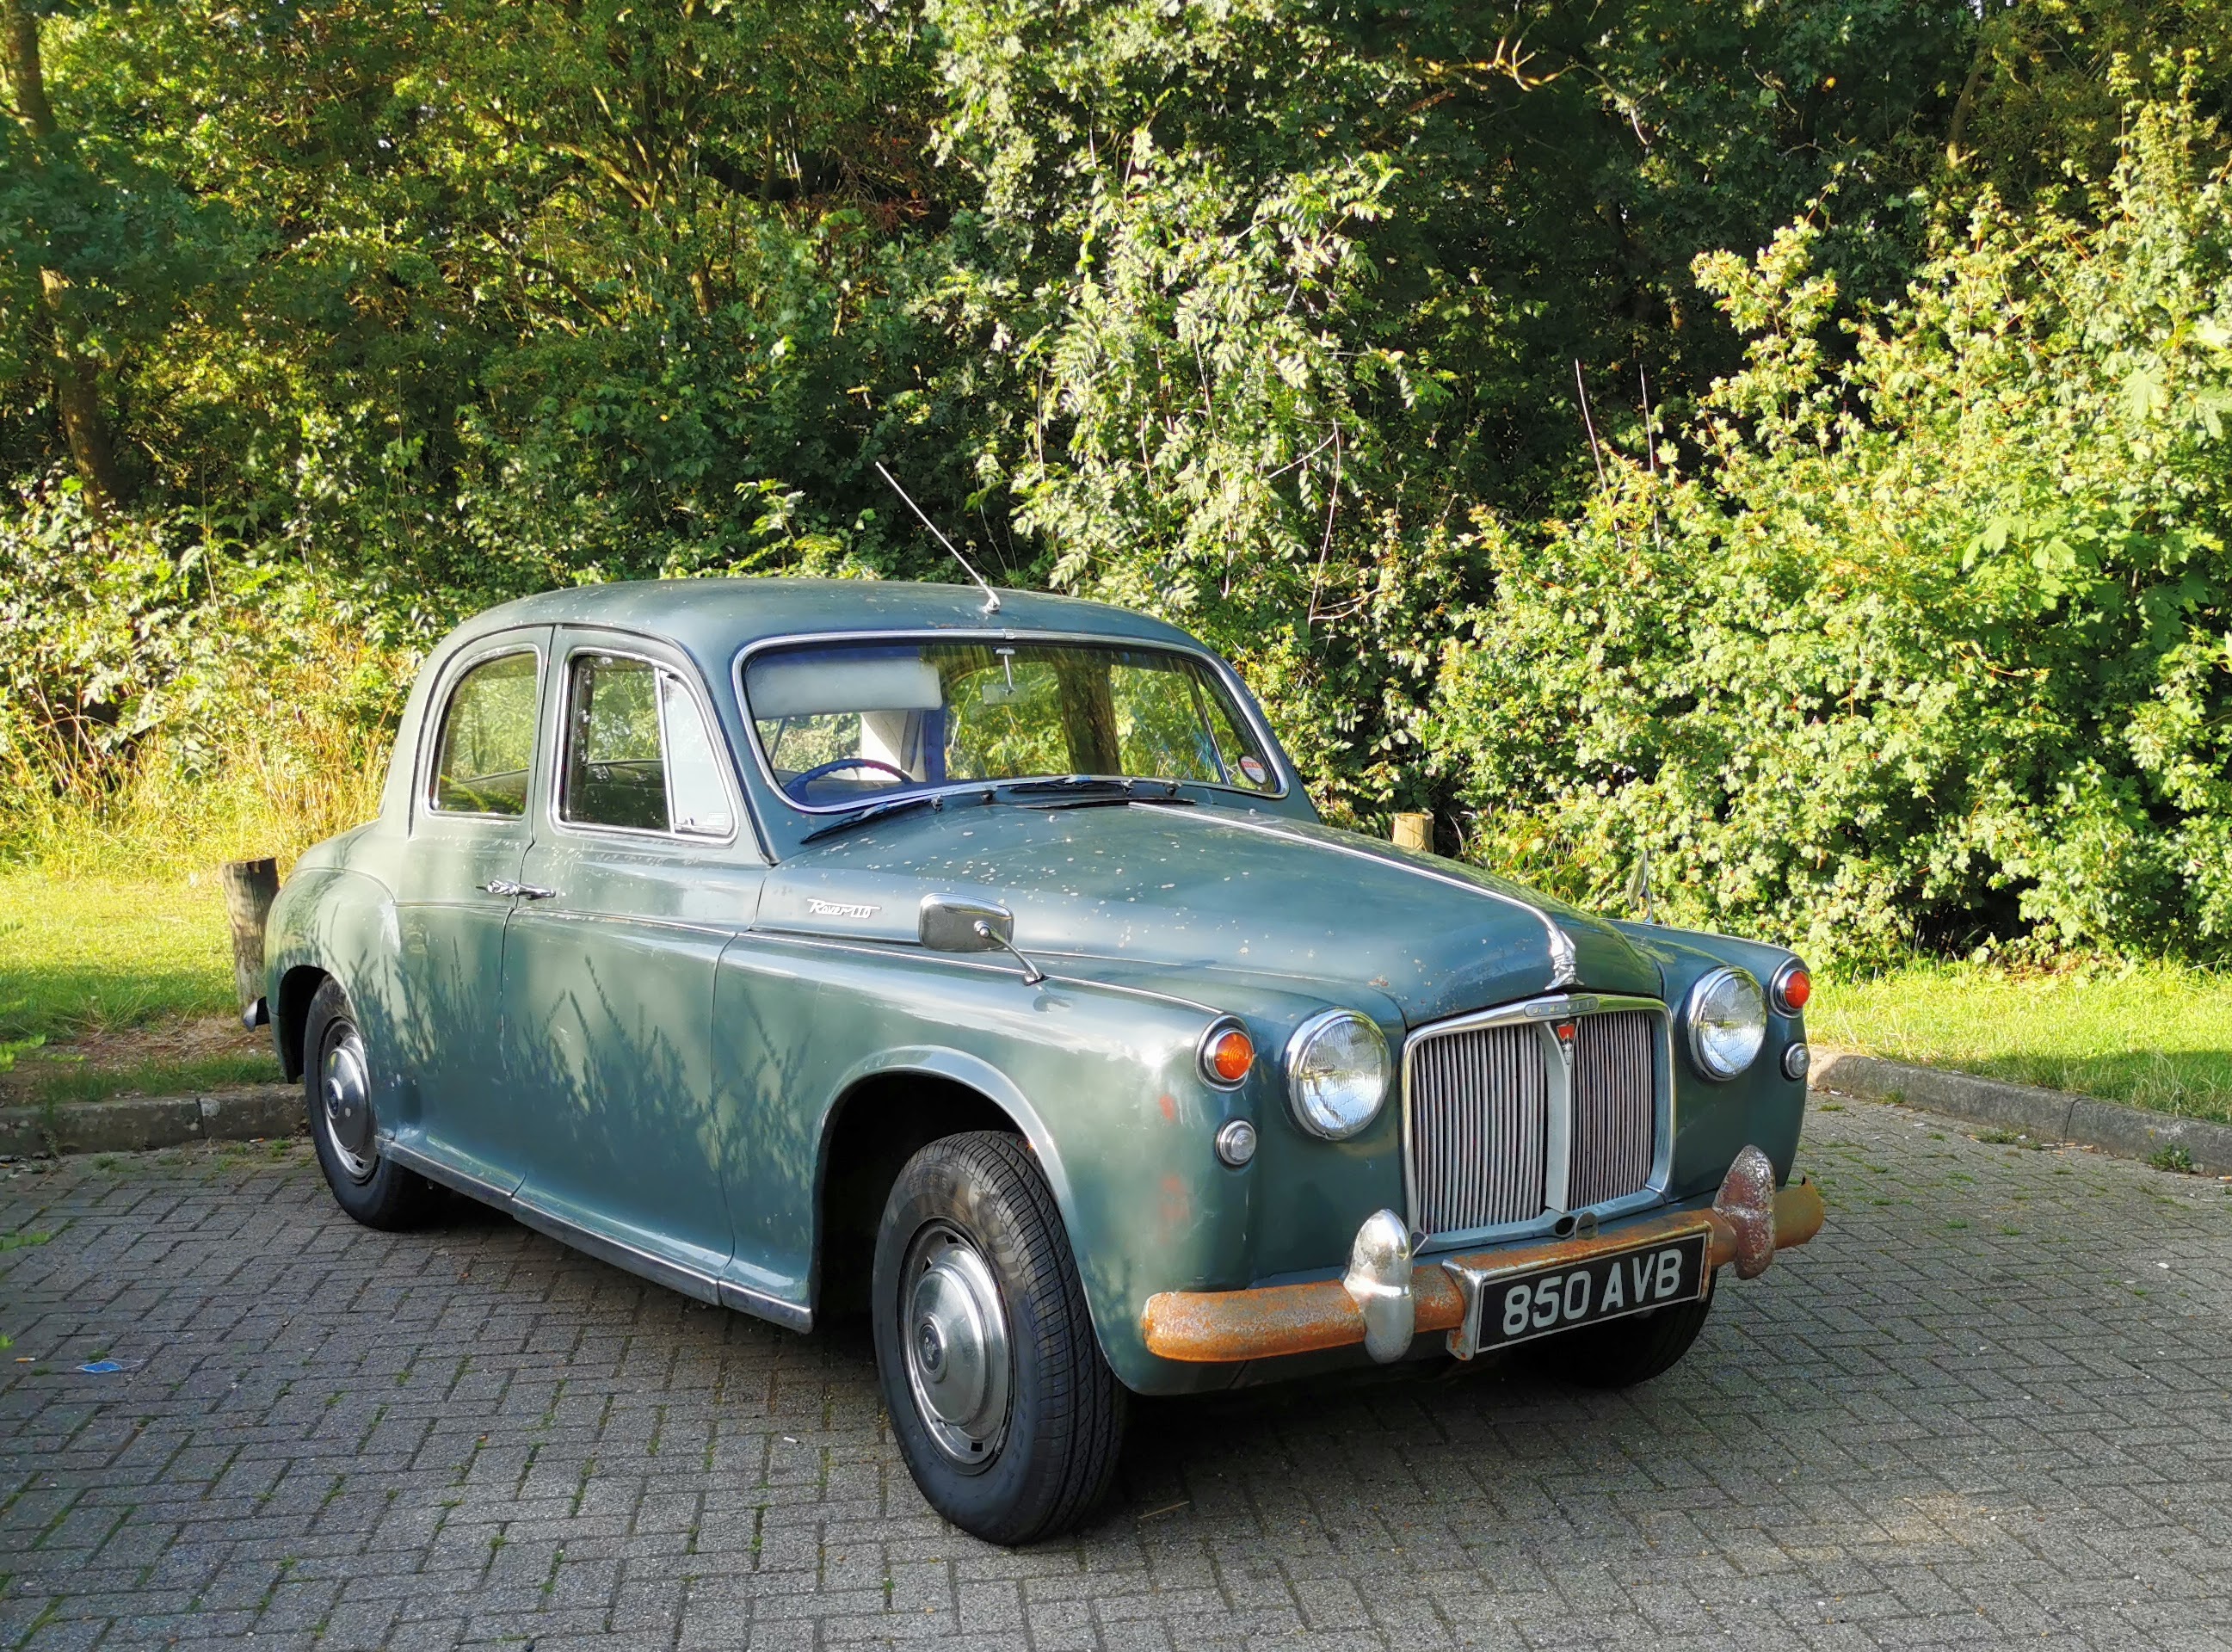
Probably the only vice I have found in driving the P4 simply is the lack of power steering. It is really quite heavy to steer, particularly at parking speeds. The addition of power steering would really have made it a true joy to pilot at any speed. Something which has been very clear when I've done any work on it is that it is so very clearly a car design which has been primarily steered by engineers rather than stylists or accountants. I very much like the P4 and feel very lucky to have had the opportunity to own one, I also feel that they really are one of the most undervalued classic cars out there at the moment. The fact that you can pick up a really nice one for the same sort of money as a tidy Morris Minor really does surprise me - I like a Moggie just the same as the next classic car nut, but the P4 is a heck of a lot more car for the money in my opinion and if I personally had to pick one to drive day to day, the Rover would win hands down.
Power steering or none, the P4 had been an almost universally well liked car throughout its 14 year run, and was always going to be a fairly tough act to follow in what was becoming day-by-day an increasingly competitive market. A like-for-like modernised replacement just wasn't going to do it, they were going to have to innovate - and innovate they did. What followed was a massive, extremely expensive gamble by Rover which if it had failed almost definitely would have spelled the end of the company.
They had identified that there was a growing desire in the market for a smaller, more economical car than the likes of the P4, but still offering similar levels of luxury. As such the replacement for the P4 was quite substantially more compact, yet was still appointed in a way that meant that anyone climbing on board wouldn't feel that they had been short changed when they traded in their faithful old P4, even if it was a little less roomy.
The car which ended up appearing on drawing boards was quite unlike anything else at the time - even more so it you looked beneath the extremely sharp, sleek looking exterior skin. There was no traditional looking chassis or unibody design present - instead a sort of skeletal framework was designed which comprised all of the structural parts of the car, referred to as the "baseframe" by the development team. Technically this is a monocoque/unibody frame, but the way it was implemented was sufficiently different that it really is its own thing I reckon. All of the exterior panels of the car - even including the roof - are simply bolted to this baseframe. This in theory allowed for far simplified repairs during the life of the cars (in an era where rust was recognised as being a huge problem), and even the ability to "re-skin" the car during its model run to keep pace with styling trends. Of course aside from a slight tweak to the face of the car and a slightly more comprehensive dashboard package, in 1970 David Bache's design proved to be sufficiently timeless that it never needed to change - and I still think looks as fresh today as it ever did.
Mechanically things were also all-new. The engines from the P4 were too bulky, thirsty, underpowered and definitely too heavy to use in the new car. As such the P6 was launched with a brand new 2 litre four cylinder overhead-cam engine - an OHC layout being quite unusual in the early 60s outside high-end performance engines. While this lacked the refinement of the older six cylinder power units in the higher trim level P4s, it was a very punchy performer. This allowed the new model a very decent set of performance figures for its day, and it had sufficient torque available in the mid range to allow the gearing to be set such that the somewhat noisy engine didn't intrude on the refinement in the cabin during high speed cruising.
The suspension design was very odd for the time. The front suspension is essentially a double-wishbone design in principle - but arranged really strangely. While the lower part of the setup looked pretty conventional, that was where the normality ended. The springs are actually mounted longitudinally, with the "top" of the spring bearing on the front cabin bulkhead, with a cranked arm and pivot transferring the force from the top of the suspension strut. This design had a couple of advantages, namely that it minimised intrusion into the engine bay, leaving a usefully wide space between where the suspension struts normally would have been. It also actually makes sense from a structural perspective in that it means that the suspension load was placed upon the bulkhead - an already very strong part of the car's structure - without having to add additional bracing to the inner wings as you normally would have had to. Not having to add that reinforcement to the area where the top of the suspension struts normally would be is obviously a weight saving, something that the designers kept in mind throughout the design. While it wasn't ever actually used in a production vehicle, the room available in the engine bay was something that Rover were very interested in at the time as while the P6 was being designed they still very much had visions of slotting a gas turbine power unit in there. Of course later in the life of the P6 this also proved to be a stroke of luck as it meant that the 3.5 litre V8 slotted neatly in with very little modification required to the surrounding metalwork.
A diagram is shown below of the front suspension. I've no idea where the original version of this image came from. It turned up in a Google image search - on a Russian T-shirt reseller's website of all places! I've tried several reverse image searches to try to find the source, but no luck so far. If this image is yours please let me know and I'll either credit you or remove it as you wish. I'd love to find a similarly clear diagram for the rear suspension too.
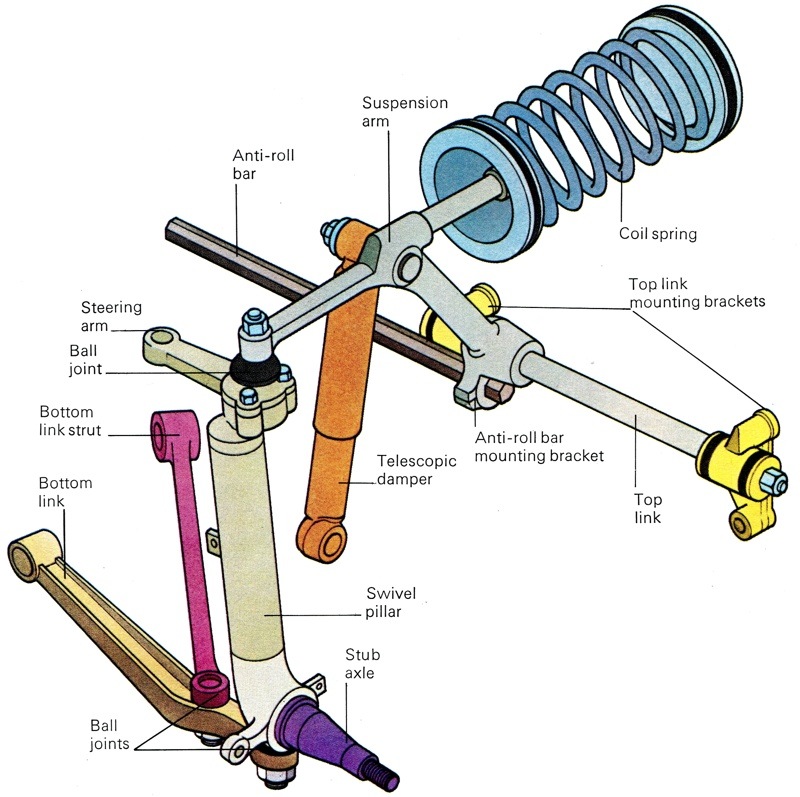
As I'd said earlier there's nothing fundamentally odd here in terms of components or how they actually work - it's just a really unusual way to package it.
The rear suspension was also very advanced. The norm for the day was a solid axle suspended by either coil or leaf springs. Instead the P6 used coil sprung trailing arms linked together at the rear by a sliding De Dion tube, an assembly containing the diff and rear brake calipers were fixed to the car in the centre. The decision to use inboard brakes was made to minimise the unsprung weight to improve both road adhesion and ride quality. Even if this does make working on the calipers a little more awkward. This type of suspension wasn't unknown on competition and some high end sports cars, but its use on a mass market production car was completely unknown. The big advantage over more conventional arrangements was that this allowed for significant independent travel of both rear wheels while also keeping the track constant between them - eliminating the "tuck under" effect which affected many cars with trailing arm independent rear suspension systems.
While both the front and rear suspension systems on the P6 were both unconventional and quite complex, the results really can't be argued with, providing the car with class leading characteristics in both ride and handling. The car had very compliant, long travel suspension but the geometry was such that the tendency for lift off over steer and front end braking dive which tended to accompany compliant springing were vastly reduced. Despite riding as well as a large luxury saloon, it could handle as well as many far smaller, lighter sports cars.
The way that the front suspension was packaged also proved to work in the car's favour in terms of crash safety, allowing a far larger frontal crumple zone before the steering and suspension hardware would start to be pushed back towards the cabin - also helped by the steering box being mounted right up at the top of the engine bay, almost level with the bottom of the windscreen. Even if things did make it as far as the suspension, it would tend to "fold under" rather than just being pushed straight back into the cabin in the case of a frontal collision. In the early 60s crash safety really was something that car designers were really just starting to think about seriously for the most part - let's not forget that fitment of front seat belts to new vehicles was not made mandatory in the UK until 1965 - two years after the P6 was launched. The fact that it took until 1983 for a law to be implemented in the UK requiring said seat belts to be actually worn still baffles me somewhat. Rover were very much ahead of the curve with the amount of passive safety measures were built into the design of the P6. The idea of a highly rigid passenger cell independent of the cosmetic bodywork is essentially the approach that is still used today, albeit massively beefed up, particularly in terms of provision against side impacts. The cabin made significant use of padded surfaces and controls which were designed to break away cleanly in the event of an impact to reduce injuries in low to moderate speed impacts - plus the dash was designed such that hard protrusions were kept well clear of the occupant's legs - the very high mounting of the steering box and column in particular being worthy of note there as that was a very unusual design.
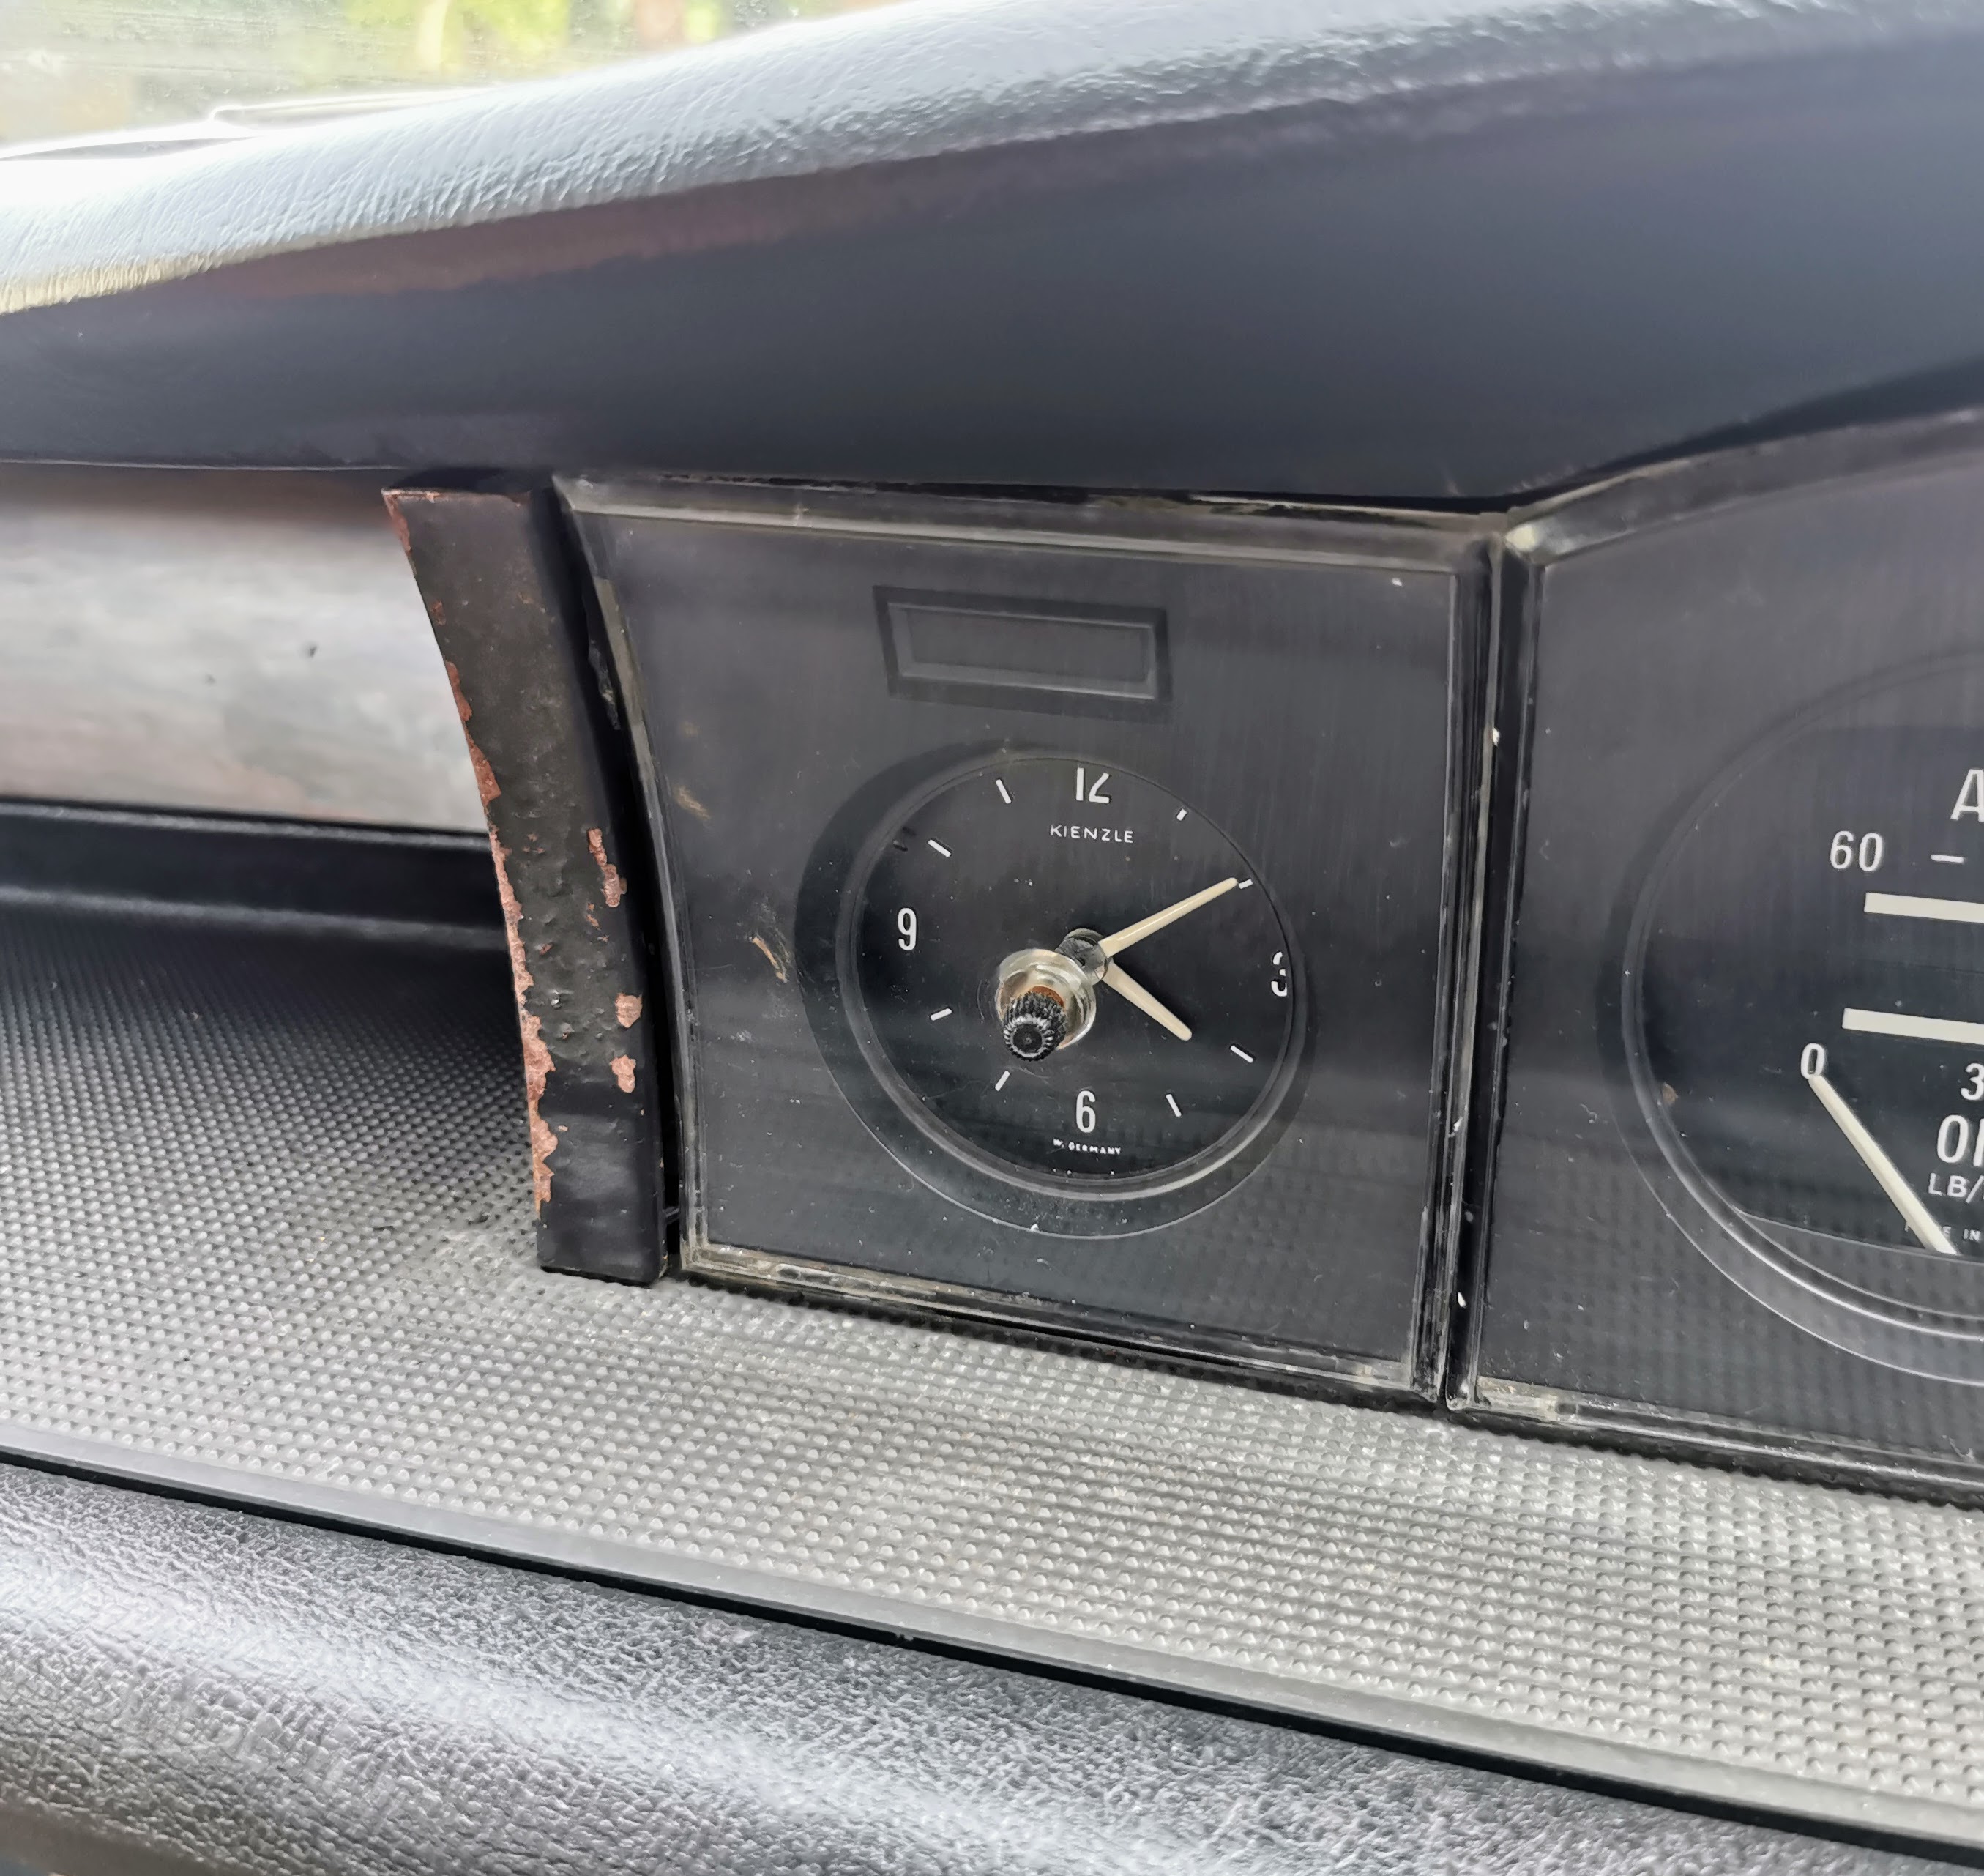
Similarly ergonomics were a field which most car makers were only really starting to put serious thought into. The dash of the P4 being a fairly classic example of a 50s design I would say. Obviously cheaper cars would have had cheaper trimmings and maybe more basic instrumentation, but the general layout would generally follow a similar sort of theme.

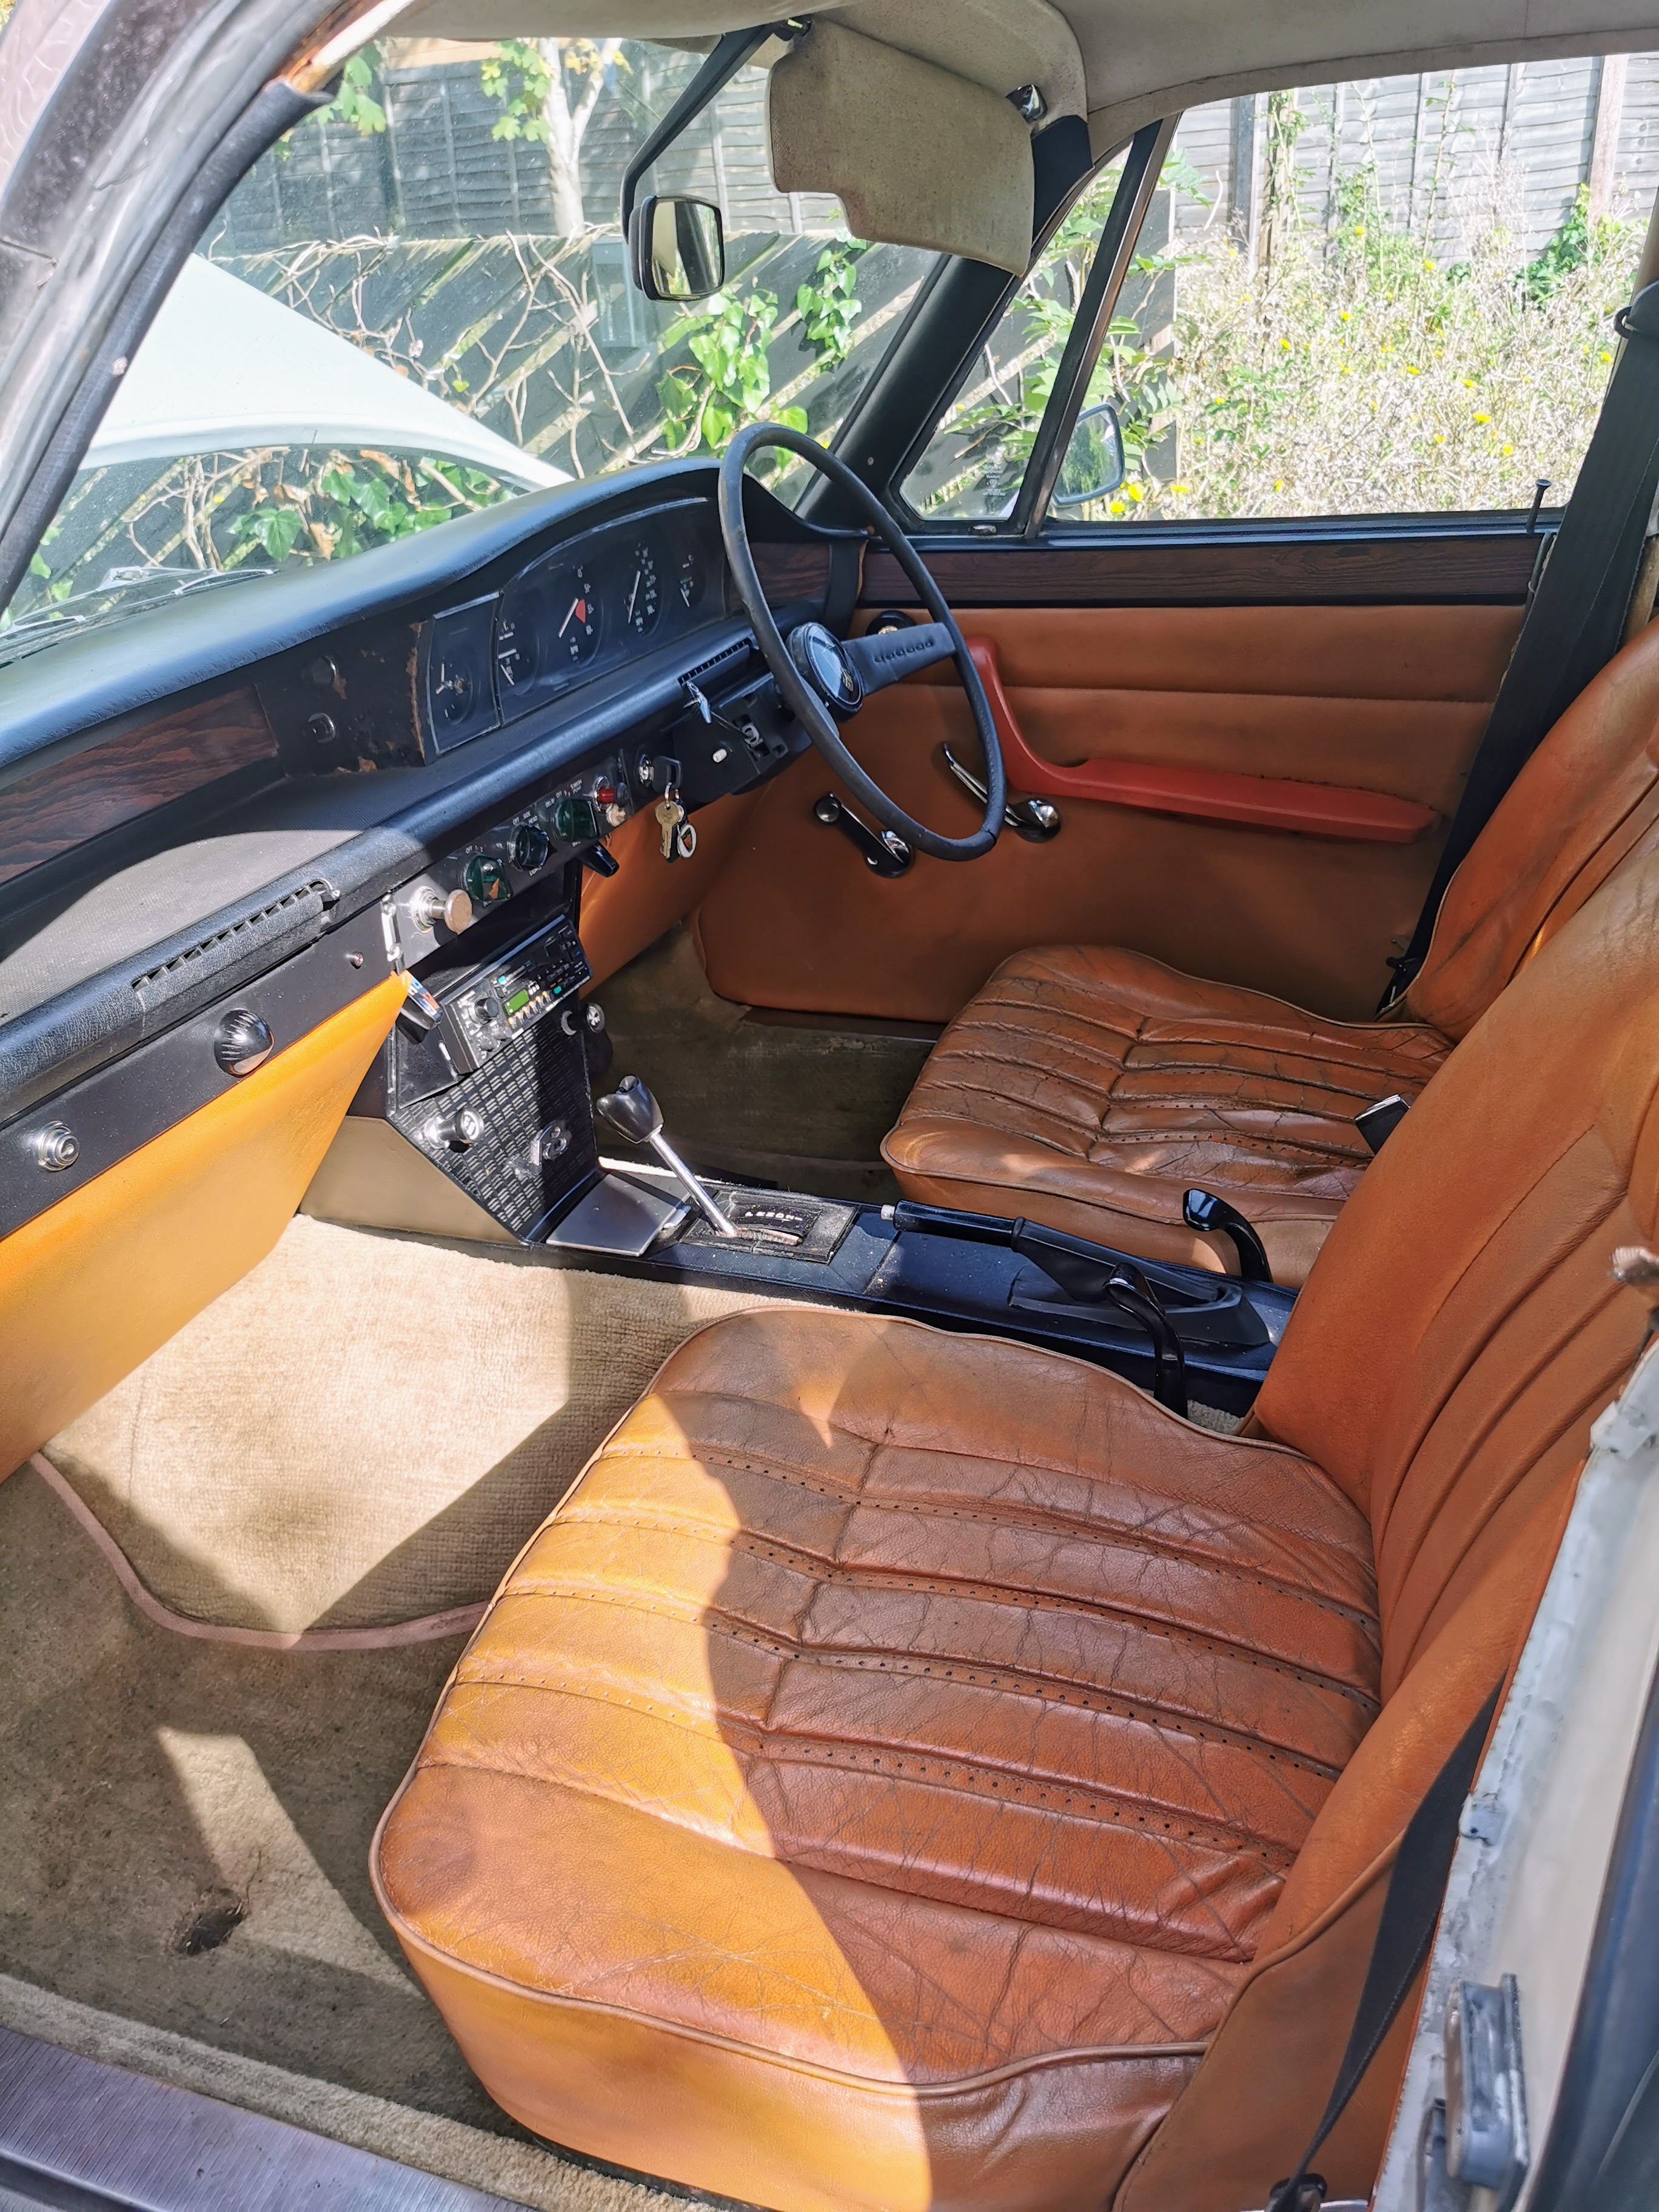
It looks really nice, and is a very comfortable place to be. However ergonomically it doesn't do so well. For a start it is immediately obvious how low down everything is mounted, when you're driving your main focus is more up here.
Really the only things you don't have to consciously glance down to look at are the clock, choke and oil pressure warning lights.
All of the switchgear is positioned somewhat awkwardly behind the steering wheel as well, so to access it you need to either reach around or through the wheel. Once you've figured out which control you're looking for as everything is identified in tiny text.

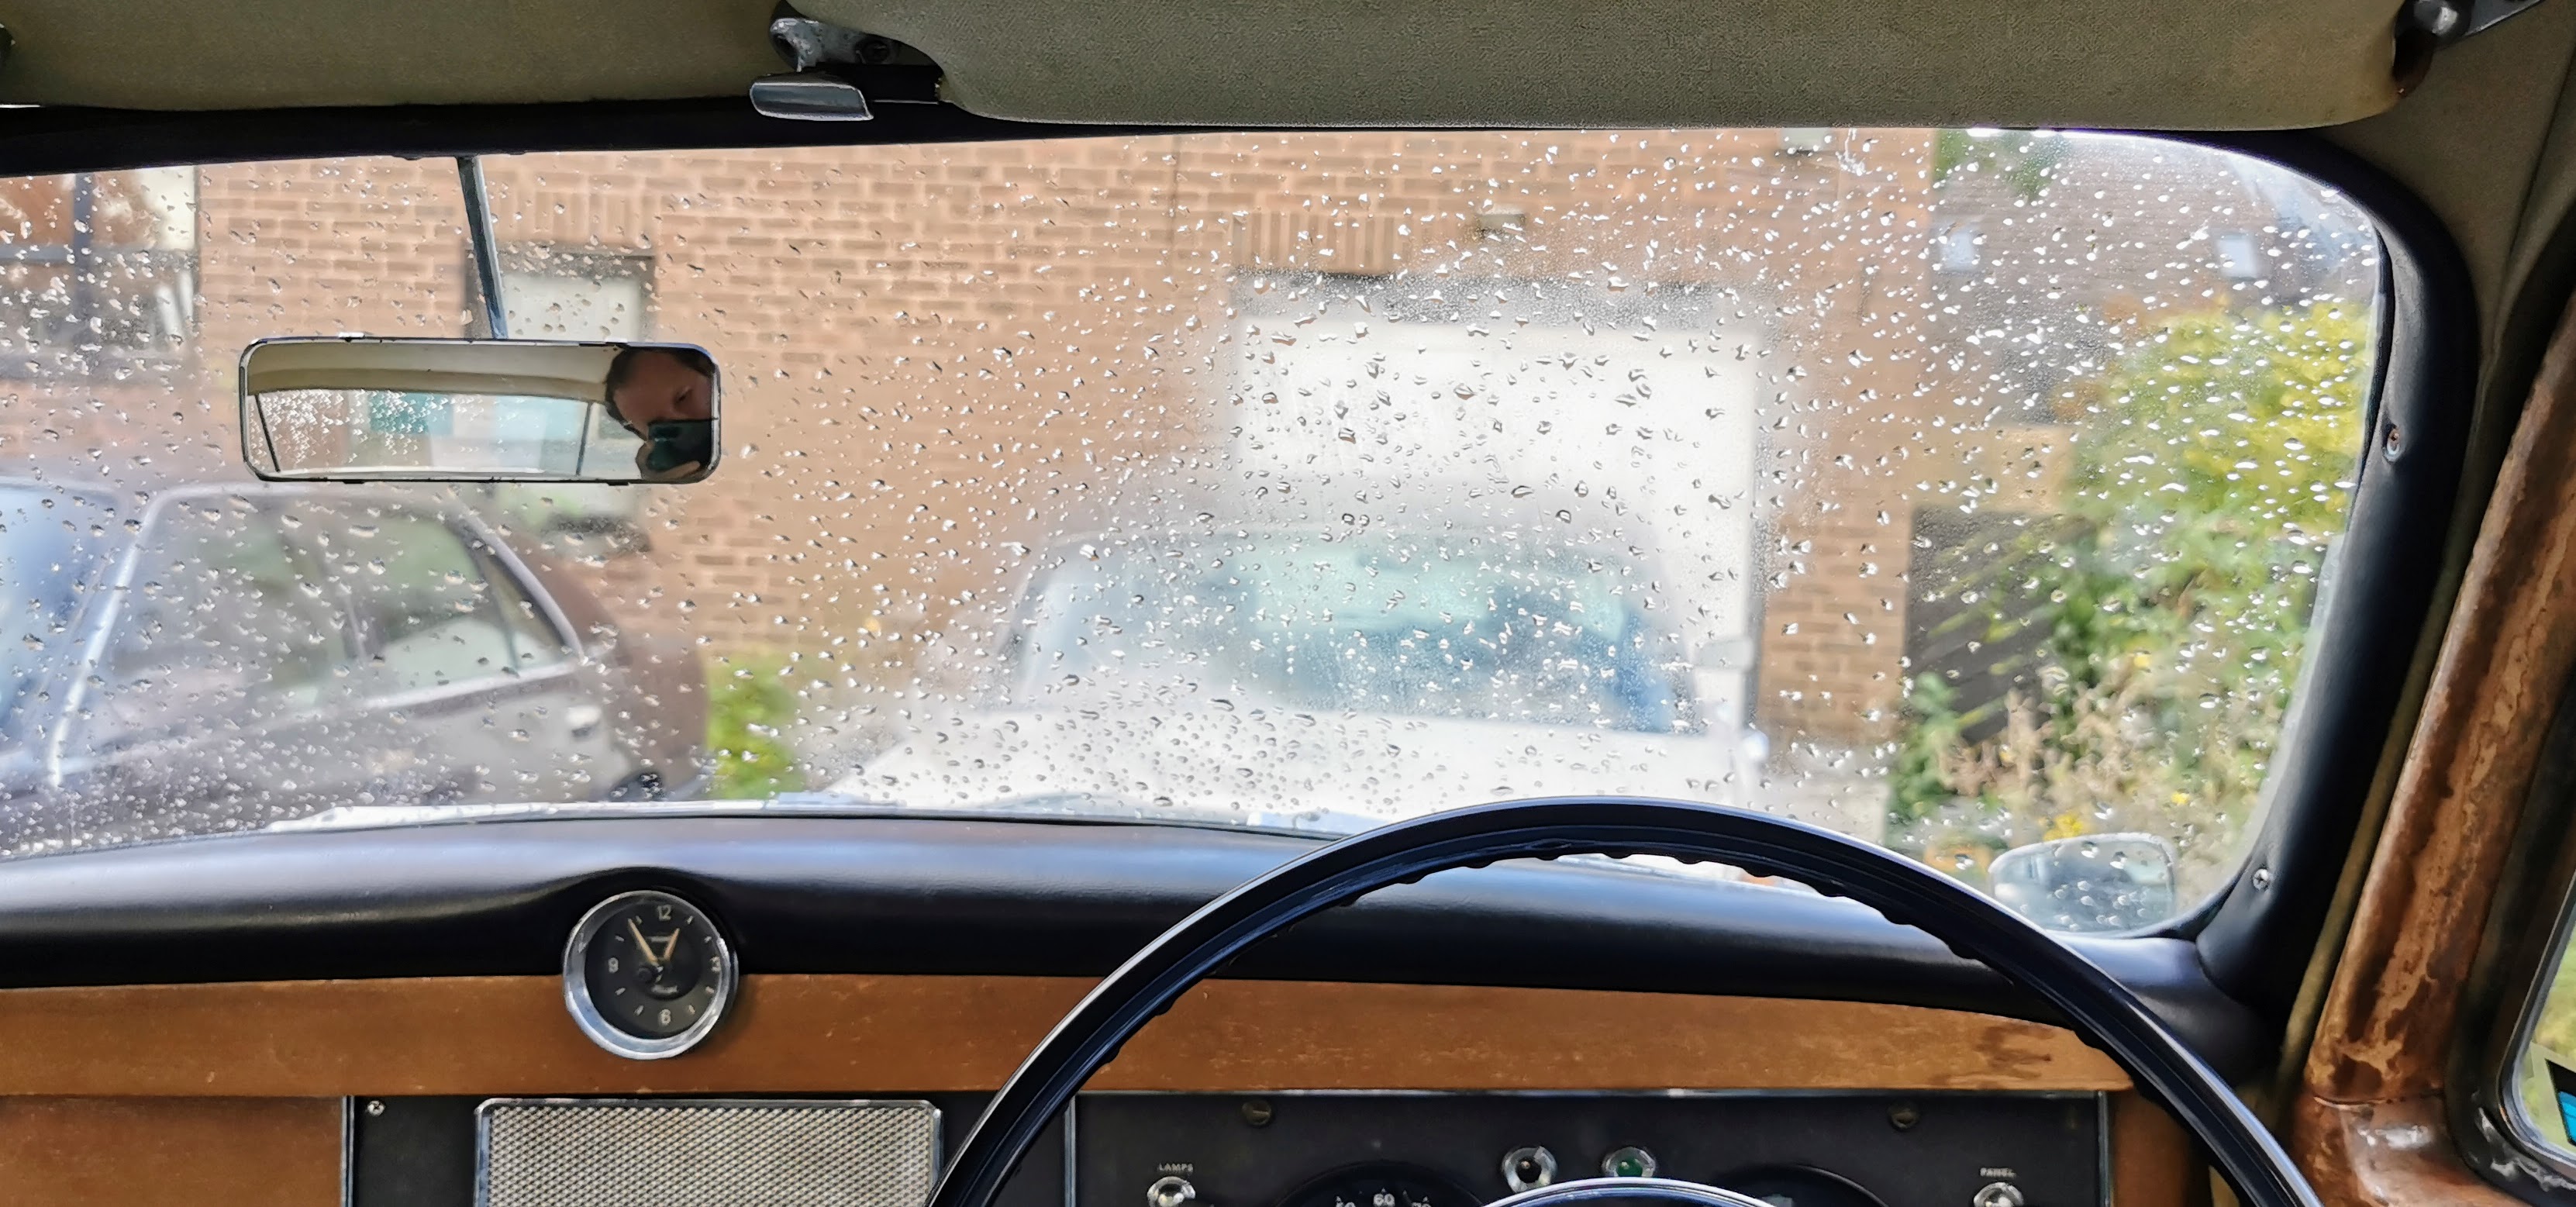
The heater controls in particular I found when I picked the car up to be pretty much completely indecipherable while actually driving if you hadn't taken the time to familiarise yourself with what did what beforehand. Not ideal when about ten minutes after I'd first got into the car it started raining and the windows started to fog up while on a busy road with nowhere to pull over.
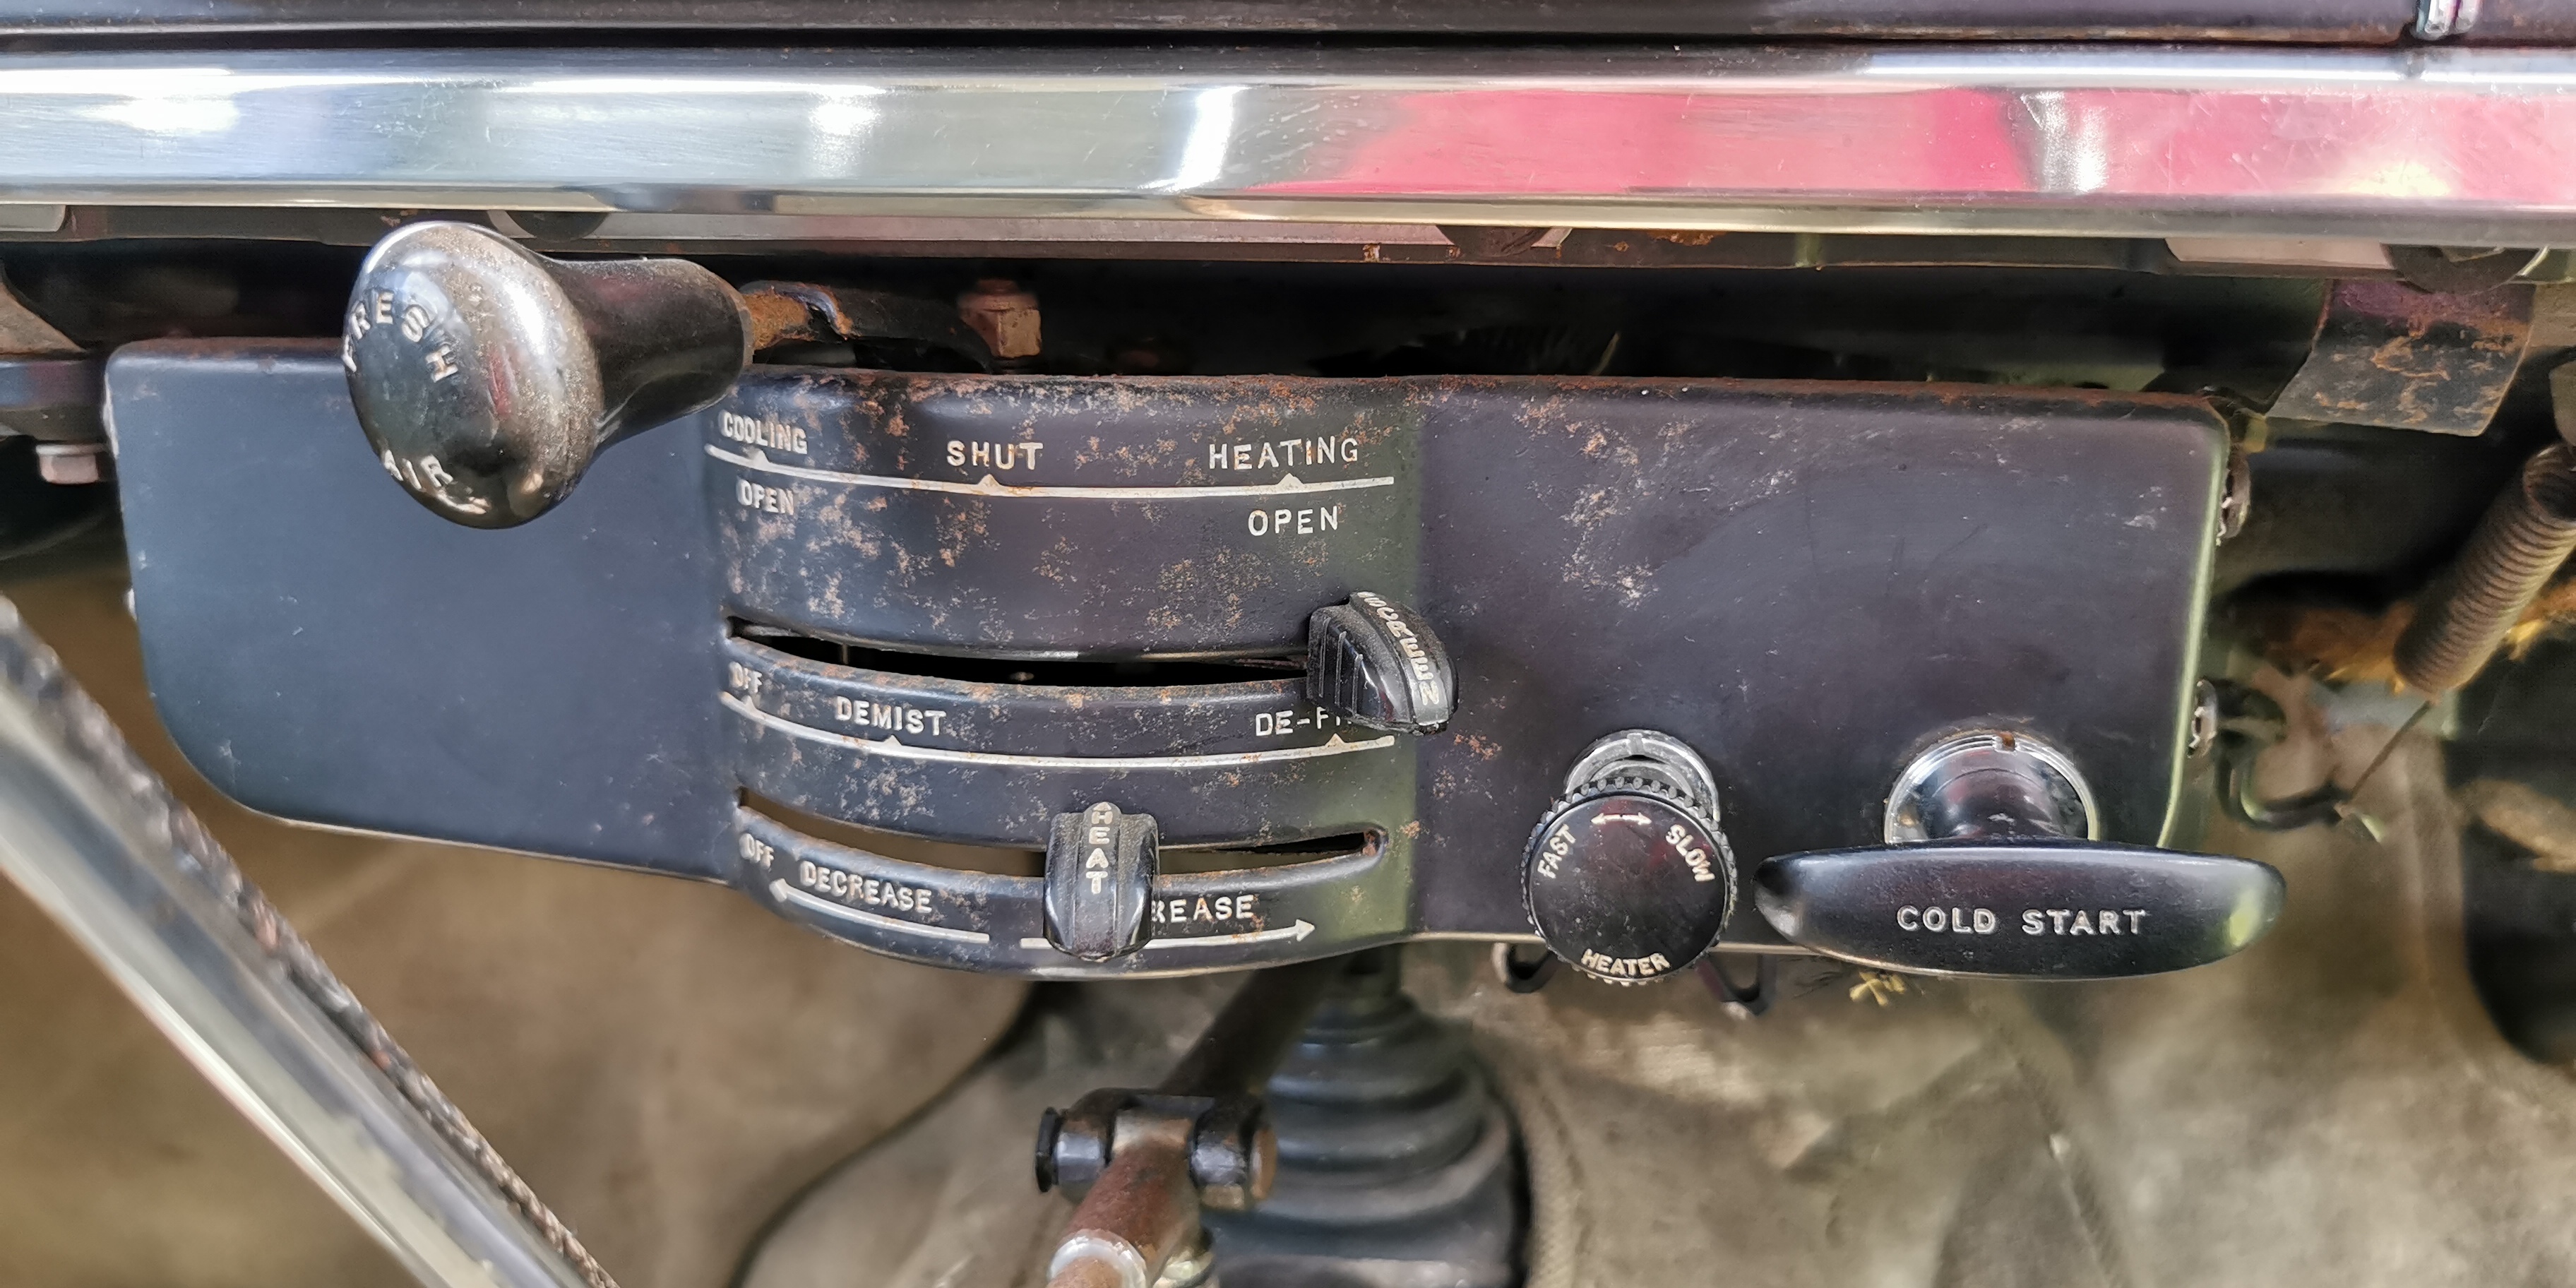
Additionally it's worth noting that nothing is illuminated at night beyond the main instruments themselves and the clock.
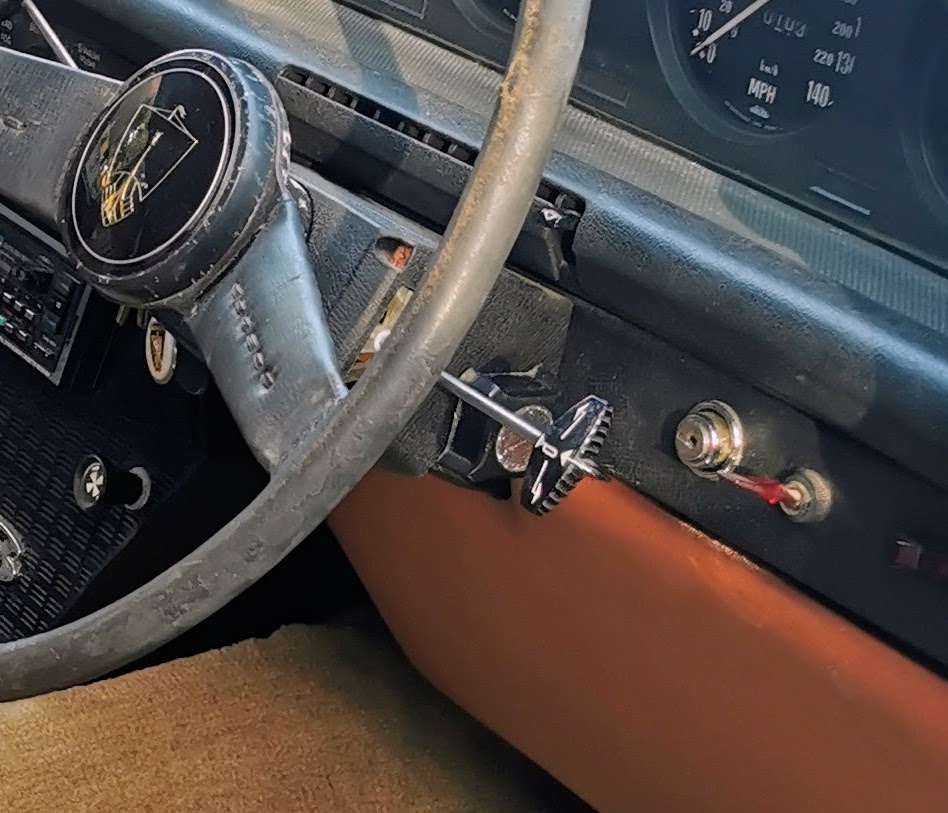
There are three, completely unlabelled stalks protruding from the steering column.
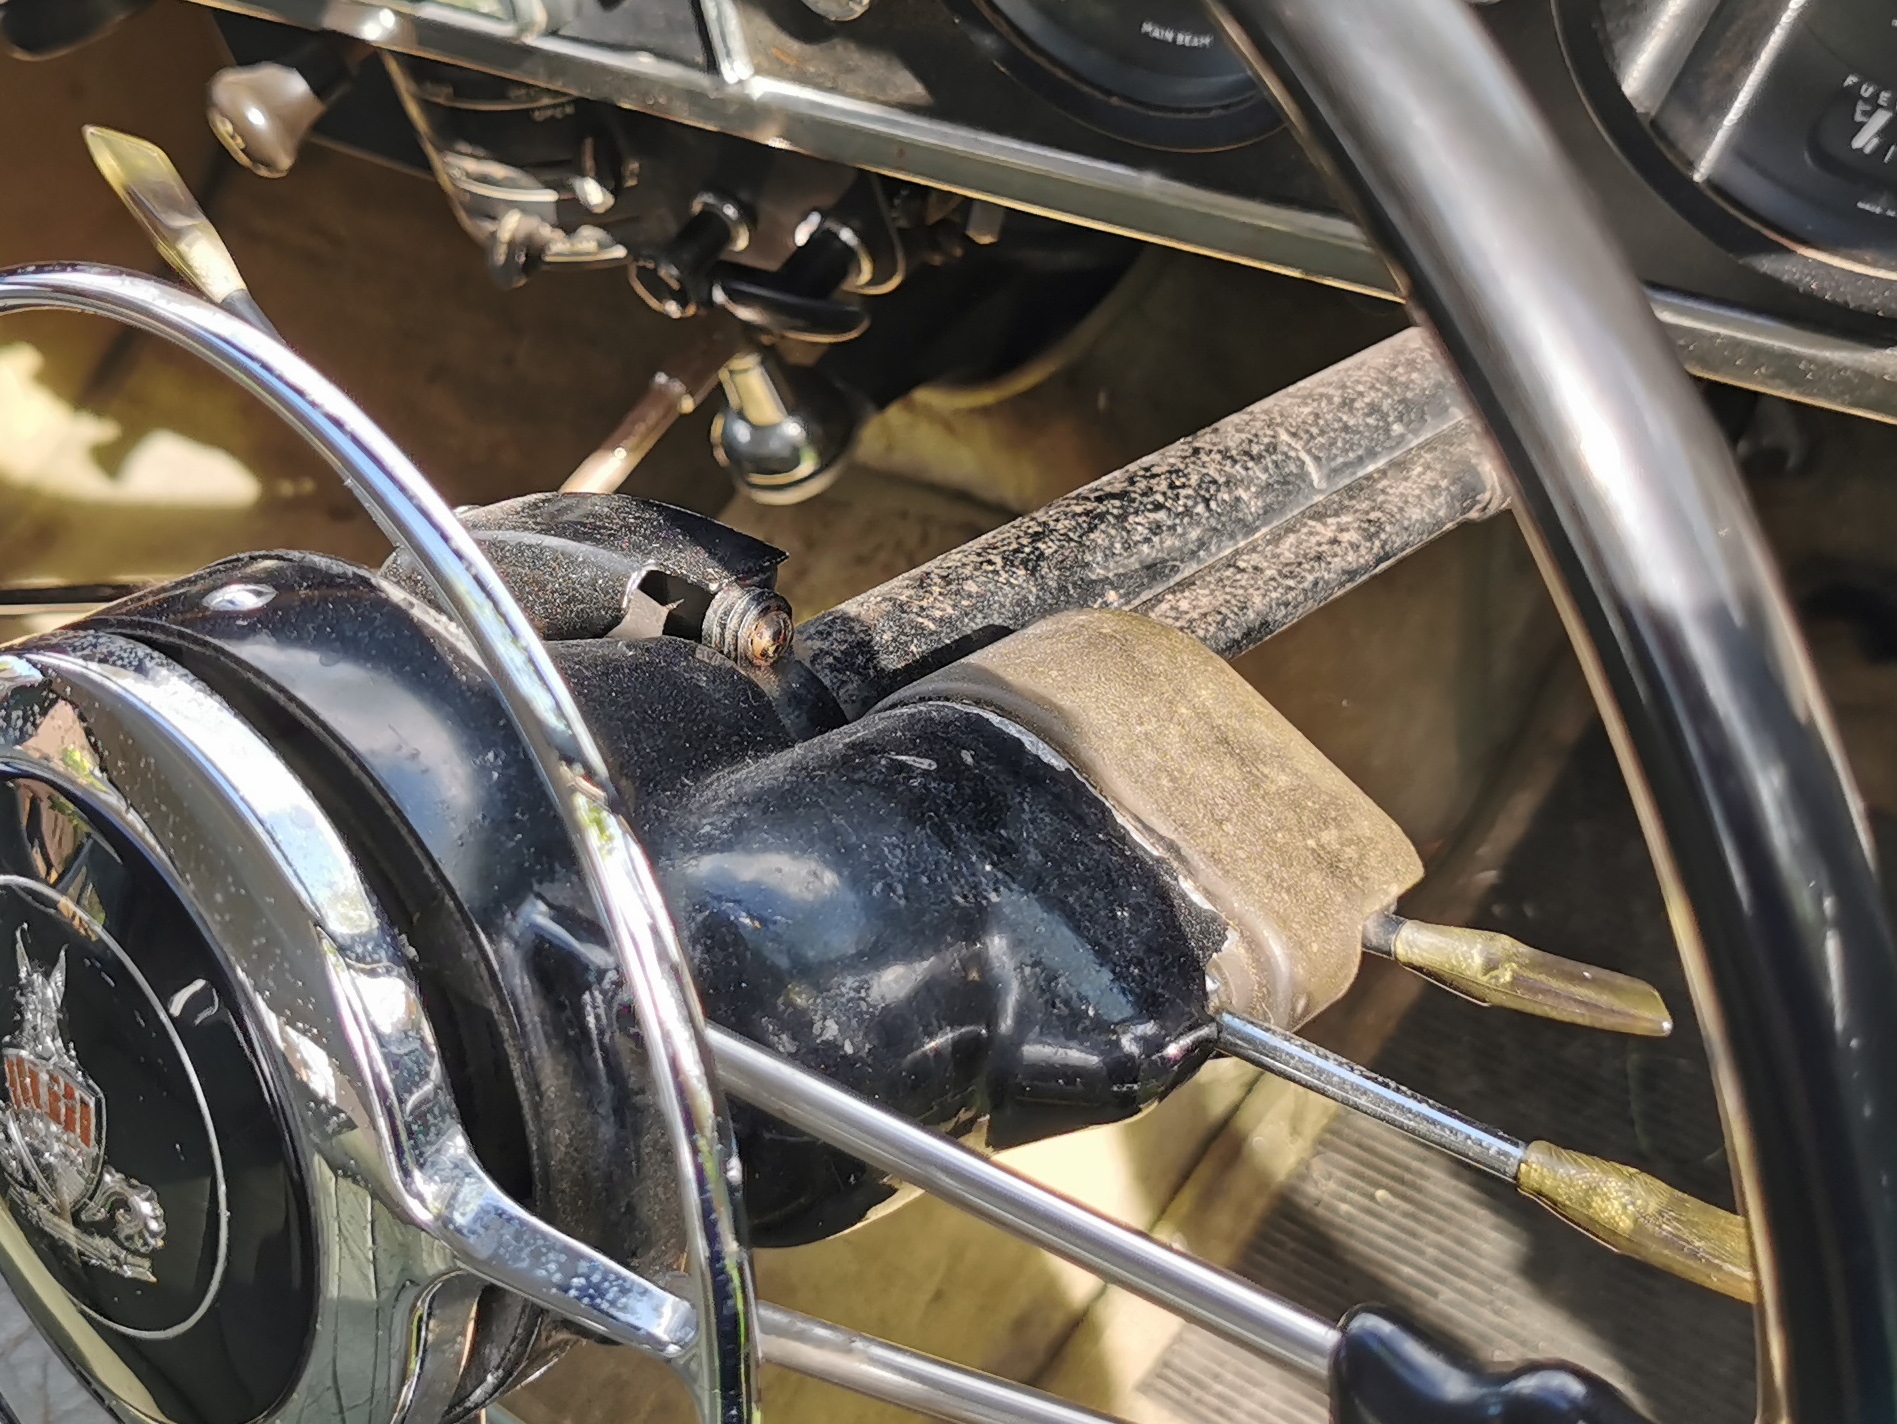
The one on the left - which at a glance looks most likely to be indicator stalk - is used to engage/disengage the overdrive on 4th gear. The larger of the two on the right controls the indicators, and the small one selects between the sidelights and dipped headlights. Main beam being toggled by a foot switch to the left of the clutch. Nothing particularly complicated there, but the complete lack of any labelling does result in a bit of head scratching if you've not driven the car before and haven't had the opportunity to be introduced to it or read the handbook.
The parking brake is operated by a shepherd's crook shaped lever protruding from the floor to the right of the accelerator pedal.
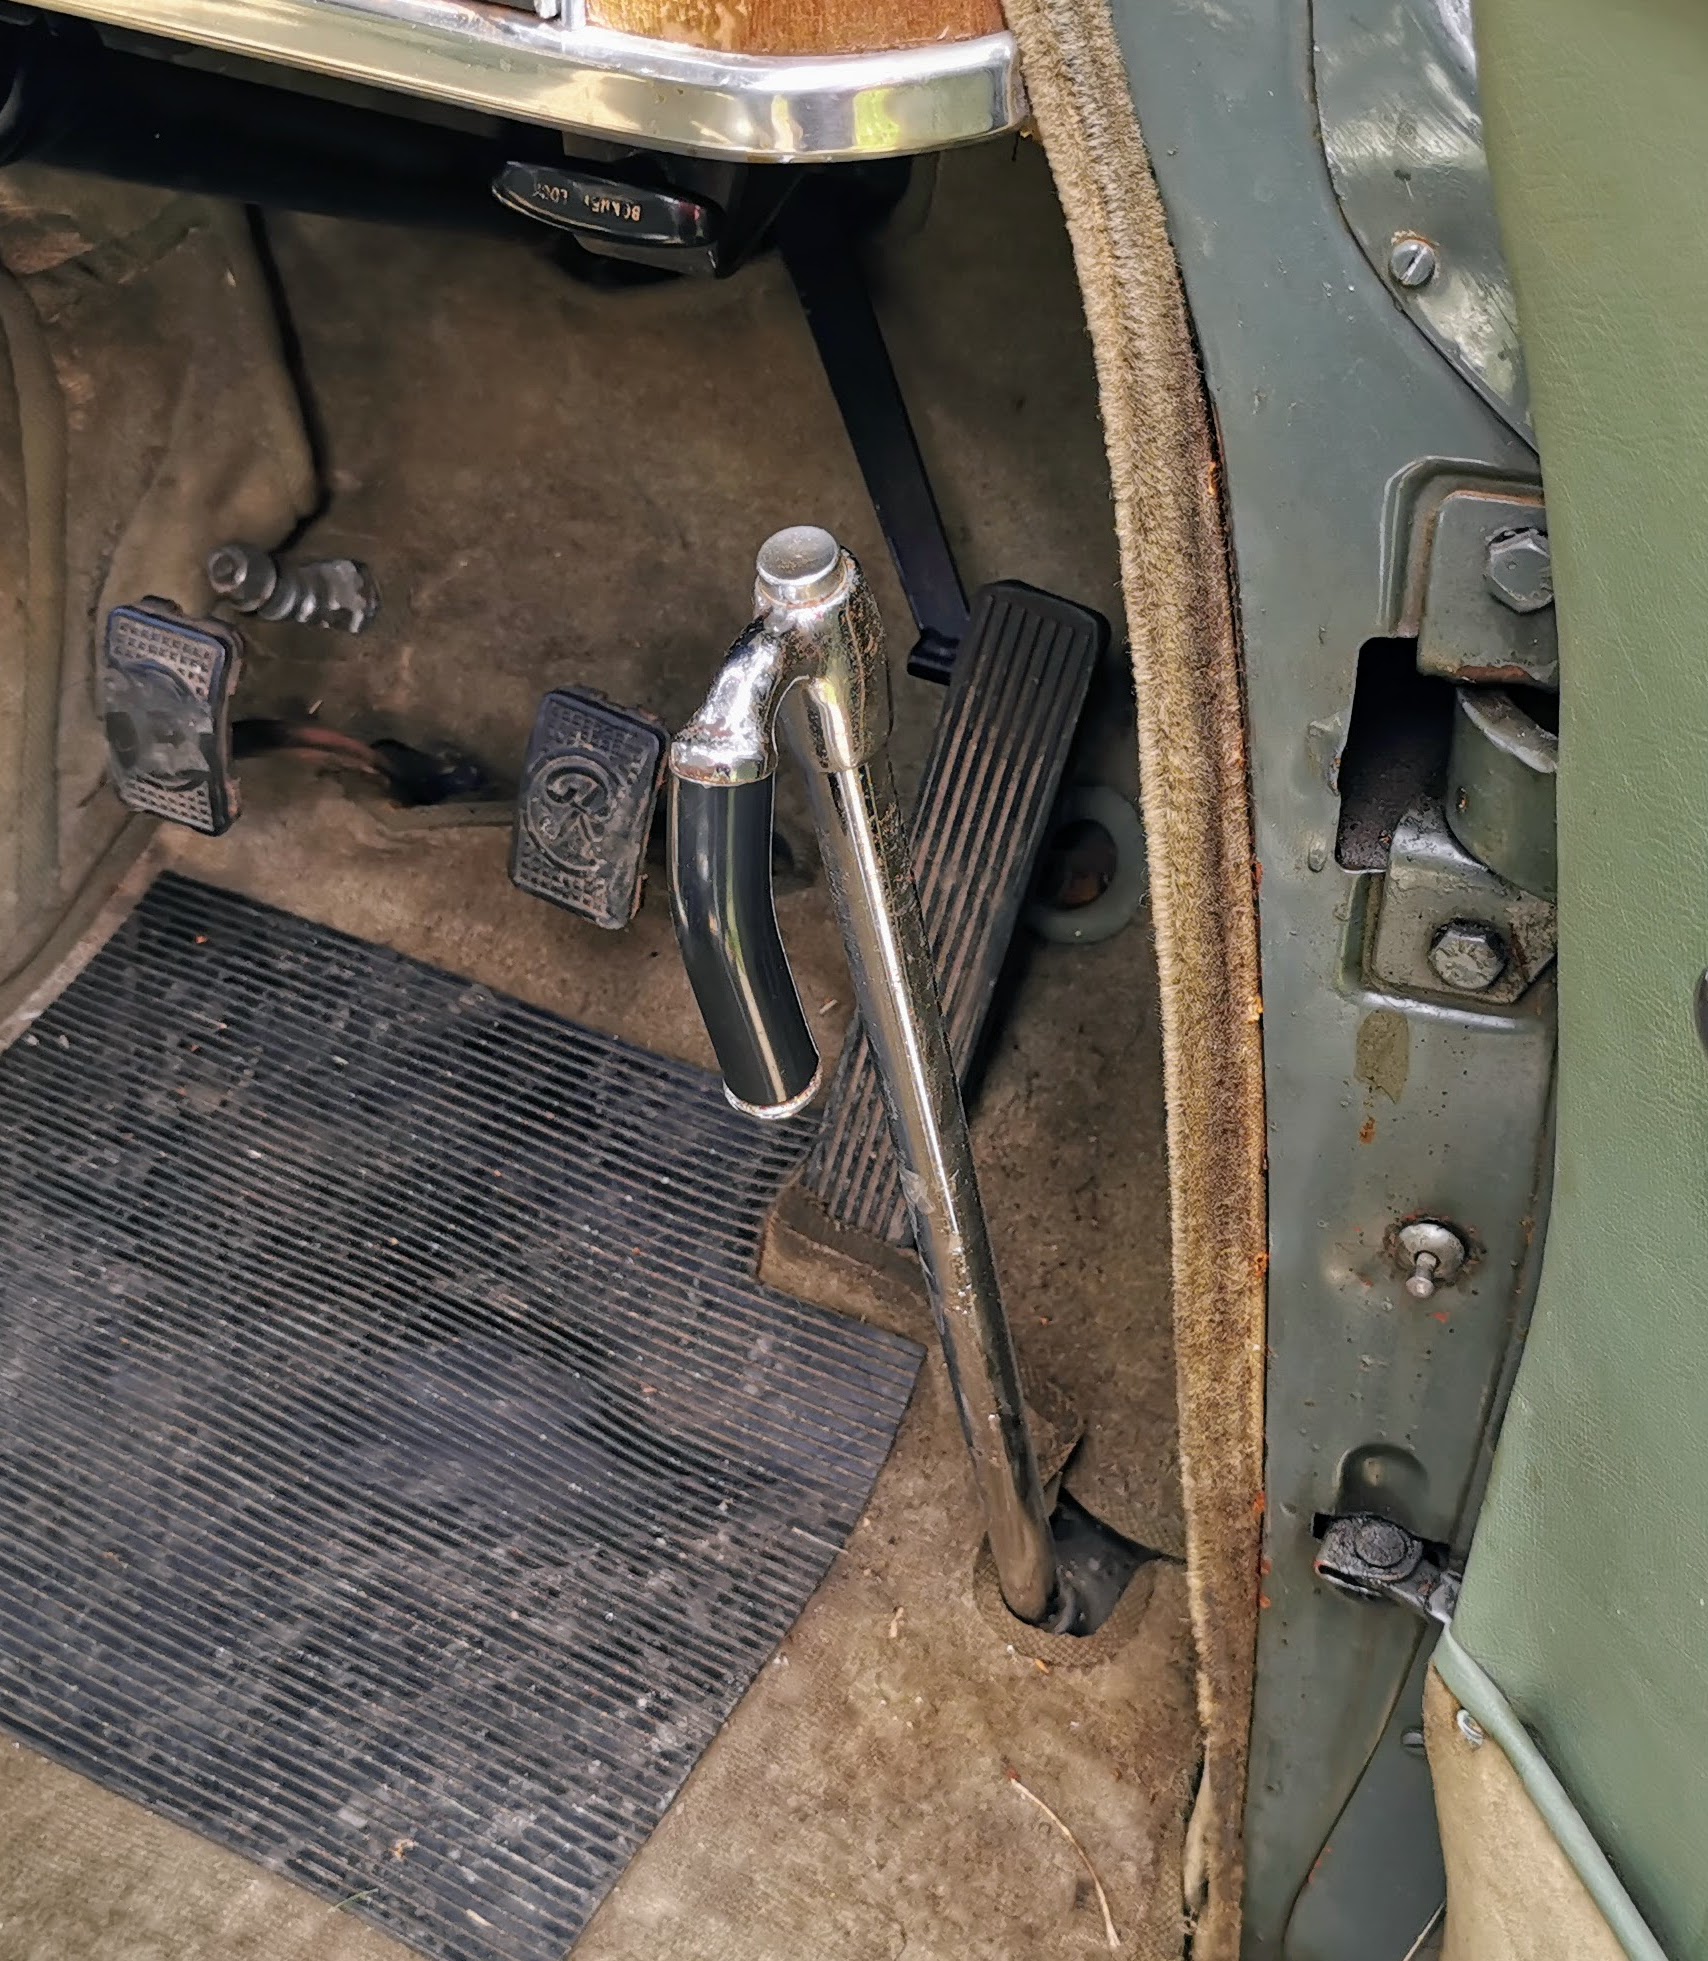
While this is an exceptionally satisfying control to operate, it does require the driver to stretch forward an awful long way, to the point that I could see it being a real barrier to the installation of three point seatbelts in a P4 - from my usual driving position at least, I simply wouldn't be able to reach it.
None of this is honestly a failing of the P4, it's "just how they were" back when it was designed. Each car maker will have had an arrangement which was a little different to suit how they wanted the interior to look, but by and large (and there absolutely were exceptions to this statement), good ergonomics tended to be something which came about by chance in many cases rather than design.
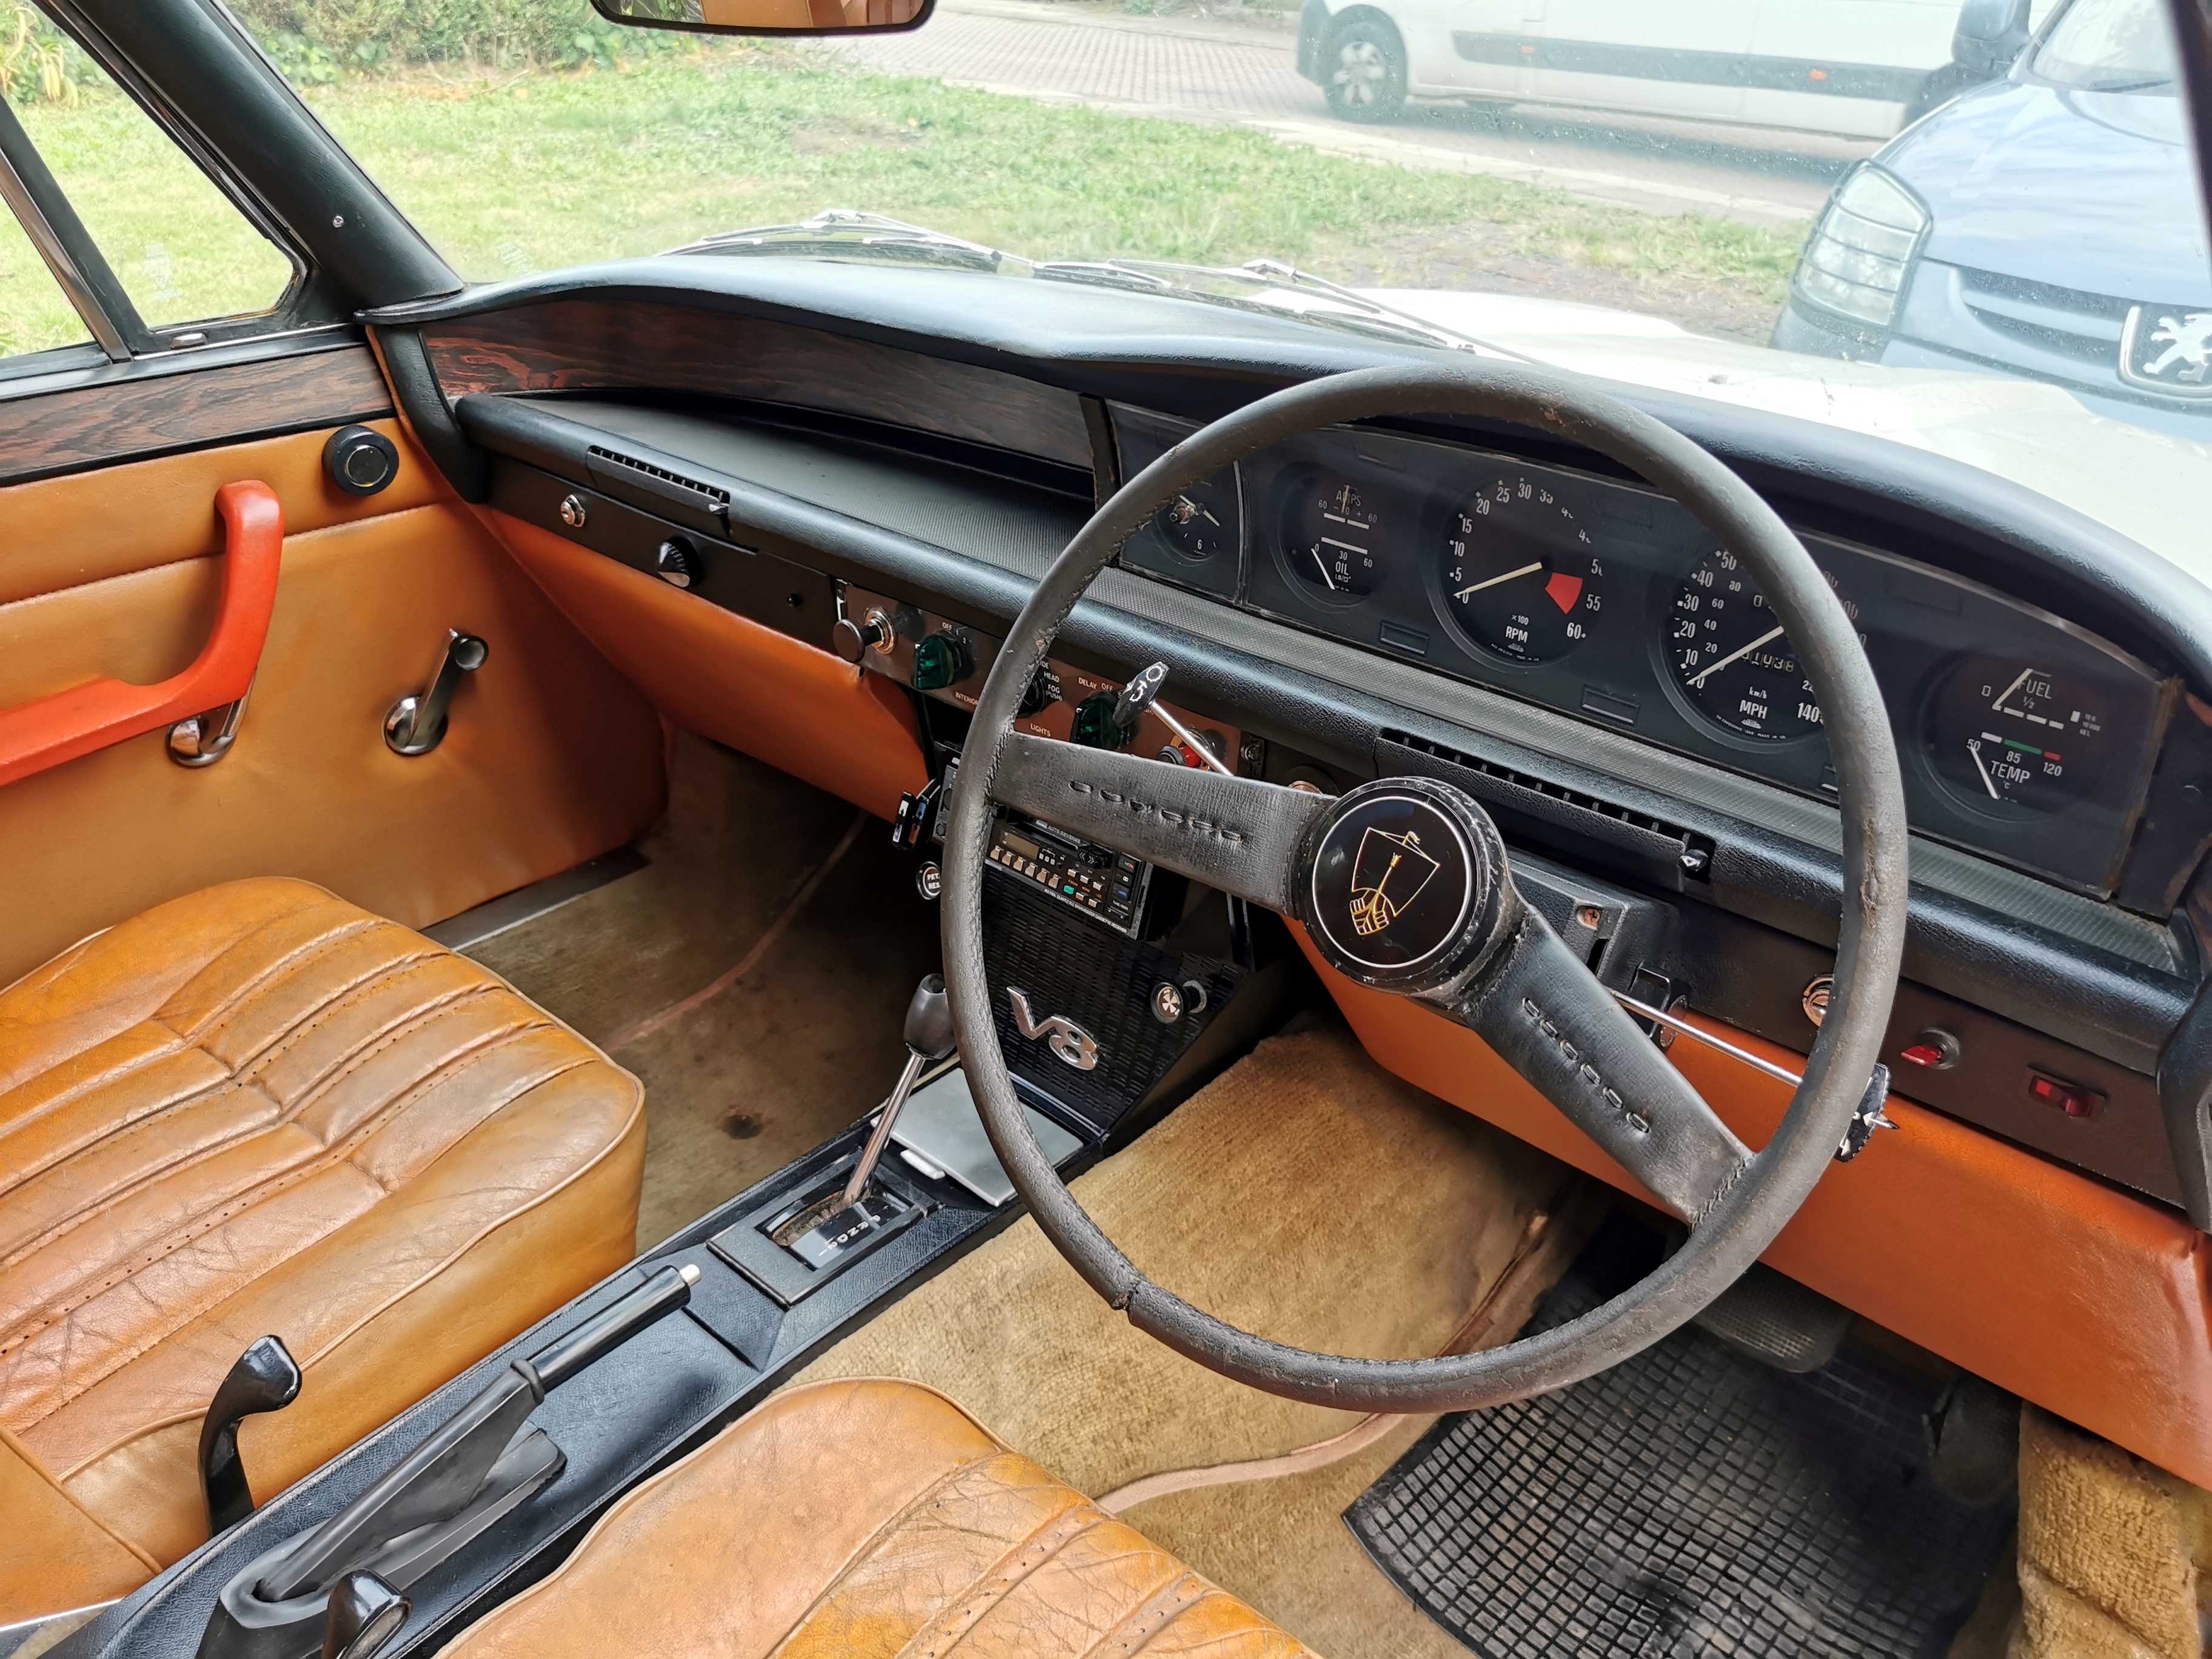
This was something that Rover went to quite some lengths to correct when they designed the P6, especially in its original incarnation.
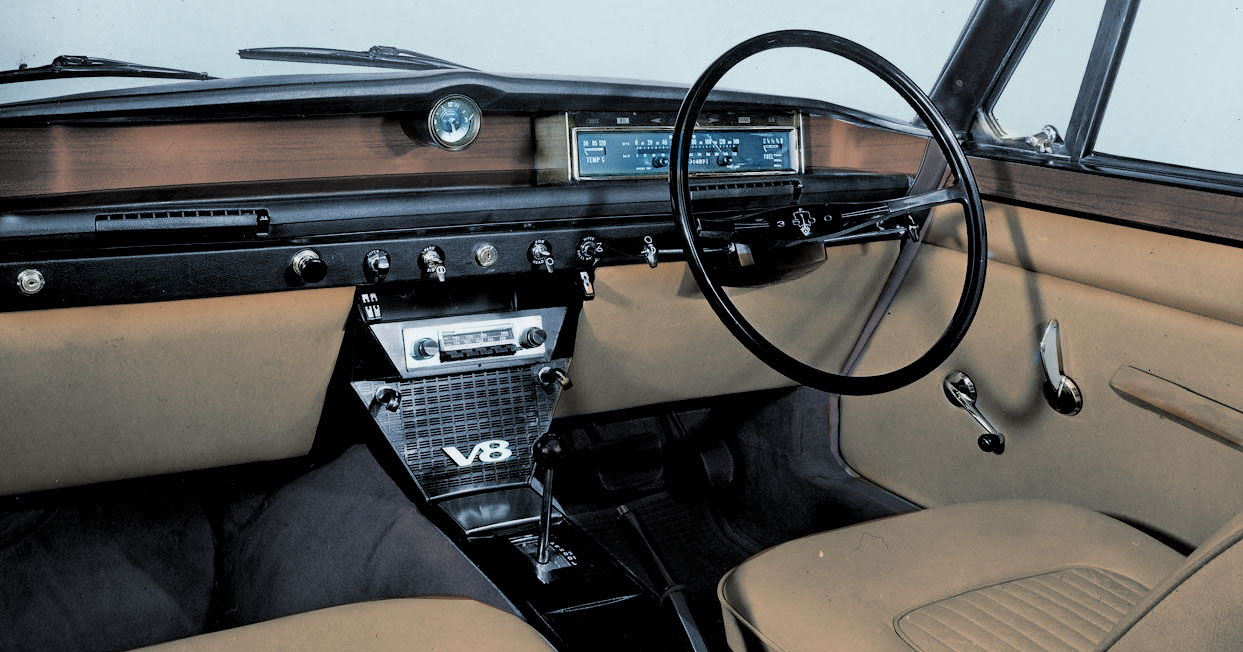
We don't actually know the original source of this image, but I found it on this page on the website Driven To Write. It has the look of a period publicity photo to me, but if you know where it originally came from, please let me know so we can get it properly credited.
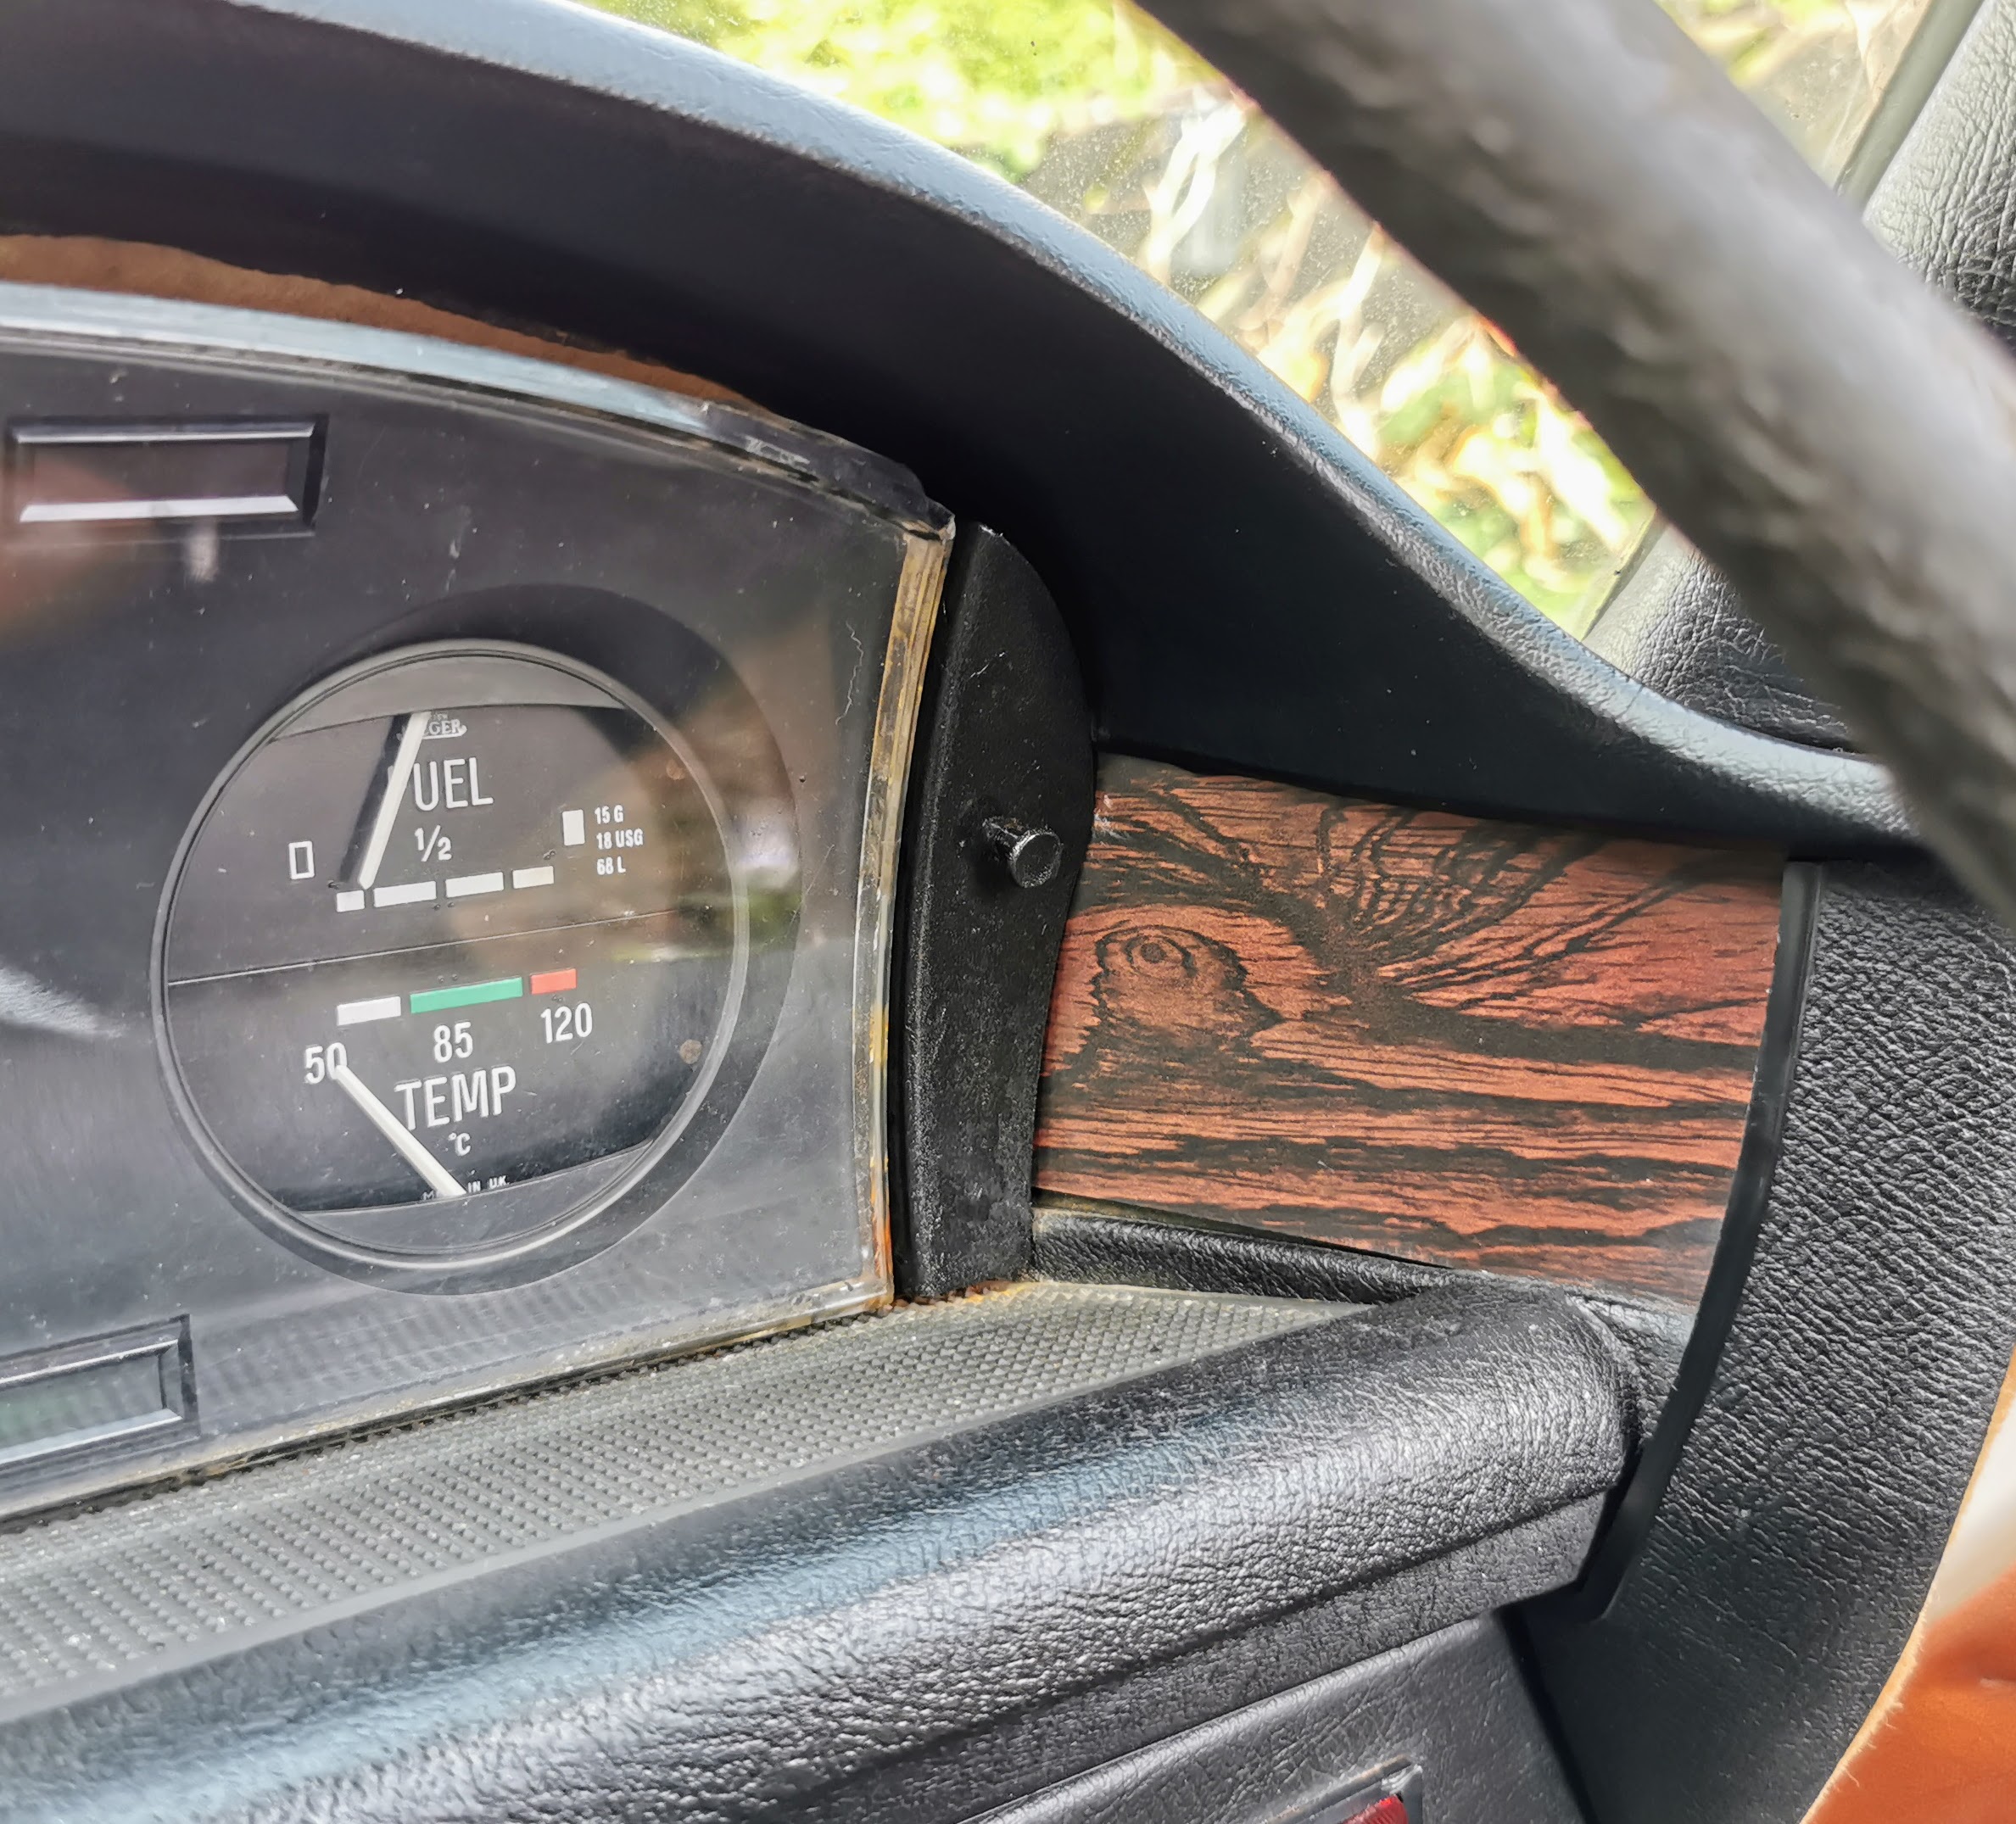
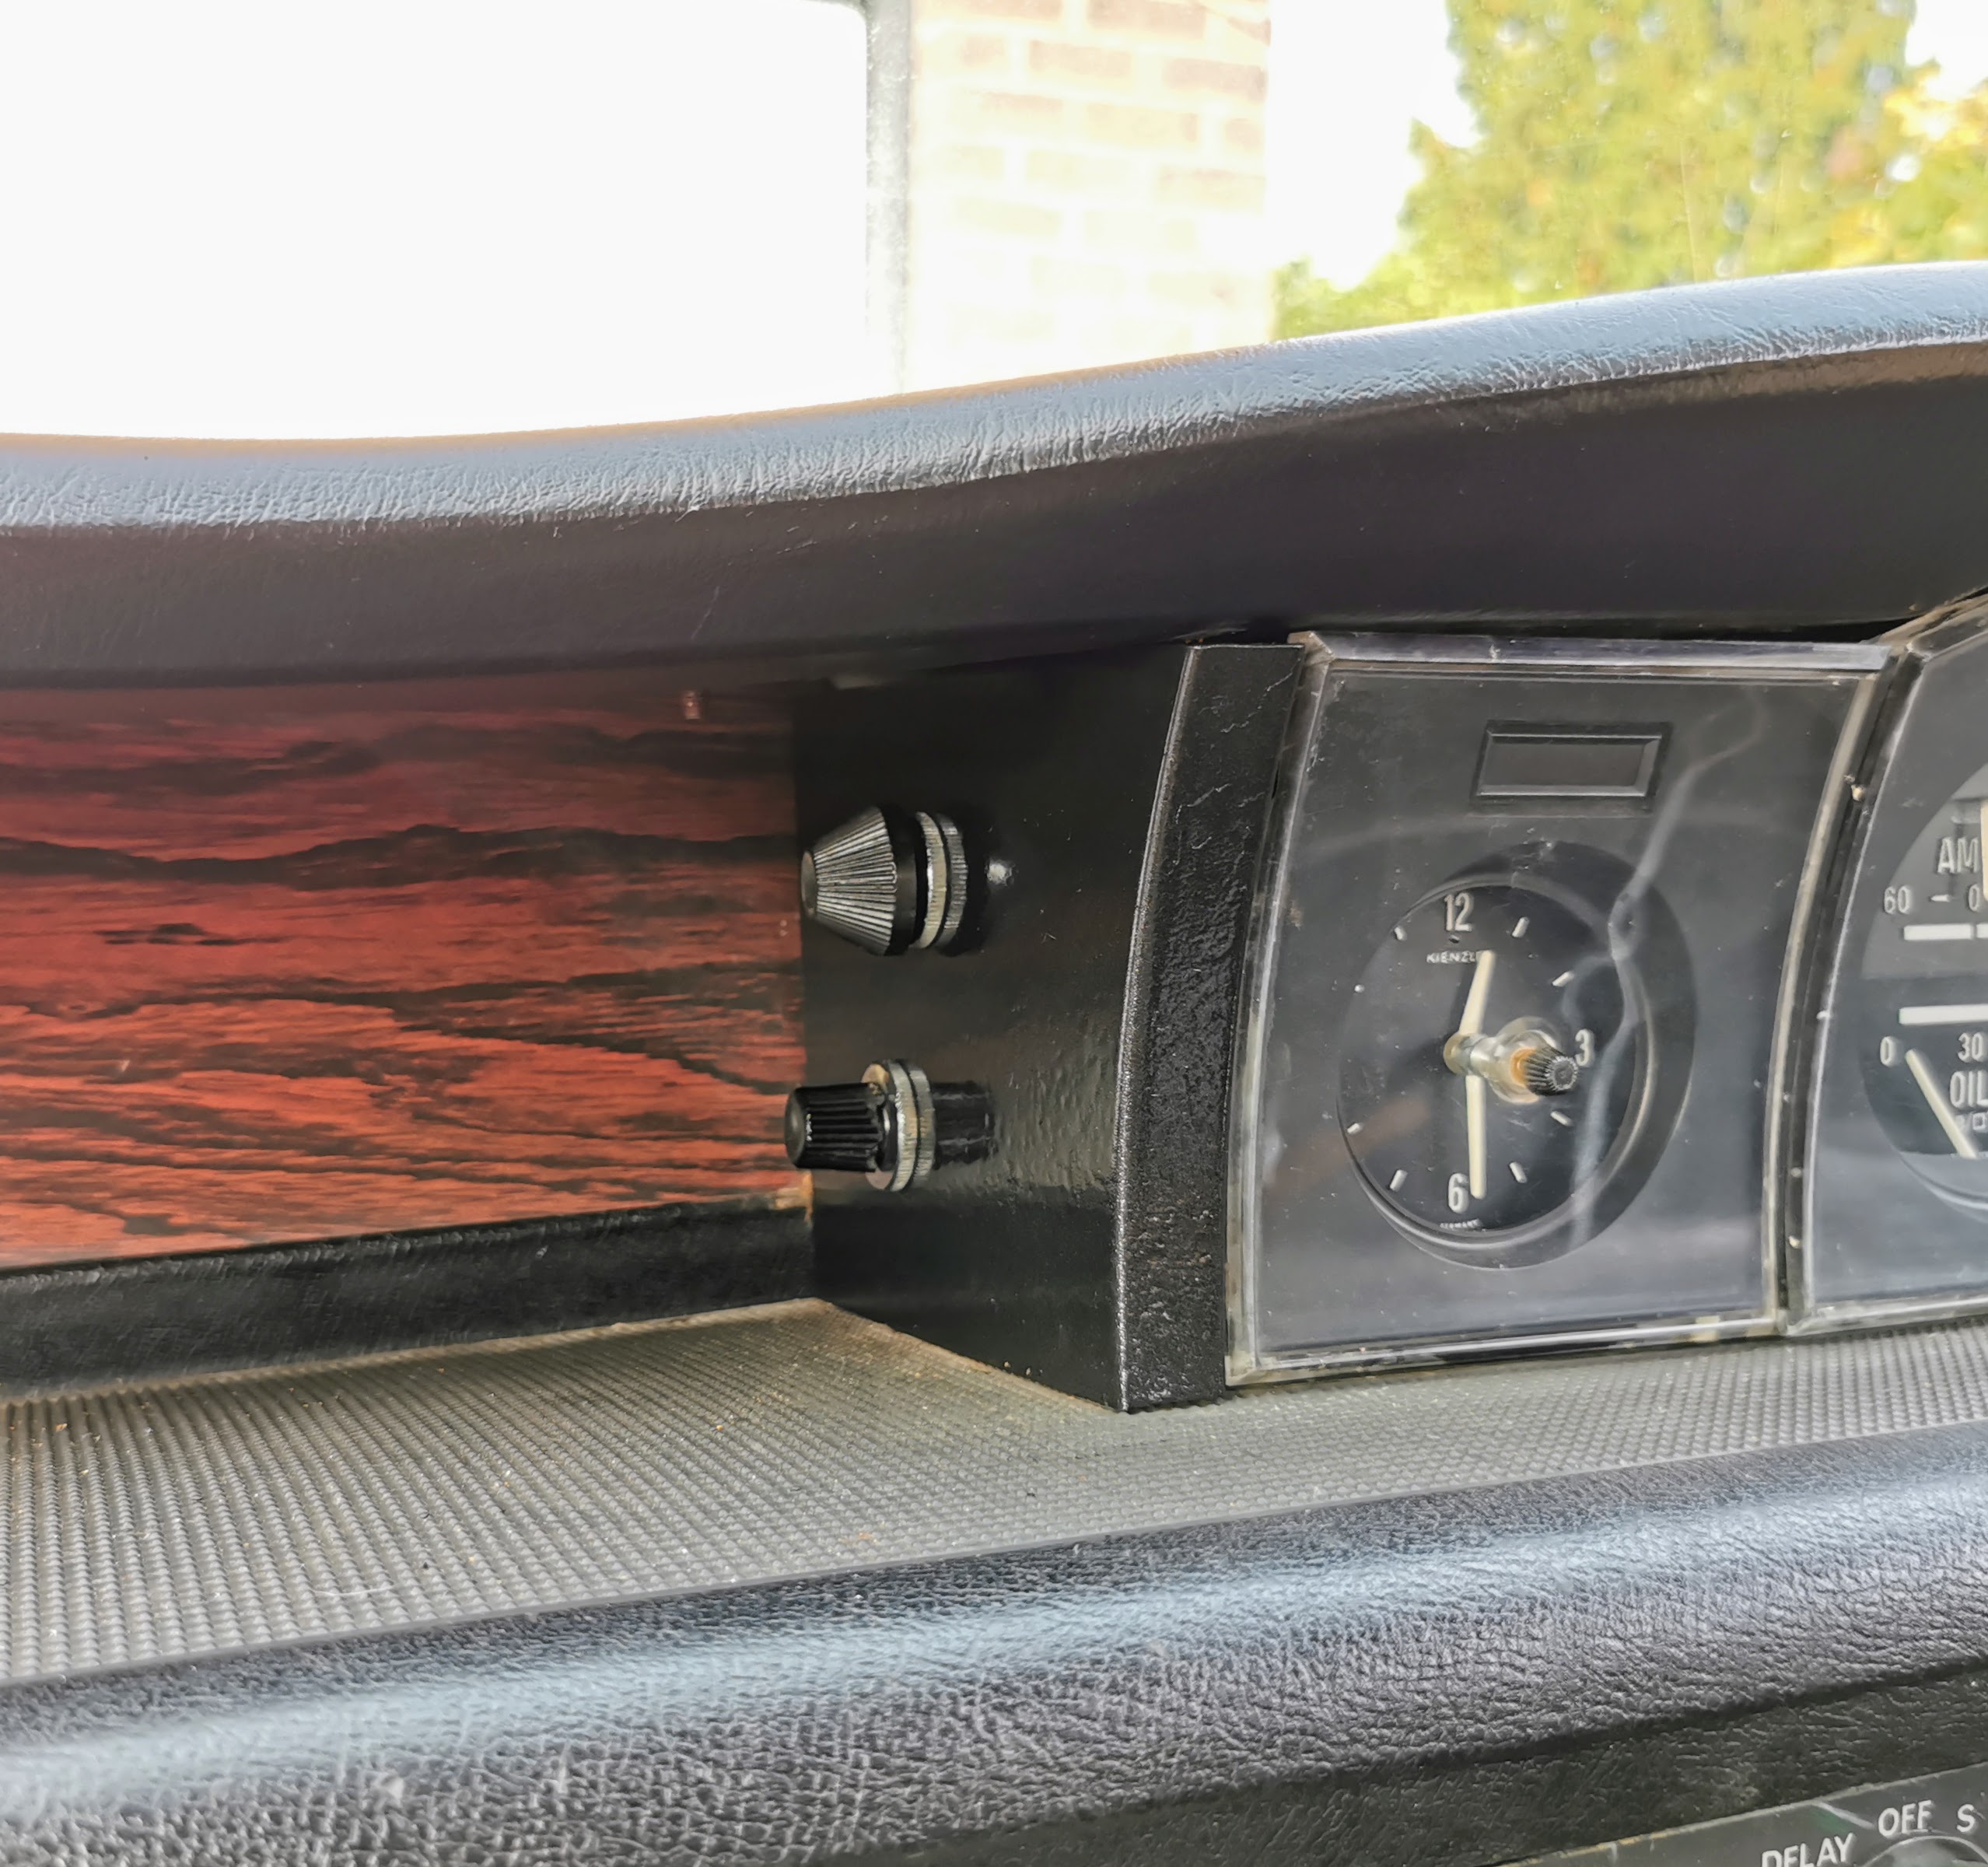
The nod to the P4 is immediately apparent - the dash top itself, the clock and very subtle pattern in the wood all having been lifted almost straight out of the earlier car.
That pleasing visual throwback however is about where the similarities end. For a start the most immediately apparent thing is that all of the instrumentation has been condensed into a single, efficiently designed cluster which is placed high up on the dash, keeping all of the important information right in the driver's field of view. The use of a ribbon type speedometer and arrangement of the various warning lights into a single line at the top of the cluster made for a very compact but clear design.
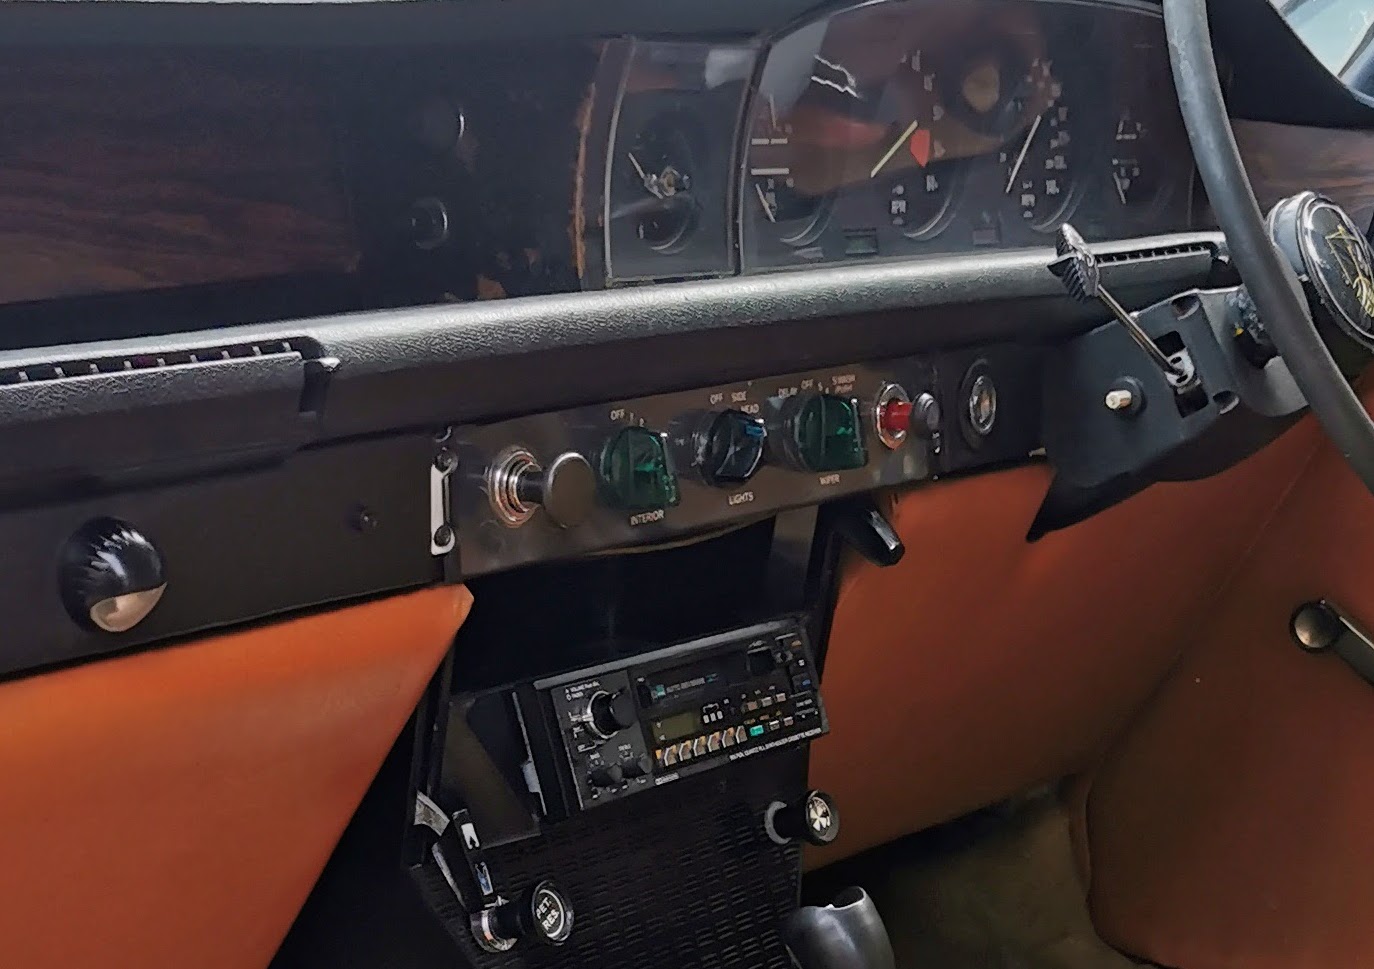
The awkward positioning of the secondary switchgear behind the steering wheel has gone, with it instead being laid out in a logical manner in a single strip across the dash. Wipers nearest the driver, then headlights, the ignition, parking lights, and finally hazard lights and a cigarette lighter over towards the passenger. These controls were very deliberately made in different shapes to allow a driver to find them by touch more easily, the idea always being to minimise the need to remove focus from the road.
The stalk situation was simplified (and labelled!) with the indicators on the right doubling up as the control for the horn if pulled towards the driver, with the stalk on the left purely being used to switch between dipped and main beam (also allowing for a high beam flash feature by pulling the stalk towards you exactly as you would expect).
Below the main rank of controls there are three levers for the heating/ventilation controls - one for air distribution, one for enabling/disabling airflow which also forms the blower fan switch, and one finally for temperature. The P6 being one of the very first cars to use an air-blend heater as well. What this means is that the heater matrix itself is always heated and the temperature of the air provided into the cabin is controlled by moving air flaps to blend heated and outdoor air. This allows for far more rapid changes to temperature than would otherwise be possible, and also for lighter to operate controls.
The final two controls were below the radio, with the choke and petrol reserve controls. ALL of the driver controls (with the exception of the gearshift and handbrake which are in their conventional locations) are positioned well above where virtually every button and knob used to control anything and everything in many modern cars is. Don't even get me started on touch screens...My opinion is that they're great for interface with a sat nav as you really do need a lot of buttons to drive that. However they have absolutely no place in my mind for handling basic vehicle functions such as the ventilation system or turning on/off the radio.
The ventilation system also features two small vents set into the dash designed to deliver air to the face of the driver and passenger if required - these are fresh air vents only and are unheated, meaning that it's entirely possible to have the cabin toasty warm but still have a refreshing breeze delivered to the face of the driver. The ability to have things arranged like this is something that having spent many years driving Saab 900s, I had come to take for granted and have been surprised how many modern cars do not have the ability to provide this - even those with highly complicated multi-zone heating and ventilation systems.
Looking at the photograph above it's immediately apparent that adapting the design to either left or right hand drive layouts would be almost trivially simple - something which no doubt considerable amount of money in terms of having set up tooling to produce export models, and a feature which was prominently carried forward into the cabin of the SD1 which eventually notionally replaced the P6.
The 1970 facelift did maybe dilute some of the simplicity of the original design, but it did also bring about a few improvements from a quality of life perspective.
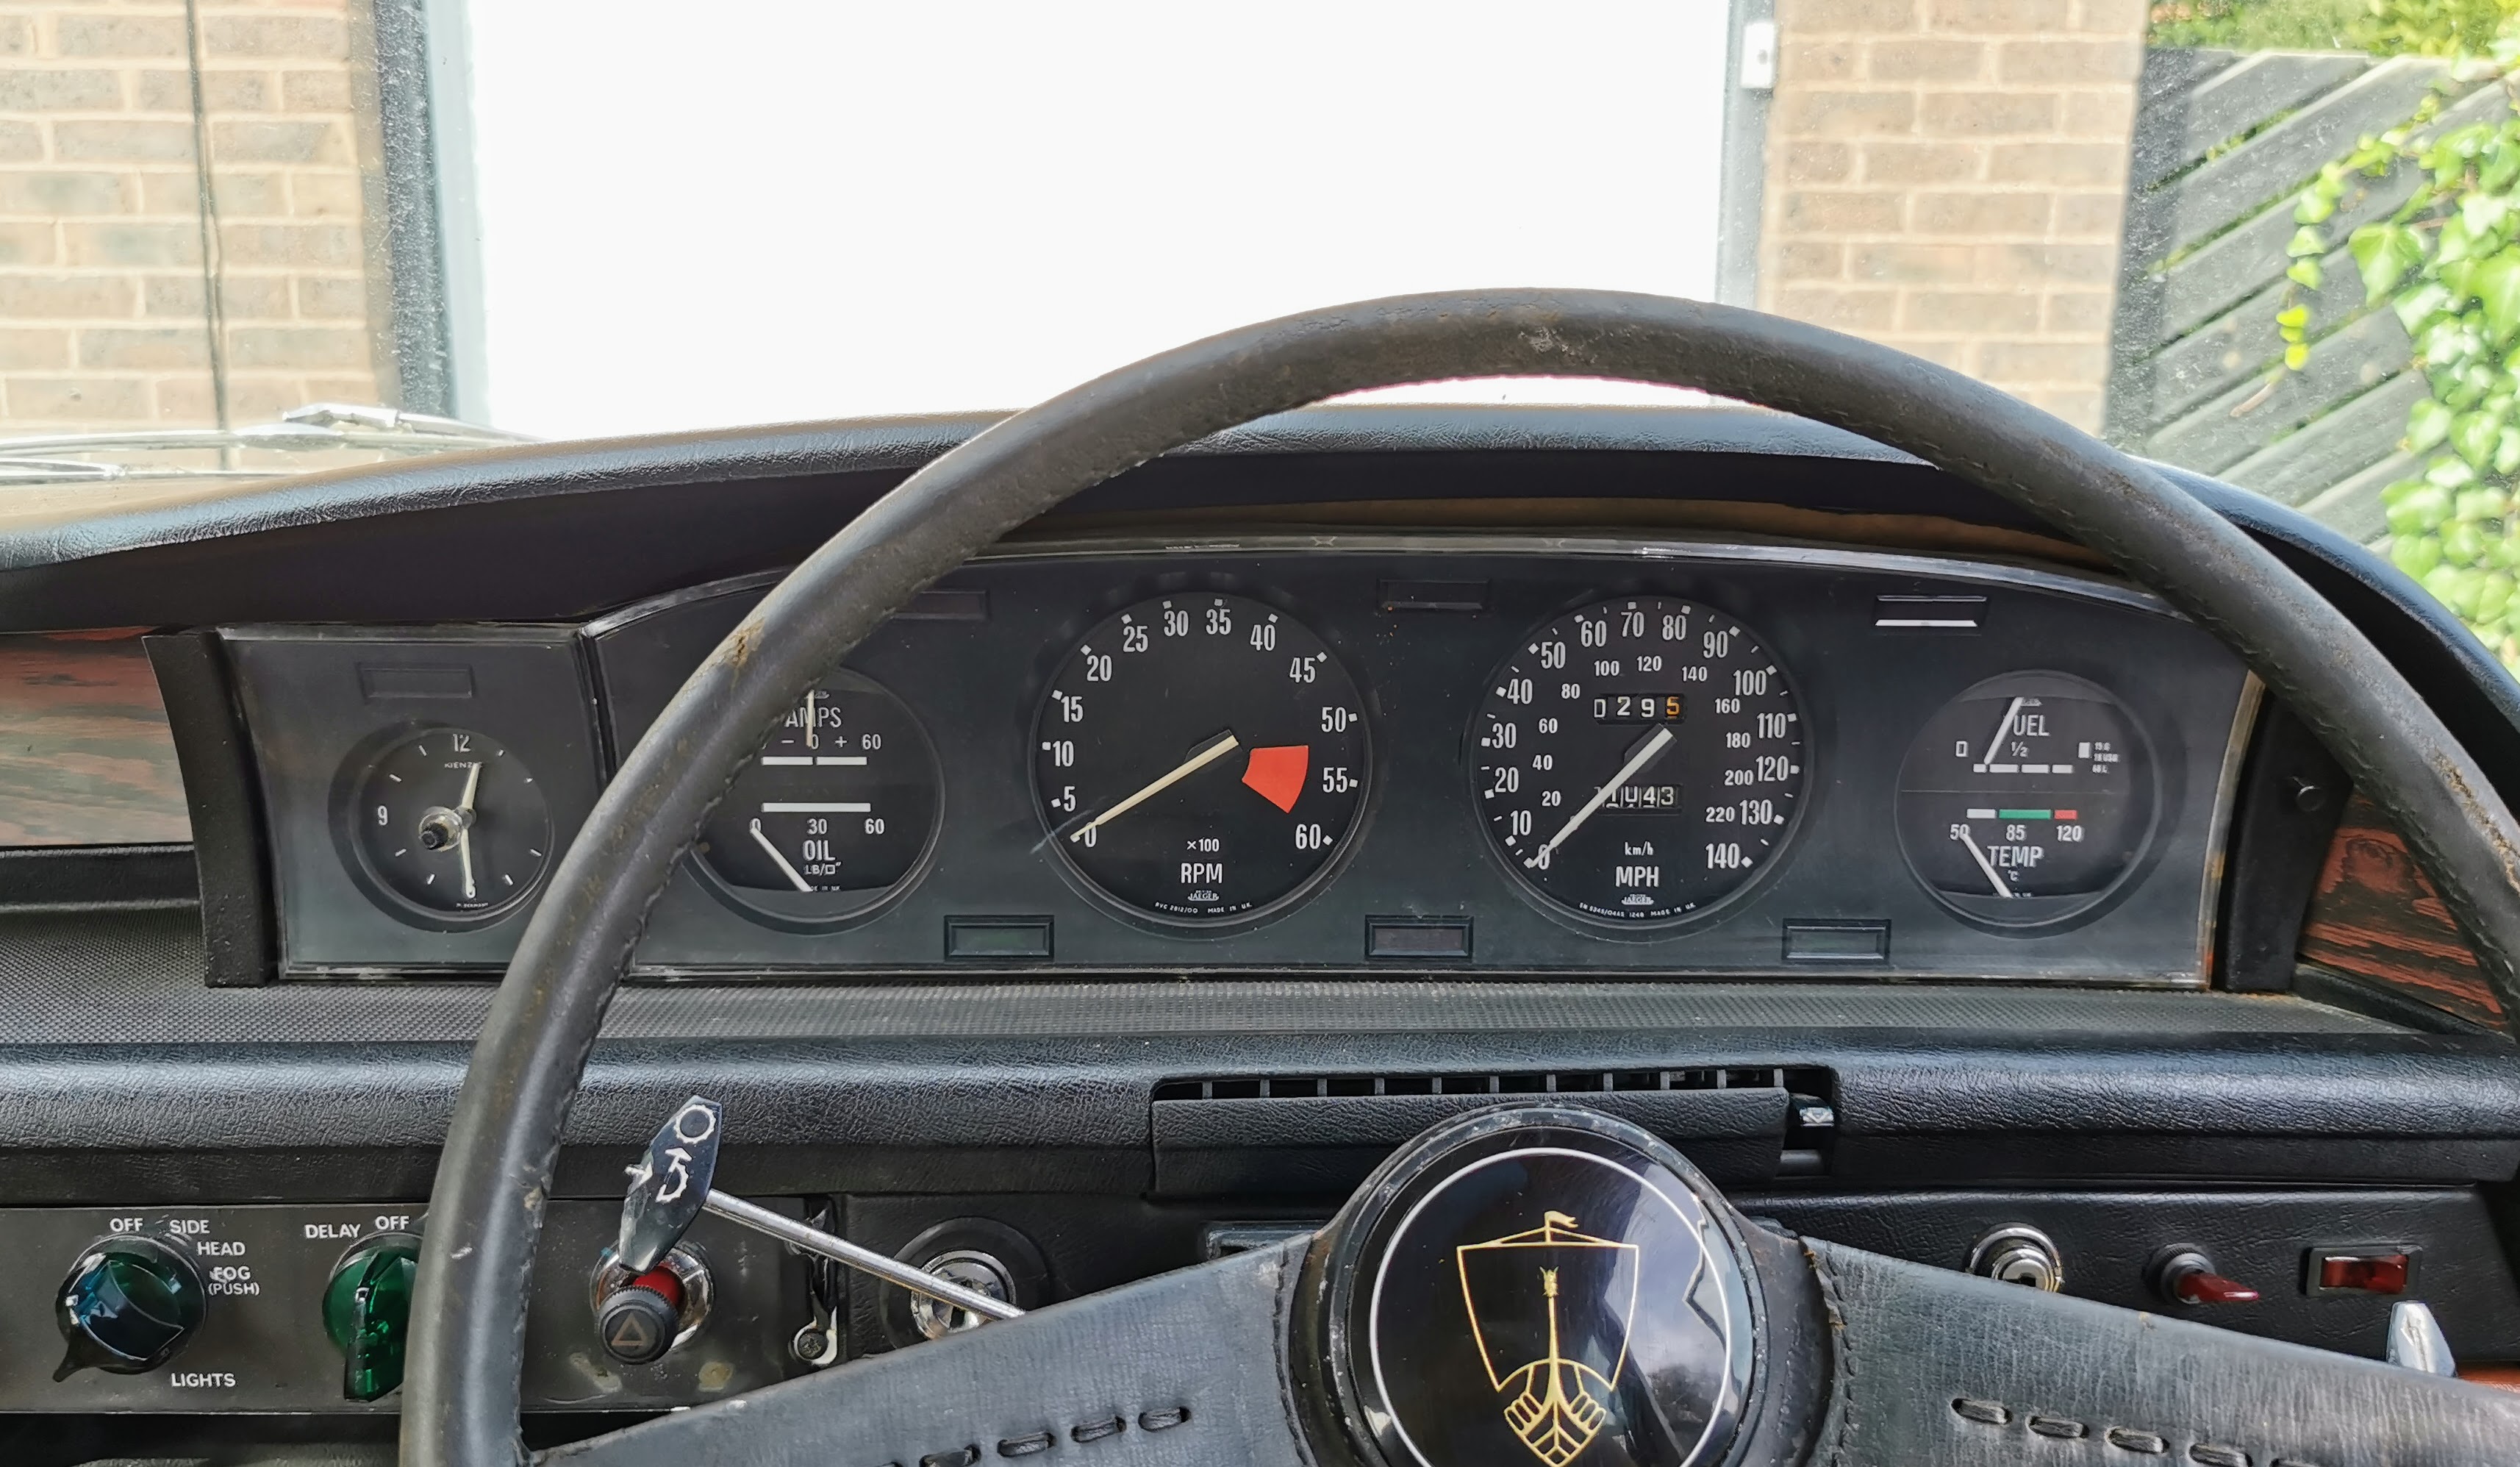
Most immediately obvious change at a glance is the far more comprehensive five-dial instrument cluster. While it's worlds away from the deliberately simplified rectangular binnacle of the earlier cars, it still remains a wonderfully clear and easy to read dash in spite of the depth of information on show, and one which I feel that modern car makers could learn from.
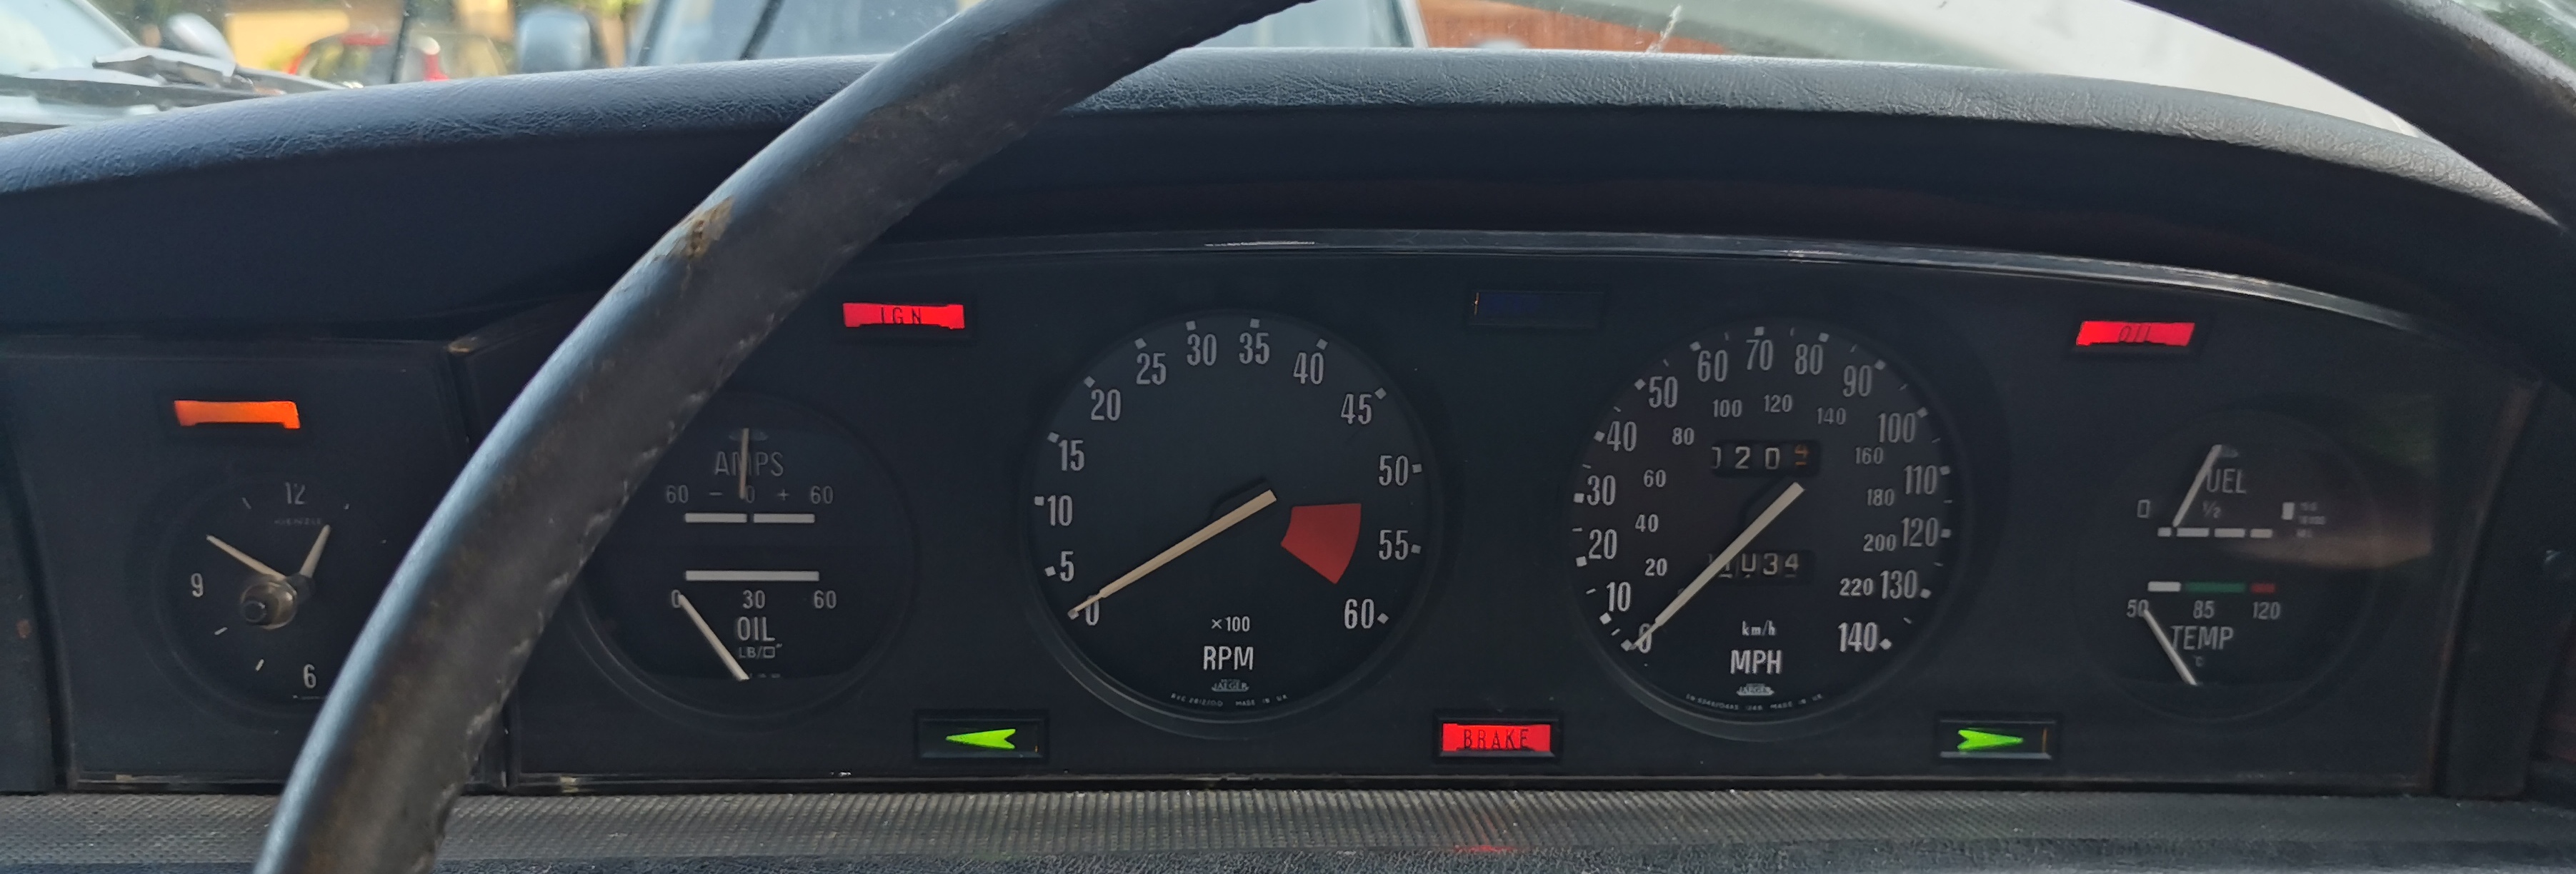
Though I do find it somewhat odd that they never felt it necessary to provide a legend on the choke warning light on the later dash - it was fully labelled on the earlier version.
A nice little nod to their past is visible on both versions of the P6 dash in that if you look at the legends used for the indicator arrows, this is exactly the same as that used on the P4. I've no idea honestly if this was intentional or not, but nevertheless it pleases the instrument panel nerd in me.
The line of black switches running almost the full width of the dash was replaced with a more compact unit mounted centrally with some rather odd looking but immediately recognisable translucent green rotary controls.
While debatably less visually pleasing than the older design, this arrangement did bring one major improvement, and that was being fully illuminated at night.
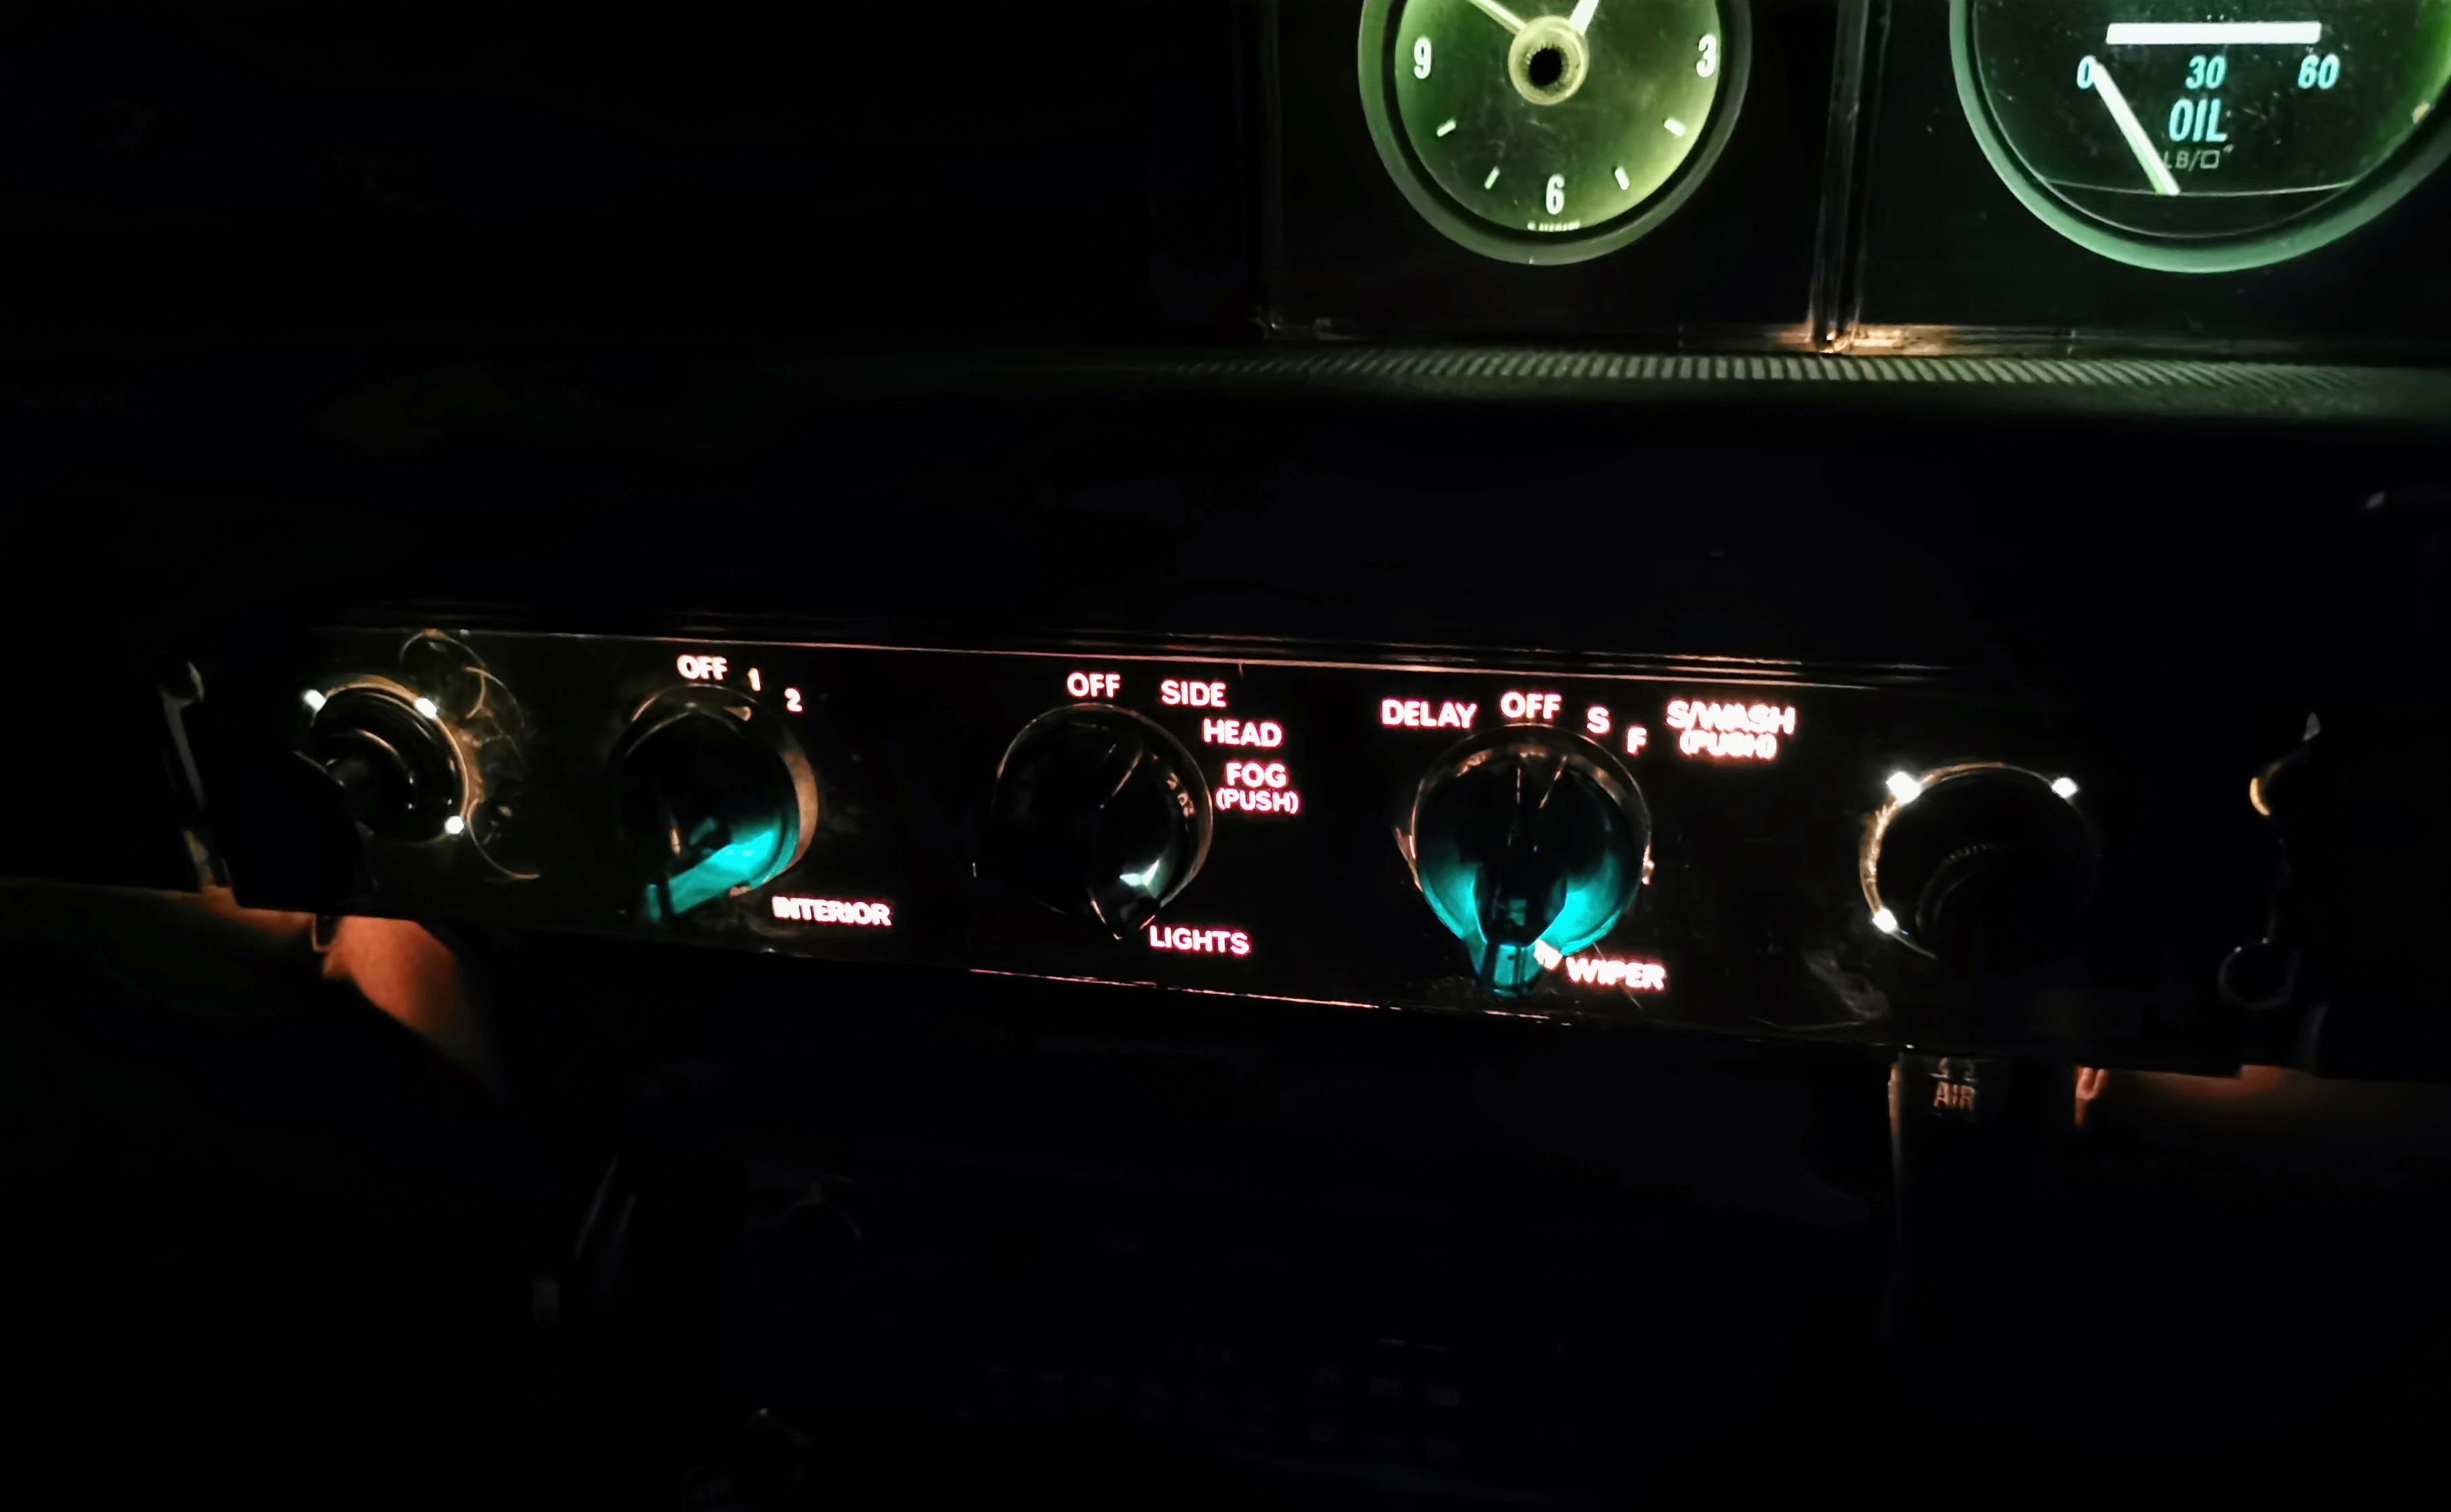
While it's a little hard to see in the photograph, light is also cast downwards from this panel onto the heater control levers immediately below. The dash lighting overall is worth a mention as well as for a car from this era it is exceptionally clearly lit at night.
It may have strayed somewhat from the almost stark simplicity of the original cabin design, but it still works exceptionally well from the driver's seat and is honestly hard to criticise. Everything falls nicely to hand and is easy to use.
On the subject of operation, I want to mention on control which gets a lot of use day to day: The indicator stalk.
The unit fitted to the P6 isn't plastic - the stalk itself is metal (I'm assuming stainless steel), with a small diamond shaped plastic paddle on the end. You're used to this being something that clicks into place - the one on this doesn't. The operation is completely silent and smooth - yet still feeling positively located when set to signal in either direction. Similarly the cancelling mechanism is completely soundless. The overall feel of how that control operates gives a huge impression of a very satisfying degree of quality. Which for a control that is used as often as the indicators actually is something which is - consciously or otherwise - going to impact your overall feeling of whether the car feels like a quality automobile to drive.
The feeling of quality starts far earlier than that however. It starts right from the moment that you push the button and the door just silently slips open without any clonks or clicks from the locks. Similarly the doors click positively closed with barely any pressure being needed at all - in an era where it was pretty common to need to give car doors a pretty decent slam to get them fully latched. It's details like that which really do colour how you feel about a car before you've even started thinking about it.
This is something that companies these days pour millions of pounds into researching to the ends of the earth, and in many cases to find cheats to fool you into feeling that things are more "premium" than is really the case...Whereas Rover just set out building a car which was actually very well engineered, and therefore felt well engineered. Rather than trying to make the interior feel more upmarket by coating everything in soft touch rubber coatings...Which after about ten years start to decompose into a horrible sticky mess.
It's a shame that the P6 had developed something of a reputation for poor quality control in its latter days. This really wasn't deserved - not as far as the actual design of the car was concerned anyway. There were a few reasons for that happening...one of course is the elephant in the room that is the ever increasing involvement of British Leyland and the general industrial unrest that plagued the British industrial sector as a whole. It's also worth remembering that when it ended production in 1977 that the P6 had been on the market for 14 years - with naught but a very superficial facelift in 1970 and a couple of tweaks to the available engine line up (of course including the somewhat legendary introduction of the V8). That seems almost unimaginable these days where a model's NAME often struggles to last for 14 years, much less a single component of the original version actually still being in production. So yes, in some ways by its latter days the P6 was in some ways looking a little dated - but equally the equipment which was making it had an awful lot of hours on it by then and would have unavoidably been getting tired and that's inevitably going to impact on the build quality of the finished vehicles. Financial pressures within the group as a whole and the spending going on to develop the SD1 of course meant that there really wasn't anything to do about that other than to make do as best as possible. While I'm sure that the design team knew from pretty early on that they had to be on to a winner with the car they were drawing up, I very much doubt they would have expected it to be in production virtually unchanged for anywhere near as long as it was.
The youngest cars as I write this are 46 years old, and the fact that there are still anywhere near as many of them left as there are - including plenty of examples which are actually driven regularly rather than just to the odd show a few times a year - I think shows that their reputation for being thrown together and plagued with endless quality control issues really aren't that deserved. Yes, there are aspects of the design which are weak points - but that's absolutely true of any car that's ever been made, no matter when it was made or which country it hails from.
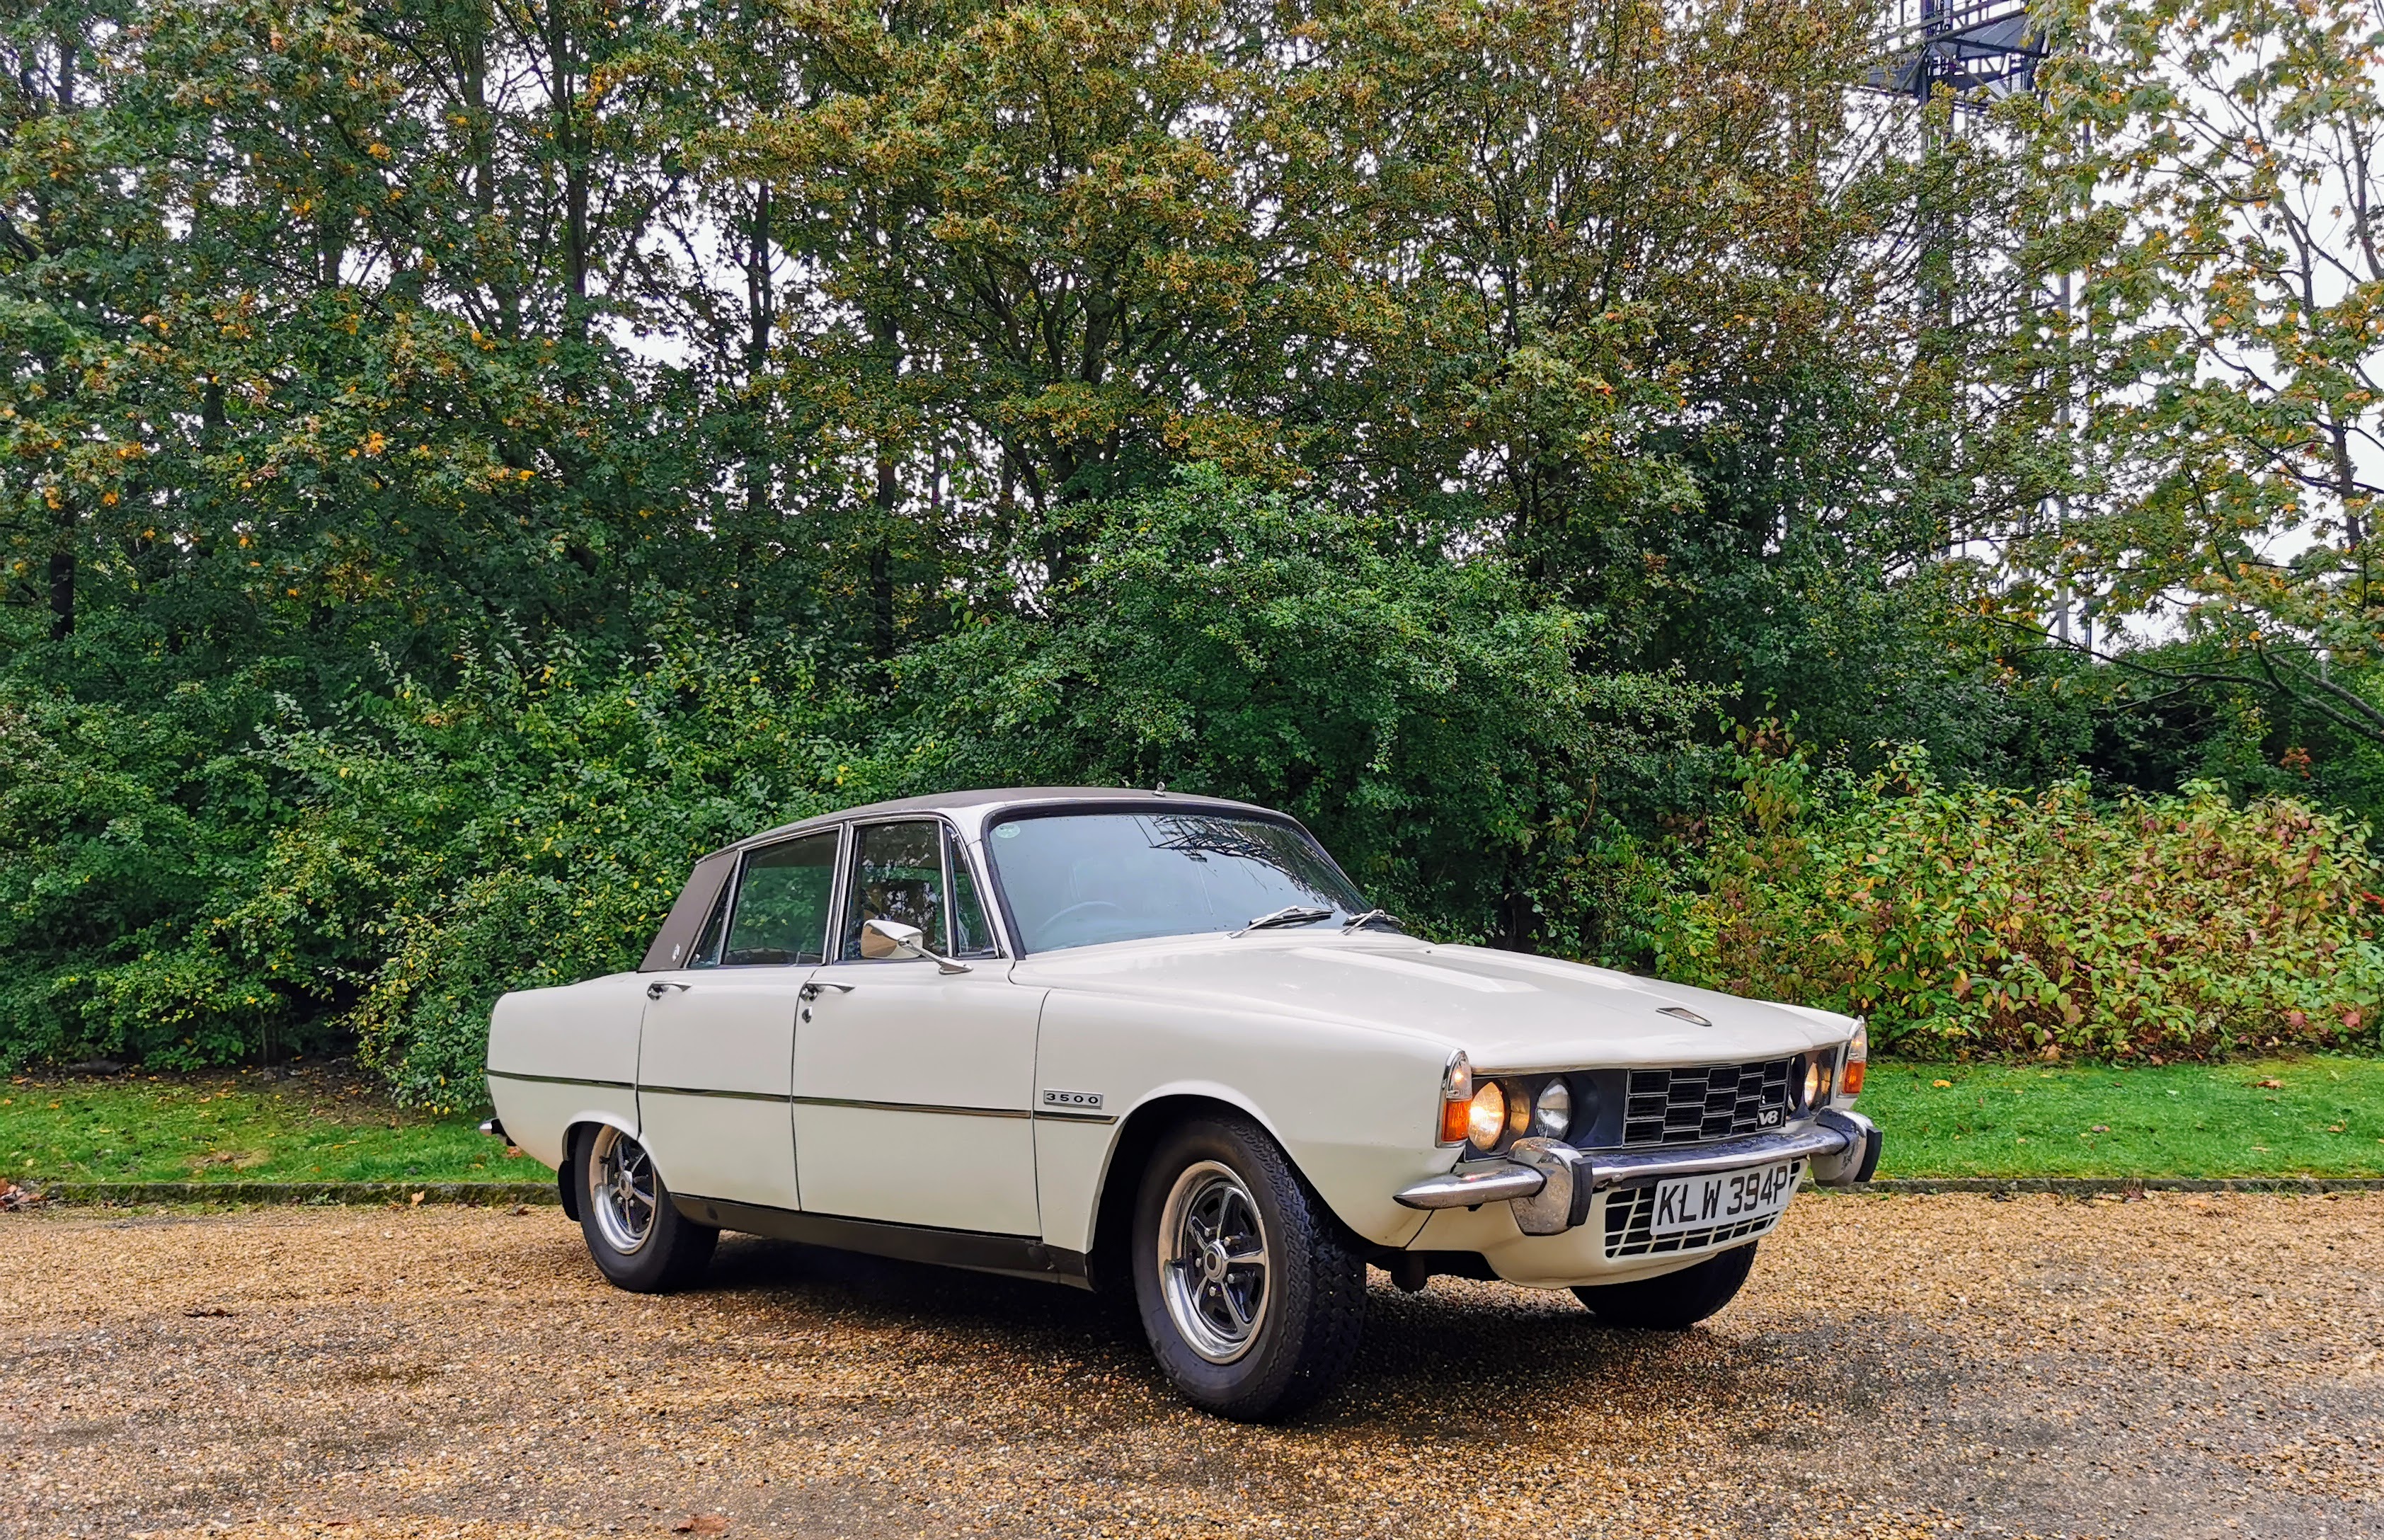
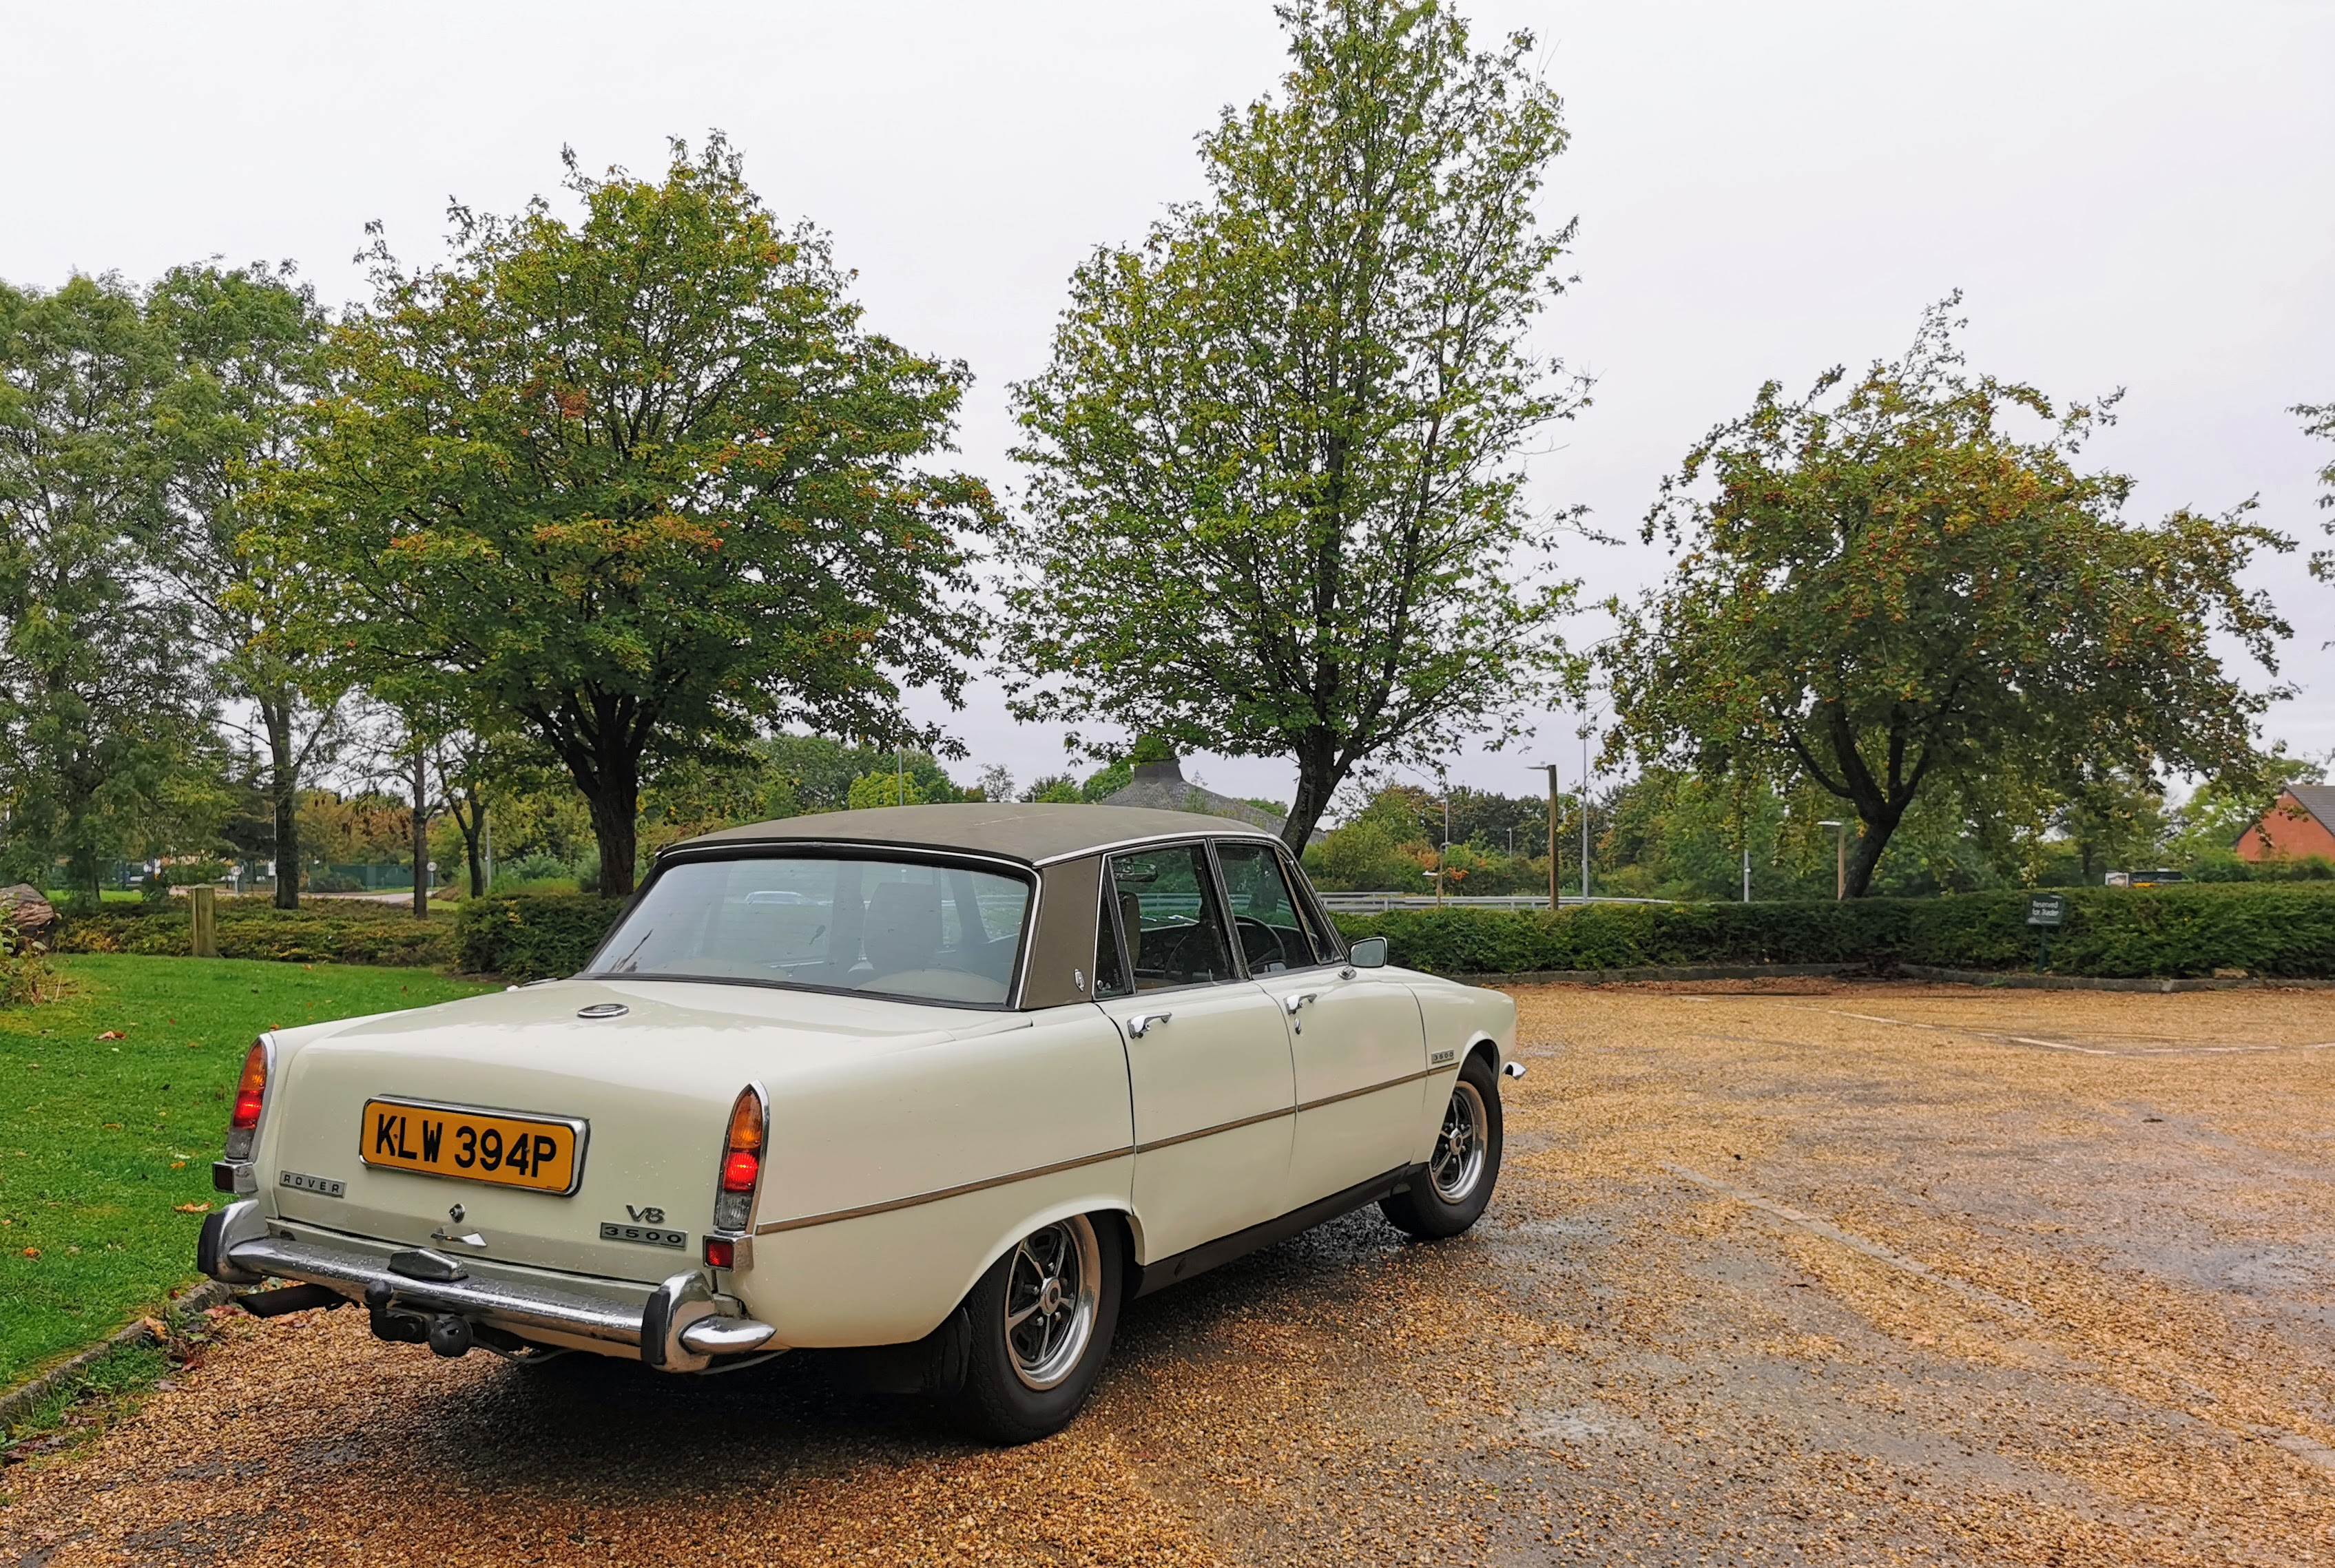
One of the most divisive questions I've seen asked in the world of classic motoring is whether the original P6 or the face lifted P6B is the better looking car. This always seems to be one of those questions which comes under the heading of "pull pin, throw grenade, stand back and watch the fireworks" if asked on a public forum.
For my part? It's got to be the P6B. Don't get me wrong, I really like the styling of both versions and can very much appreciate the simplistic dignity of the original car. However the revised front end treatment that the P6B got always conveyed to me a look which seemed to hint at a British take on the classic American Muscle Car - absolutely fitting for a high performance, V8 powered beast like this. That very pointed, forward swept nose and deeply recessed black grill always just I thought gave it a somewhat menacing look, but somehow without ever seeming over done.
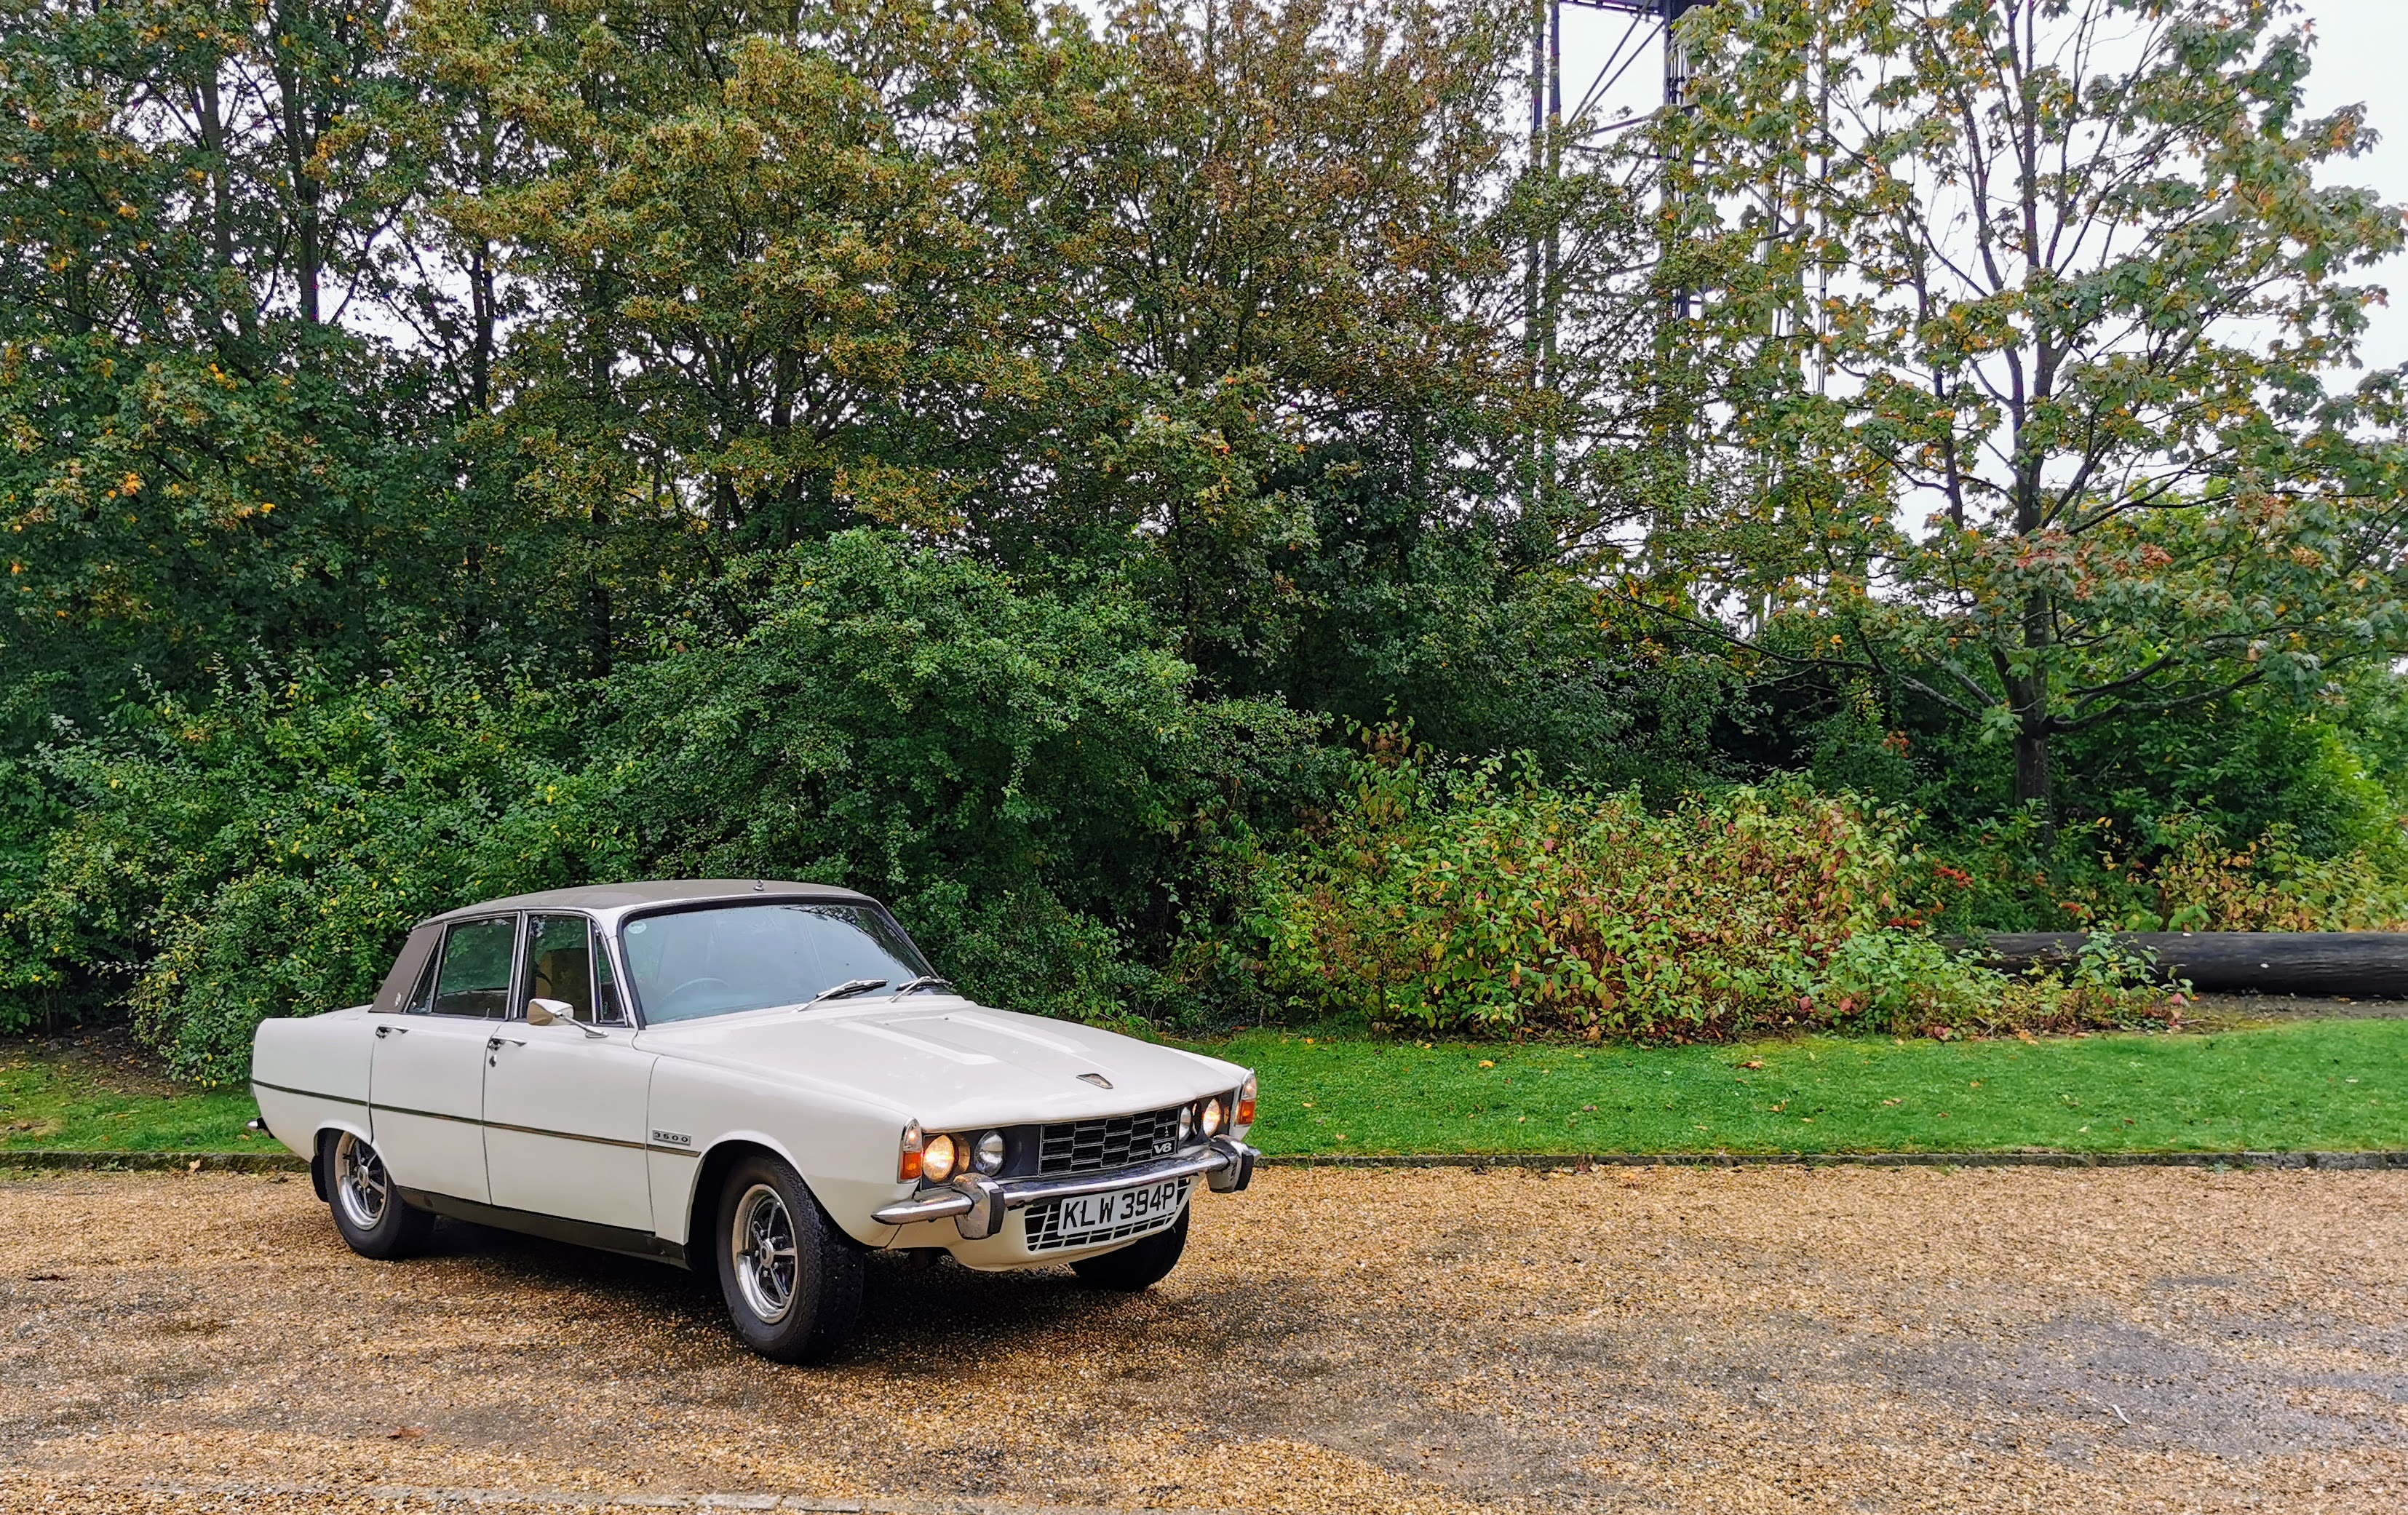
It's a really interesting car to actually look at, as - like another favourite design of mine, the classic Saab 900 - it actually doesn't follow a lot of established rules yet has somehow come out looking pleasing to the eye and ended up in many ways timeless. In profile in particular I think you can see that in isolation there are quite a few features which would look quite odd. The bonnet is really quite steeply sloped forward. The doors are very, very deep compared to the height of the glass house, and the line running from the front of the car to the end of the rear fins actually almost makes it look as if someone attached the top of the cabin unintentionally off level. However when you put it all together, it just...works.
I think one of the reasons that things work so well is that it is a very un-fussy design. All of the detail work is bold but not over-done. The door handles for instance have a very simple, smooth shape to them.
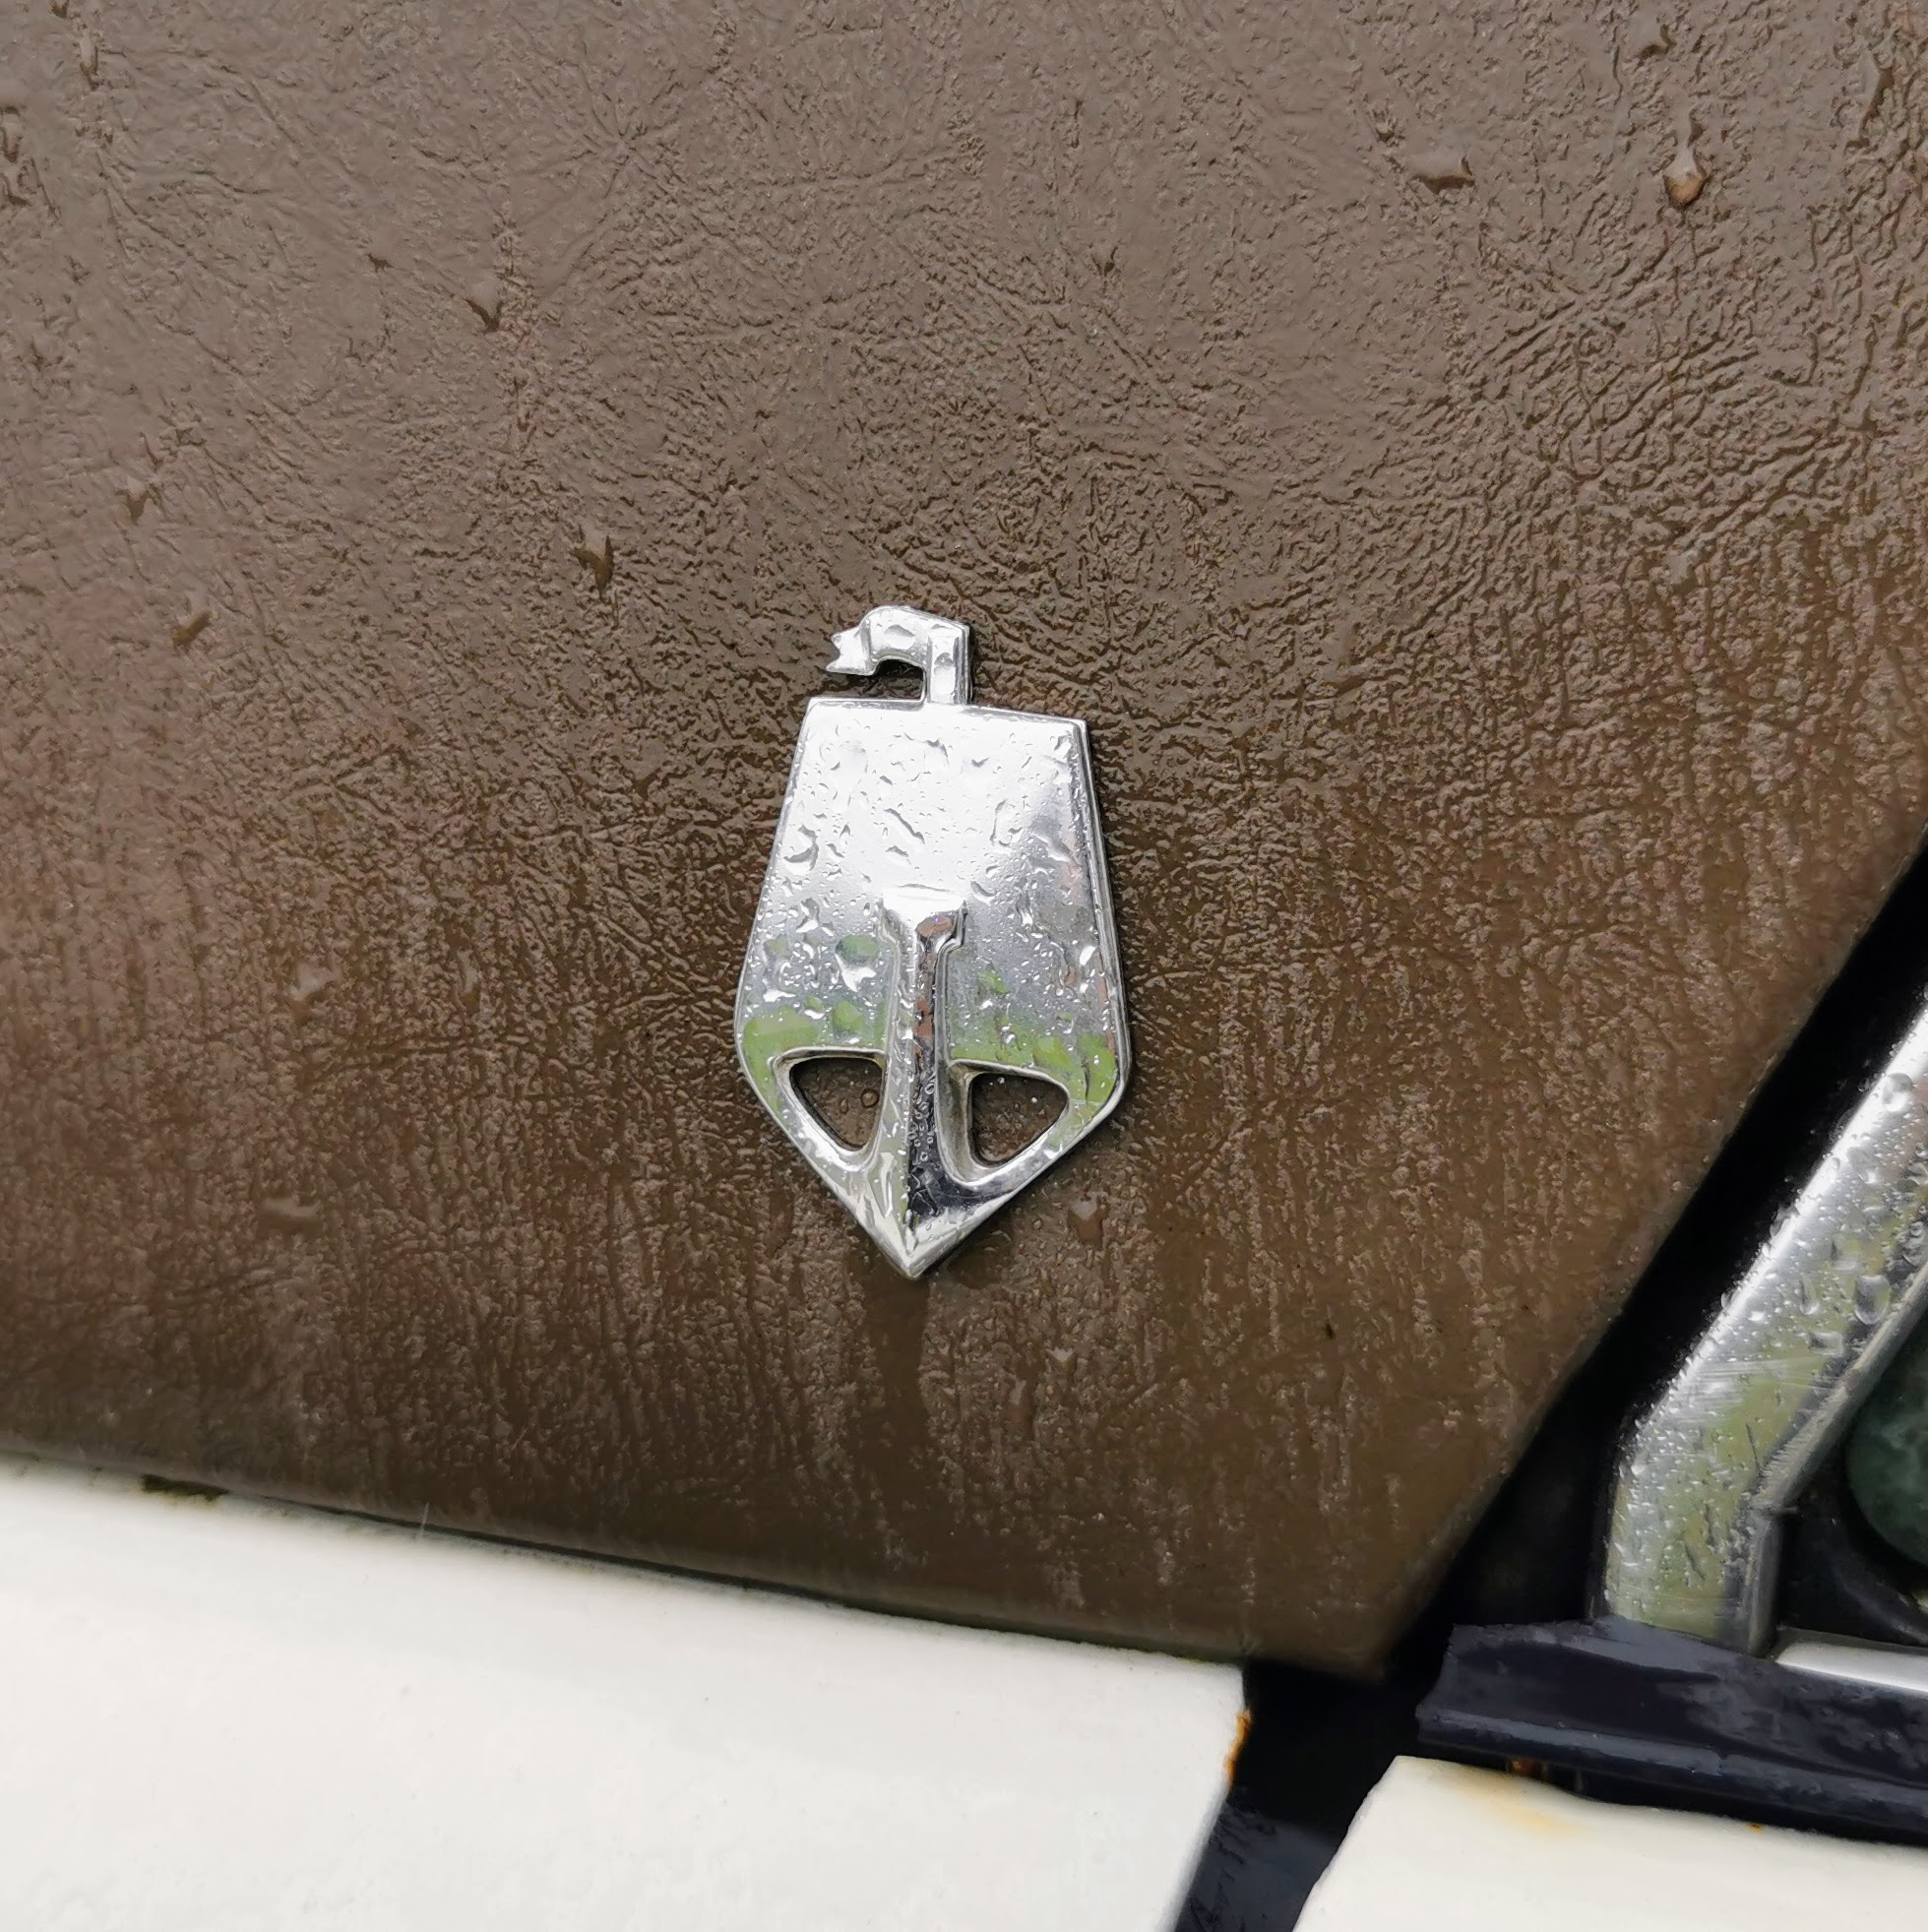
Likewise while the Viking Longboat emblem is prominently positioned on the C pillar where you can't possibly miss it - the design is a very simplified, stylised design. A sort of stylistic approach to corporate logos and such which it interests me to see is very similar to what a lot of companies have been doing in the last few years. It's interesting how in the world of design that certain things do go in cycles.
A lot of the cars I've had a hankering for over the years have been a bit oddball, so seeing something that's pretty universally agreed to be a classic on this page might seem as something of a surprise. I assure you, the appearance of the car here was as much a surprise to me as to you.
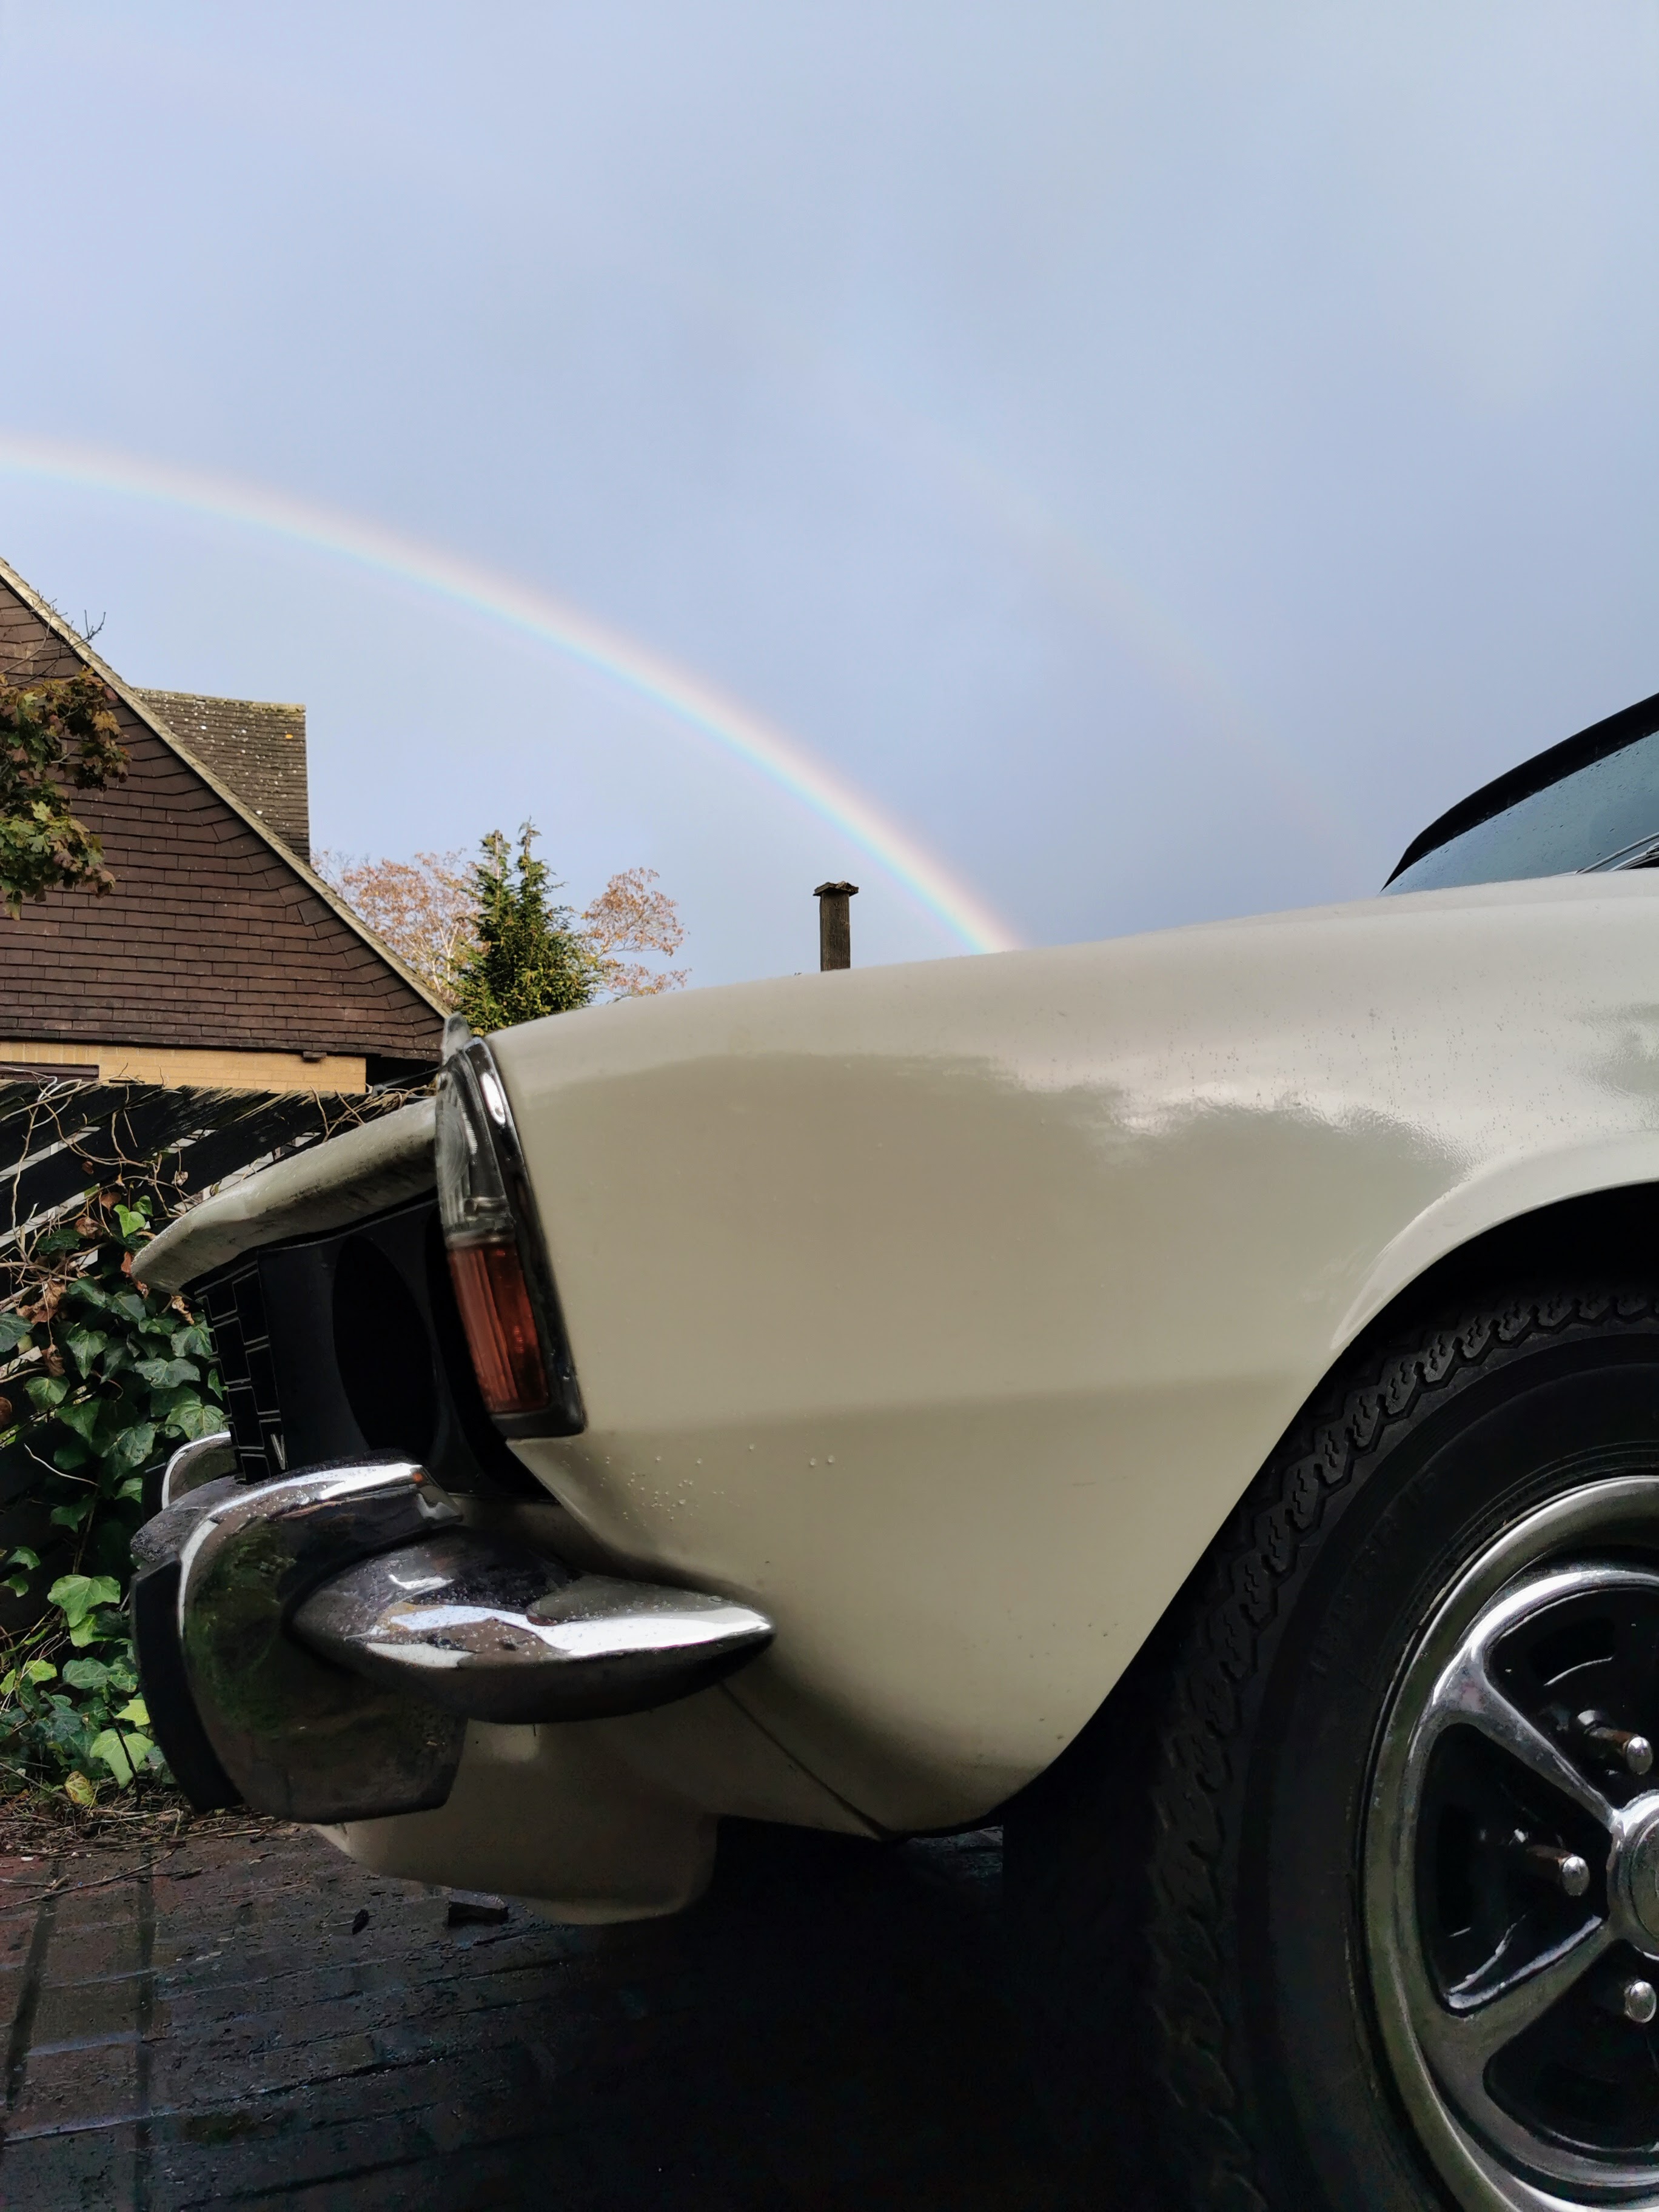
The Rover P6 is a car that I've had on my bucket list since well before I could even drive, much less start thinking about buying my own cars back in 2002 with a very scruffy brown Austin Metro City. However it's one which I felt that I'd well and truly missed the boat on in terms of getting hold of one that's in a condition I was willing to consider living with at a reasonable price. I did have a look at a couple 10 or 15 years back, but they were absolute basket cases and I sort of shrugged and just moved on to other things.
That was until a few weeks ago when I heard of another user on one of the forums I'm on having run into problems with a sale of a seemingly solid sounding P6, at a price which to me sounded very reasonable. On the off chance, I pinged them a message to see what the details were...couple of days later I made what should have been a 3 hour round trip to take a look at it (which ended up being basically the whole day thanks to an accident closing the M1), and a week or so later it arrived on my driveway.

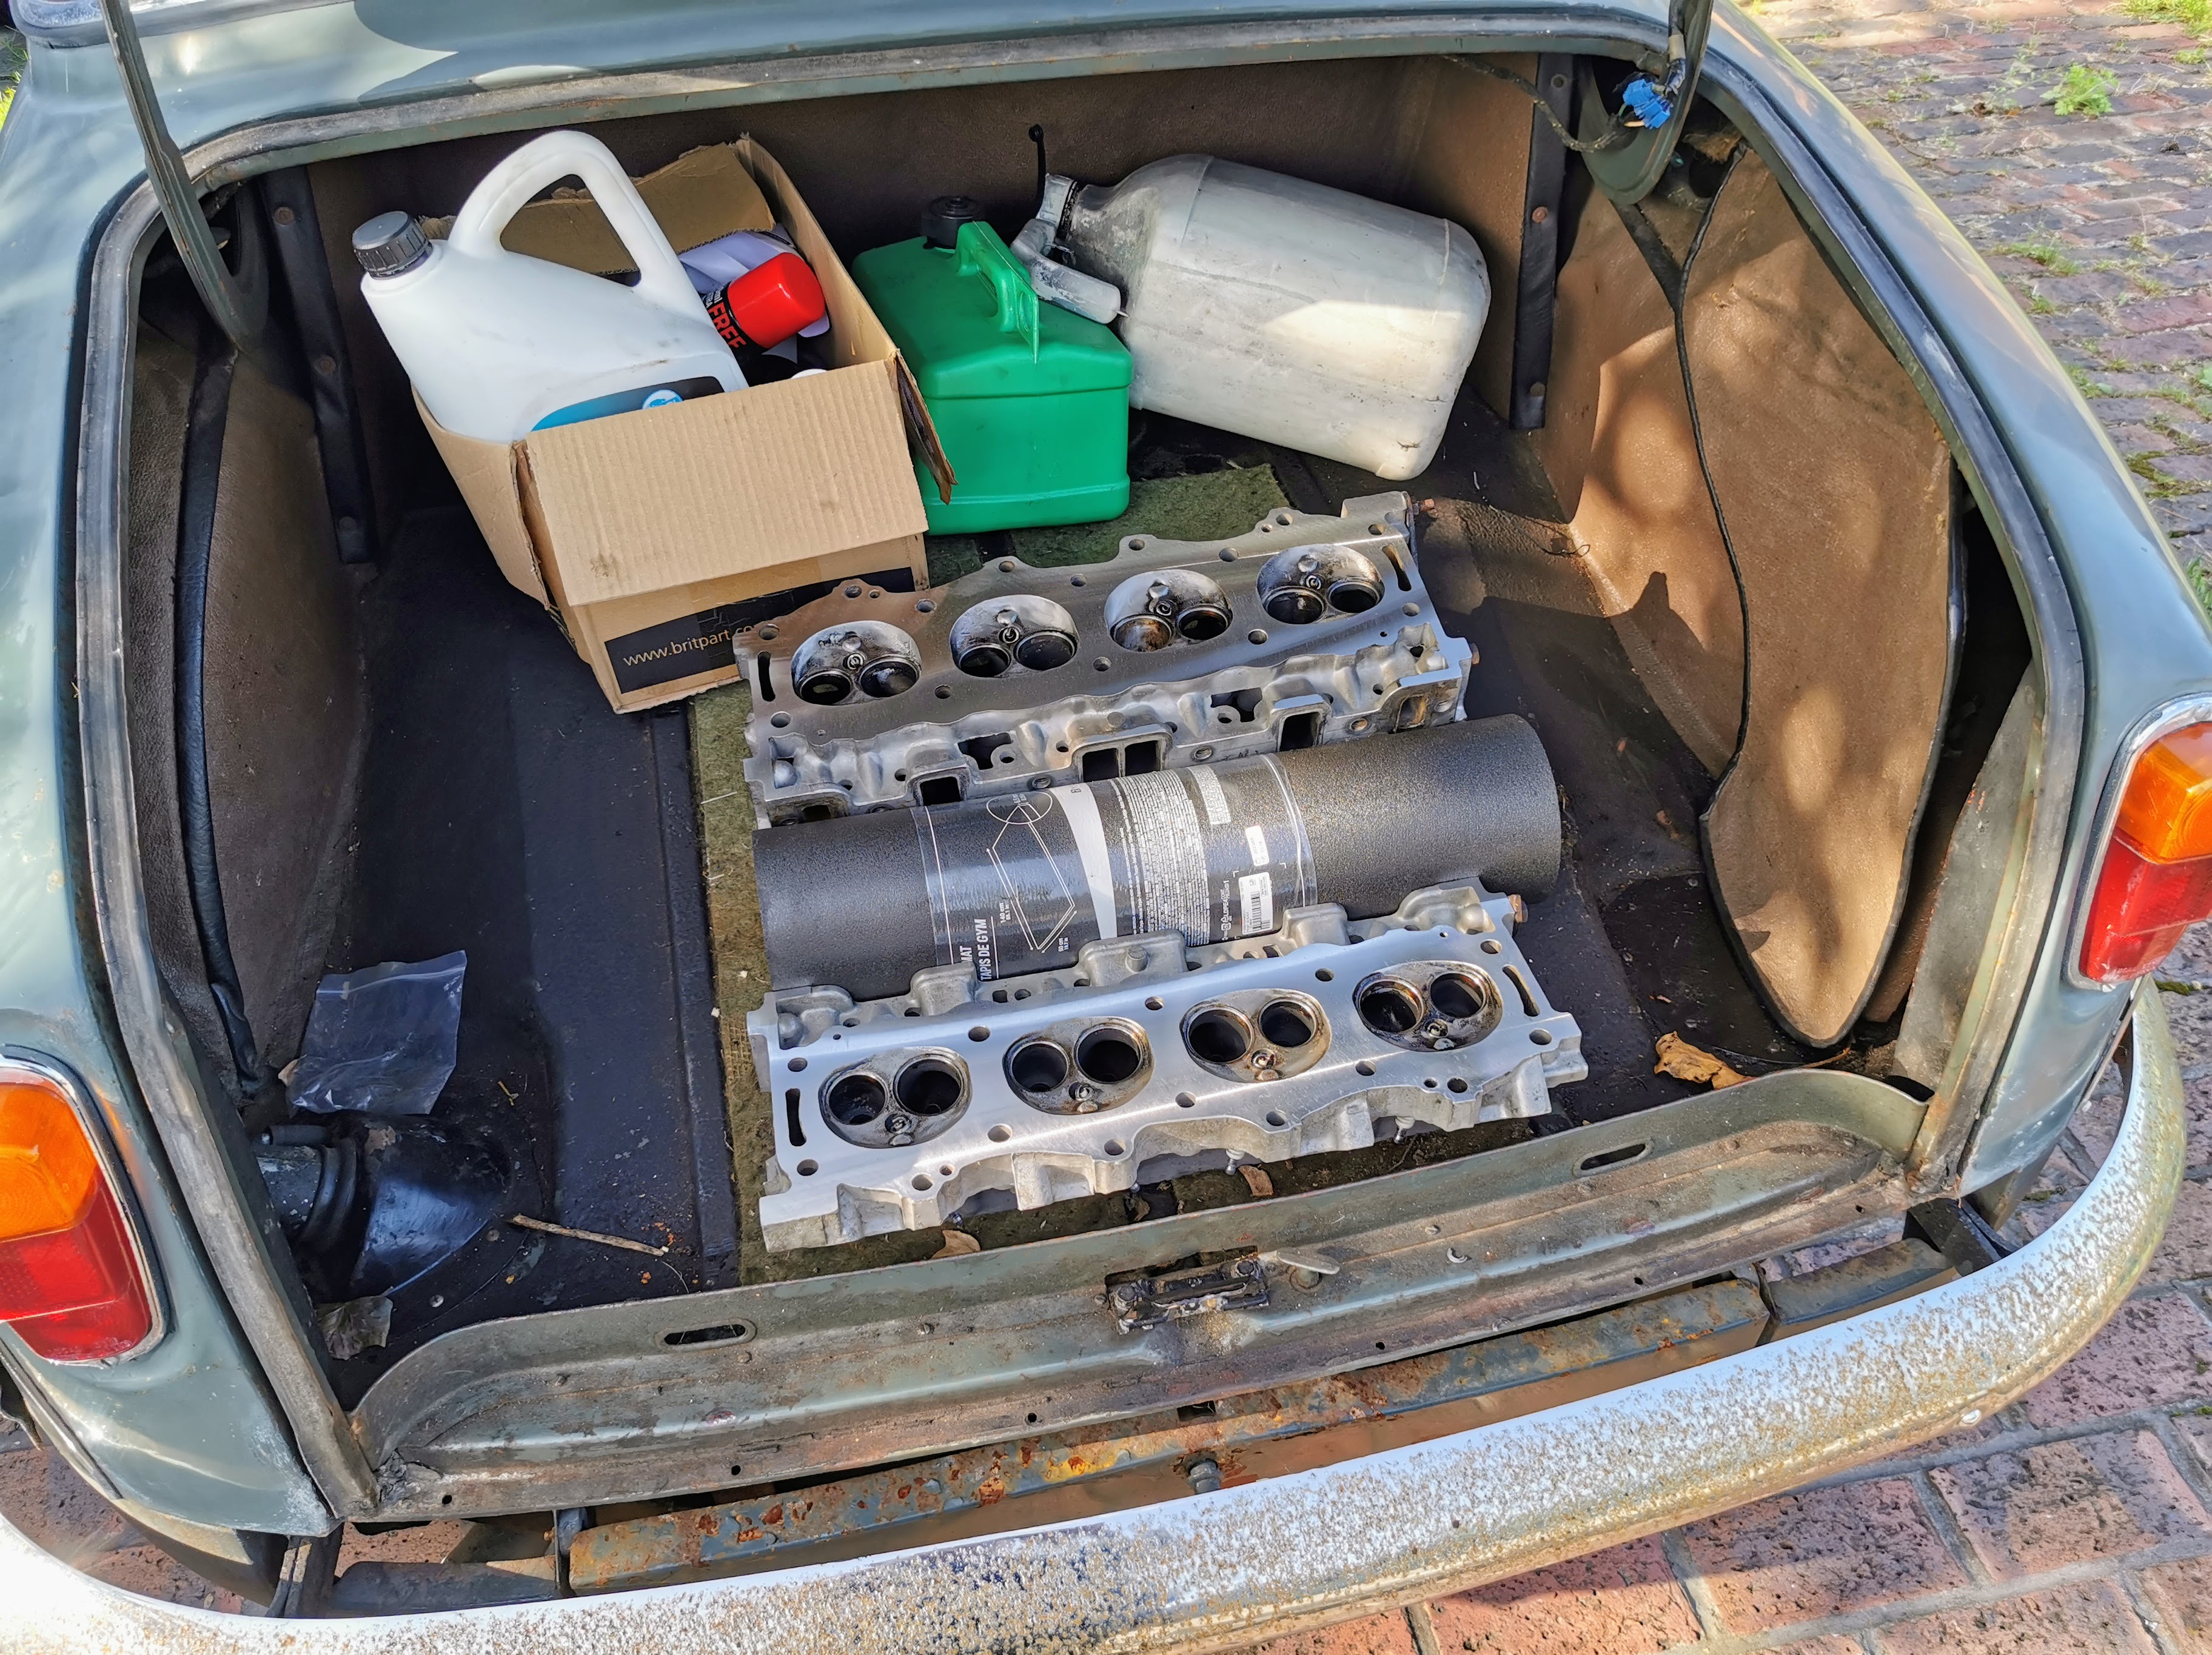
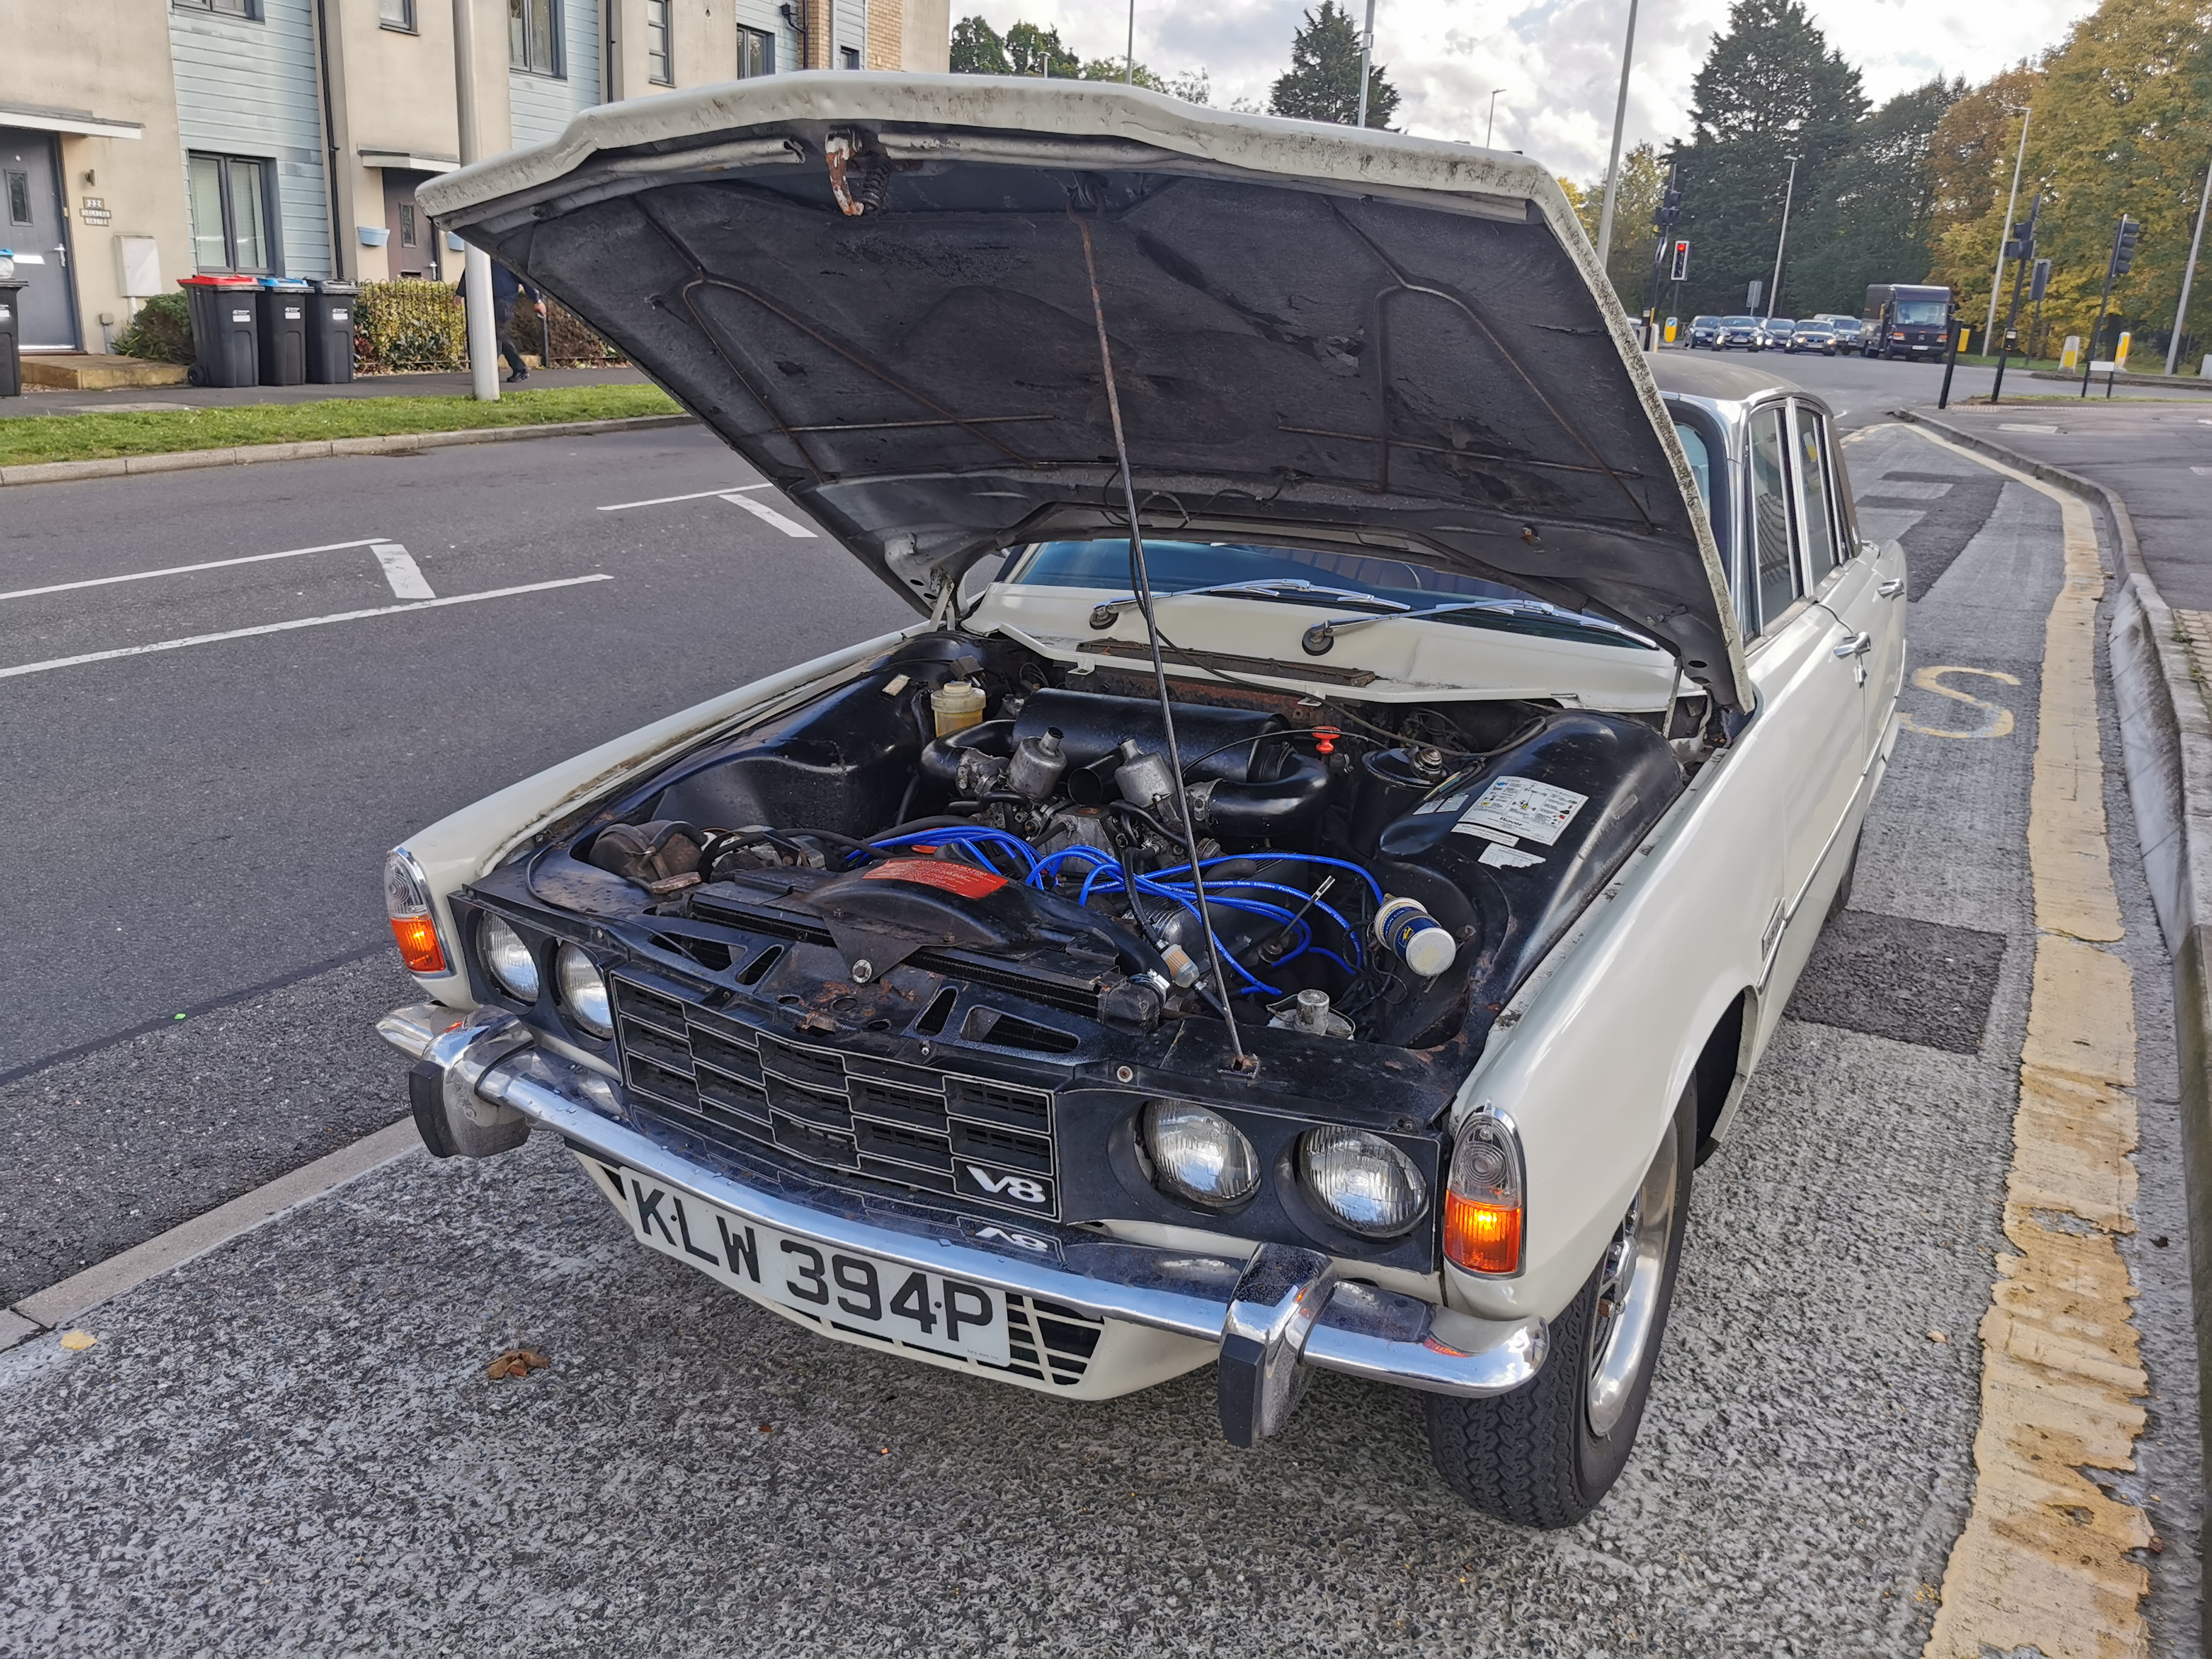
Fact of the matter is that I really wasn't looking for a car when this turned up. In fact the Caddy you can see in the photo above had just gone on the market because a slightly more modern van had been bought to replace it, and to make room for this a friend has had to offer me lodgings for this Rover P4 which I'd only picked up recently and had been very much enjoying. It's never a fun feeling when the automotive overflow level has reached a point where you can no longer fit everything on your own property!
However the price was right, and the car seemed a good fit for what I was really looking for in a rolling project. It seemed to be fundamentally solid, but hadn't been in regular use for a fairly significant but unknown period of time. The sort of work resulting from that though is far more a good match to what I can deal with than major structural work - which on a P6 is never easy due to the complexity of their structure and ability of all the bolt on panels to hide some truly catastrophic rot while still looking pristine.
Photos do flatter this car a little, but it's really quite presentable as far as I'm concerned. There have clearly been repairs done here and there and the paintwork is definitely a DIY job when you look closely, but you know me - I'm not a concourse show judge.
I have to admit to being quite curious as to what the story behind this car really is. It's plain that someone has put quite a bit of work into it relatively recently, I was guessing 2019-20 or thereabouts given the one newer tyre on the car has a 2018 date code. However a lot of things looked to have just been hastily thrown together when the car was then parked up somewhere. Pretty much all of the screws from the lights were missing for example, and there were a lot of things in the engine bay that were just sitting in place rather than properly fastened. I have to wonder if it was a nearly finished project that got pushed aside due to something like ill health, or it someone did a load of work and then encountered running issues with the car and just ran out of patience with it.
For instance the front brake calipers have obviously been either replaced or rebuilt relatively recently.

Likewise the starter motor definitely looks to have been replaced in the not too distant past. Not done yesterday obviously, but this definitely hasn't been on there since the 90s.
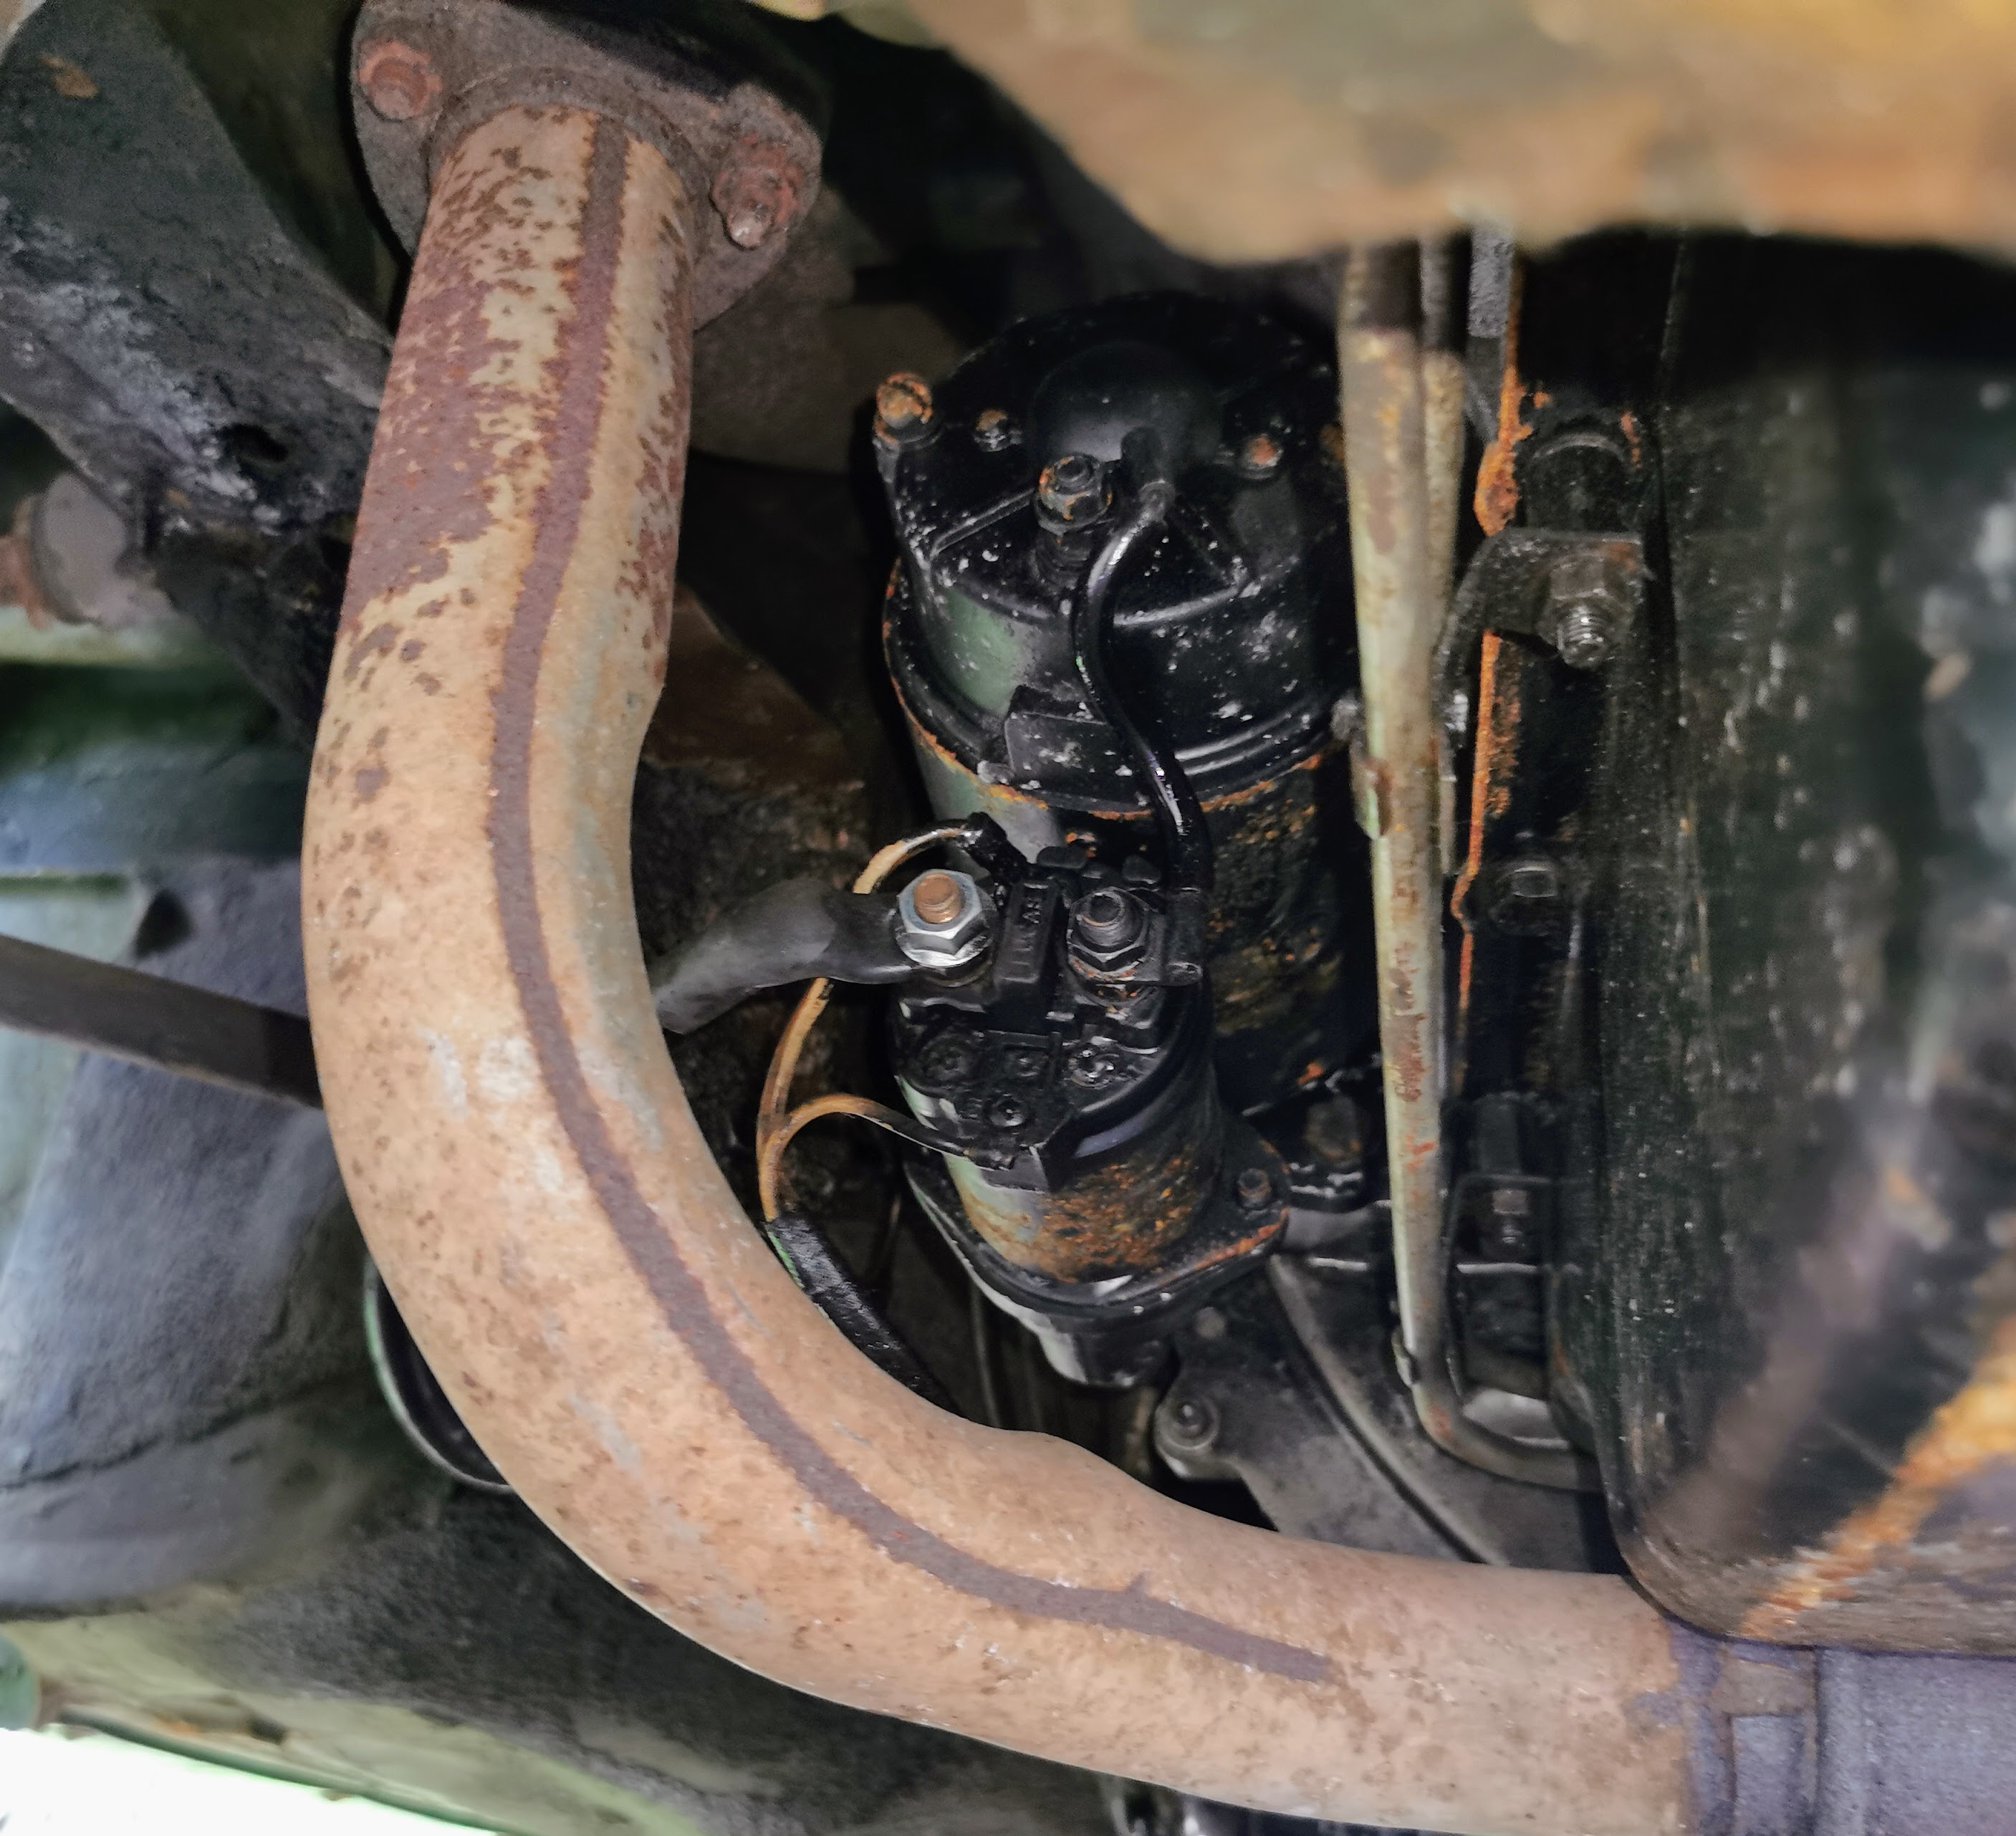
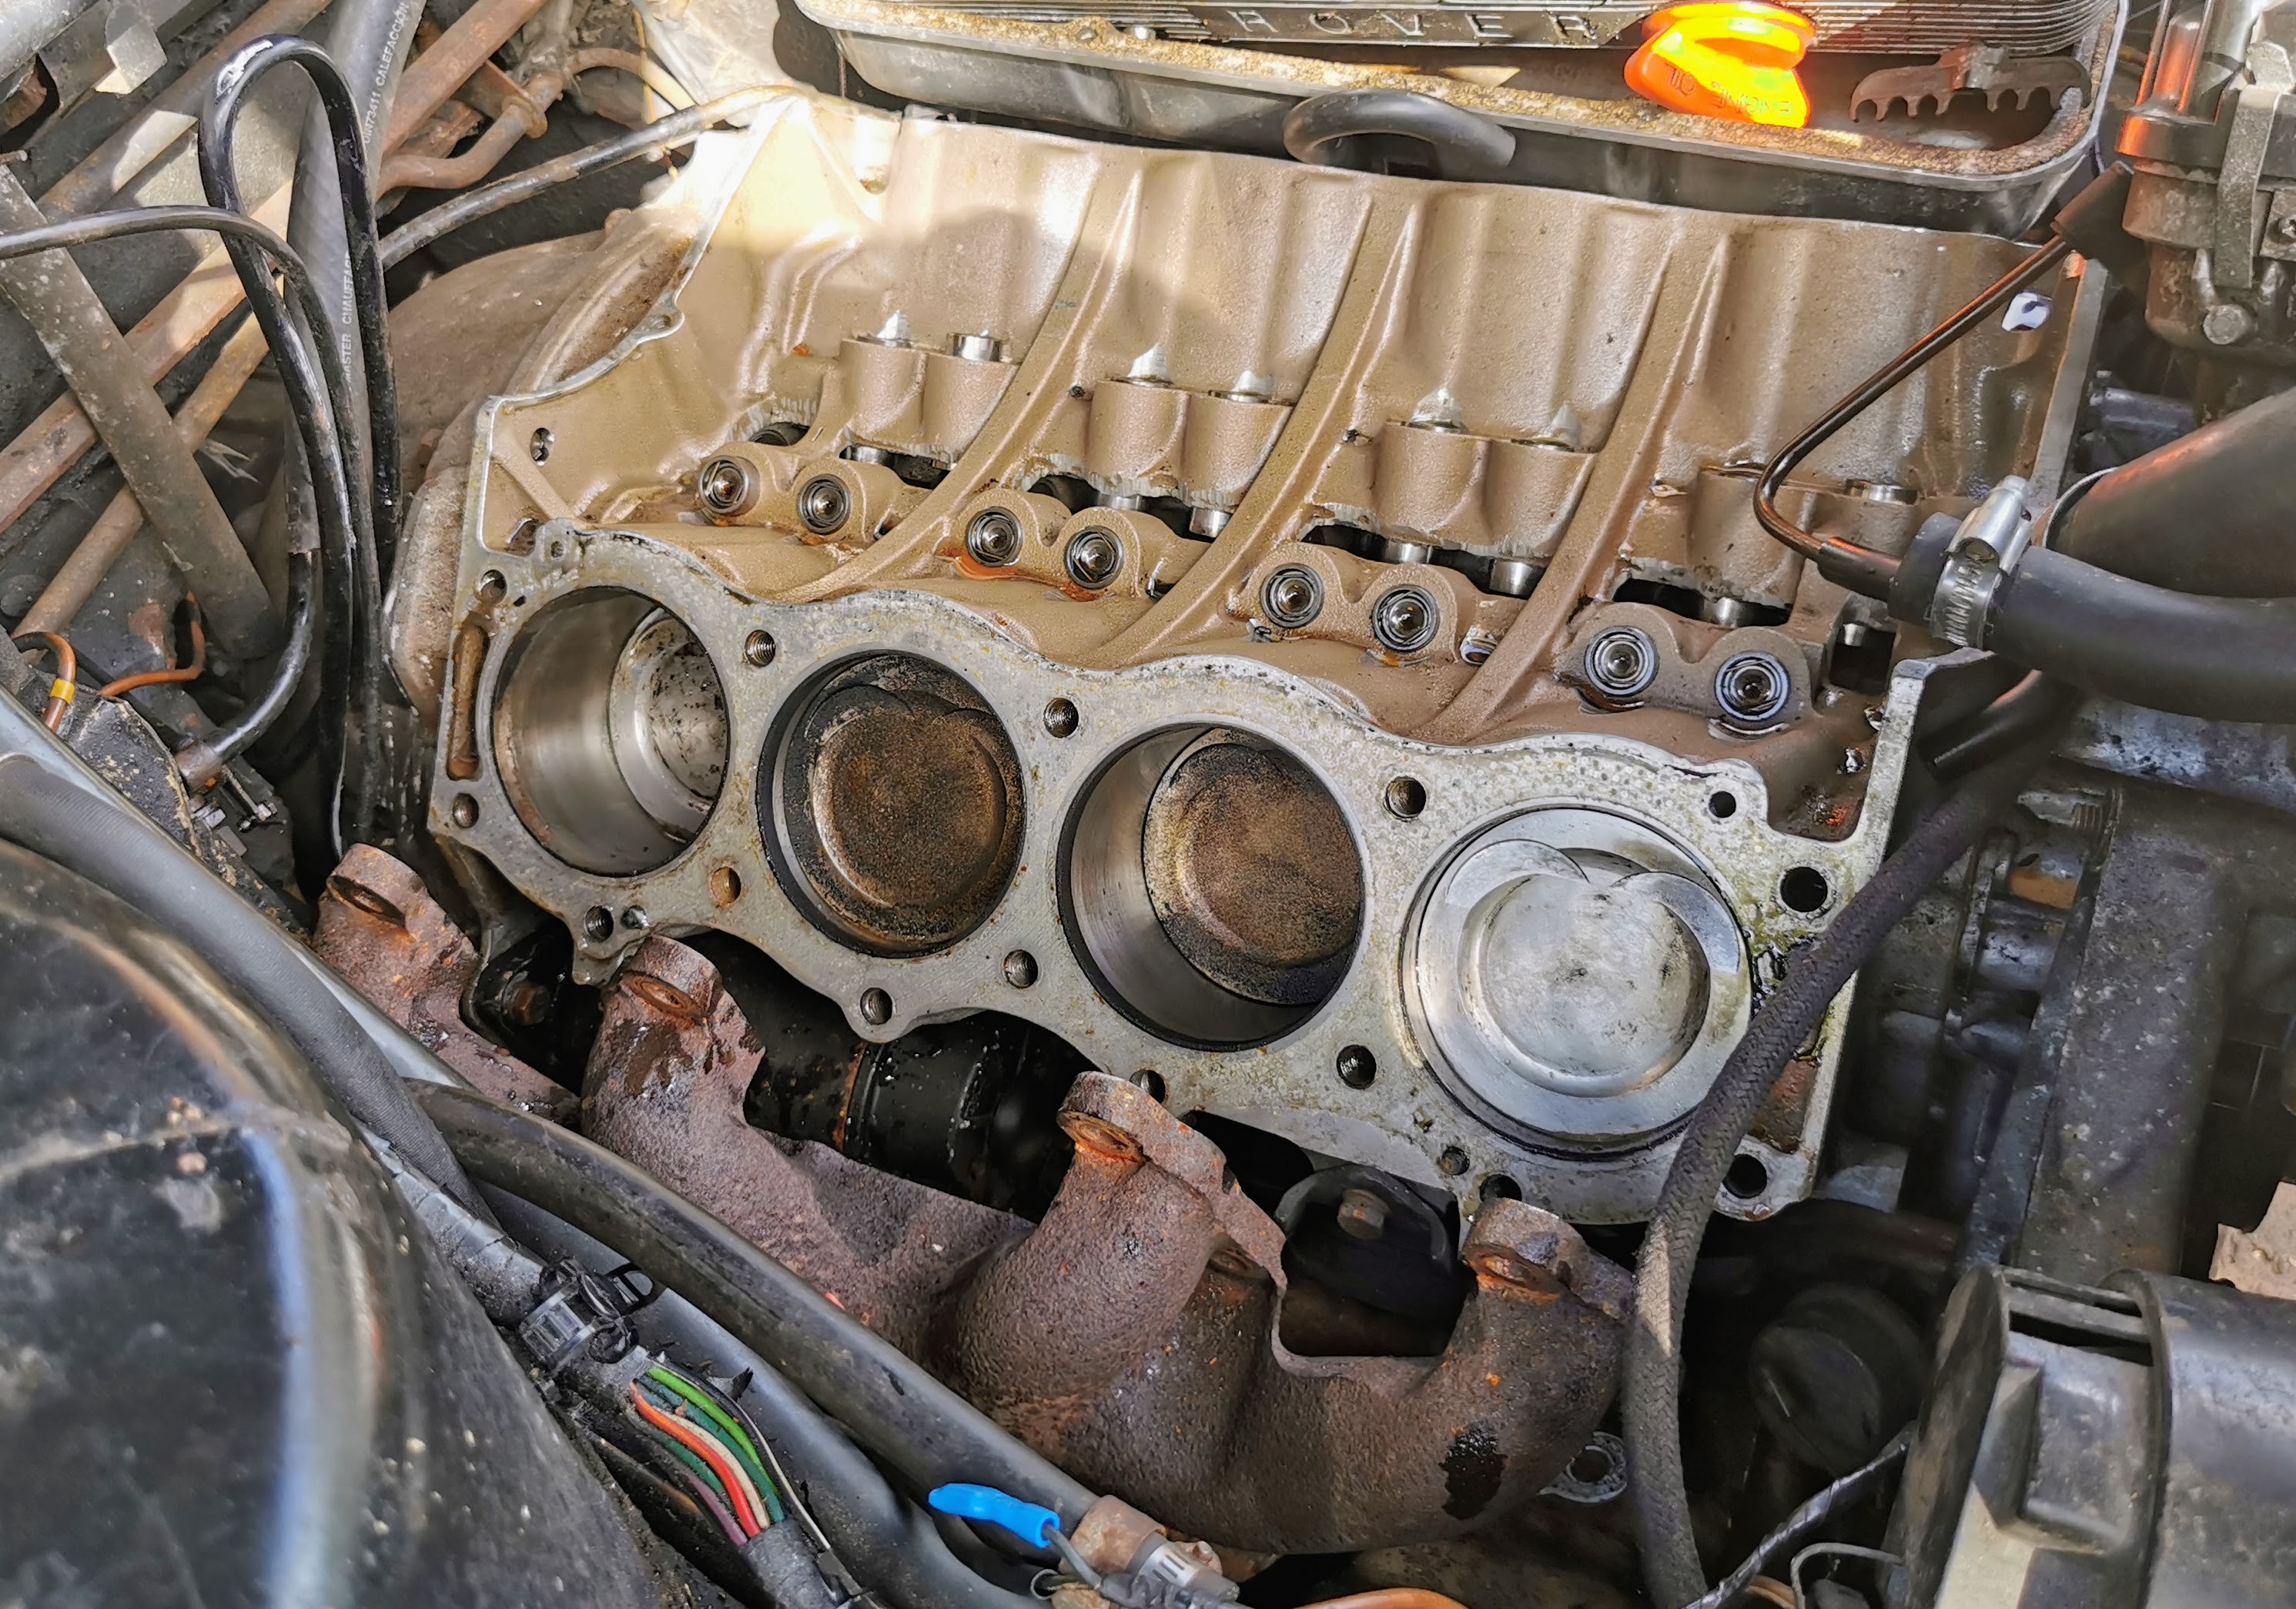
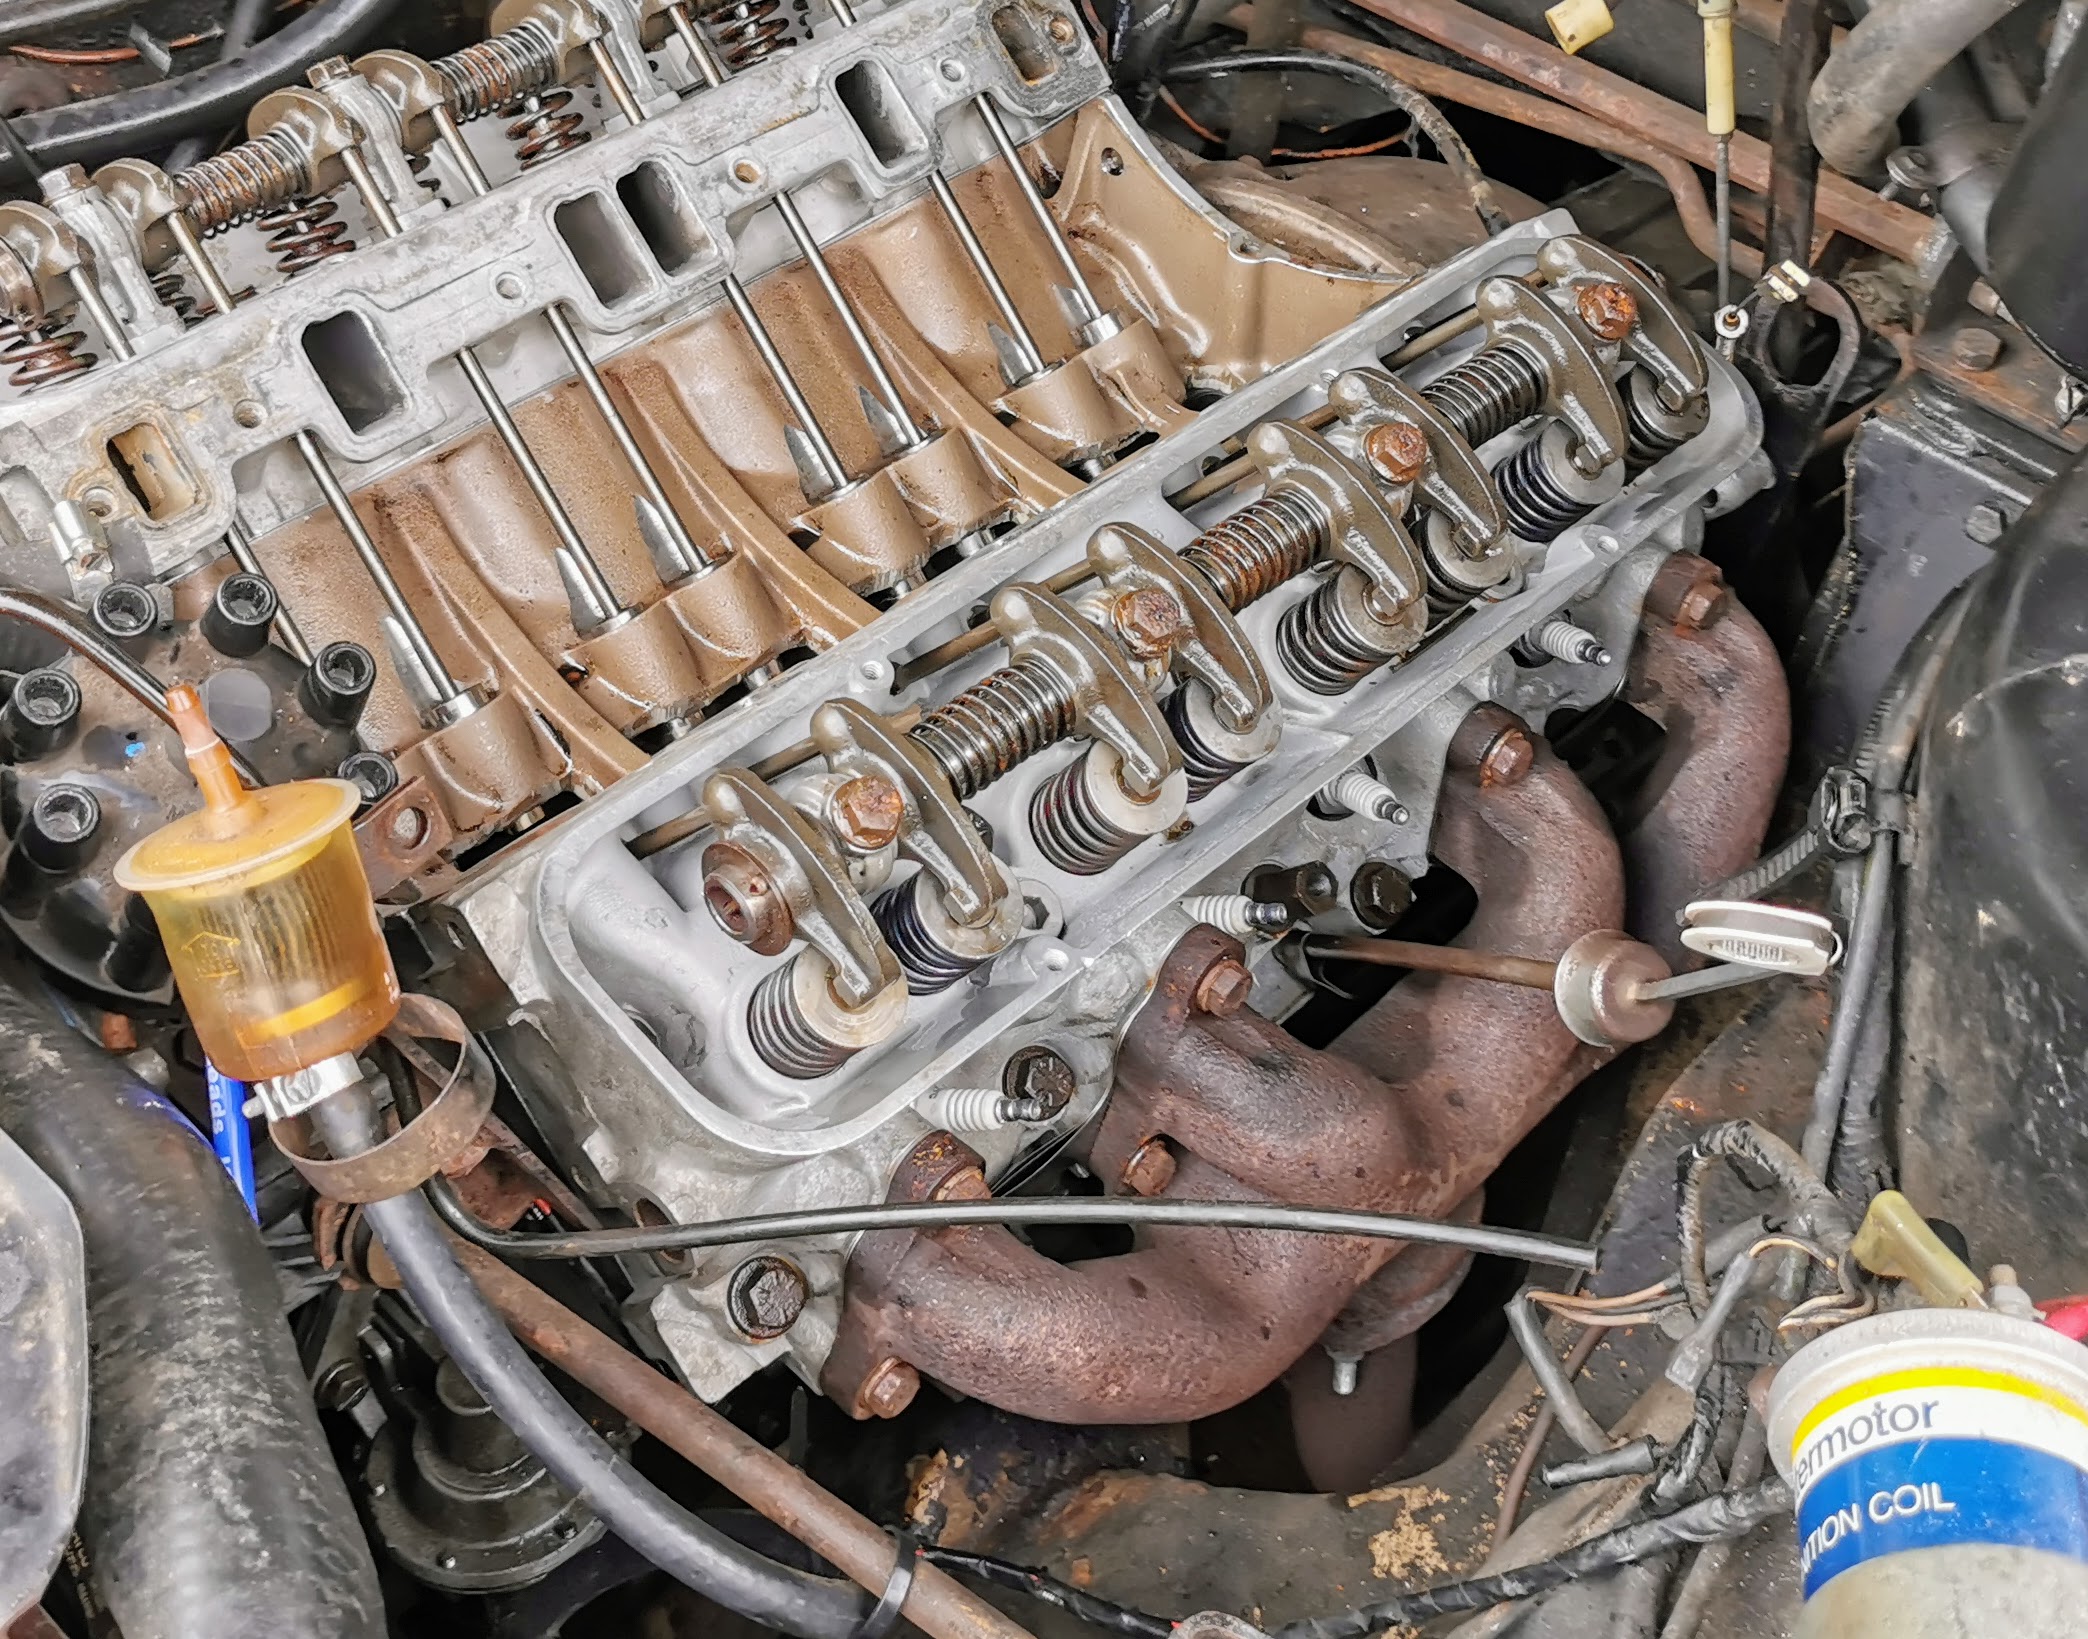
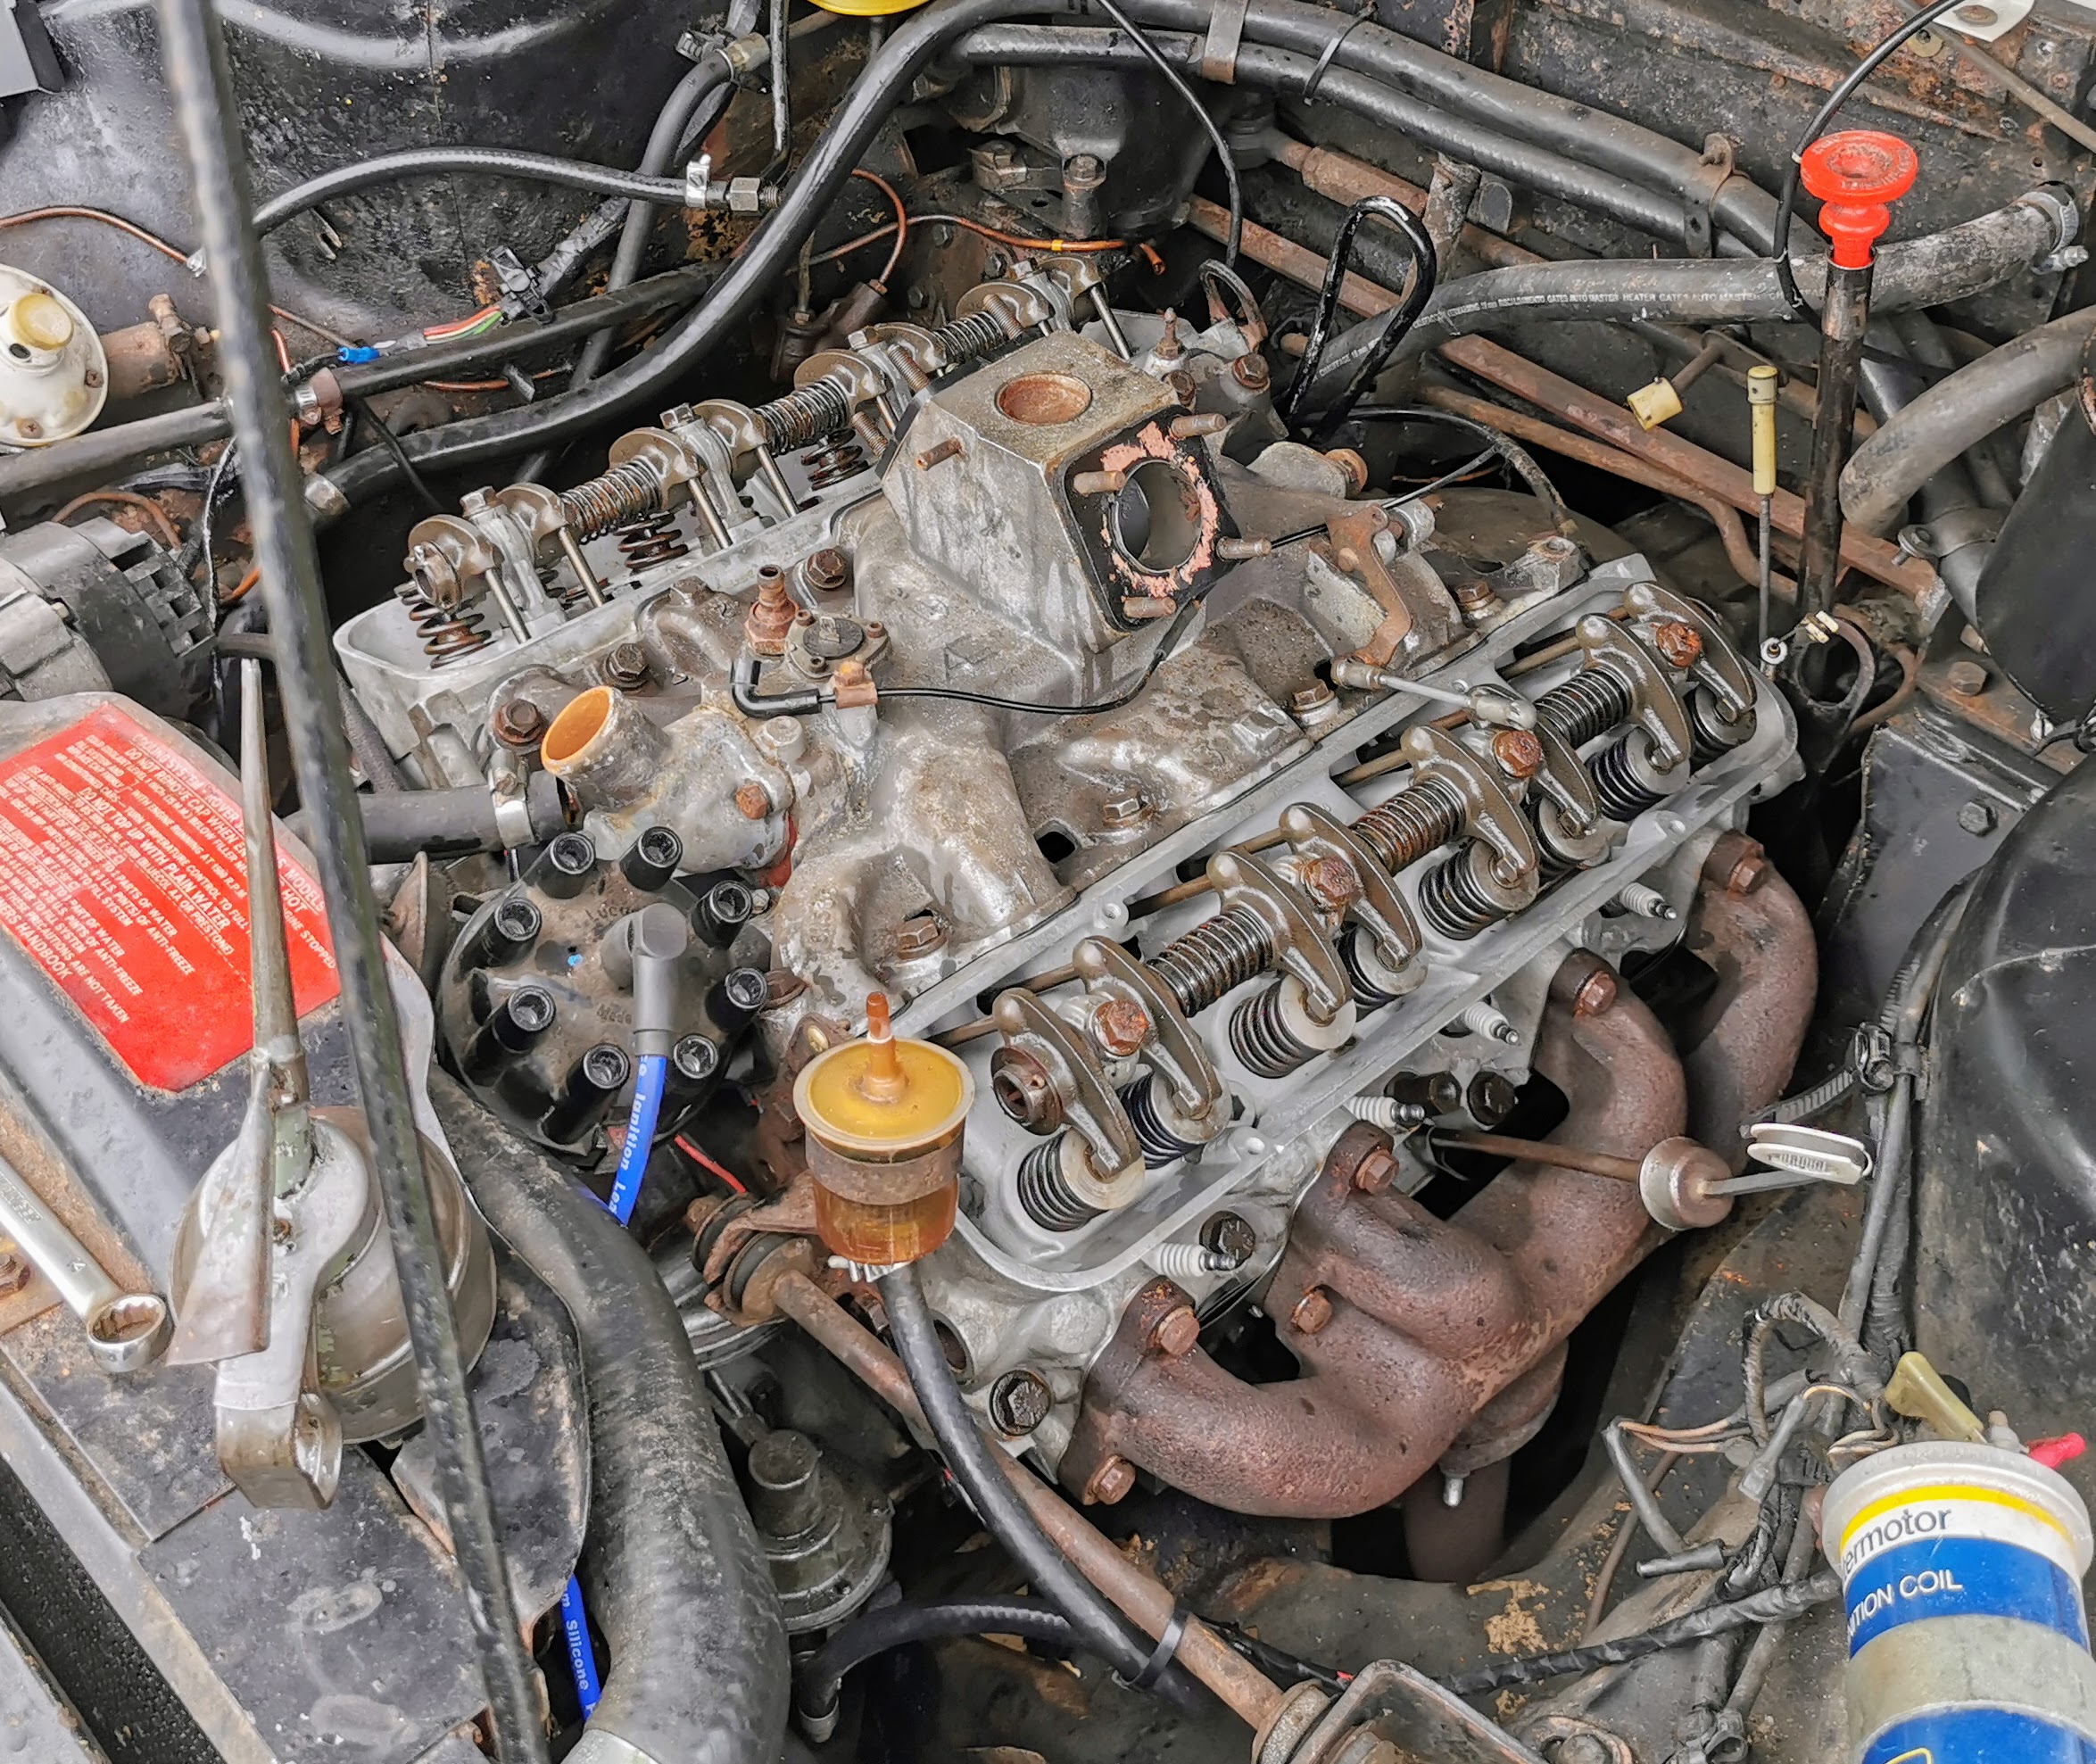
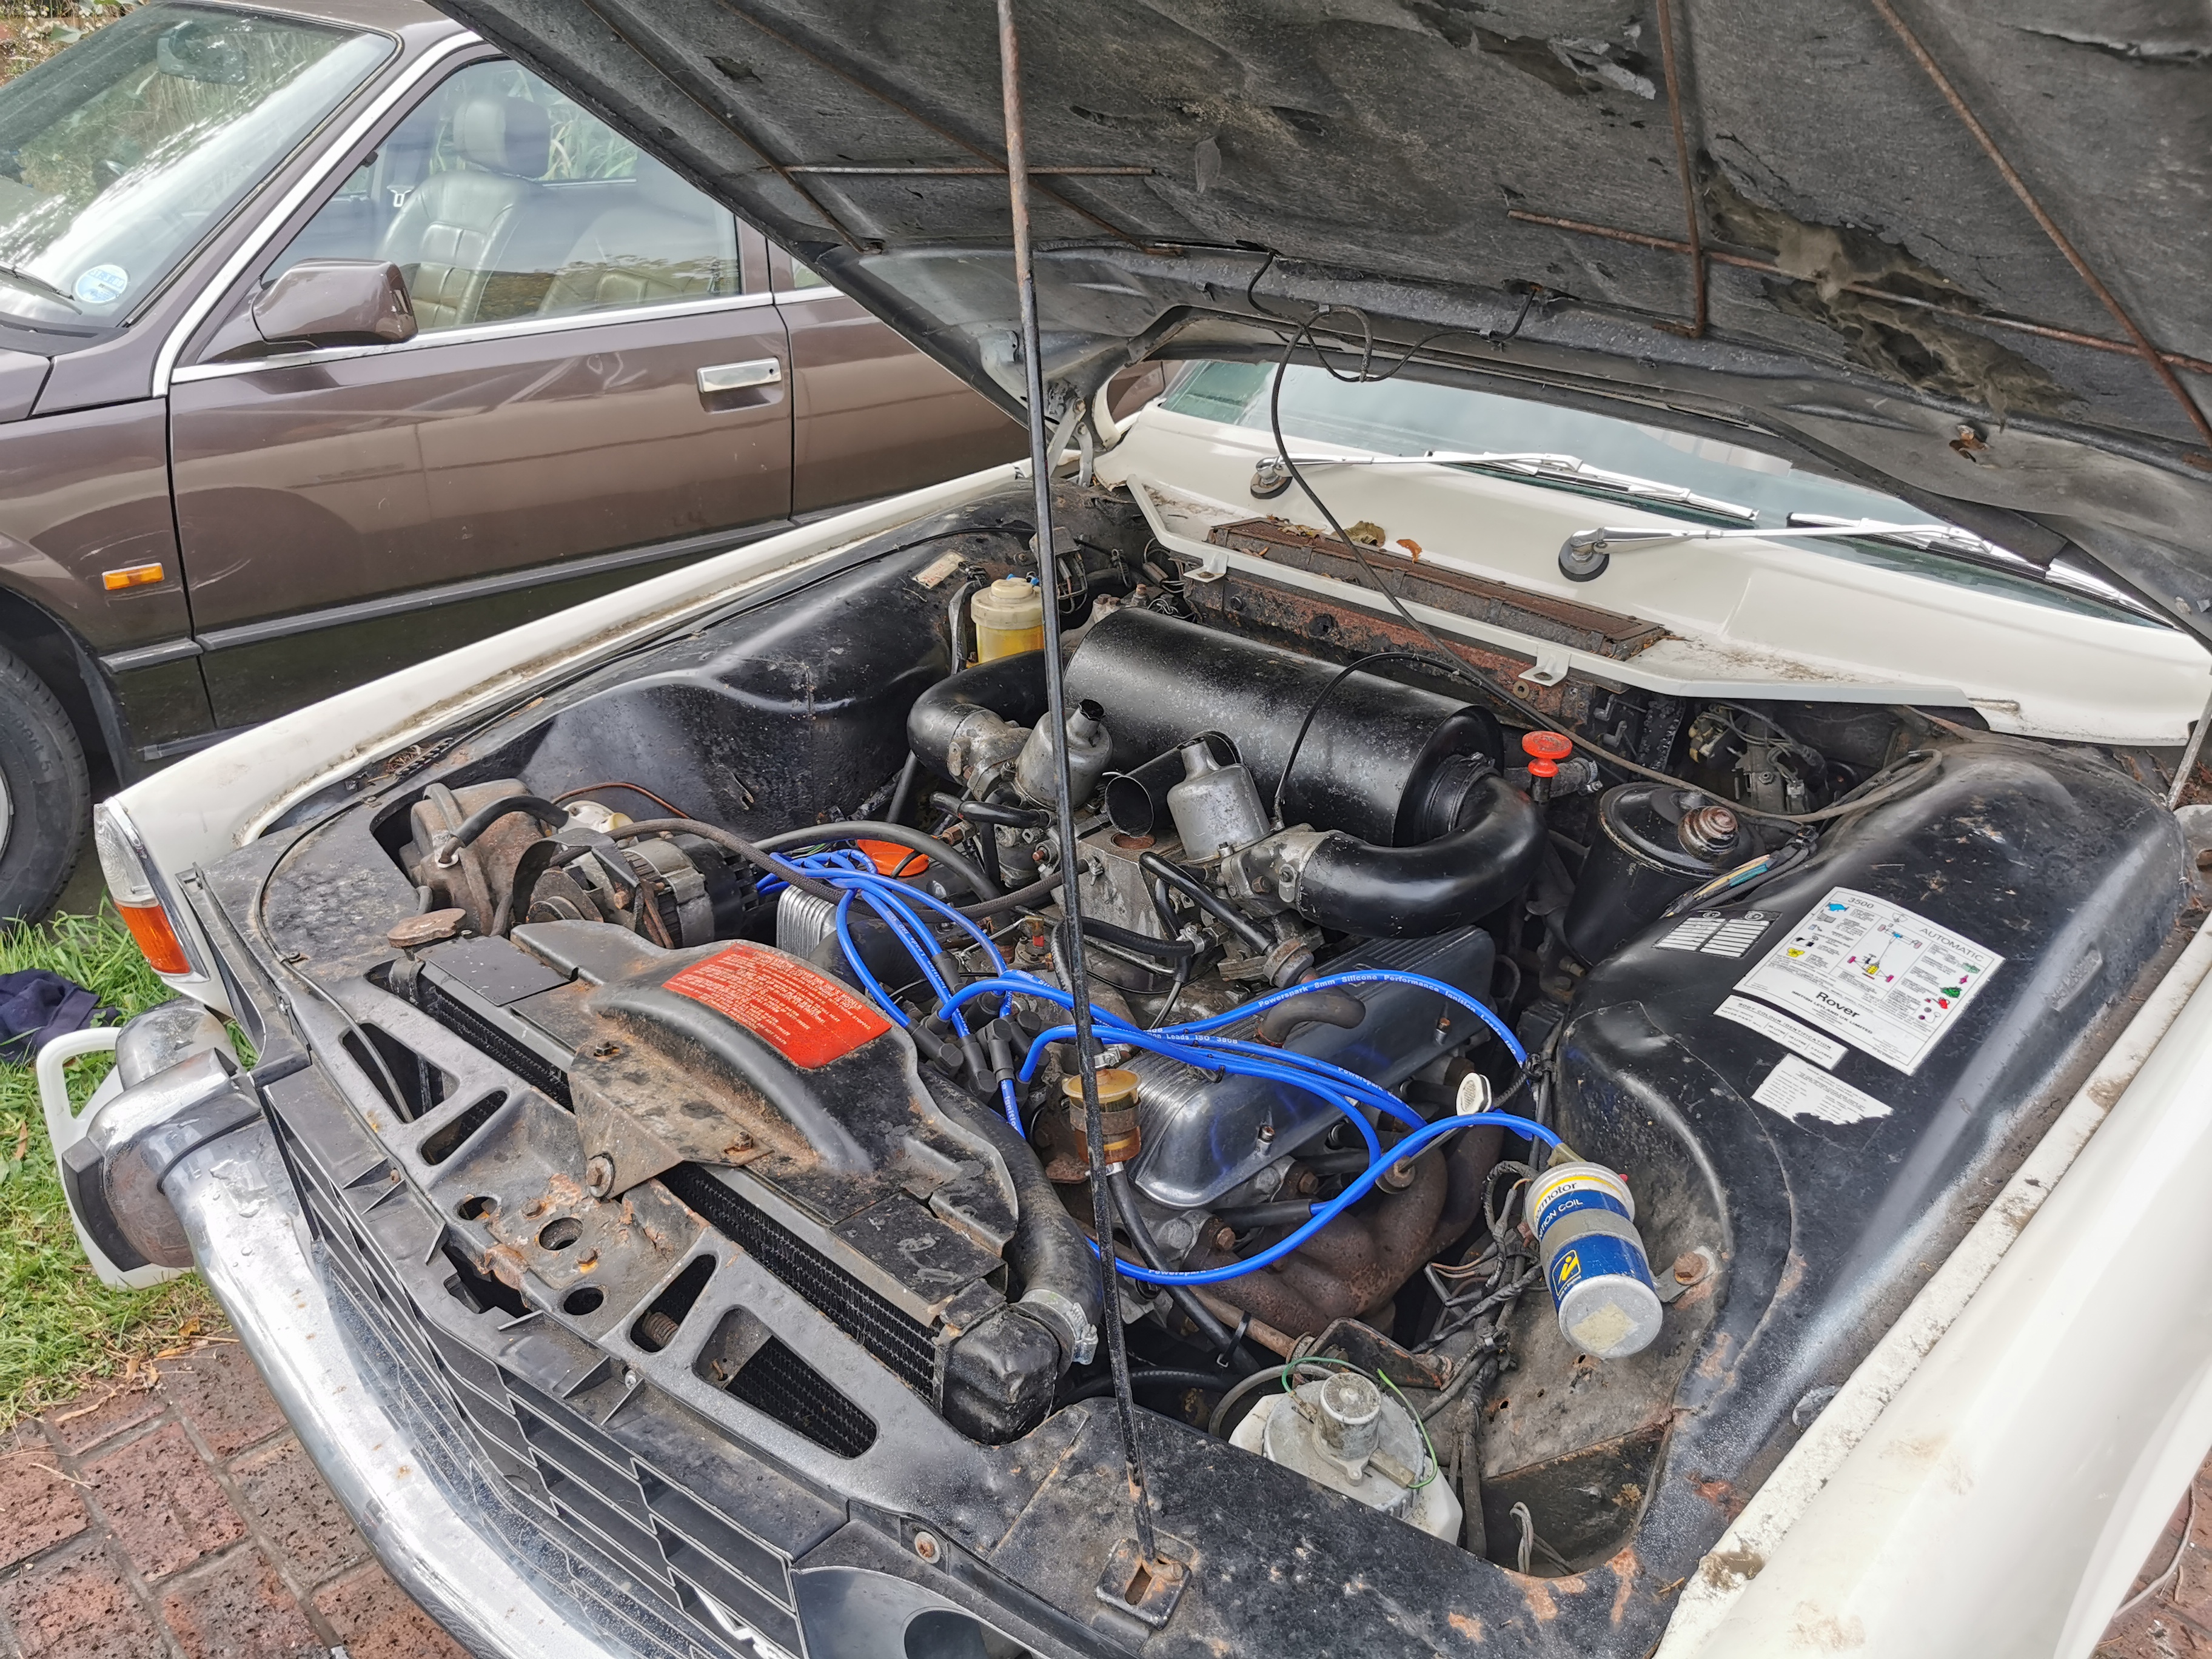
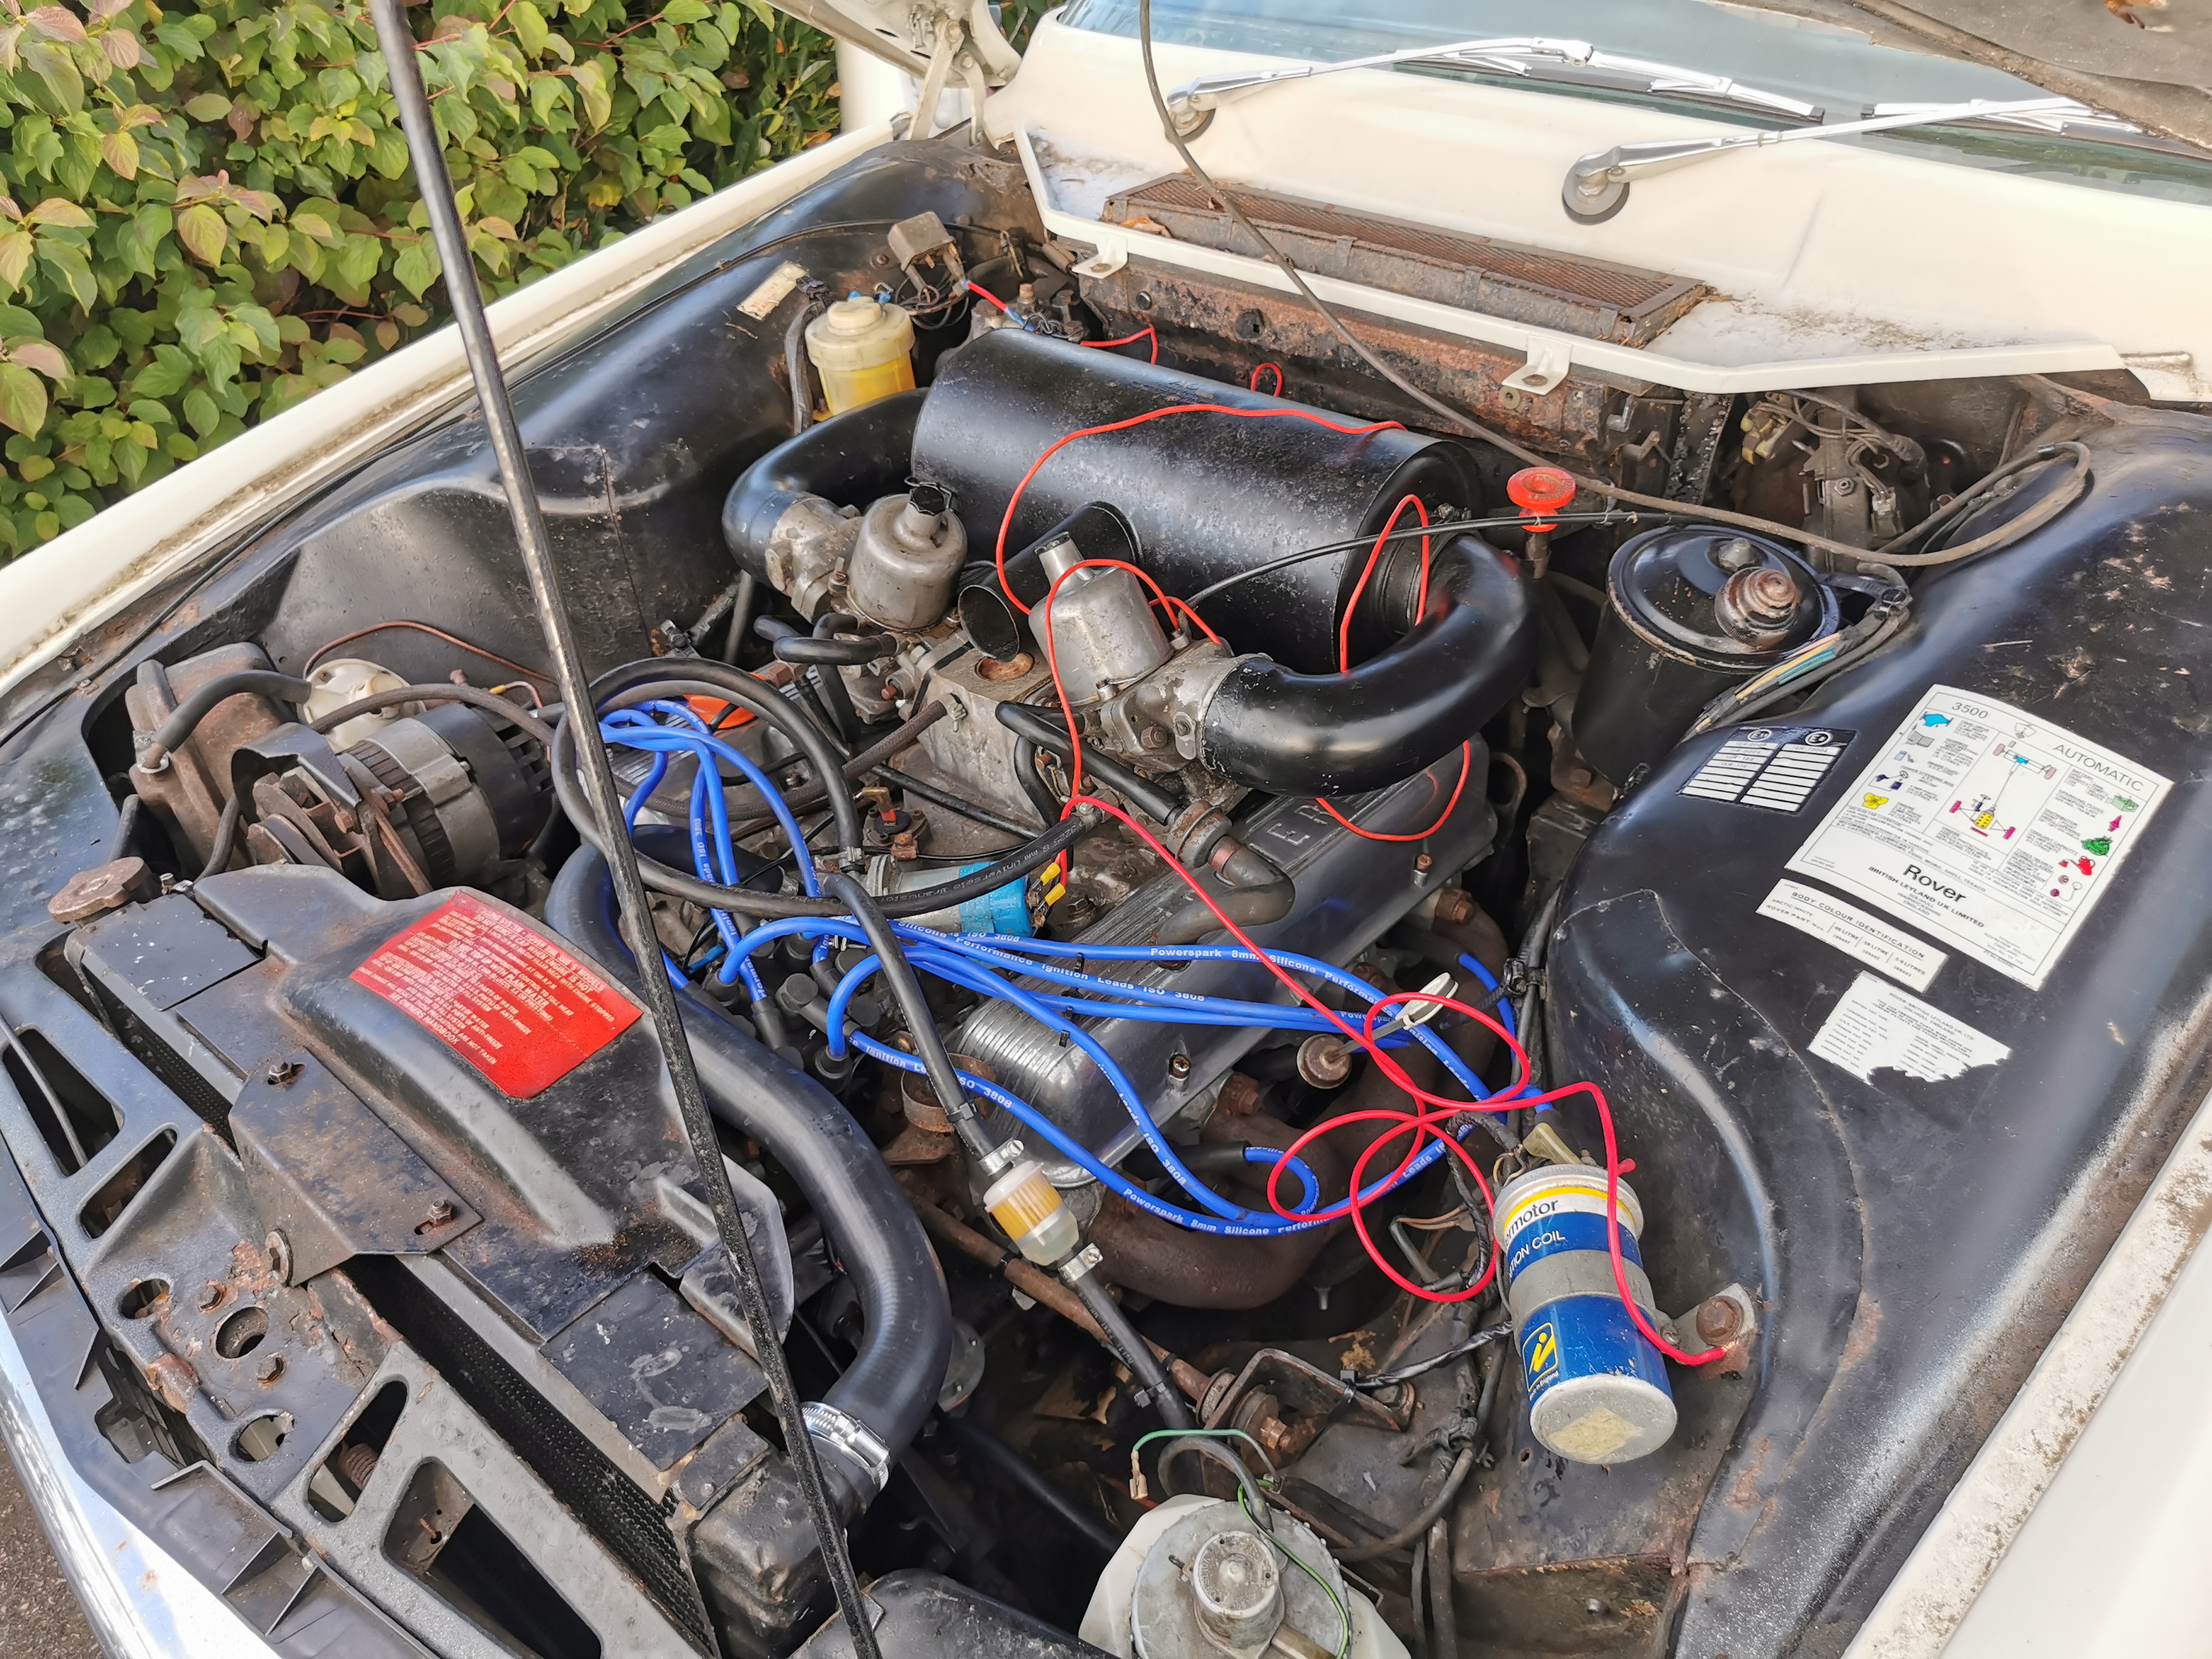
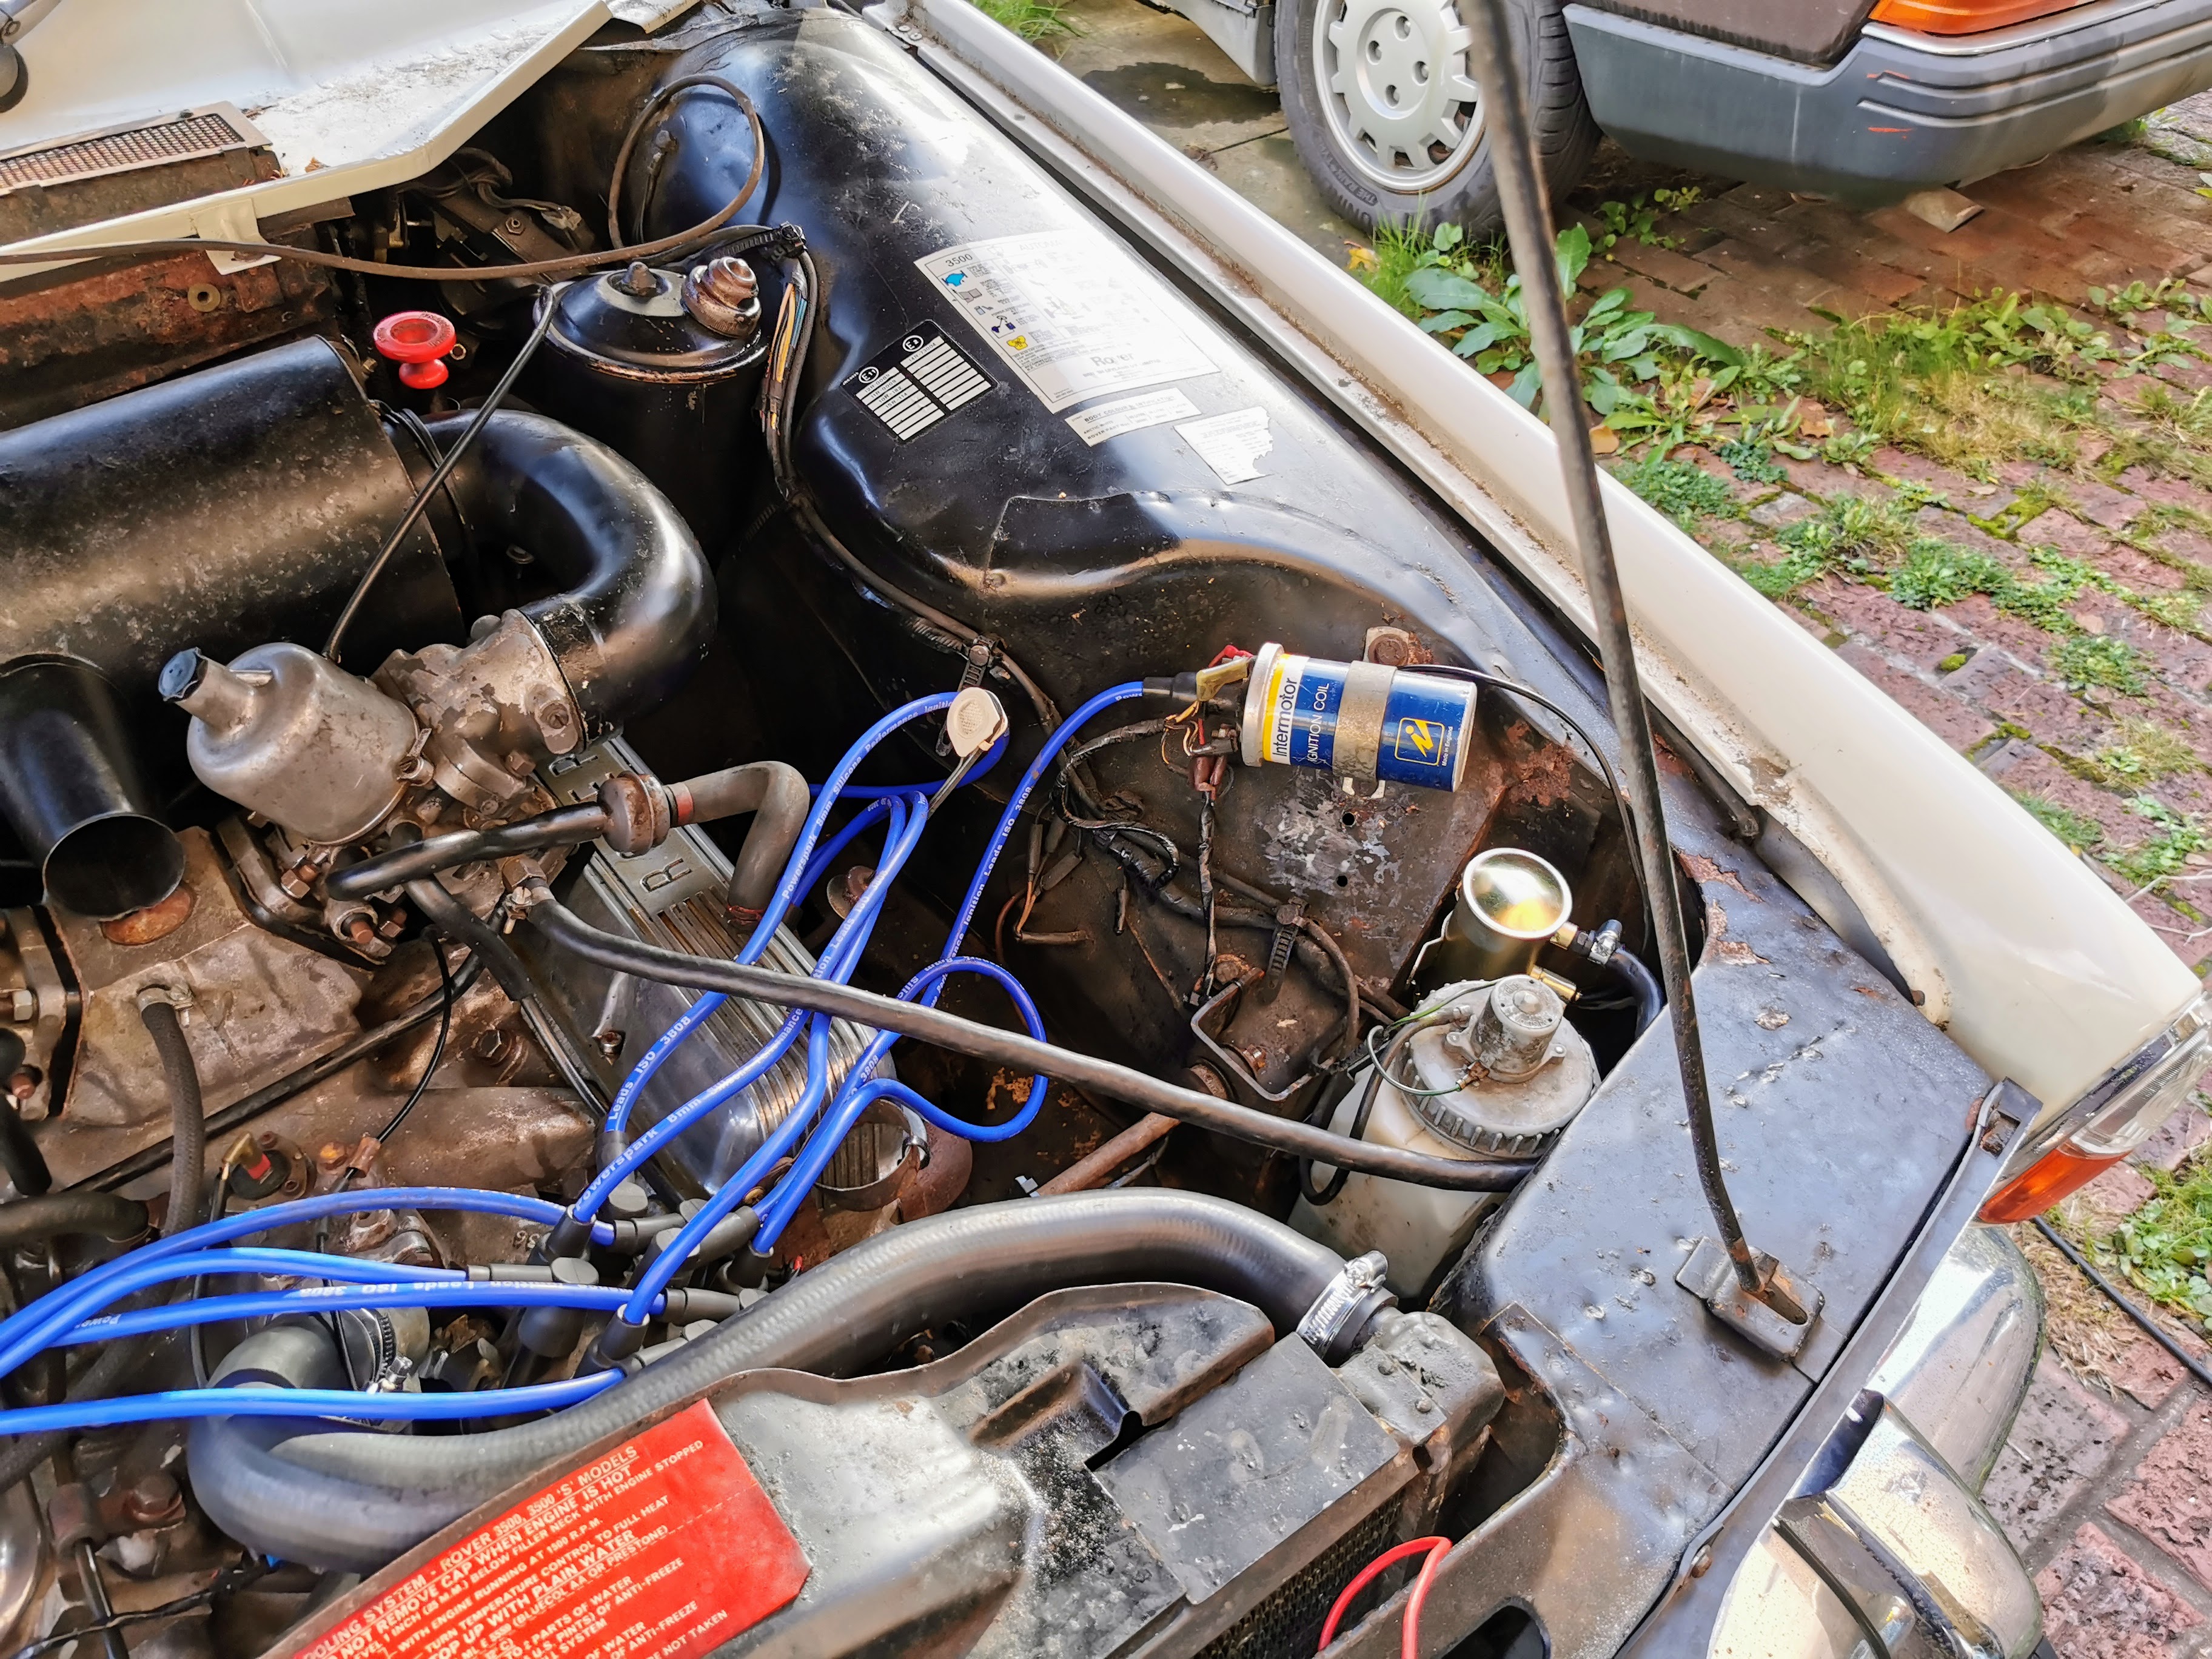
The first immediately obvious issue apparent even before I had the car delivered was that it plainly wasn't running right. It did start and run, more or less, but at best we had seven functional cylinders, and it became quickly obvious that it wasn't just an ignition issue as you could clearly hear that one cylinder had little to no compression as the engine cranked over.
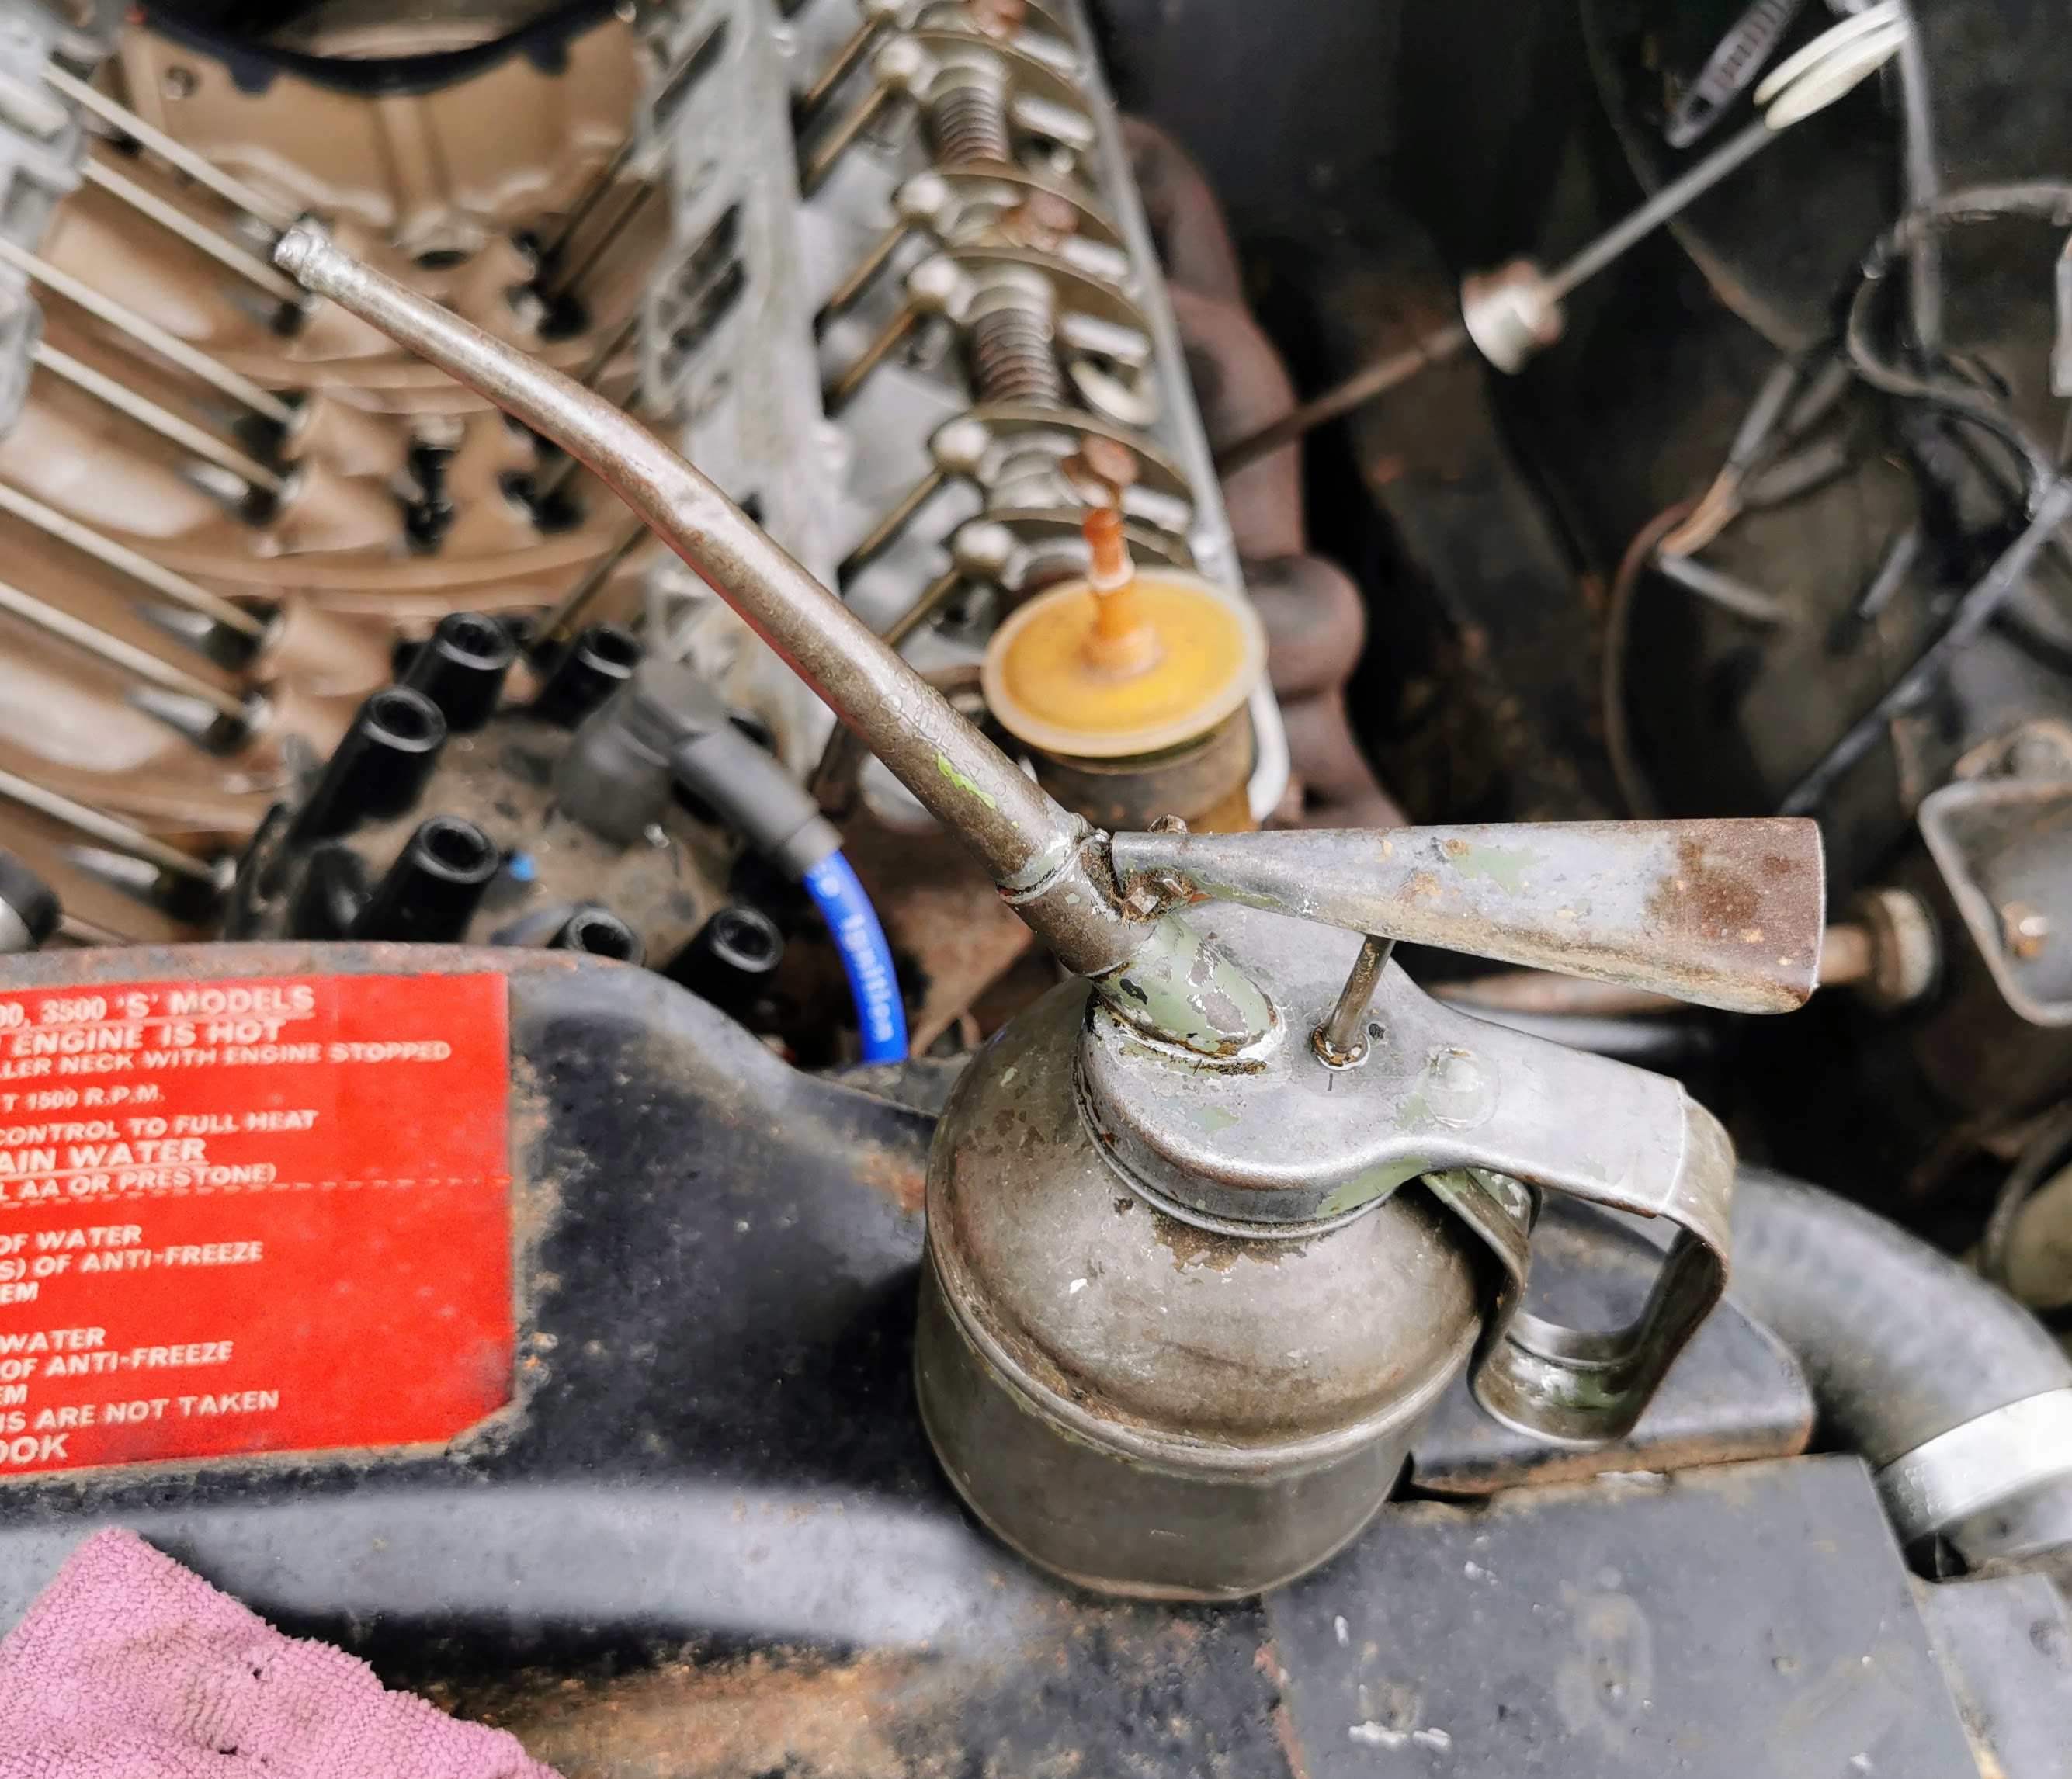
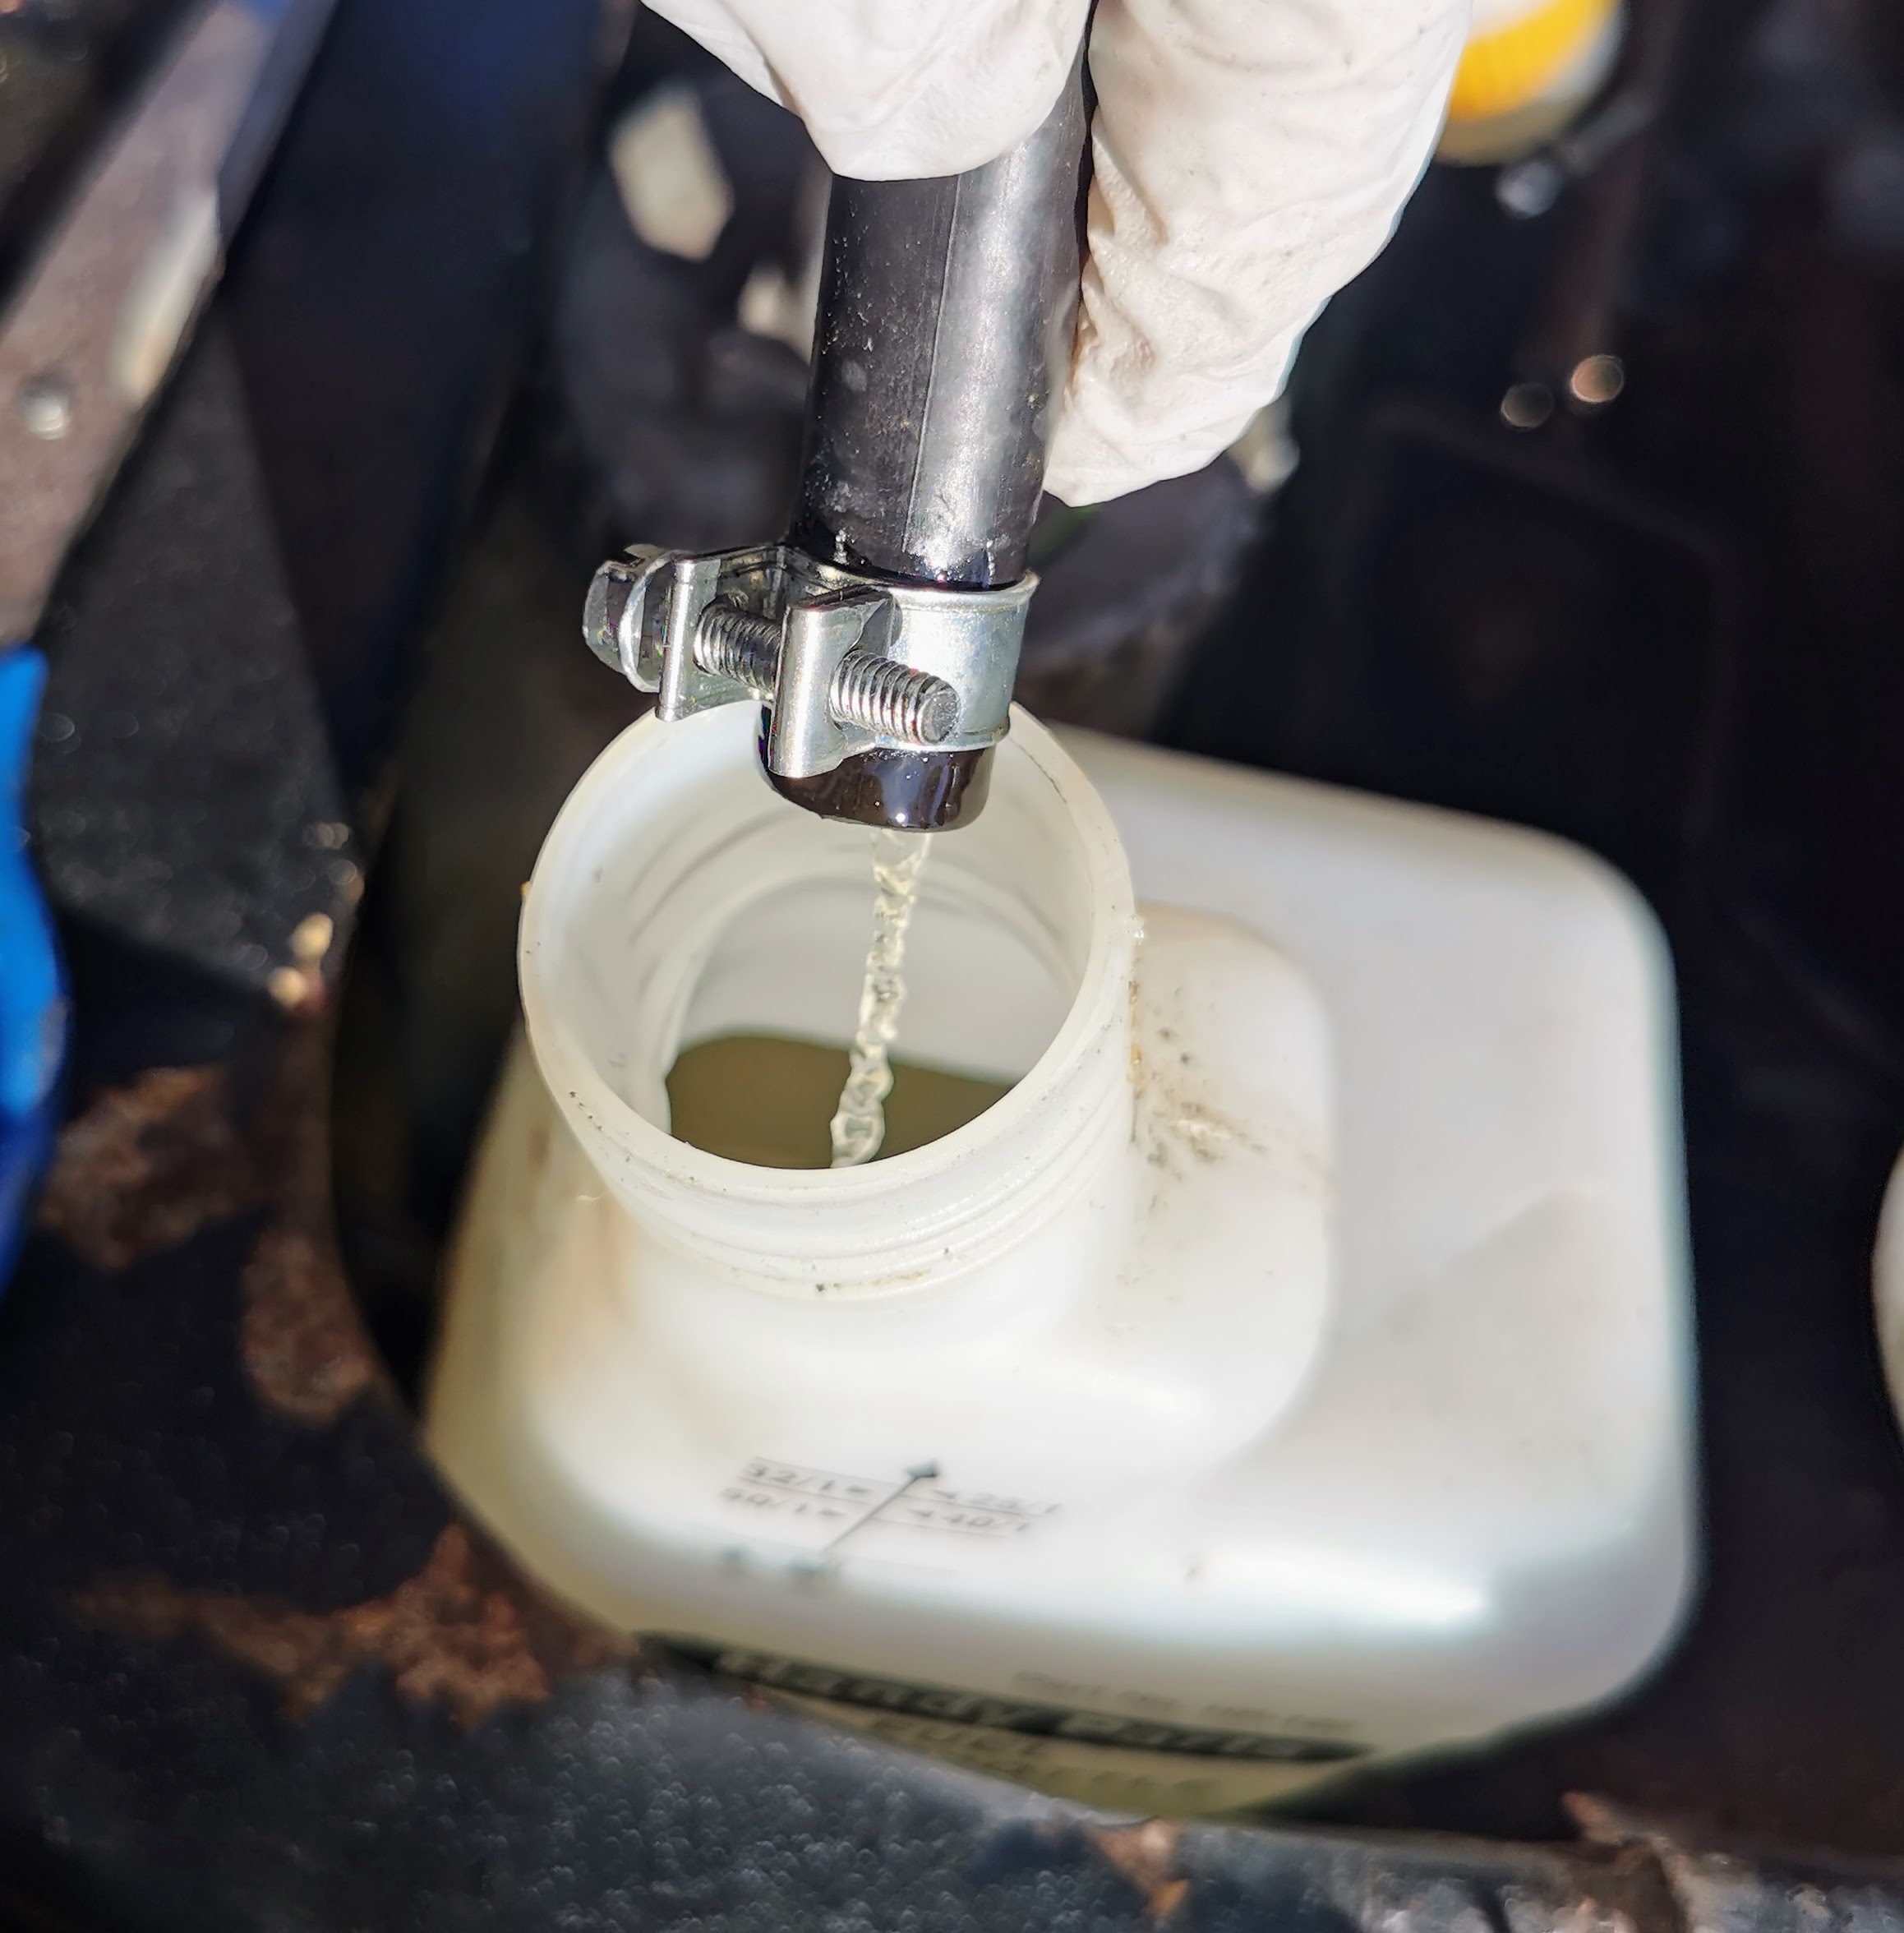
Before I was willing to even run the engine for more than I had to to get it into a position where I could work on the car the oil needed to be changed. It was horrendously badly fuel contaminated and there was a lot of condensation in the engine. This is what was drained.
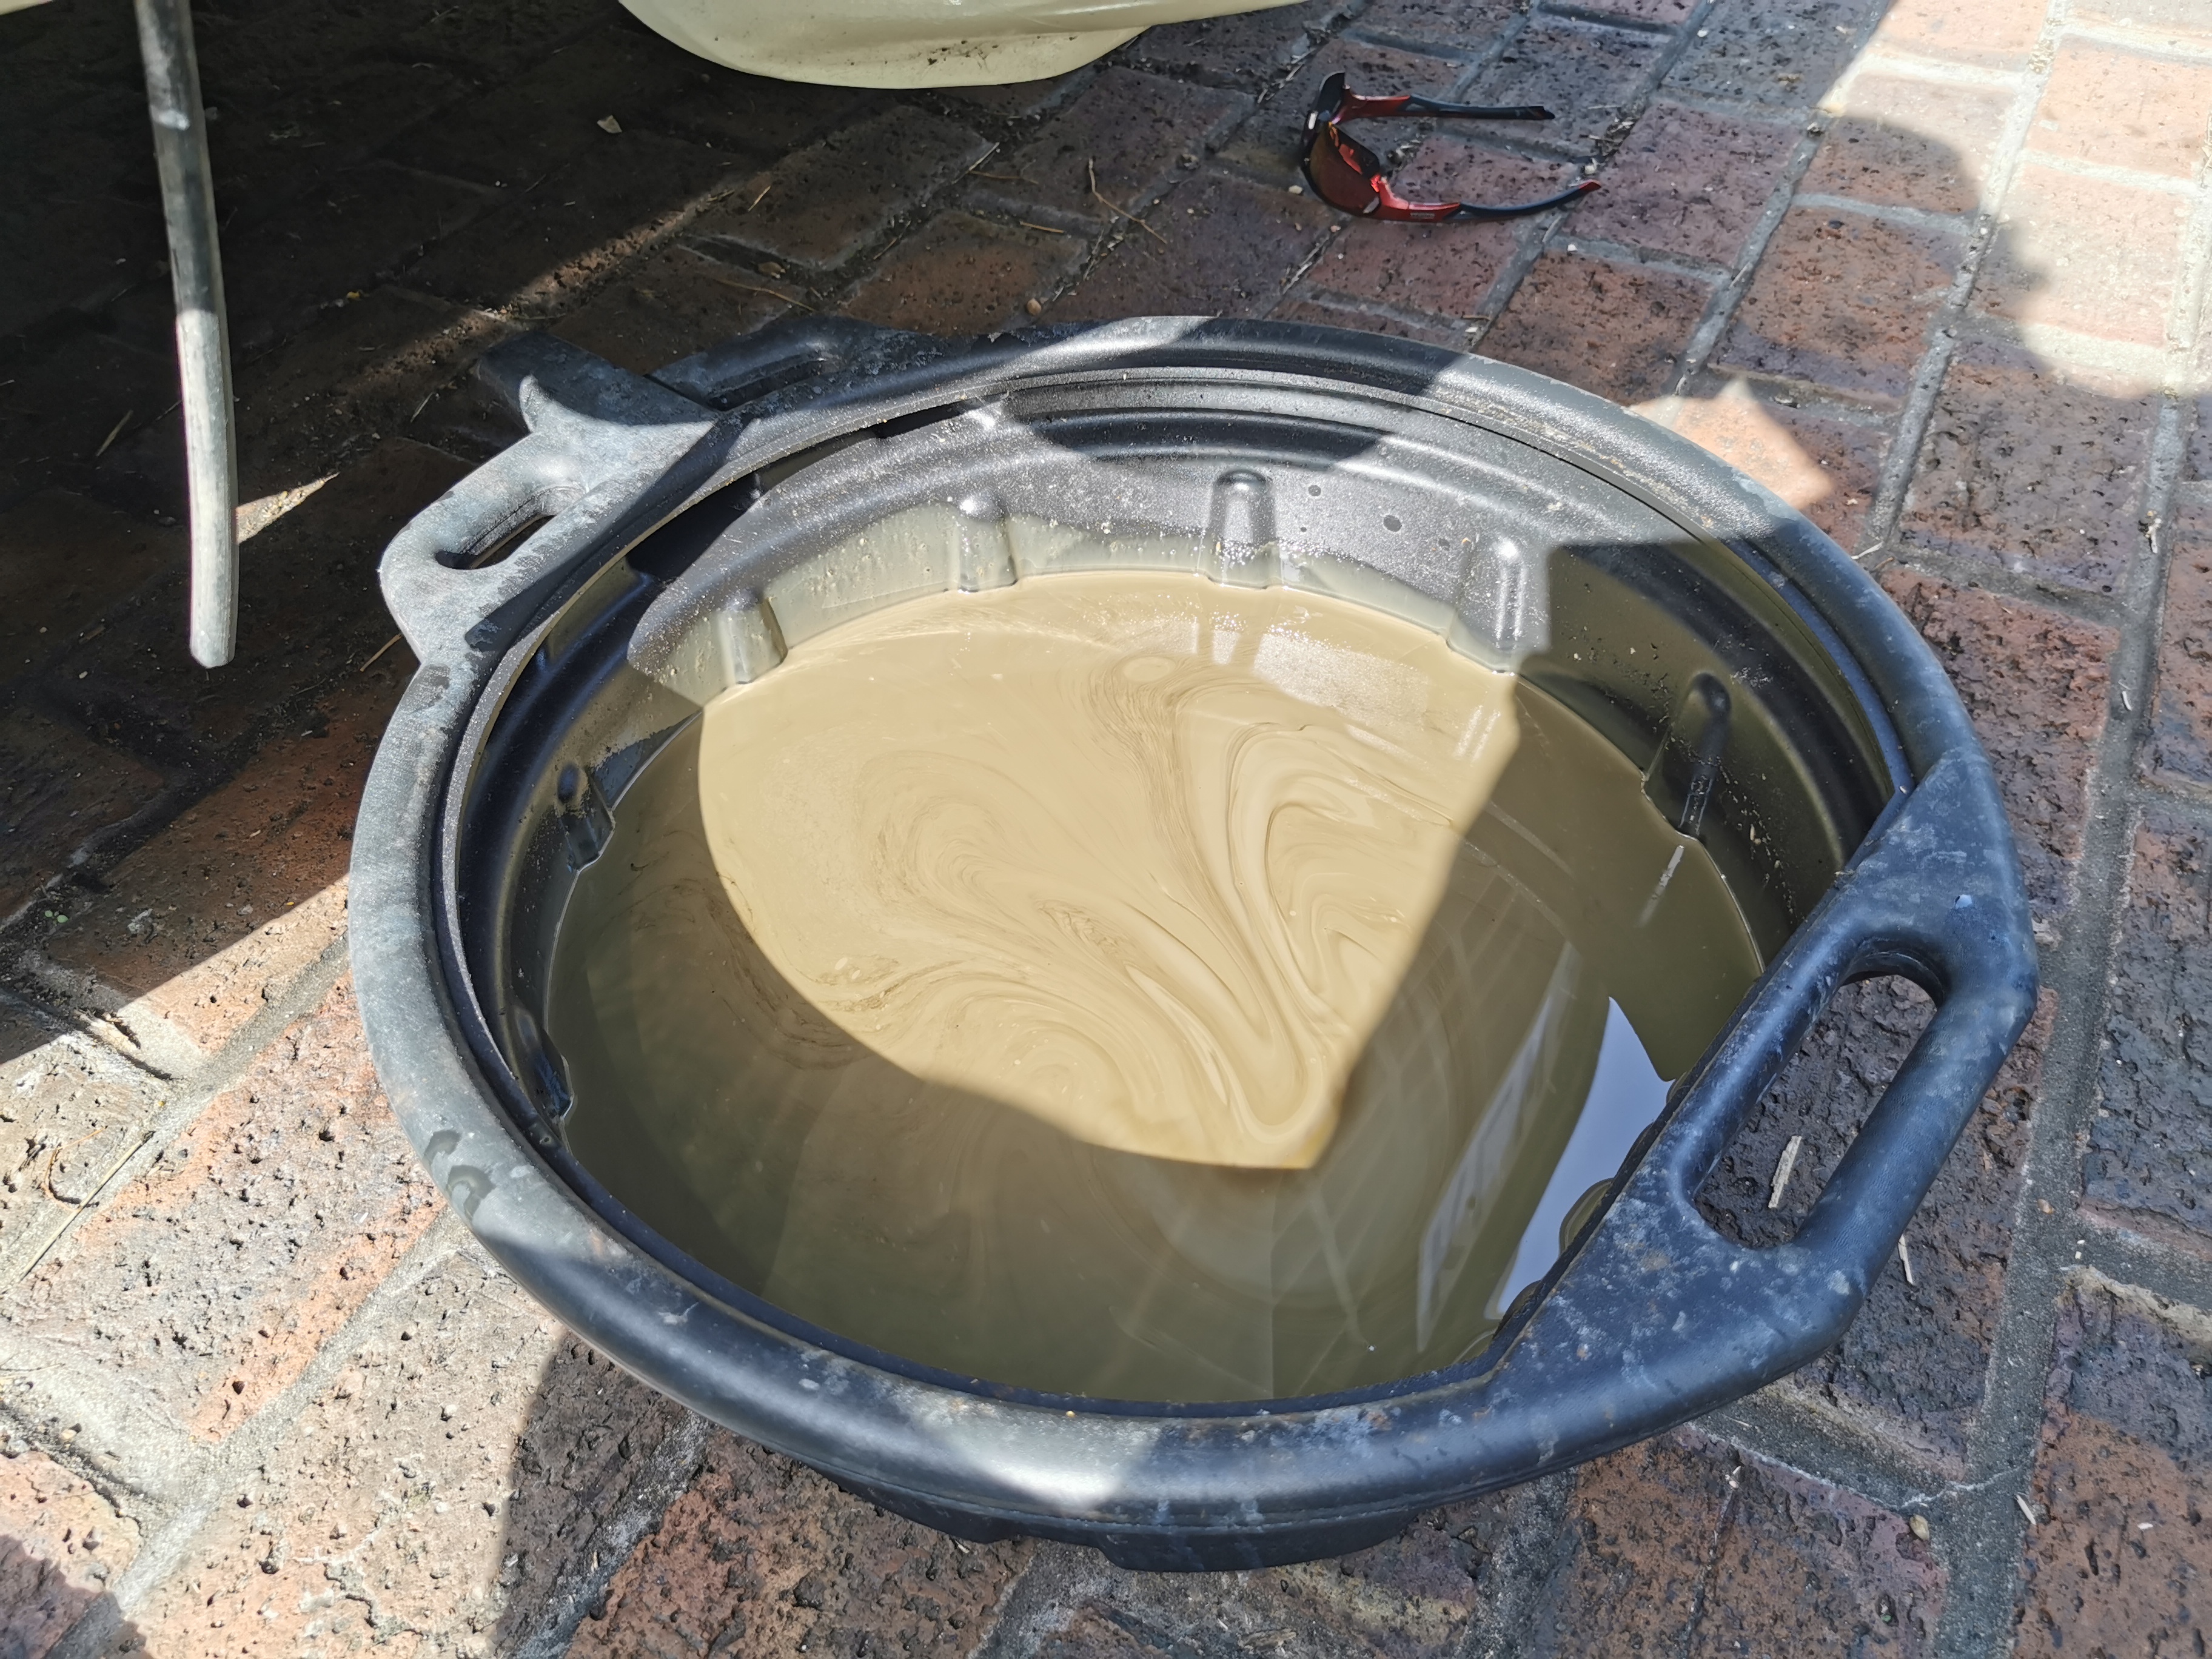
That's not what engine oil should look like! The thing you can't get from this picture though is the smell - it absolutely stank to high heaven of stale petrol. It was also well over a litre over-full.
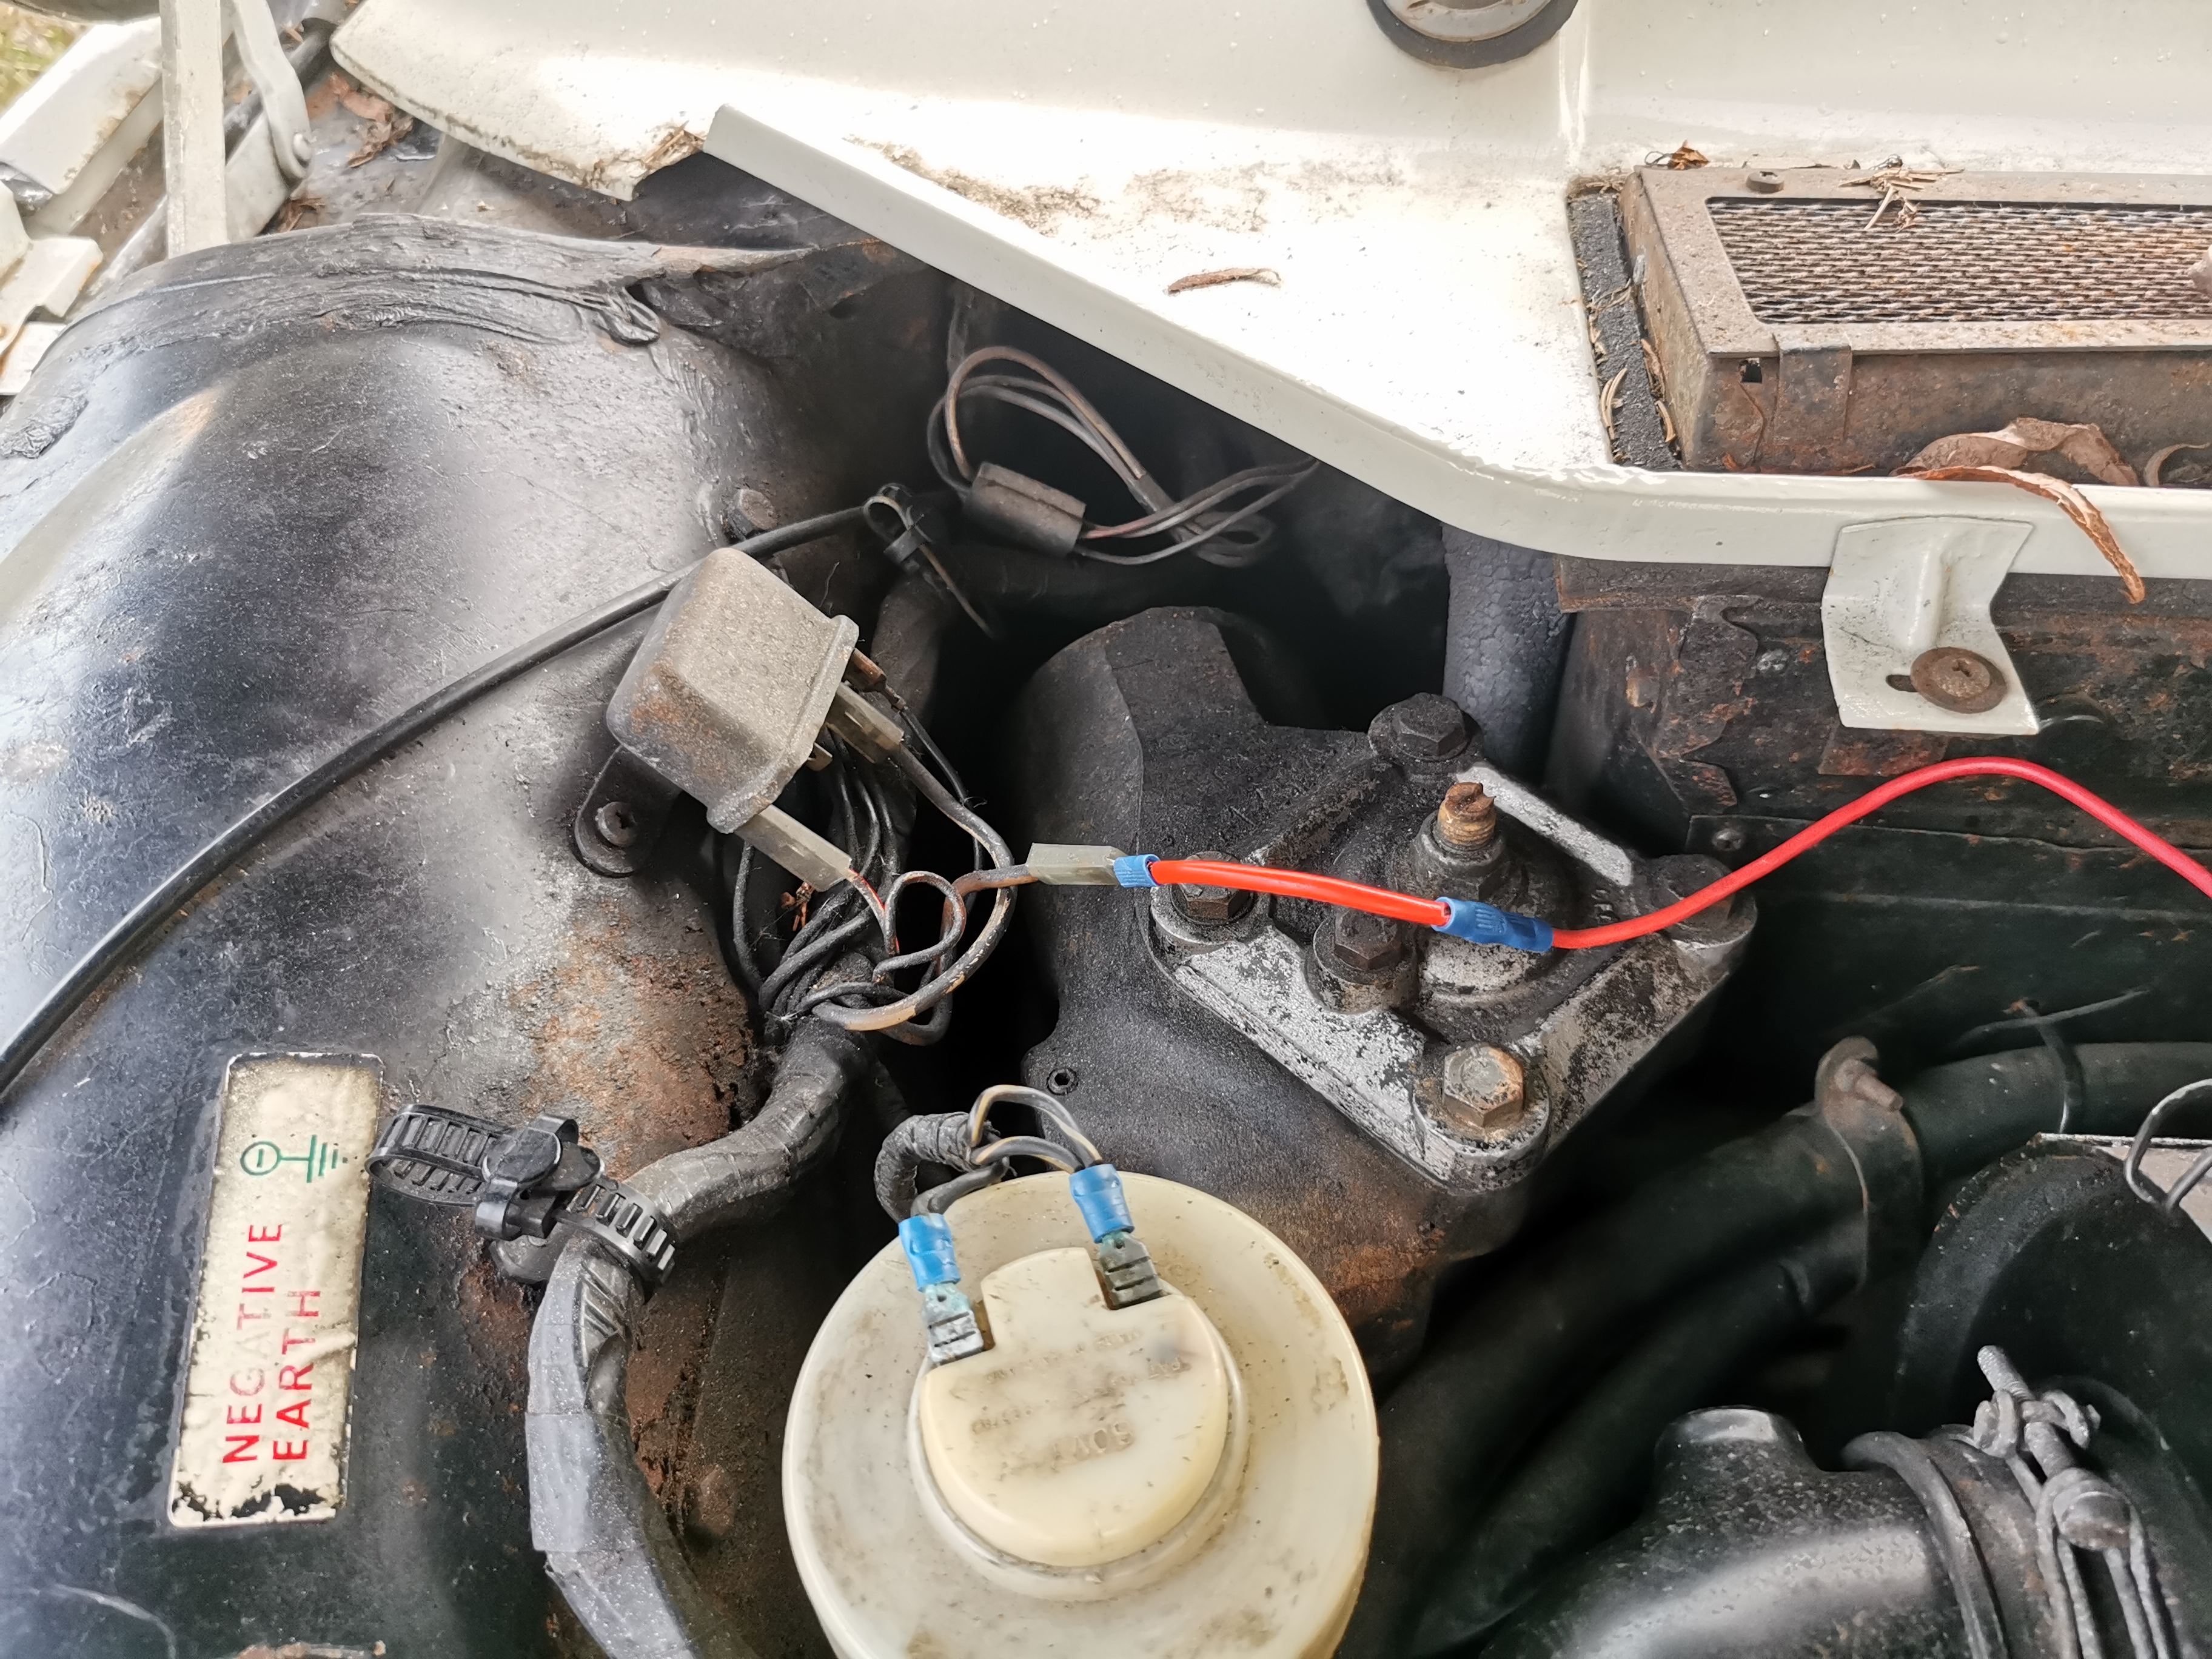
Also on the list of things not working was any form of instrumentation aside from the ignition light and rev counter. That actually ended up being item number 1 on my to do list, as I simply wasn't willing to run an engine even for diagnostic purposes when the oil pressure warning light, oil pressure gauge AND temperature gauge were all non-operative. These were actually pretty easy ones to resolve - a combination of dirty contacts in the fuse box (a recurring issue, I really do need to just replace it) got me power to the instrument panel. The oil pressure gauge/light weren't working because the pressure gauge and warning light senders had been plugged in back to front on the engine - and similarly the sensors for the choke warning light and temperature gauge were also switched. The only things on the instrument panel I hadn't been able to get any life out of were the clock and fuel gauge. The ammeter clearly also has issues as it shows virtually no deflection, but does visibly move if high load circuits are switched on.
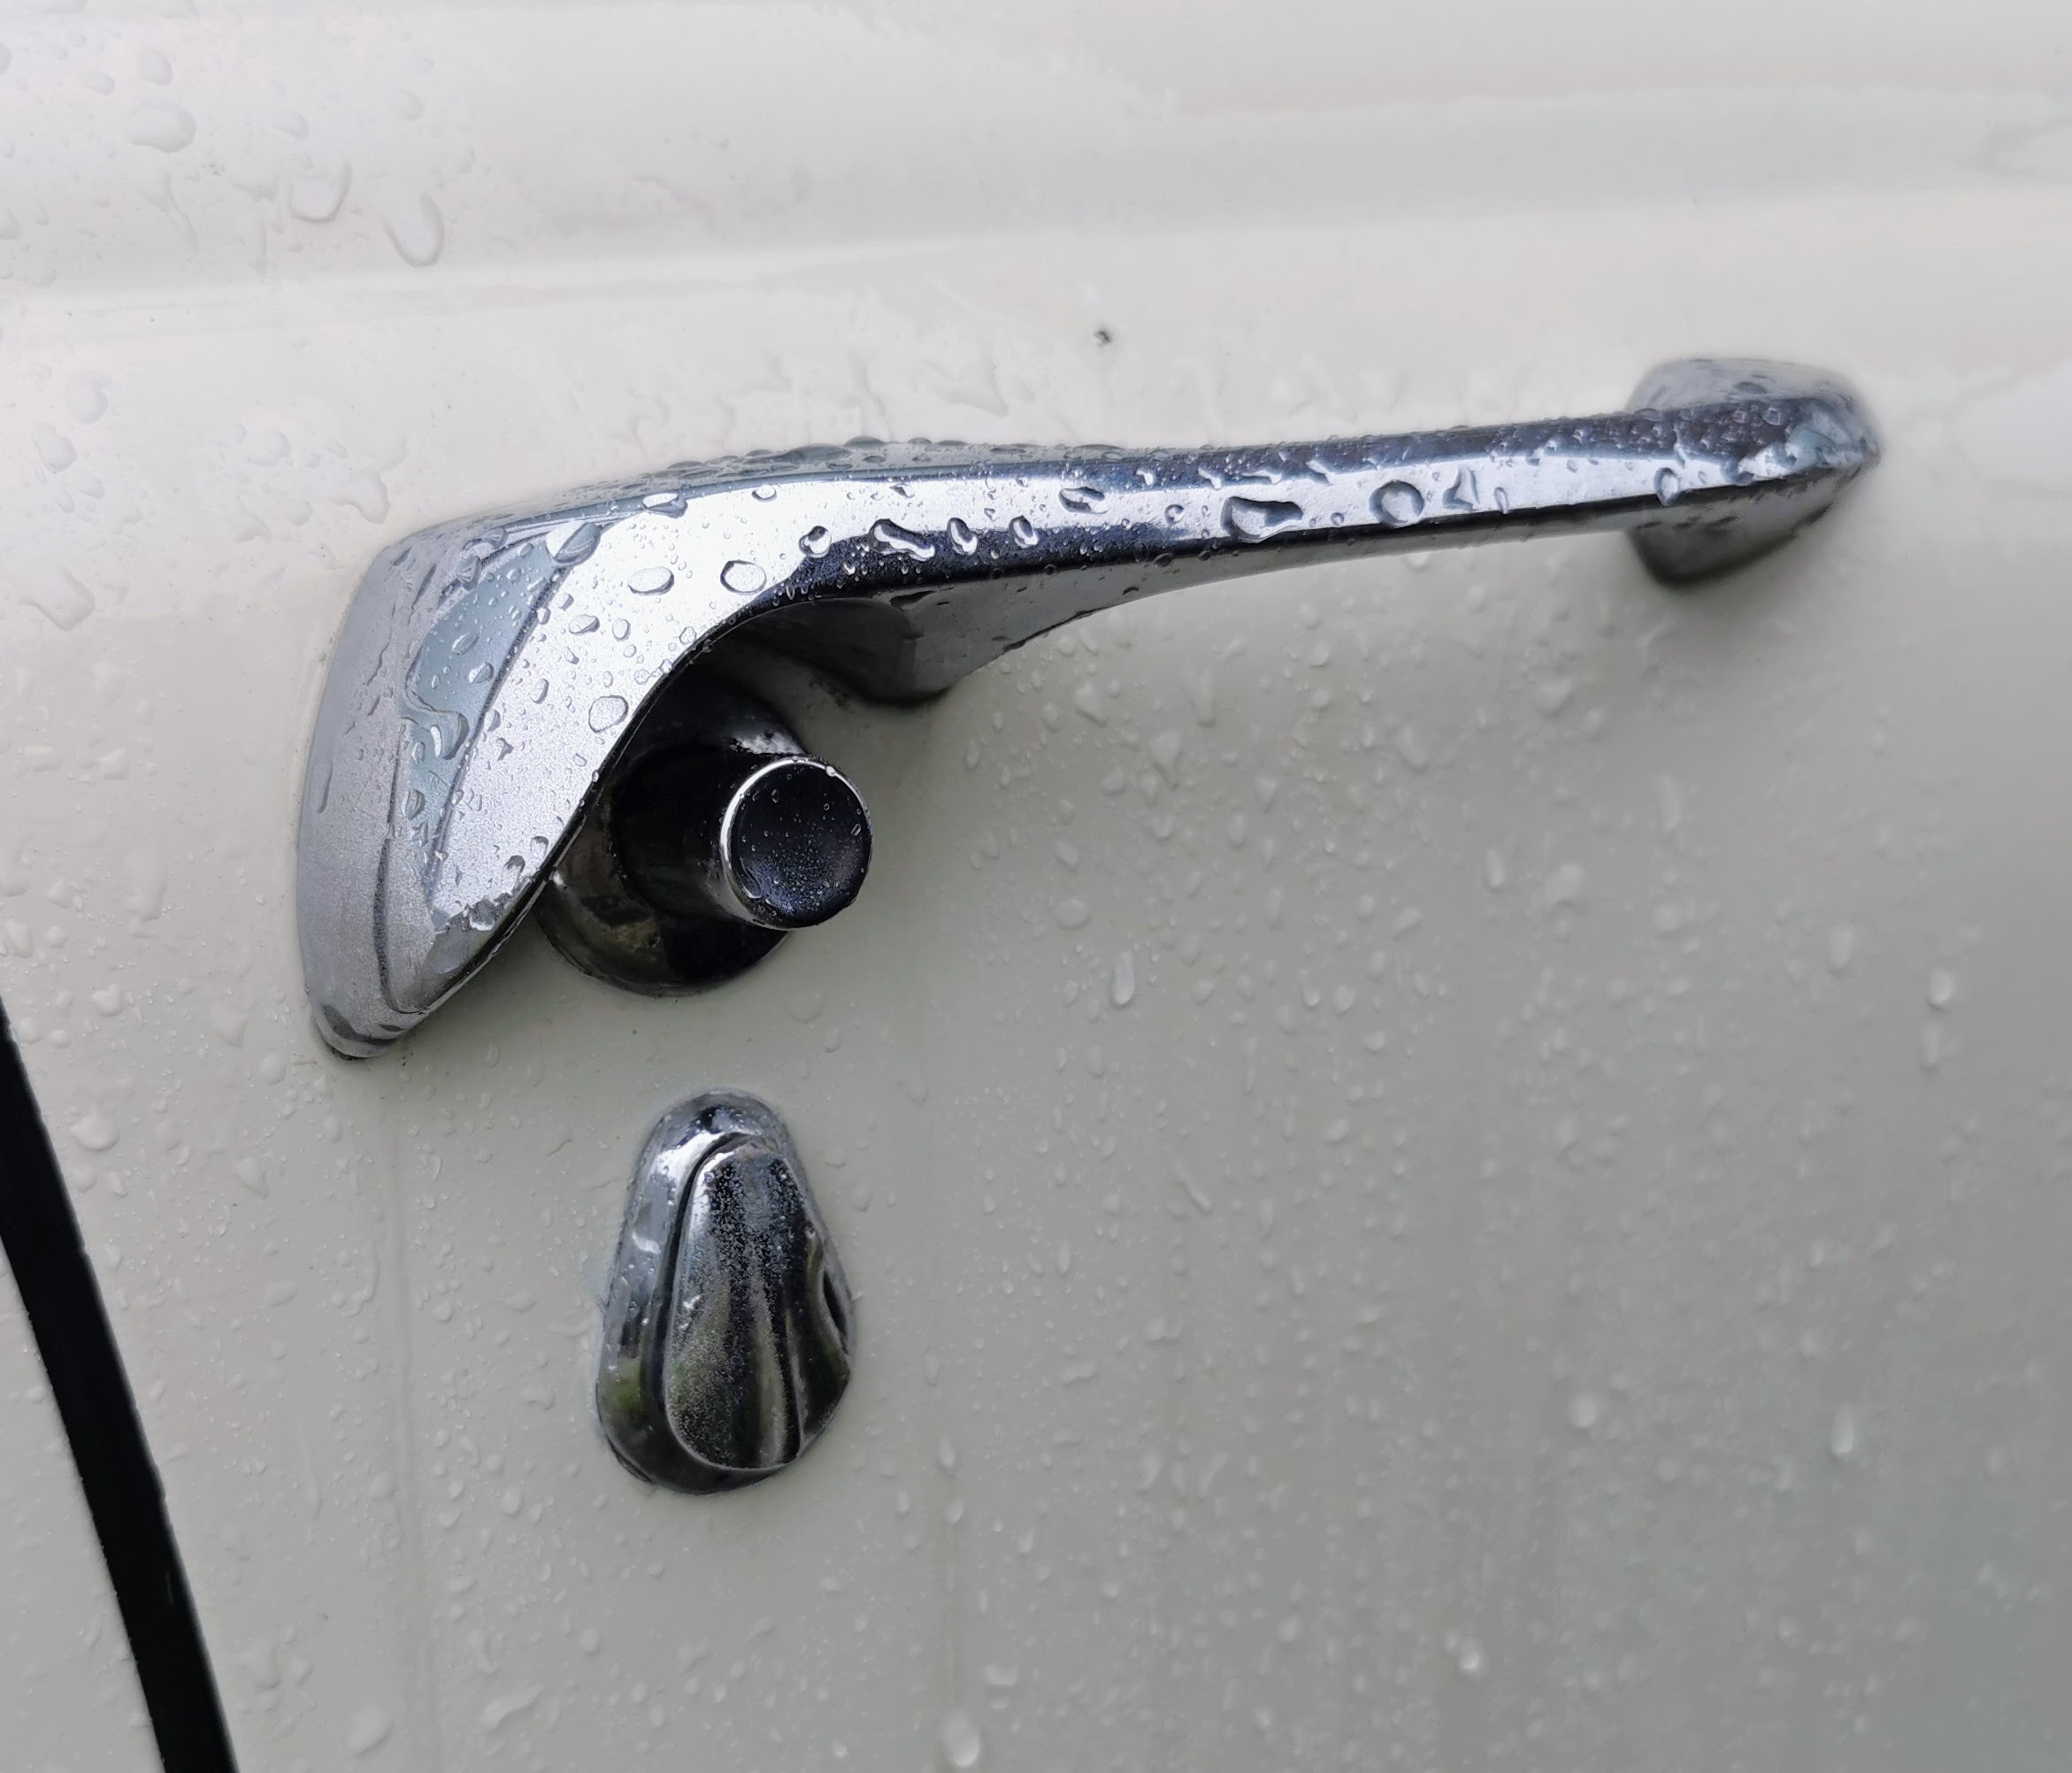
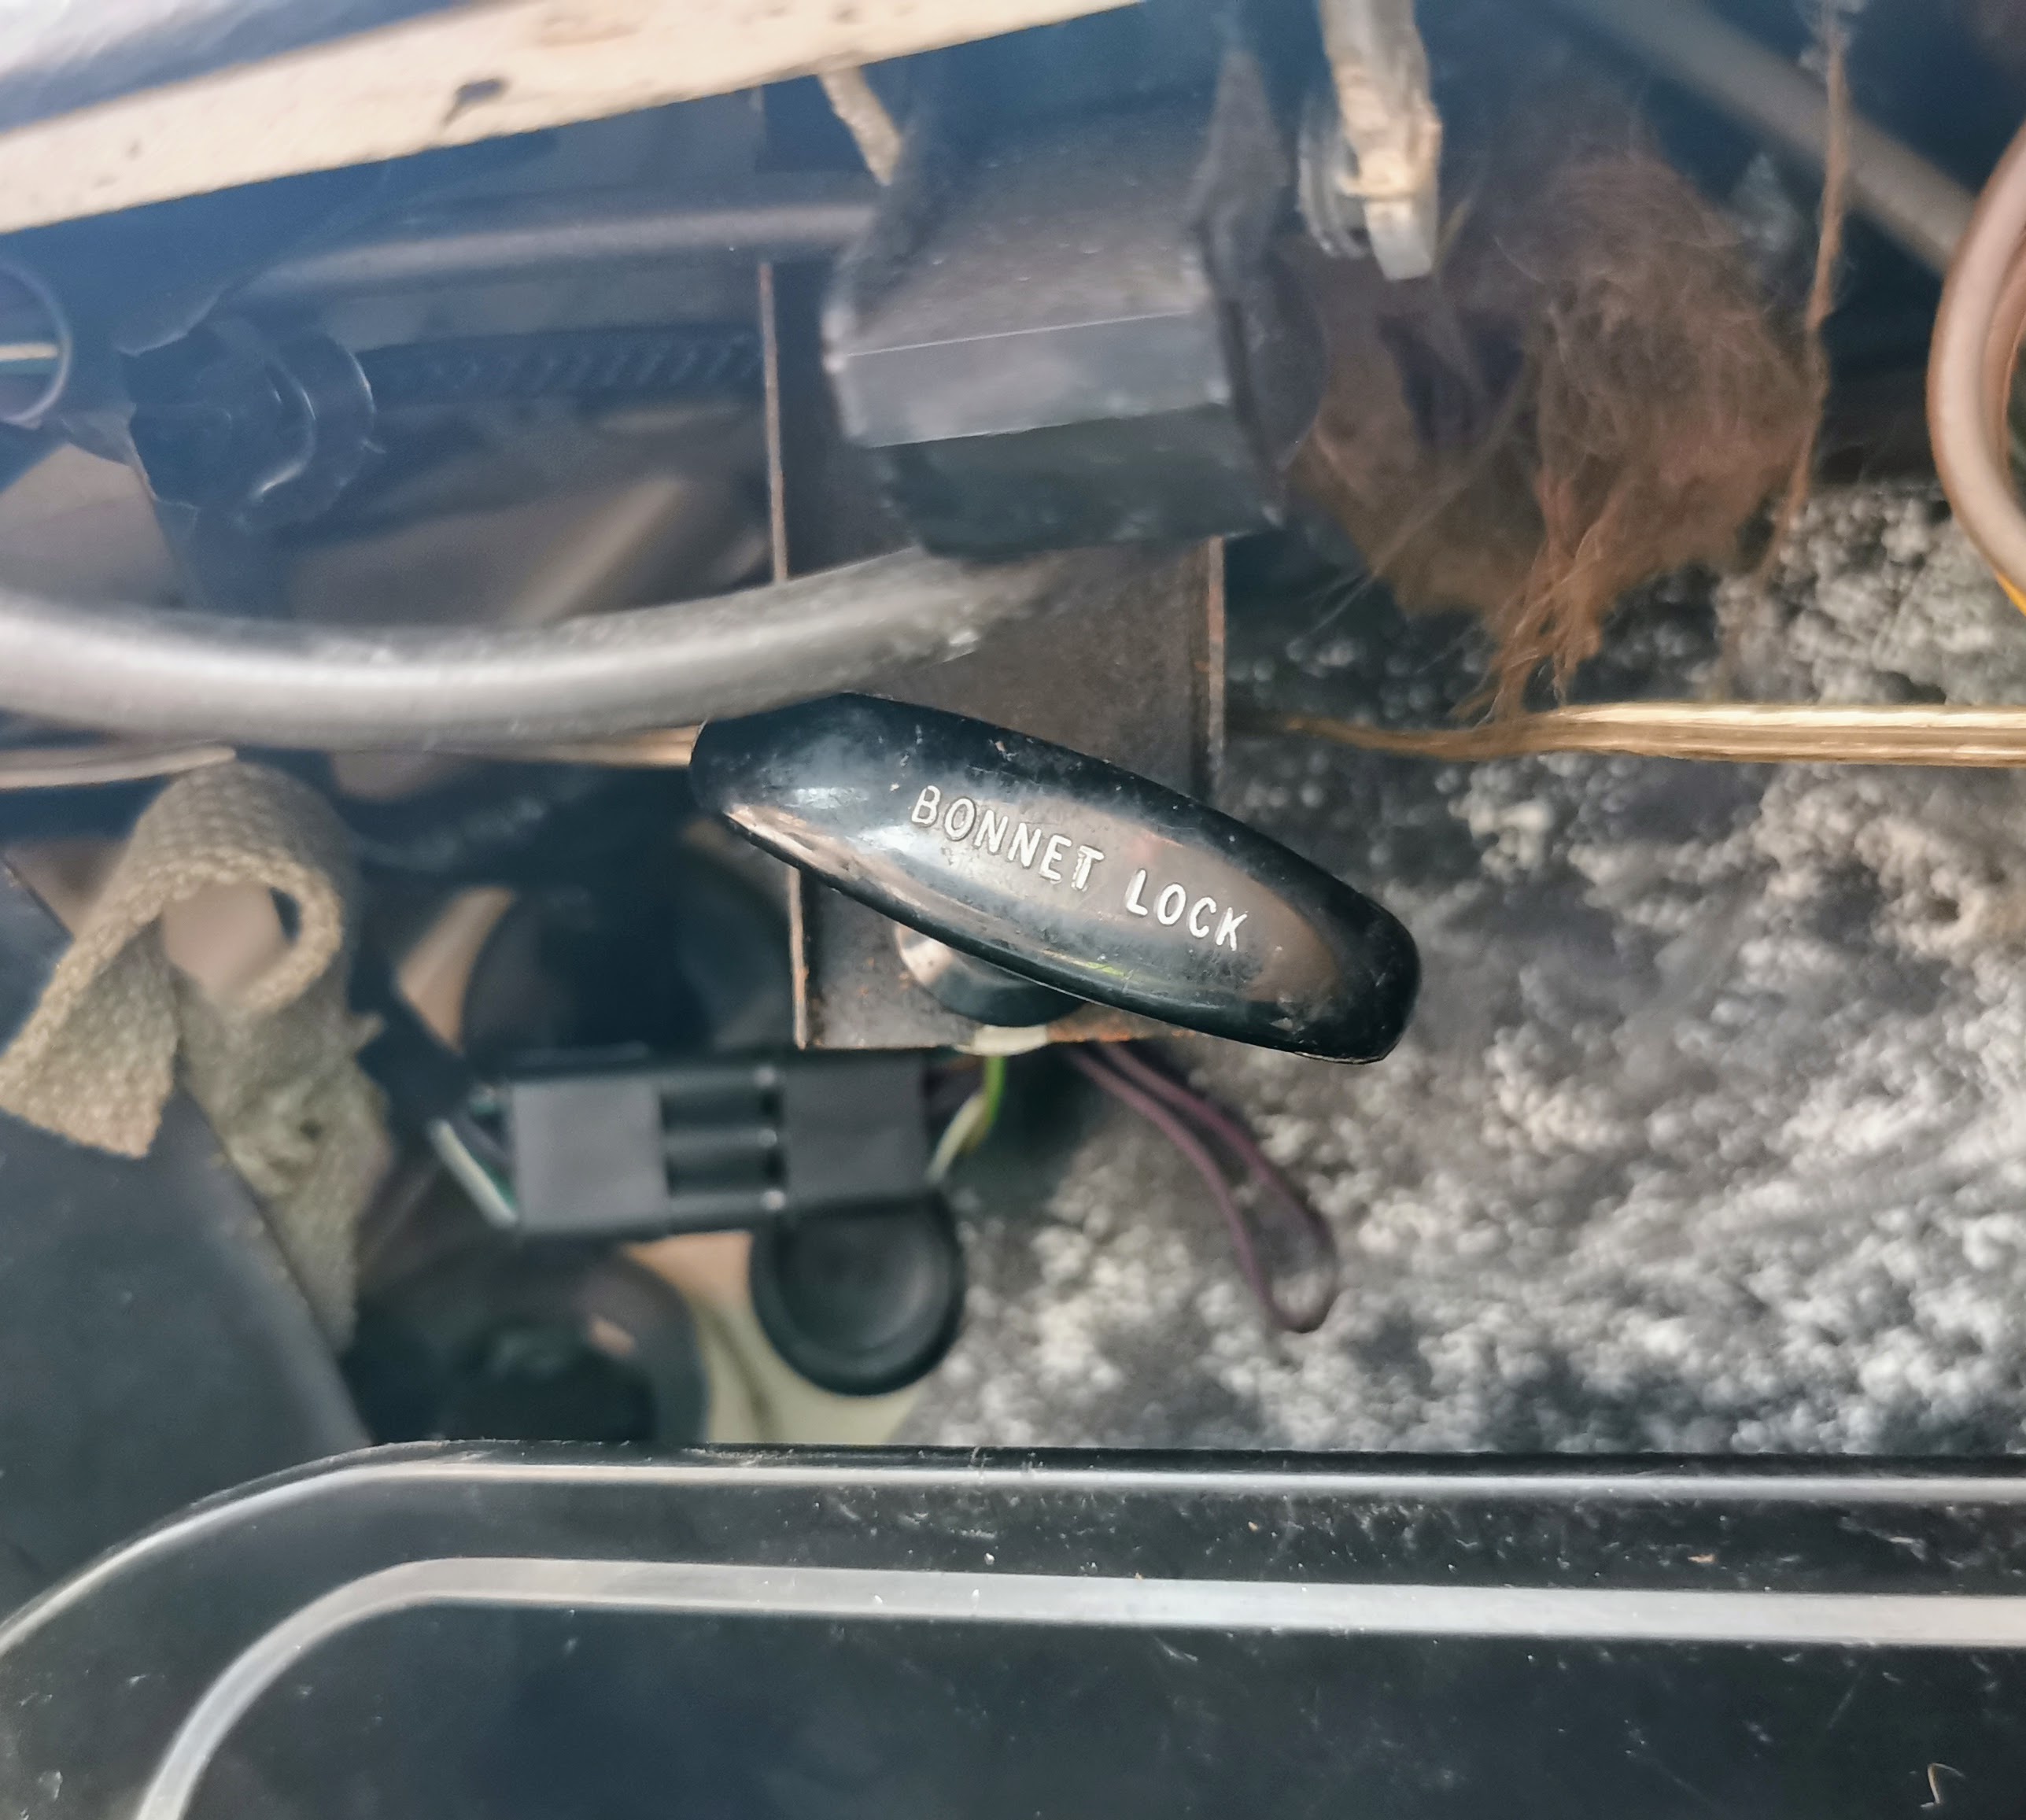
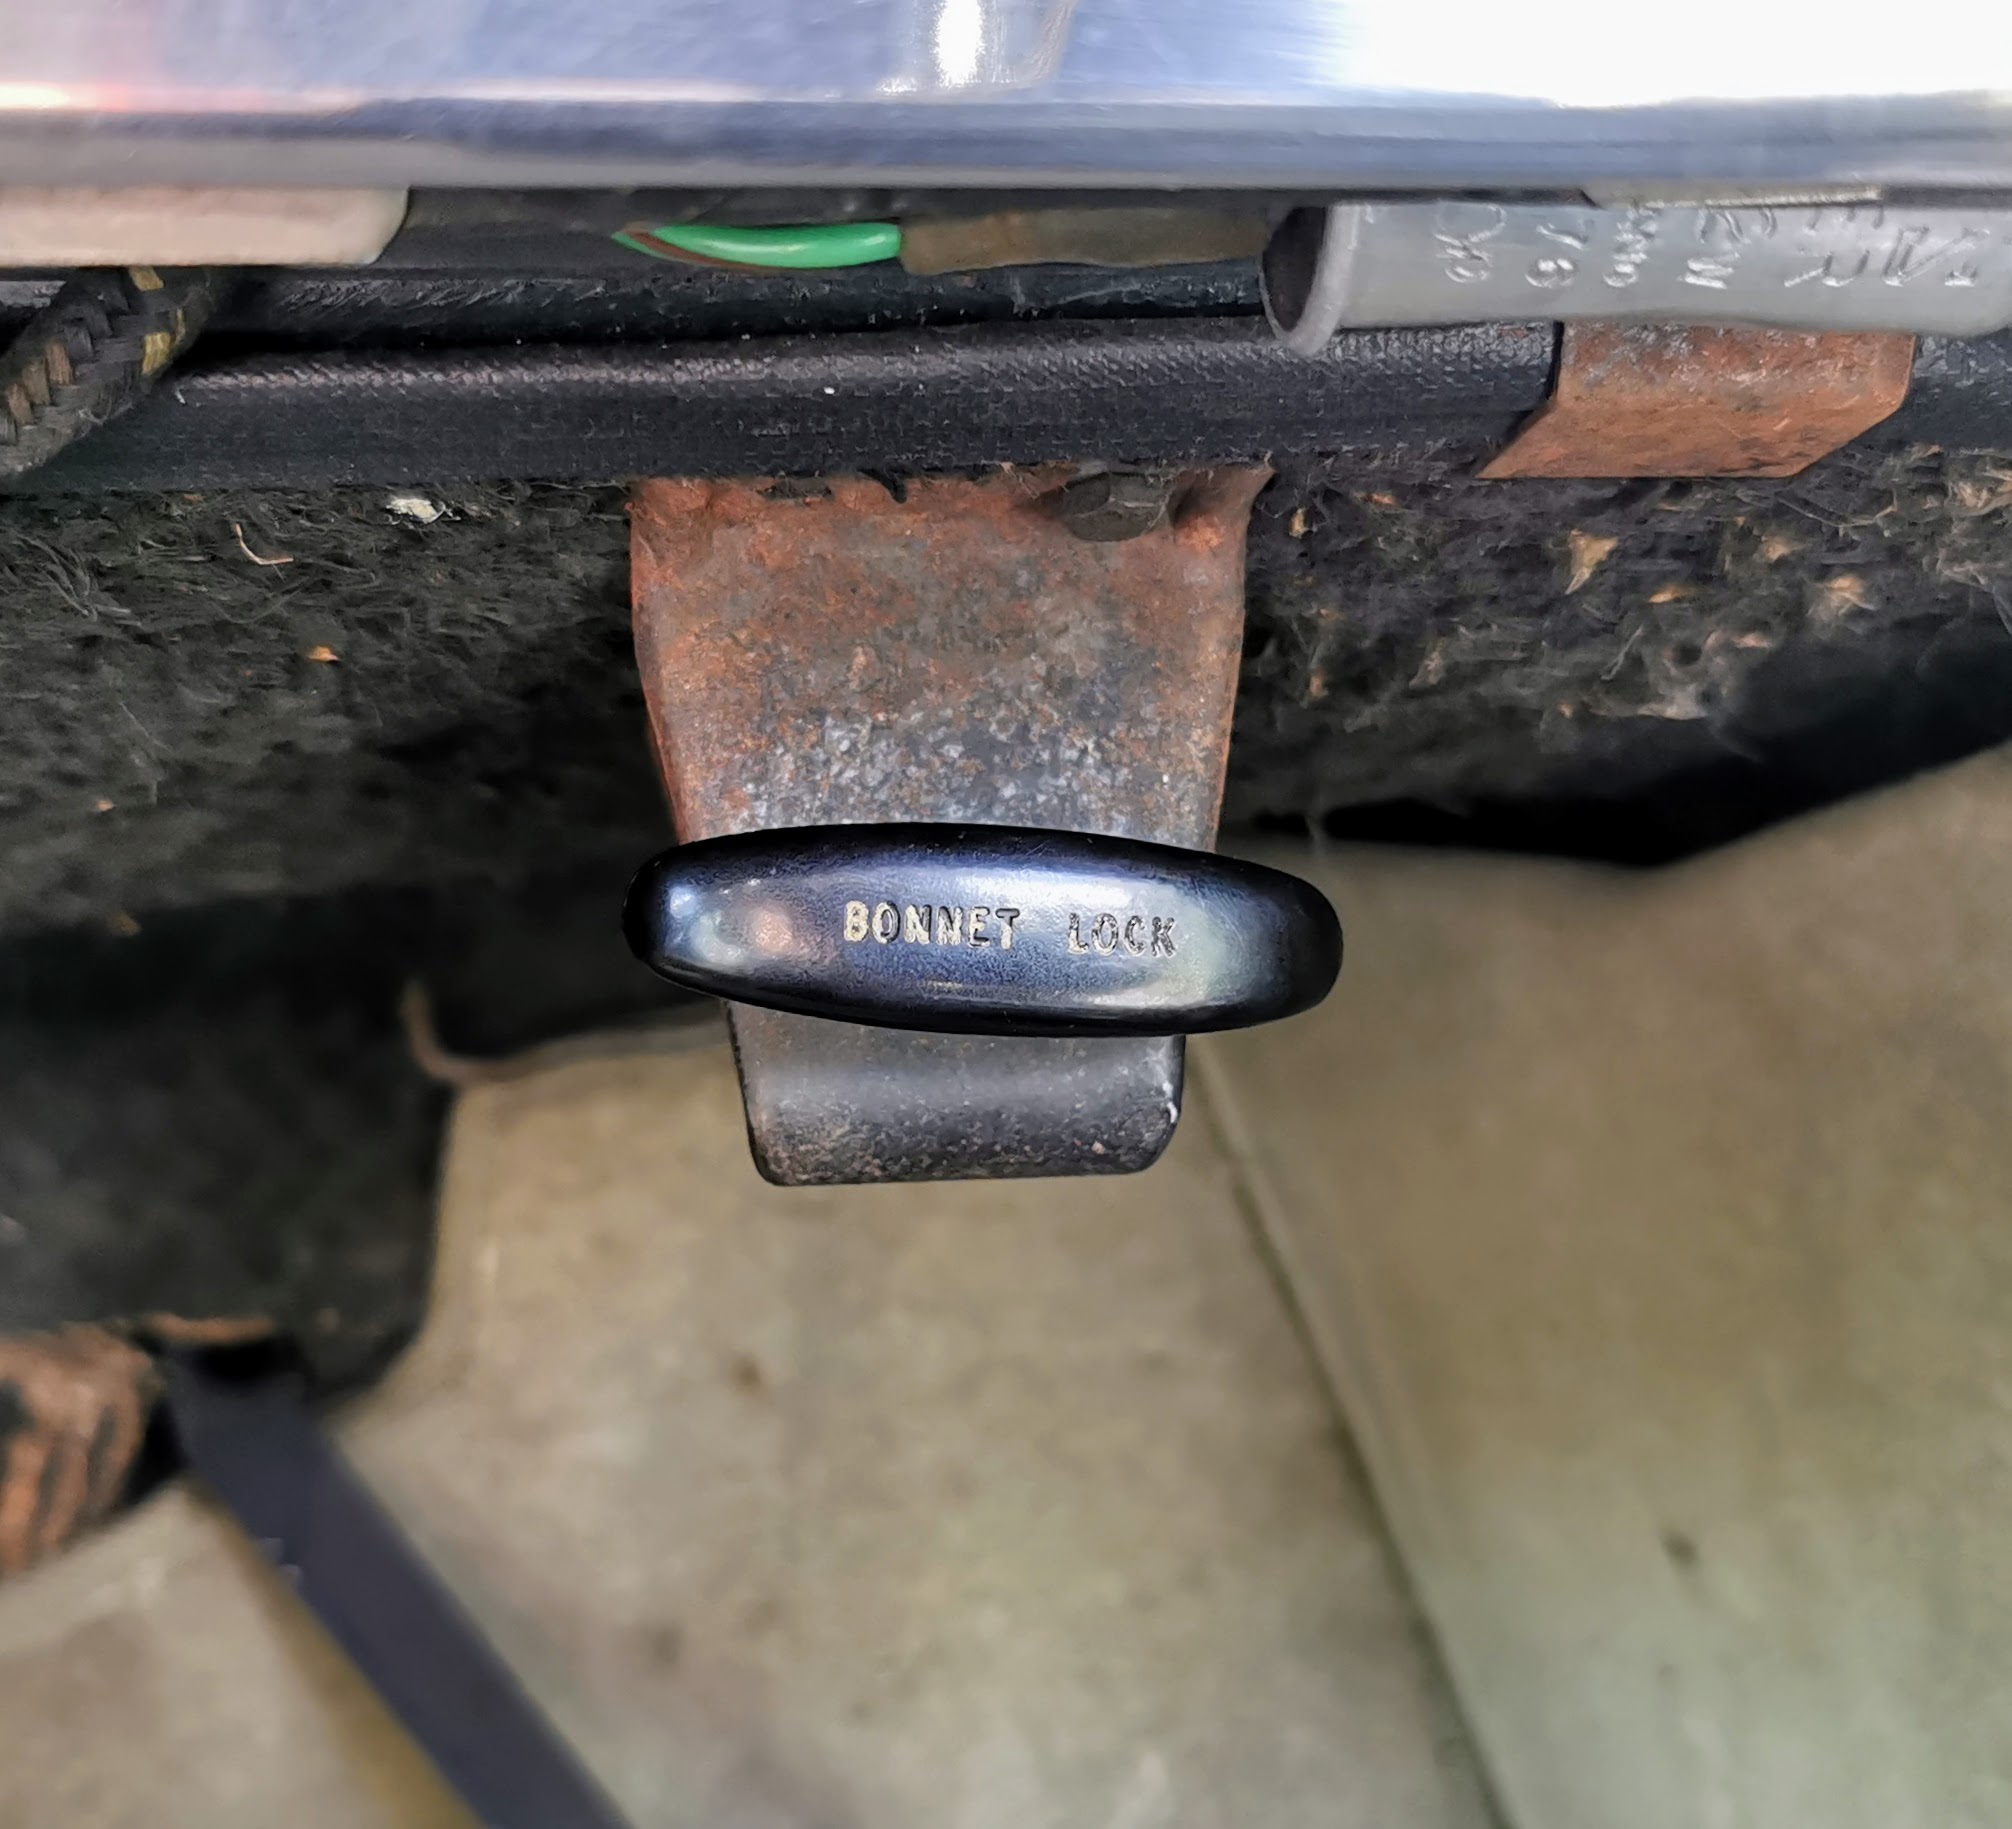
It's clear that there are a couple of components which did survive to be carried directly over from the P4 into the P6 if you look carefully enough into suitably nerdy level of detail...The bonnet release handle to name one is identical.
Here's the one on the P6.
Then for comparison, the one on my 1963 P4 110.
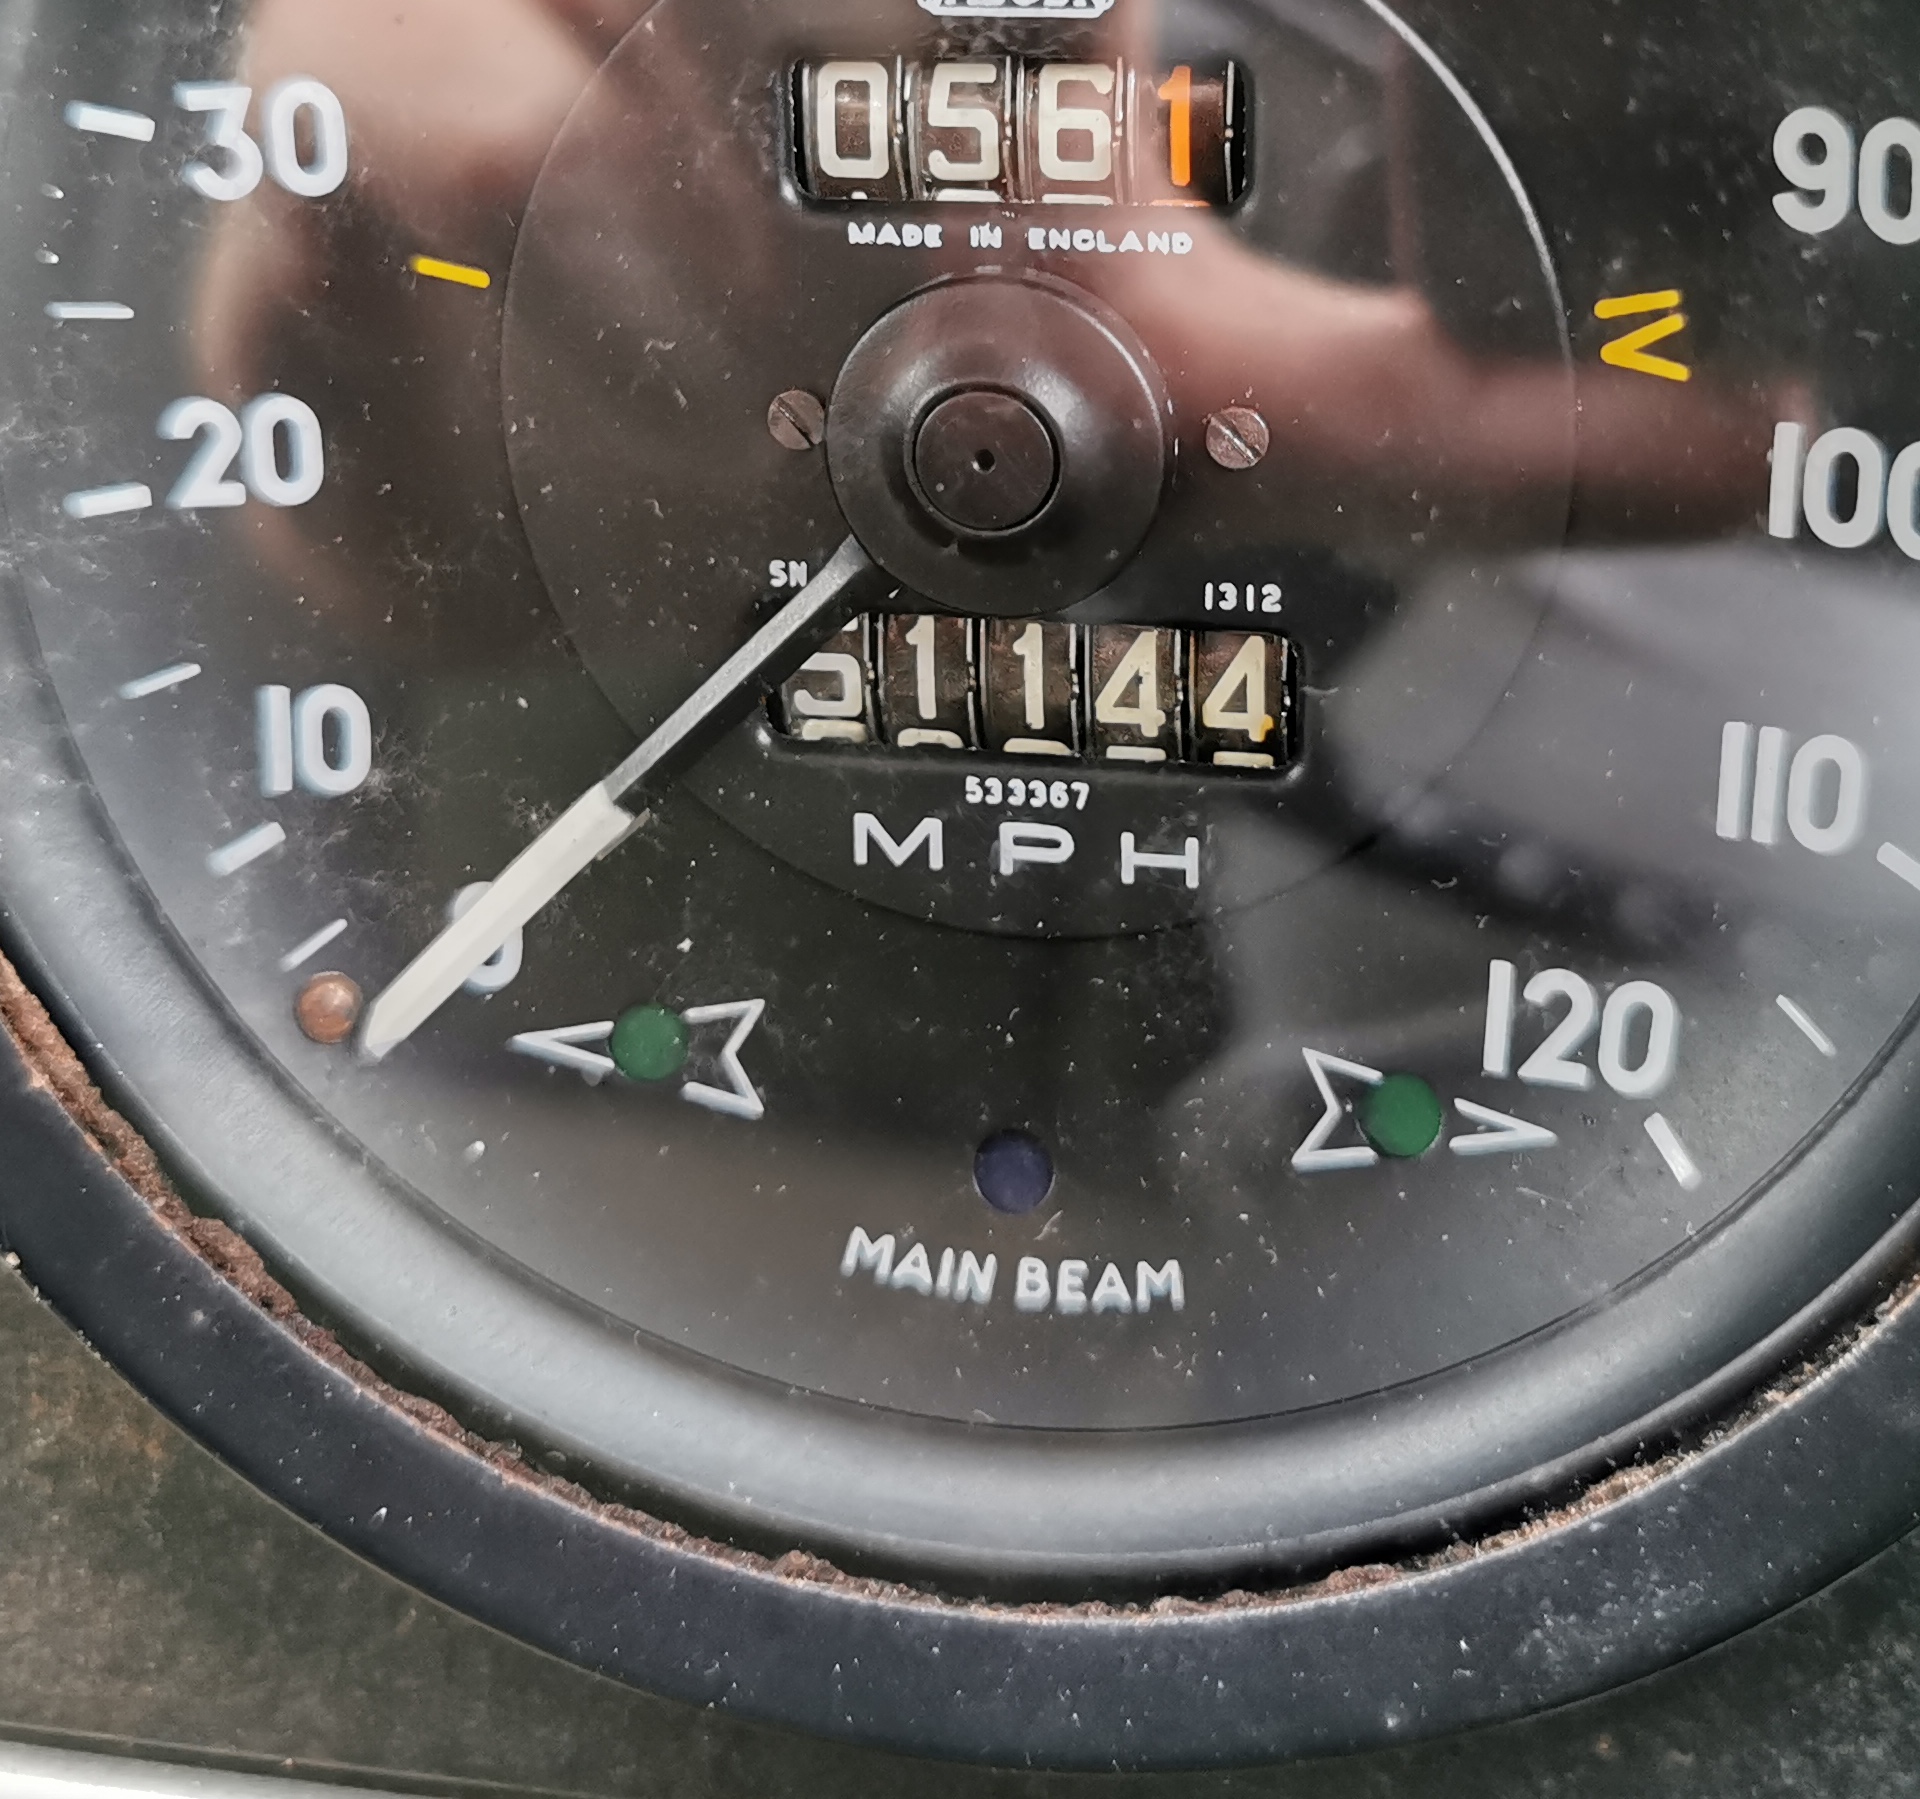
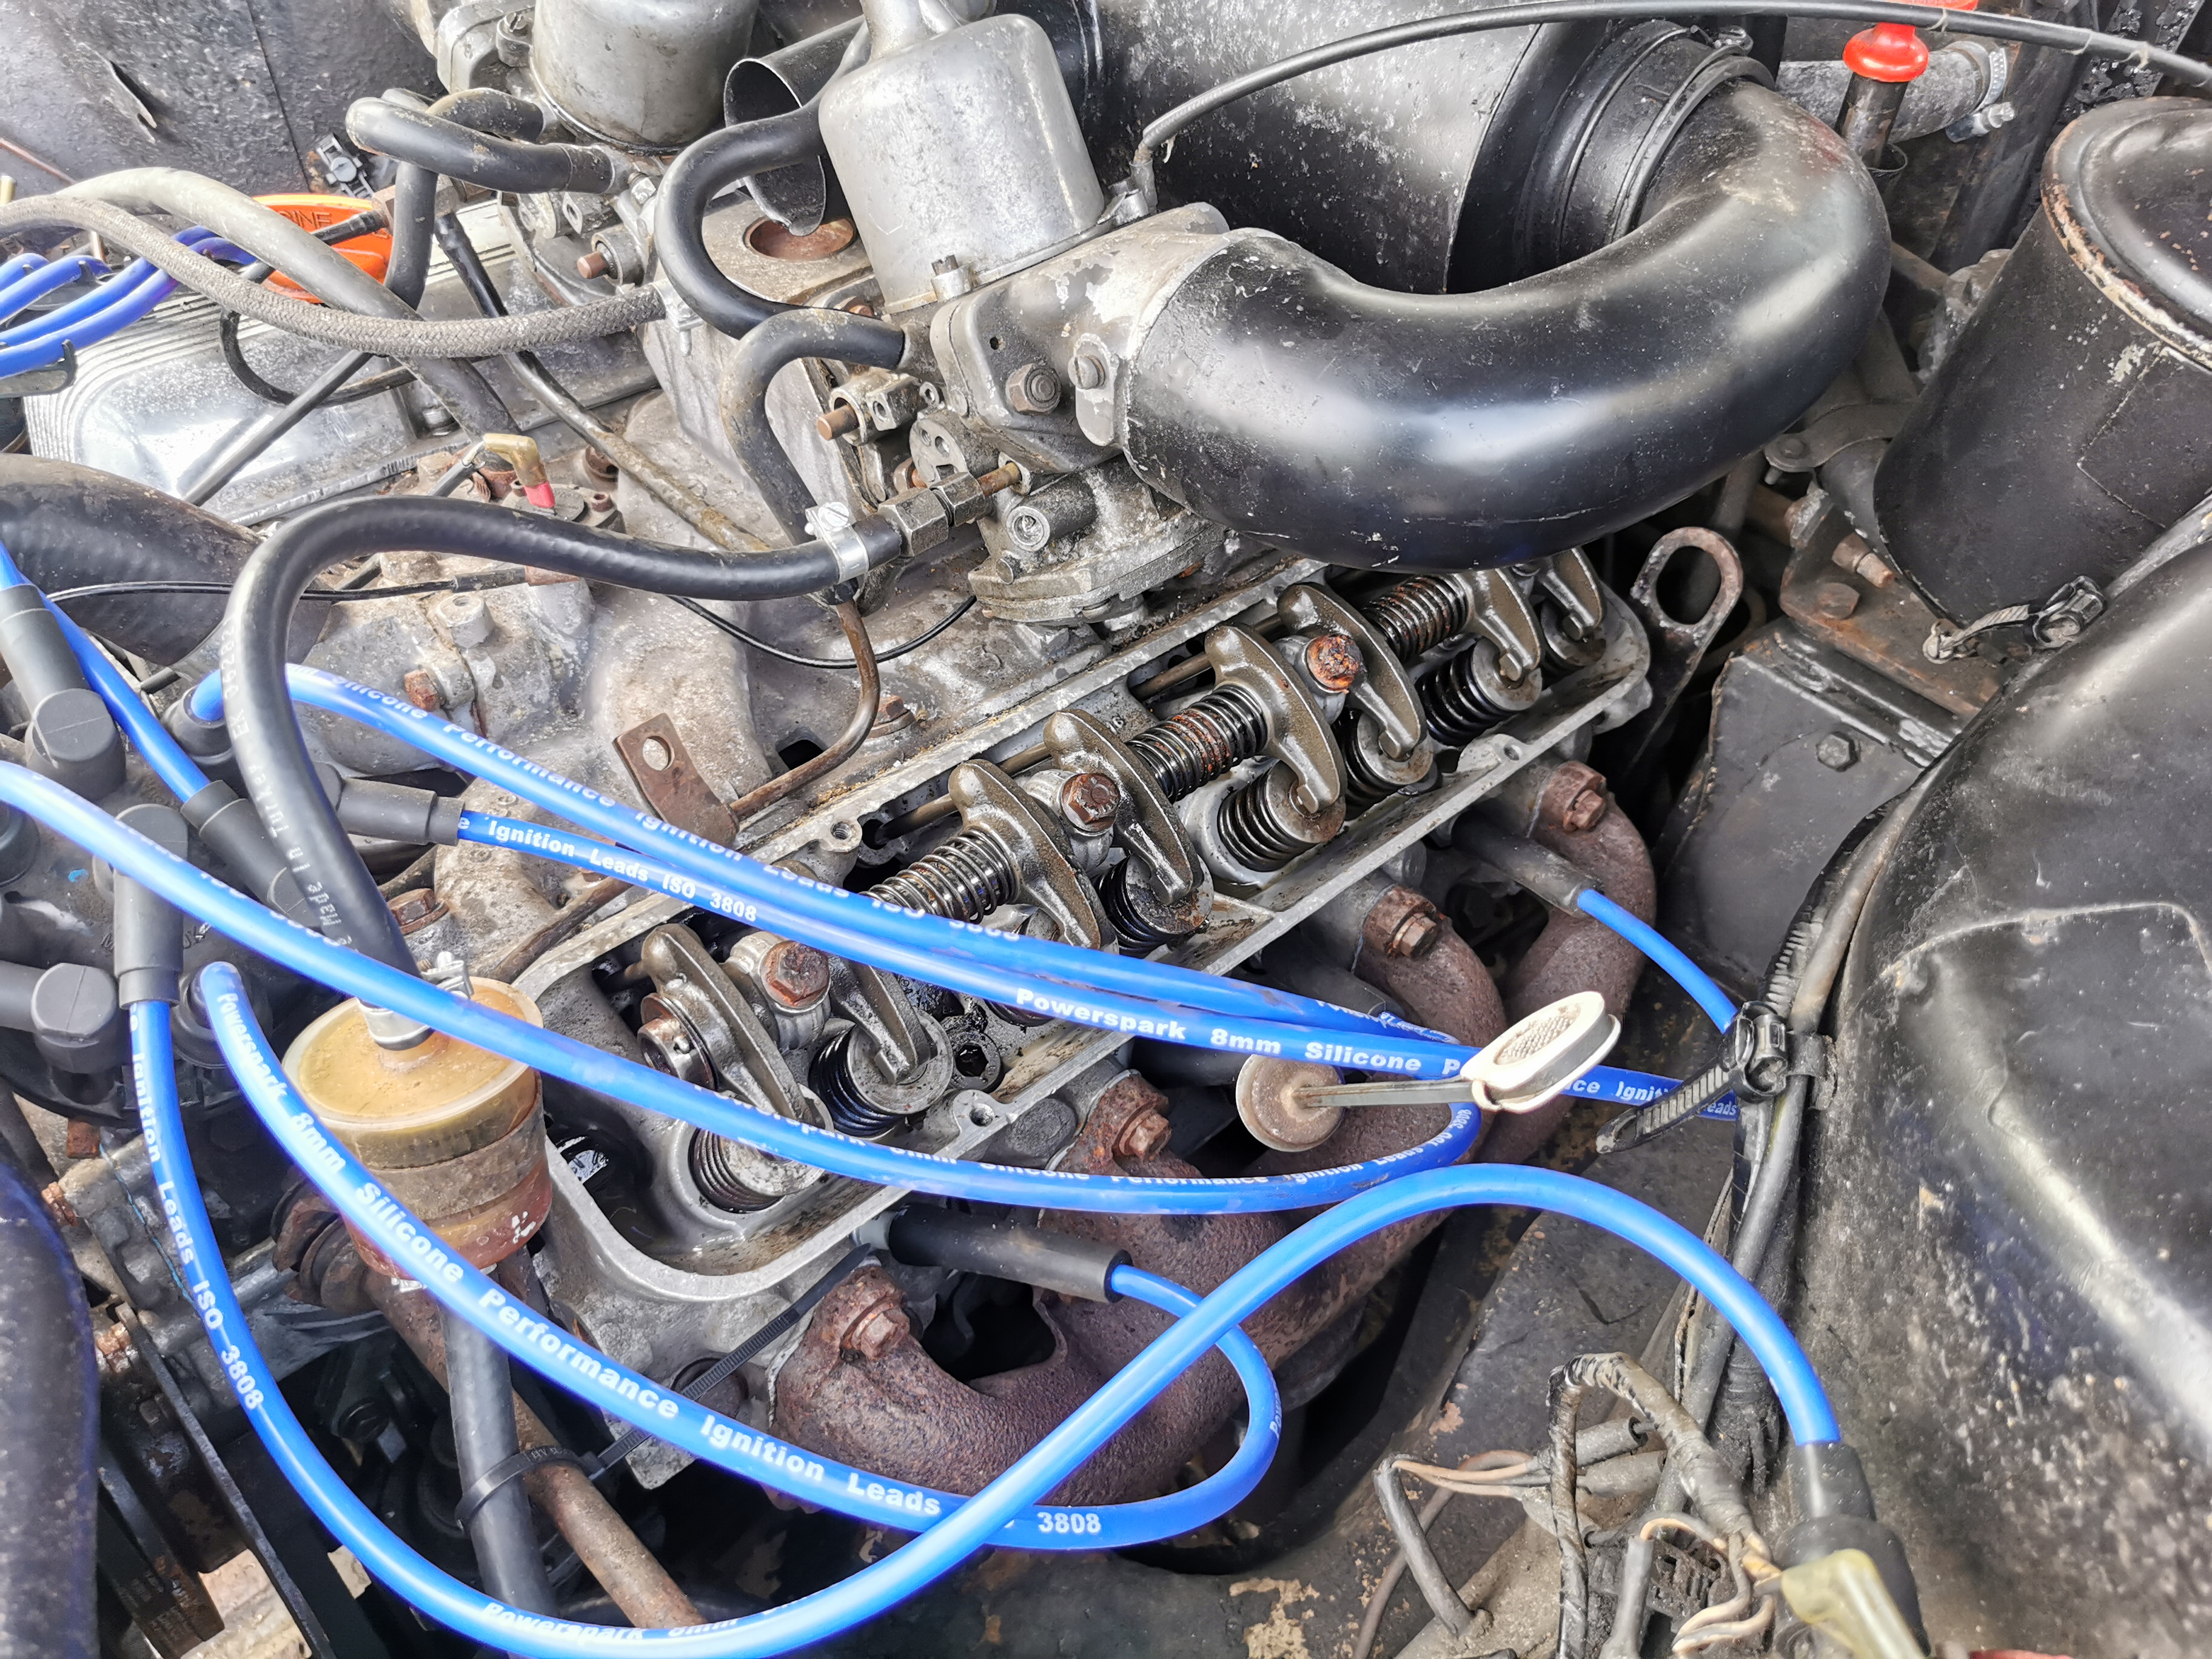
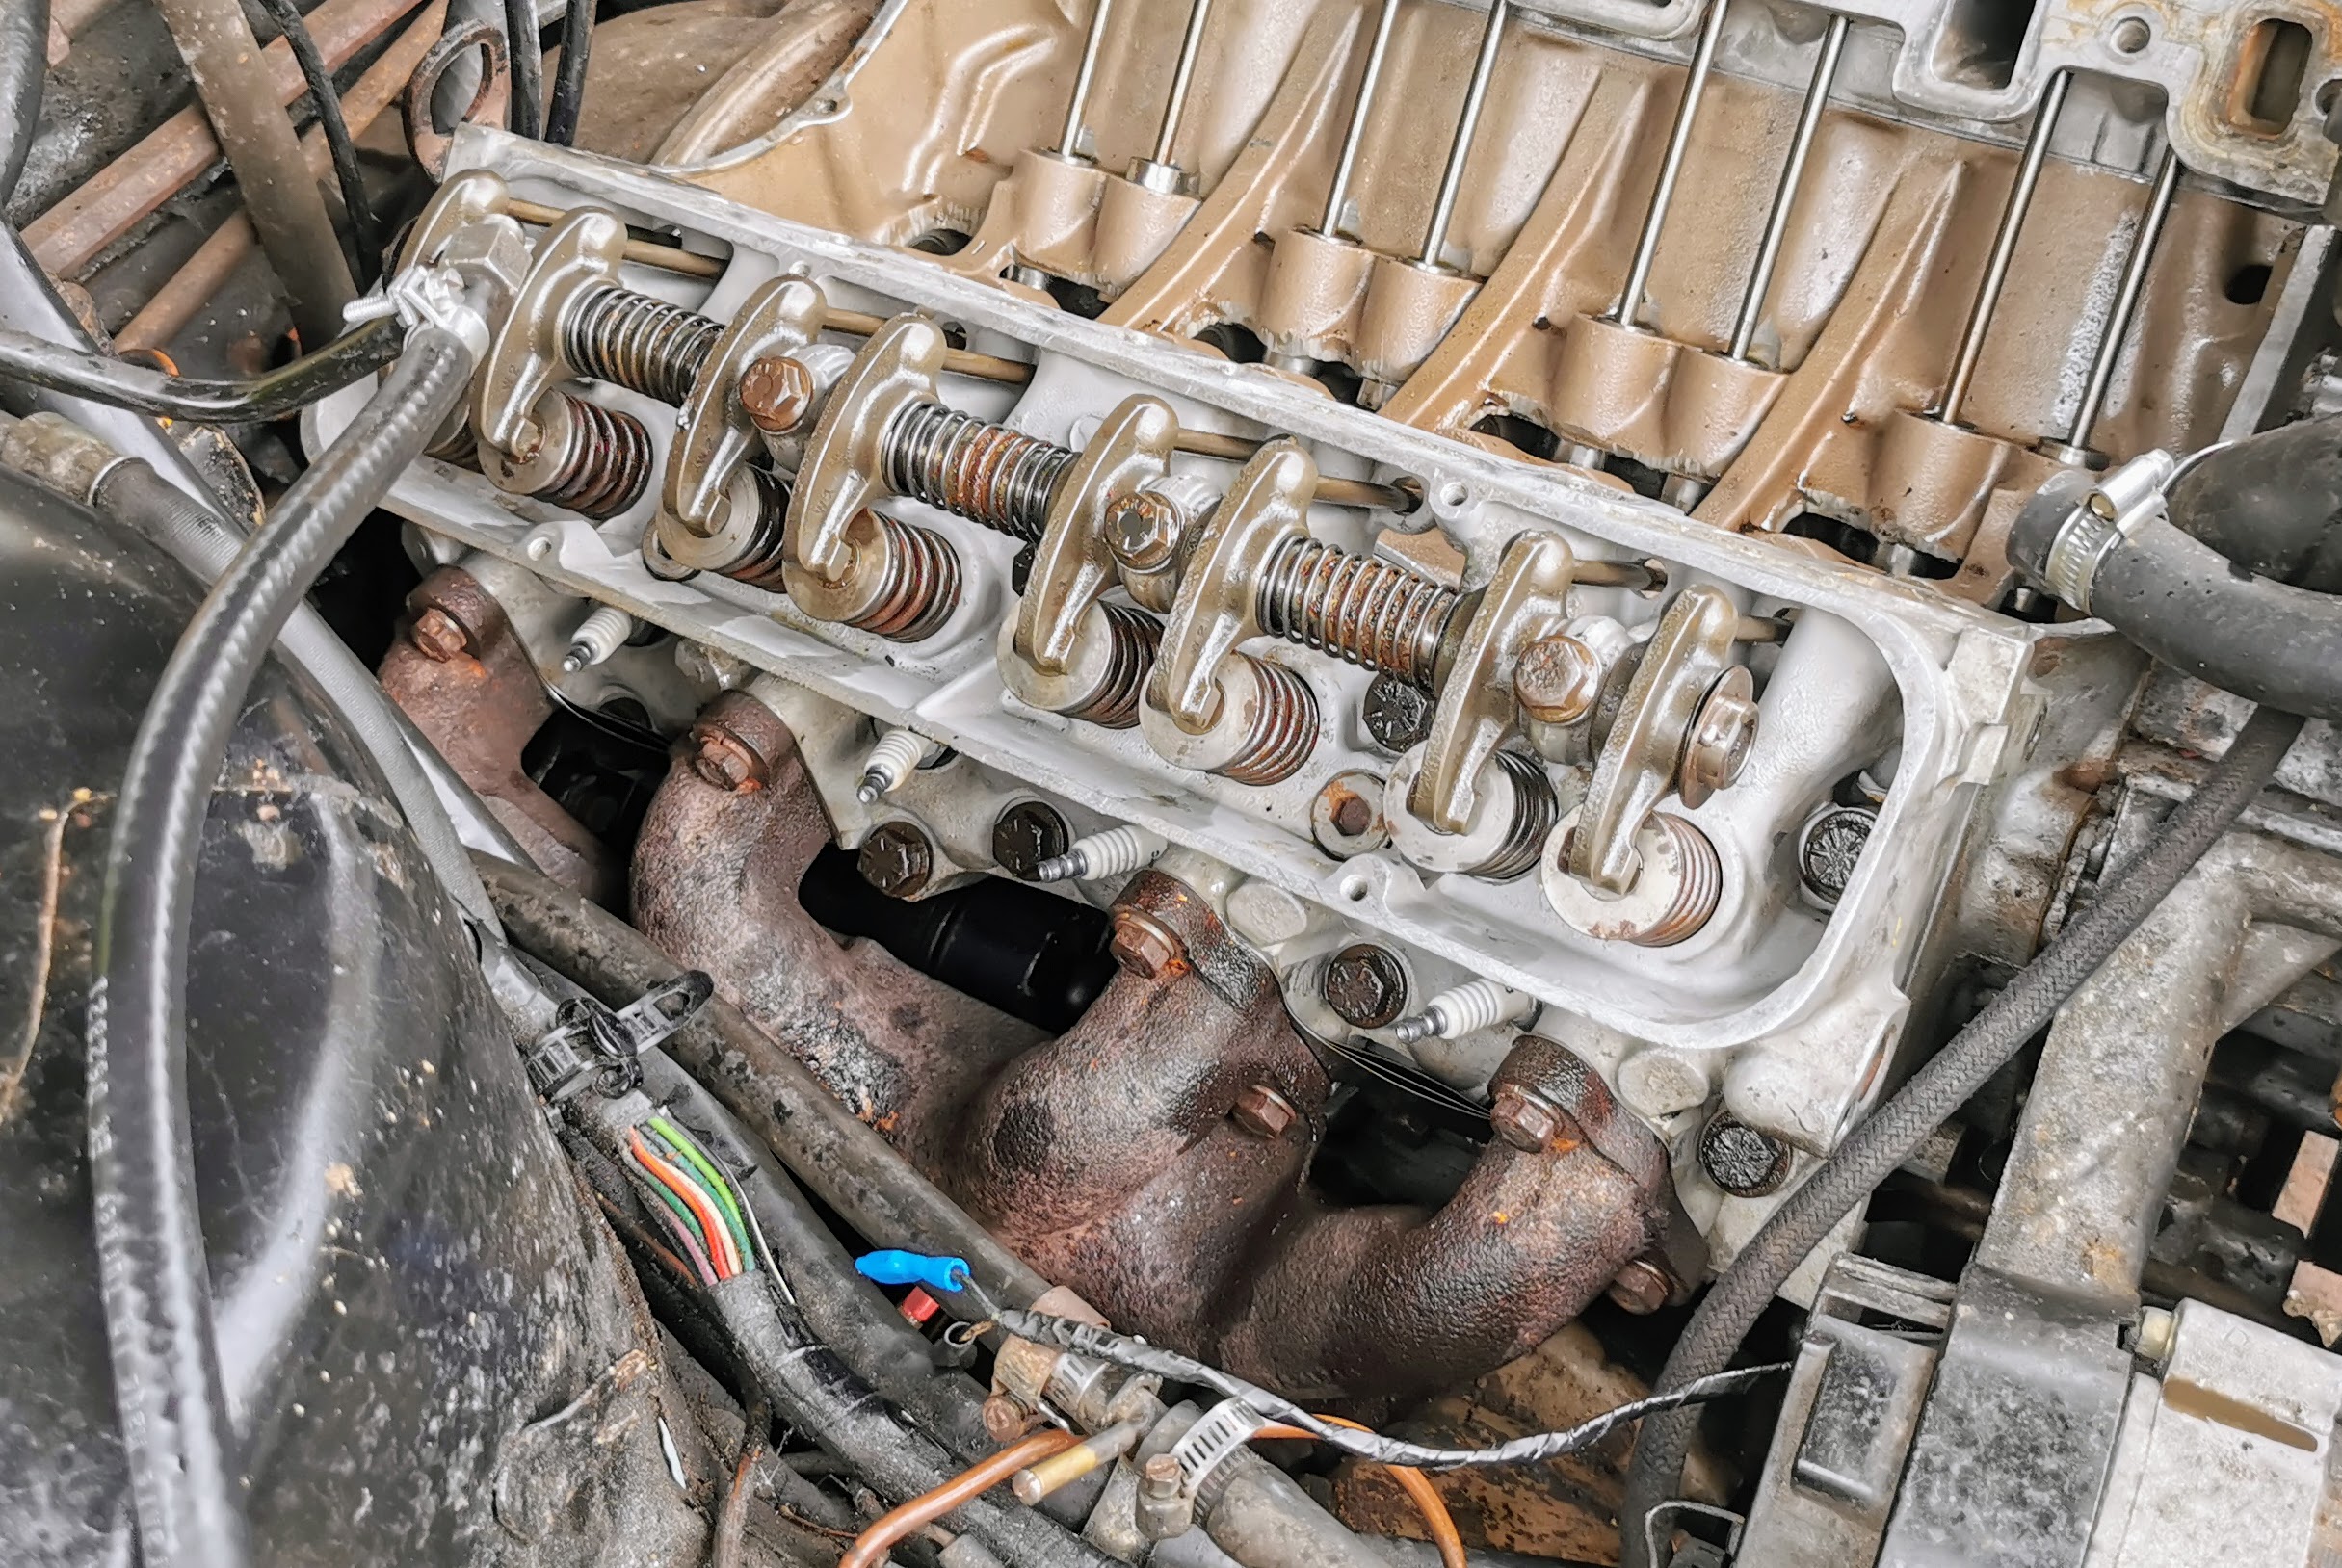
Armed now with some instrumentation to allow me to confirm that I did indeed have reasonable oil pressure and a means to keep tabs on the temperature I was able to dig into our running issue a bit more. Given that these engines have a bit of a reputation for camshaft wear one of my first suspects for our lack of compression, apparently on cylinder number 5 as that one wasn't firing, was that I was going to find that one of the valves simply wasn't moving. Upon pulling the valve cover on that side though I found that everything was moving as expected. Aside from some obvious signs of long term moisture in the engine things were surprisingly clean looking for a 101K mile engine.
A little closer examination revealed that (unsurprisingly) that this isn't the original engine from the car. The number suggests that this is actually a power unit from an SD1 Vitesse. Given how widely available these engines were in the 90s for very little money it's not really surprising that at some point it's been replaced - with their values being what they were at the time it would generally have made more financial sense to drop in a lower mileage unit than to rebuild one unless you were doing all the work yourself.
A compression test revealed near zero on number 5, a reasonably close spread on six cylinders, and a distinctly marginal looking figure for number 2. Doing a wet or dry test didn't have any noticeable effect. The actual numbers I wasn't particularly interested in, nor have any faith in as my compression tester was a cheap piece of rubbish when I bought it 25 years ago, and it hasn't got any better with age! However it had showed me what I needed to know: That there was something amiss in the top end of the engine. I had ascertained that the piston in number 5 was actually moving by the way, so was pretty convinced that it was an issue with the valve gear. Most likely some crud on one of the seats preventing the intake valve from closing properly - a very clear rhythmic "thud" coming back through the intake when the engine was running tended to support that theory. If the leakage was escaping past the piston rings I would have expected to see the results on the compression test increase noticeably when I repeated the test with a bit of oil having been added to the bore. Investigation also revealed that the unpleasant metallic "clack-clack-clack" noise I'd heard at idle wasn't actually coming from the bowels of the engine - it was the pulse coming back through the intake causing the metering piston on one of the carbs to bounce. That was quite a relief as it sounded quite sinister to be honest.
I did persevere a little, trying a few old tricks to see if I could dislodge whatever was causing our issues from the valve seats, but it was only really delaying the inevitable and satisfying my curiosity while I waited for the necessary parts to arrive to allow me to pull the cylinder heads. Given the amount of water that there seemed to be in the engine I wasn't 100% sure that we didn't have head gasket issues anyway so I didn't really see it as wasted effort anyway.
I got quite a surprise when I removed the valley cover plate (which also doubles as the intake manifold gasket). These aren't engines which are exactly renowned for running clean, so even if this was a relatively low mileage replacement I was expecting to find at least some degree of slime under there...Not an engine which looked basically factory fresh like this.
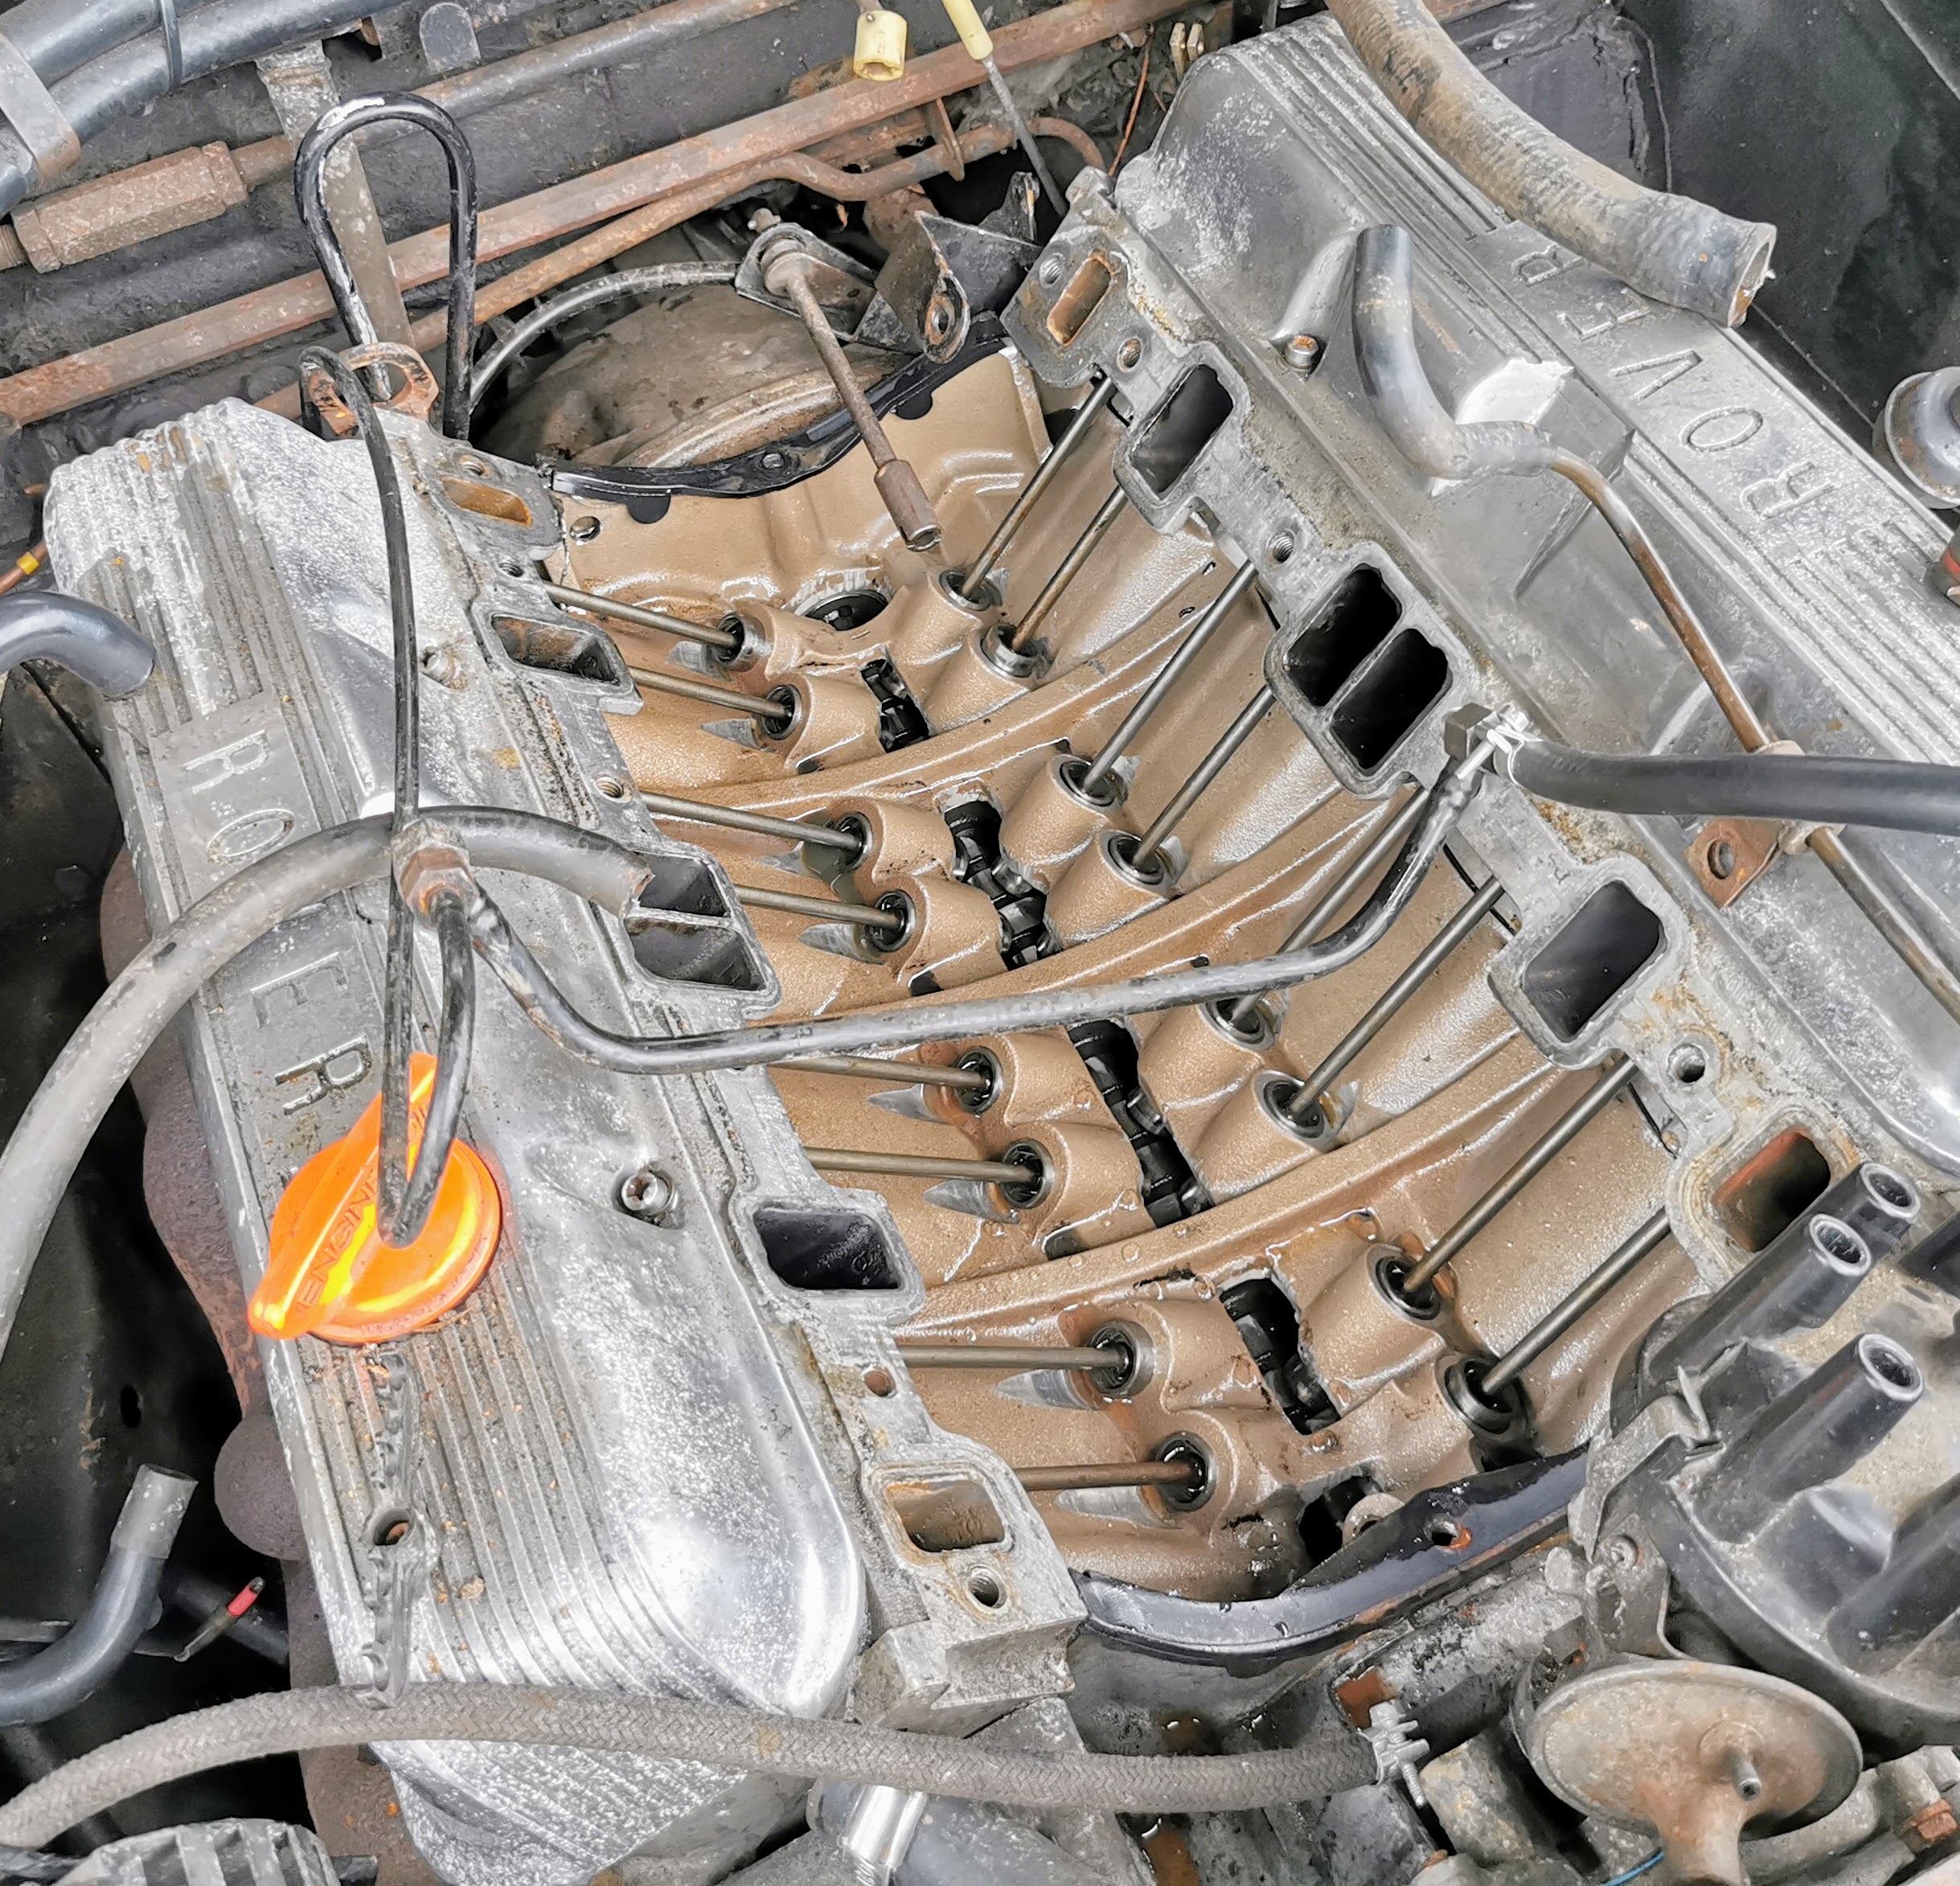
Examination of the lifters showed them to be basically brand new.
The mark that looks like a surface defect at about 6 o'clock isn't by the way - that's an oily fingerprint.
Similarly the camshaft looked to be near new - if difficult to photograph.
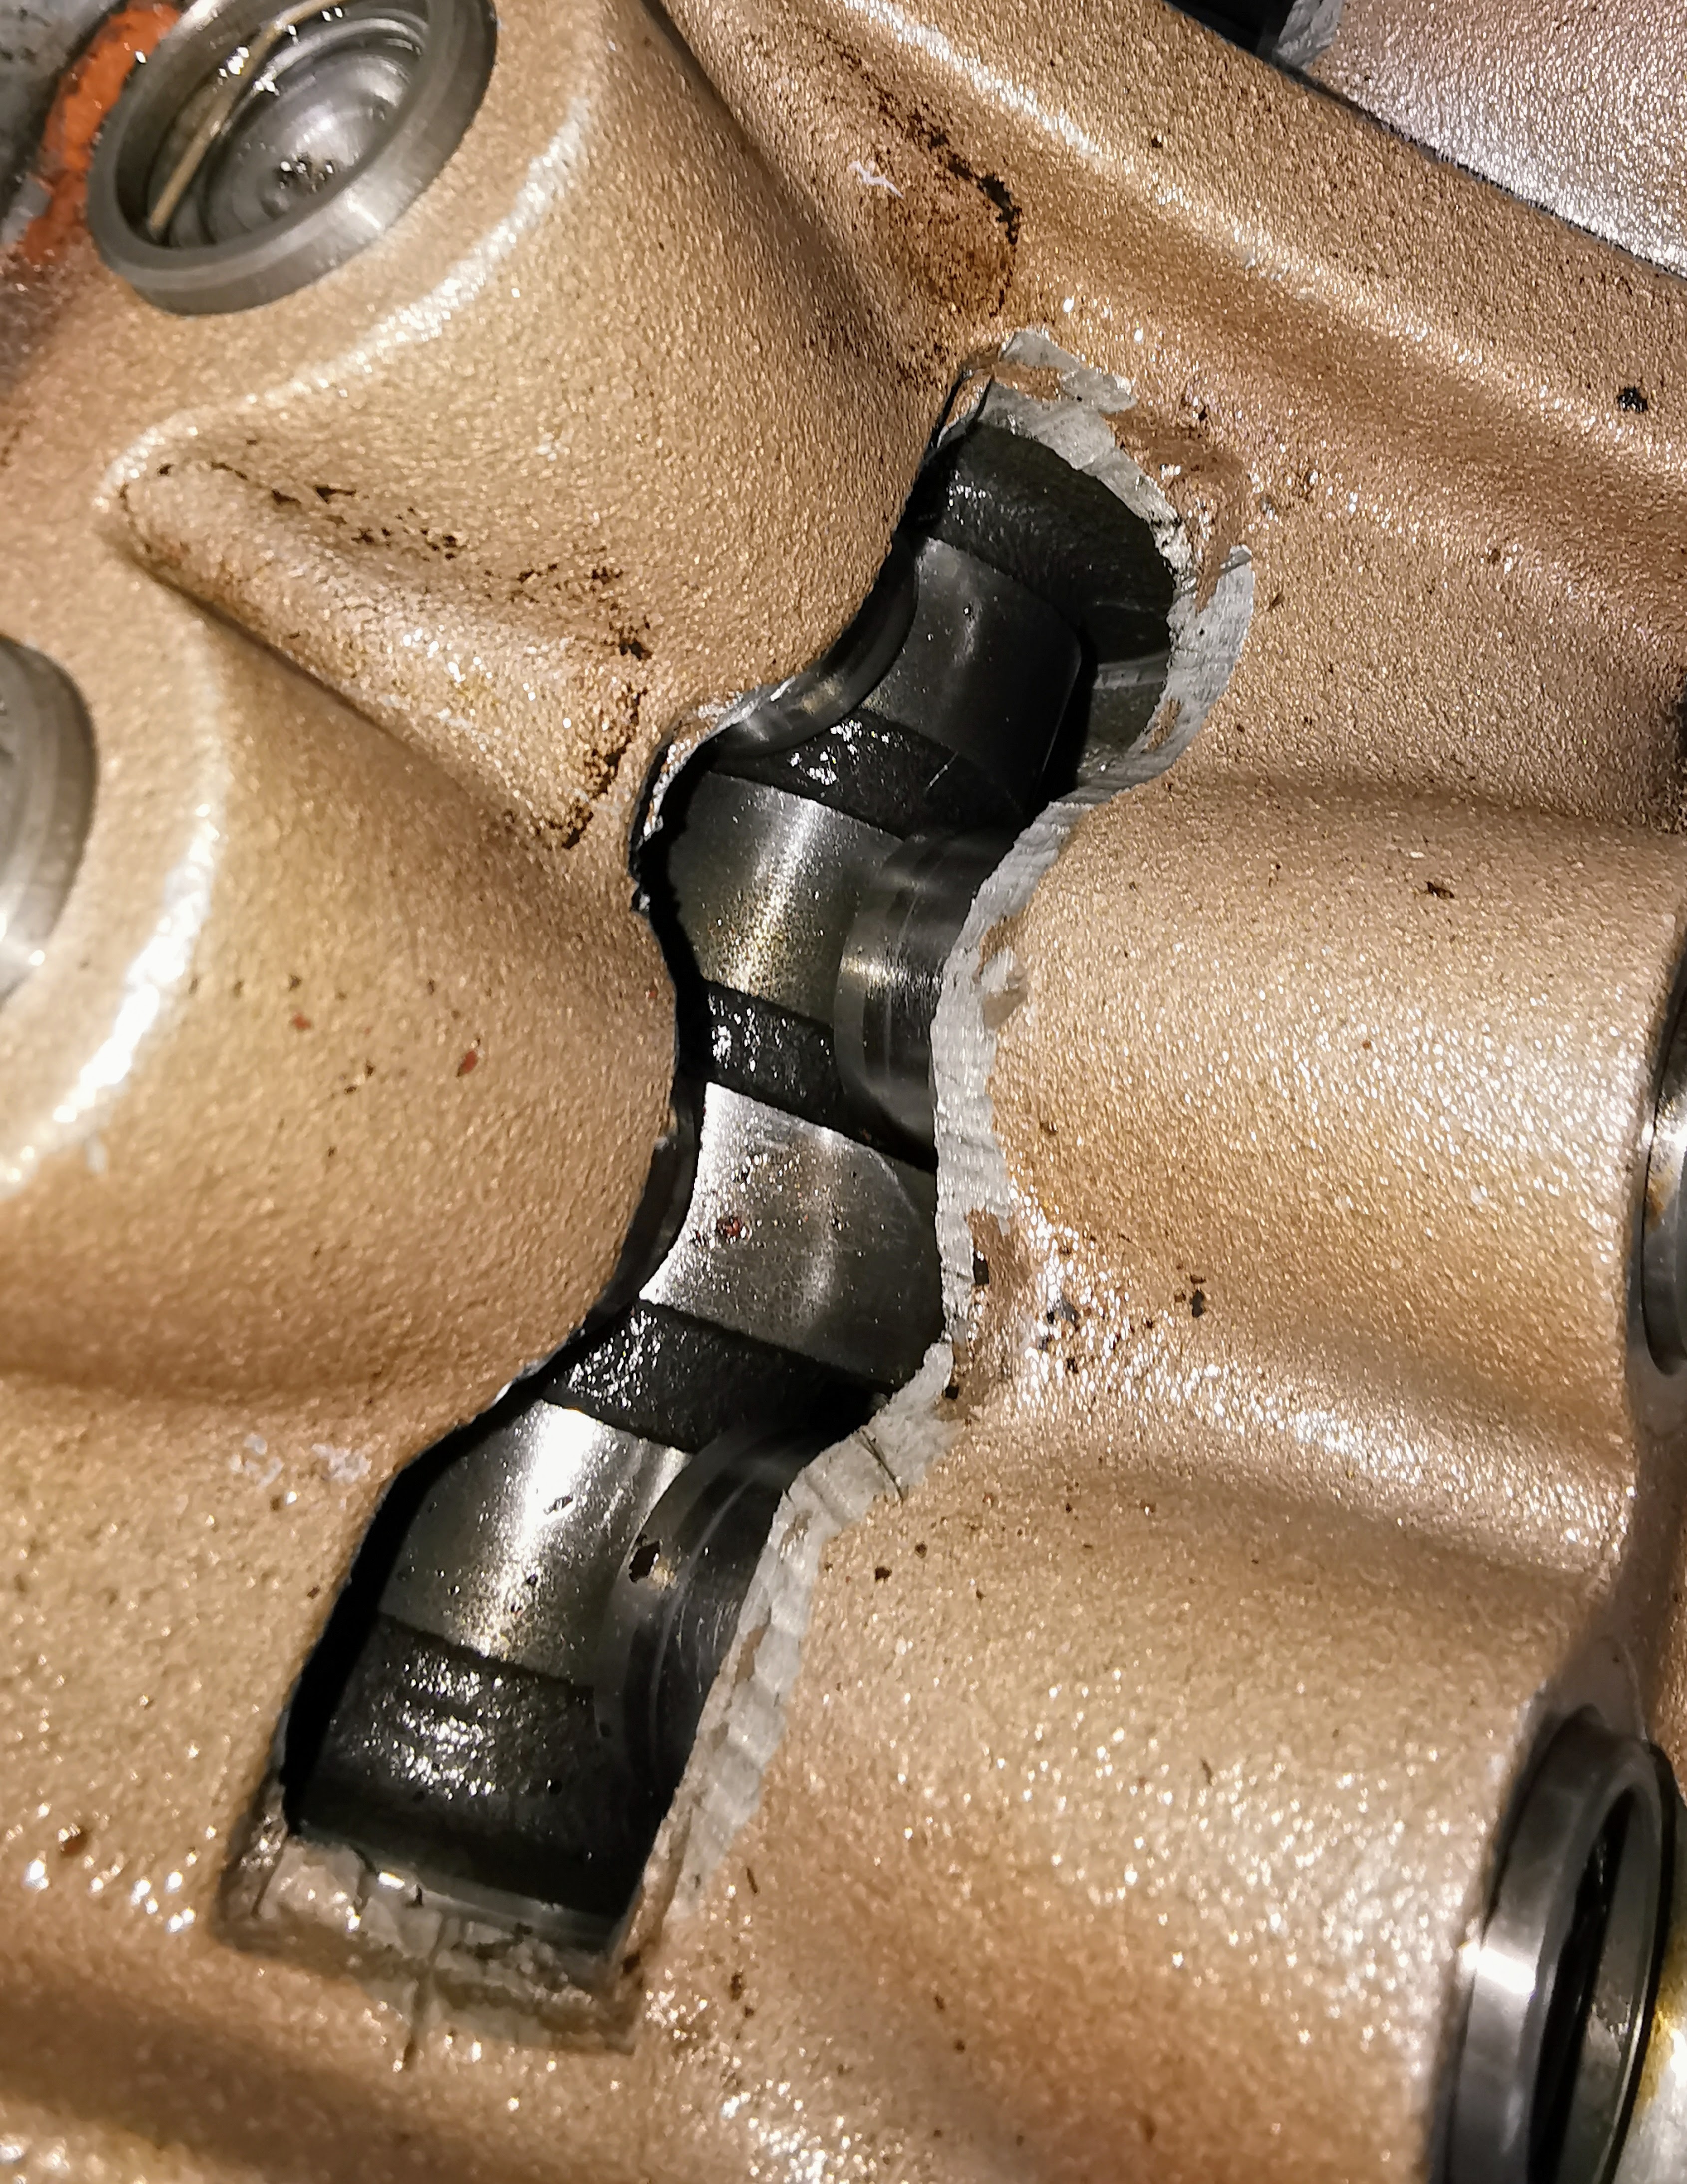
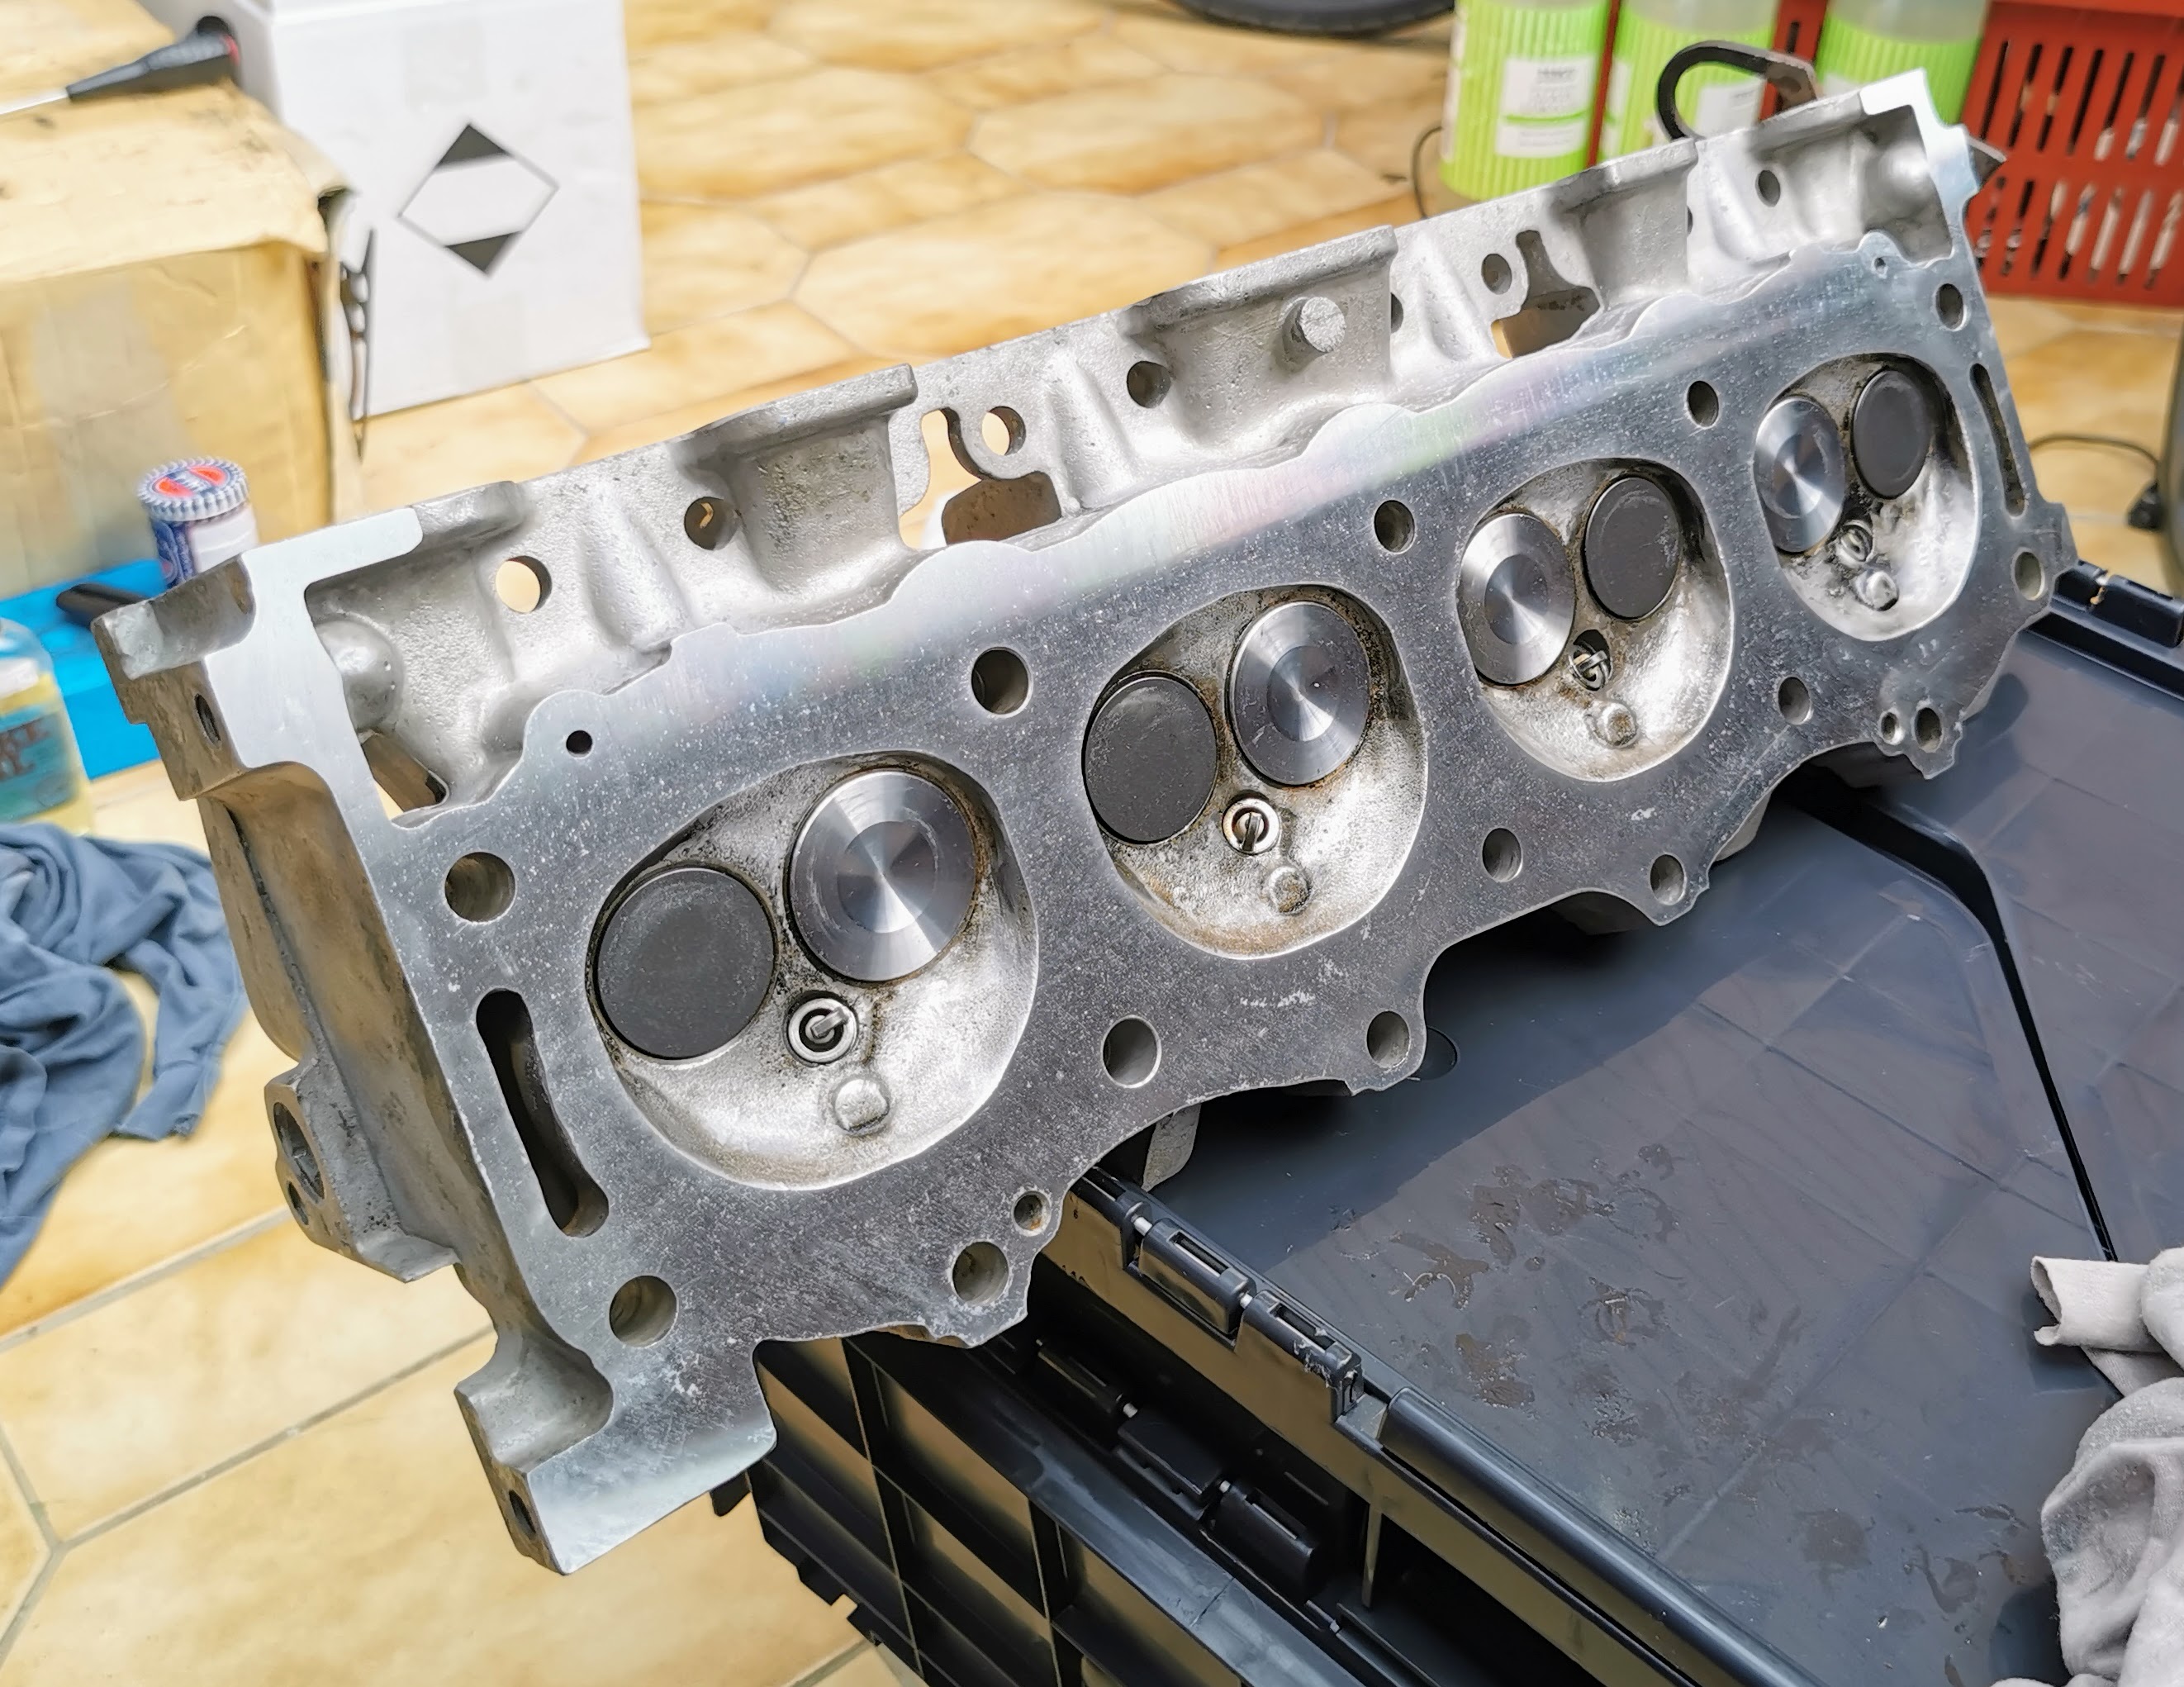
Someone had clearly been in here pretty recently. The picture which started to emerge in my mind was that given how clean it was internally that this was likely to be a refurbished short block which had been made back up with the external parts from the older engine. The heads for example while had obviously been cleaned at some point were nowhere near as spotless as things under the intake.
Pulling the first head revealed more indication of "having been thrown together enough to run" in that there was a lot of surface oxidisation on the head, and imprints left from a head gasket other than the one in the engine, so the head clearly hadn't been cleaned up properly before being fitted.

This did also allow us to get a confirmation of when a lot of the work on the car was done by there being a 2019 date code stamped into the head gasket that was removed.
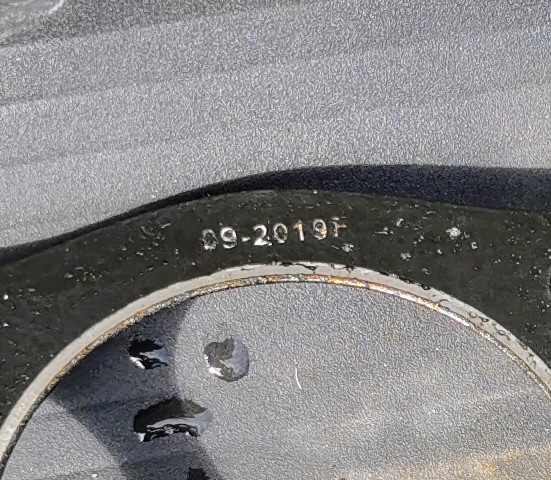
This was broadly in line with what I'd expected based on the tyres and such like.
The other head revealed a very similar story, but no real horror stories at least.
It is worth noting that getting this one off involved a LOT more swearing than the other side. This is because the rearmost lower exhaust manifold bolt is way, way harder to get to on this side than the other. The only way I figured out that worked was snaking a skinny wrench up between the chassis rail and starter motor and undoing it about 1/90th of a turn at a time. If I'd been smart I probably would have just removed the head with the manifold still attached as I *think* you could get to all the head bolts without it getting in the way.
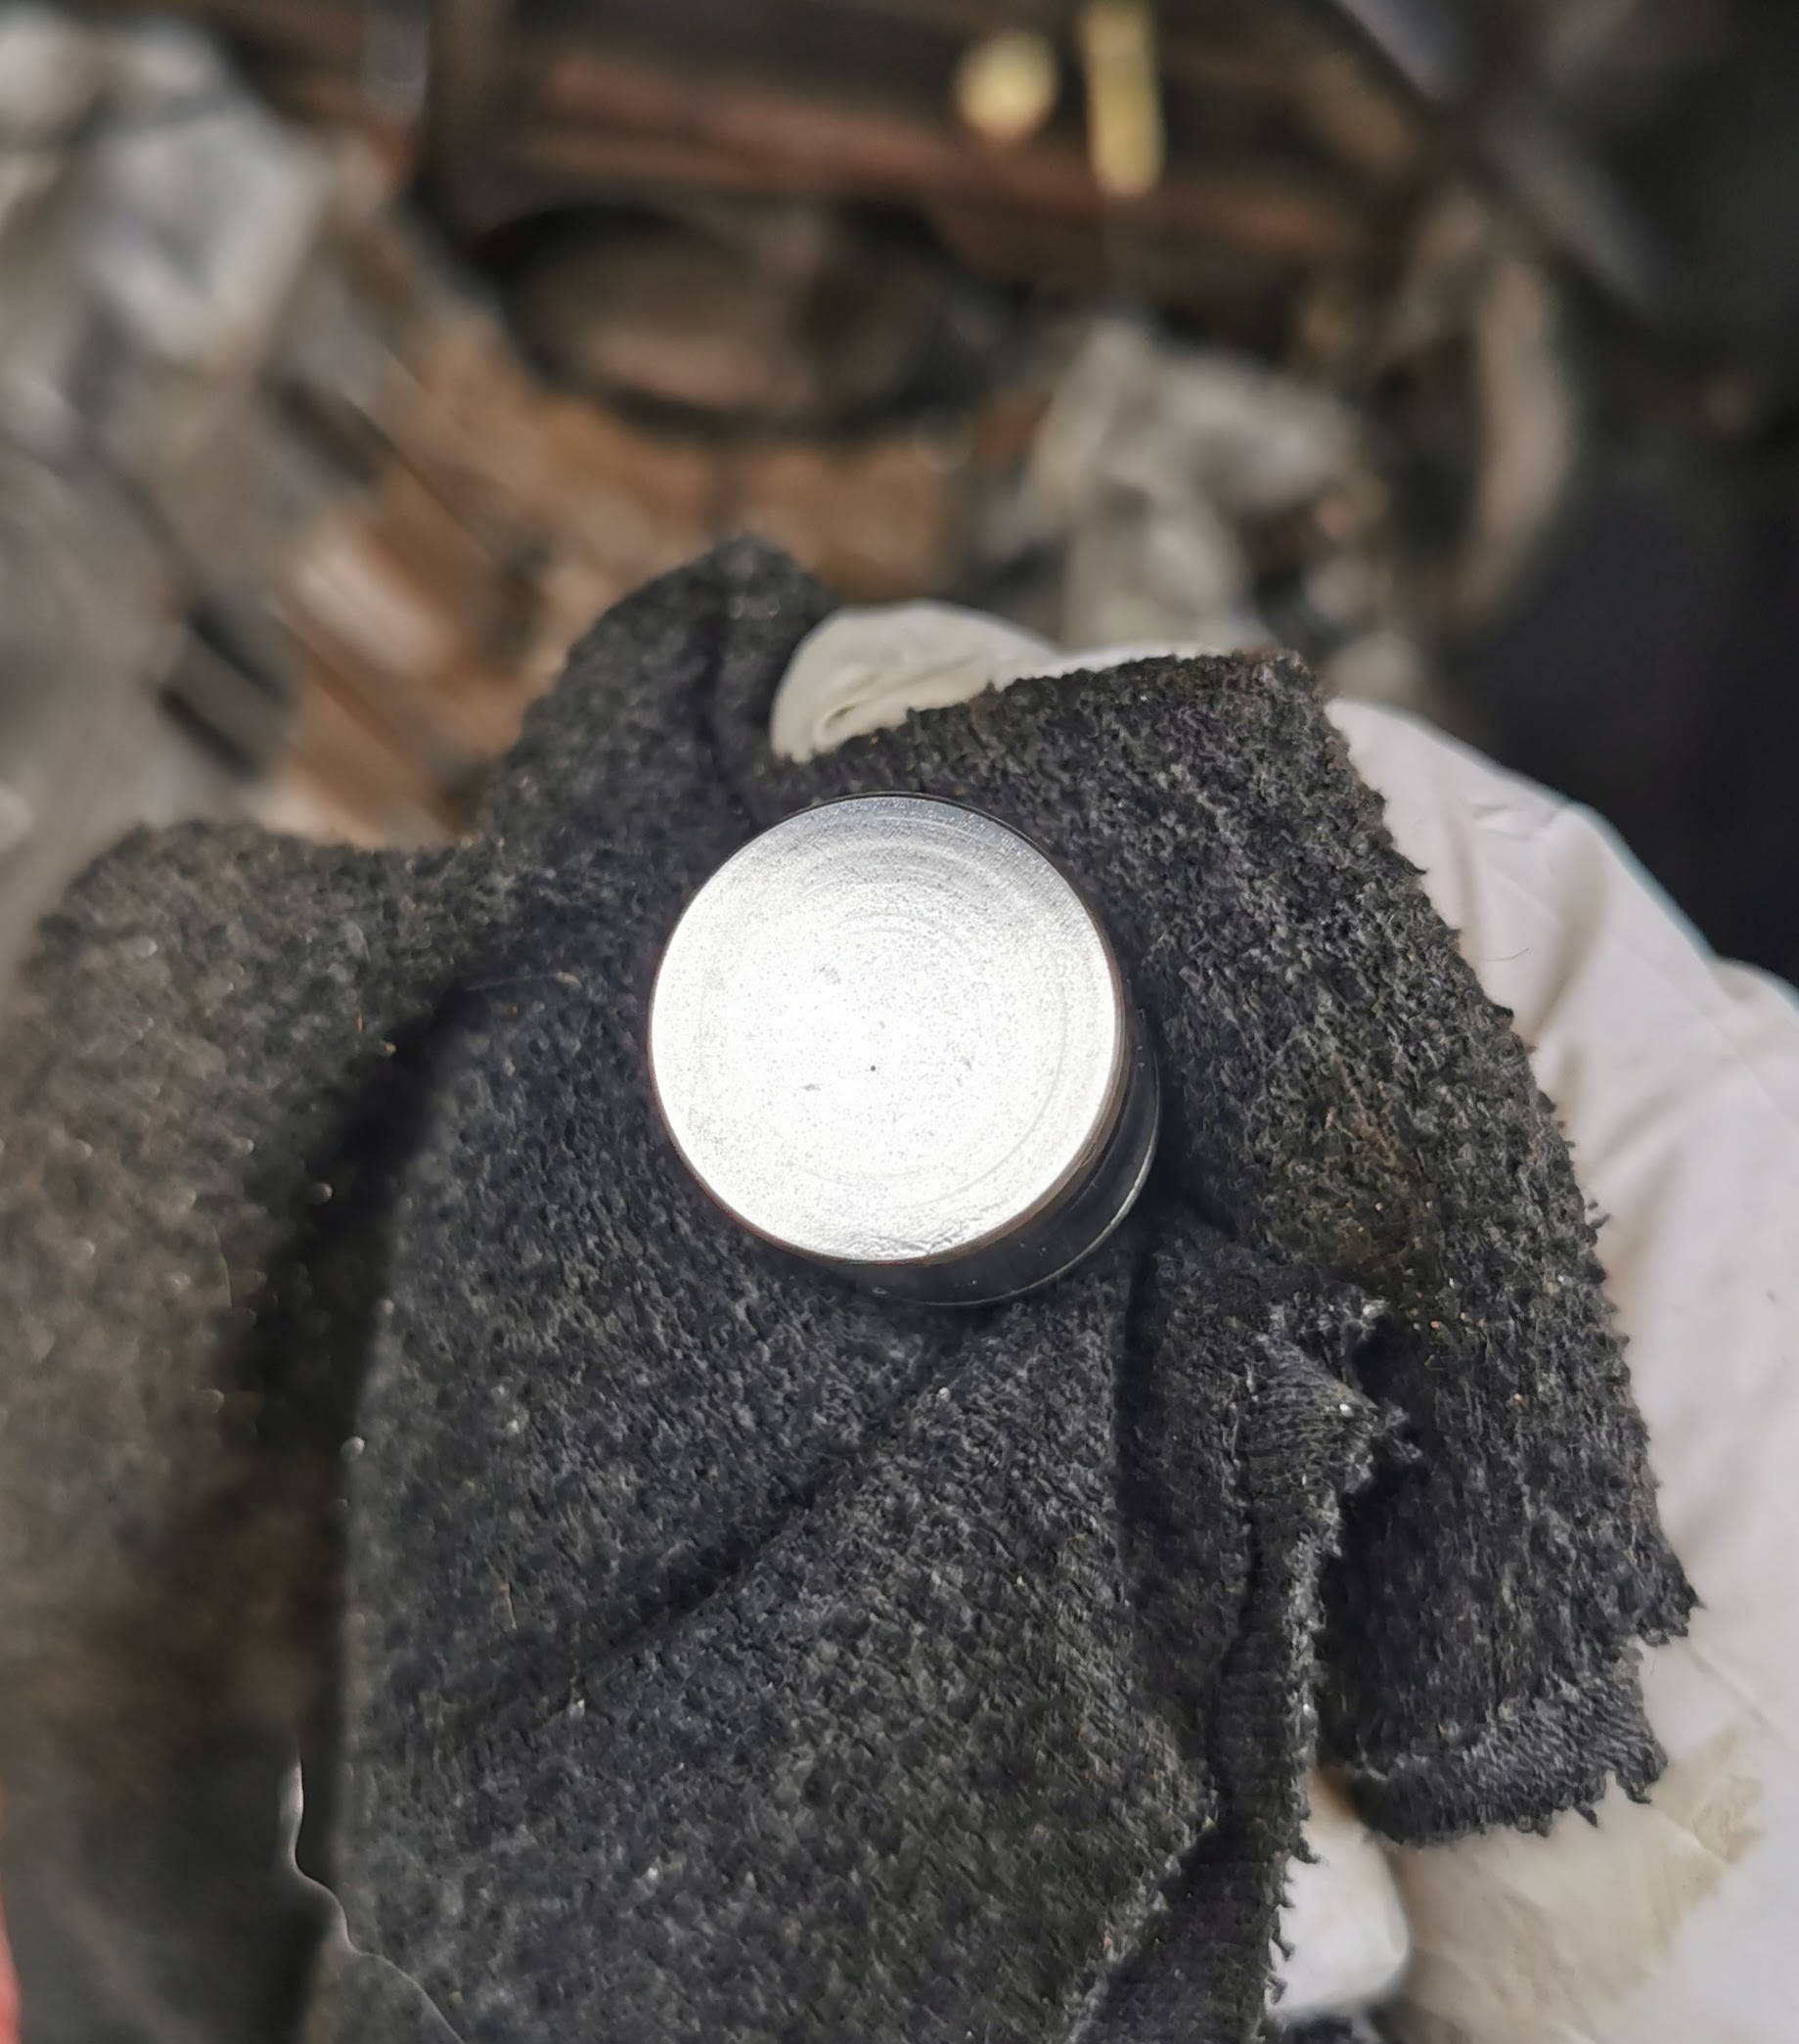
I did quite quickly spot an obvious reason for the marginal looking compression figure for cylinder number 2 once I started looking at things more closely.
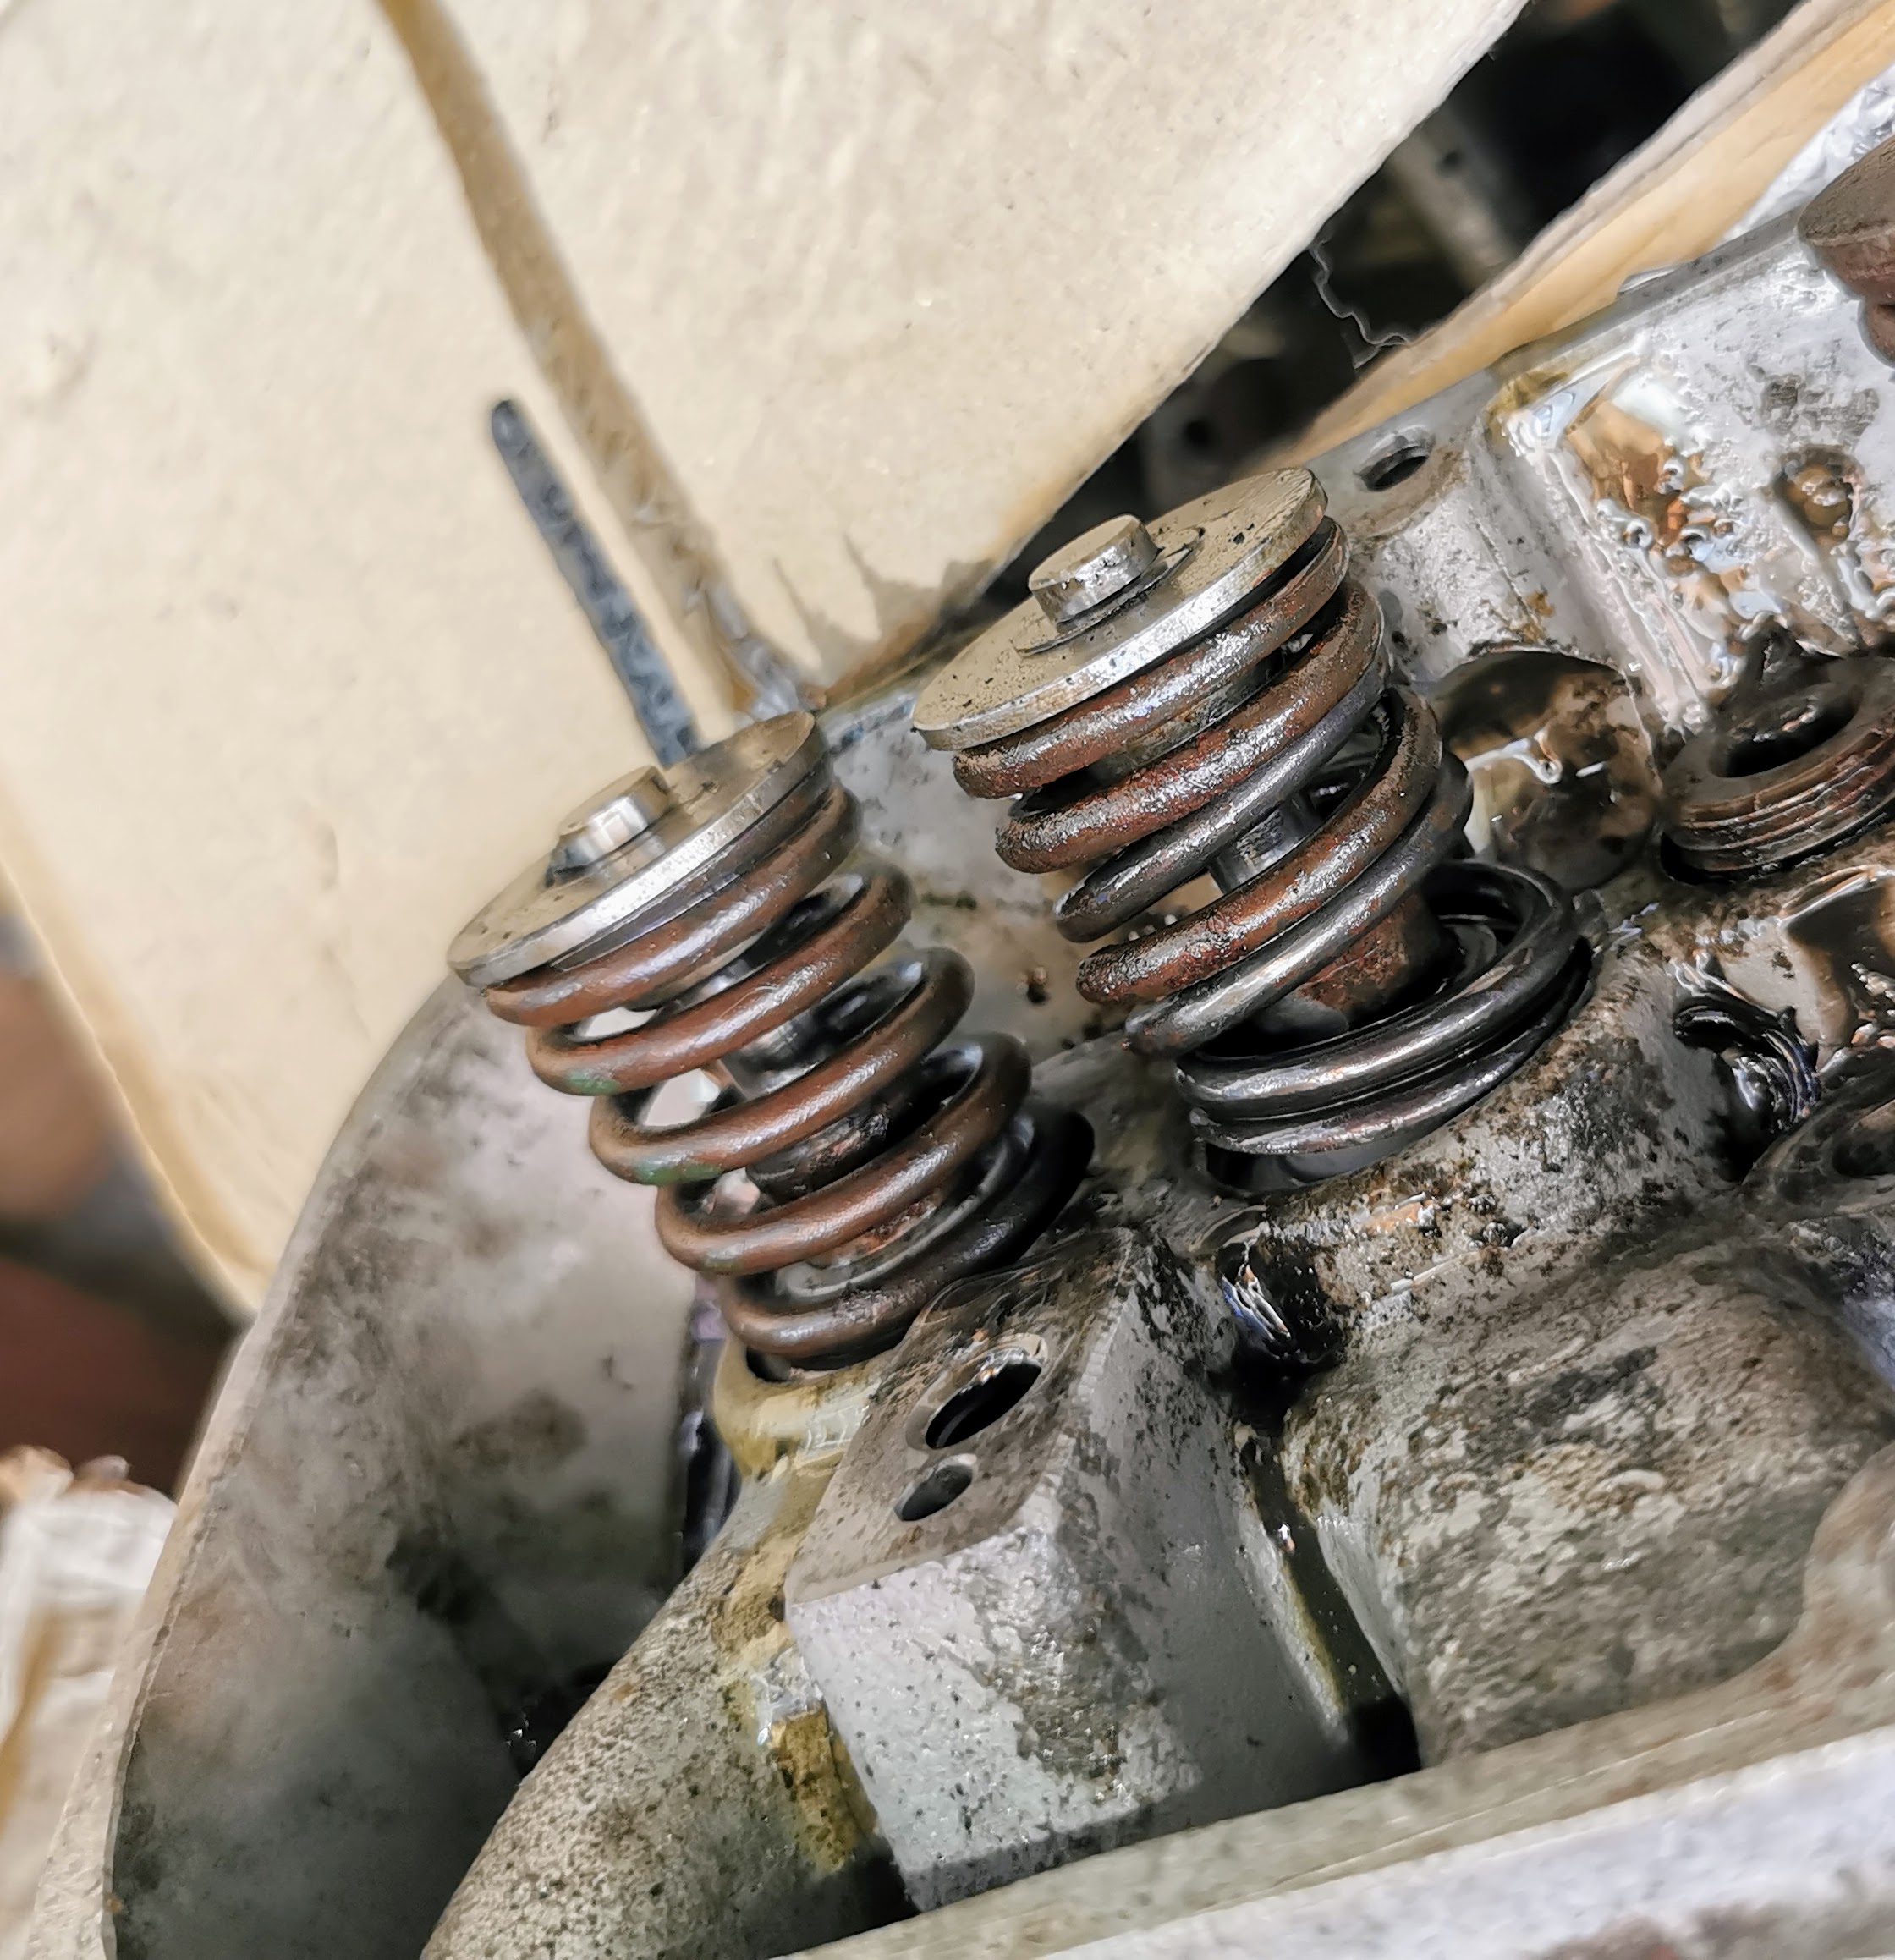
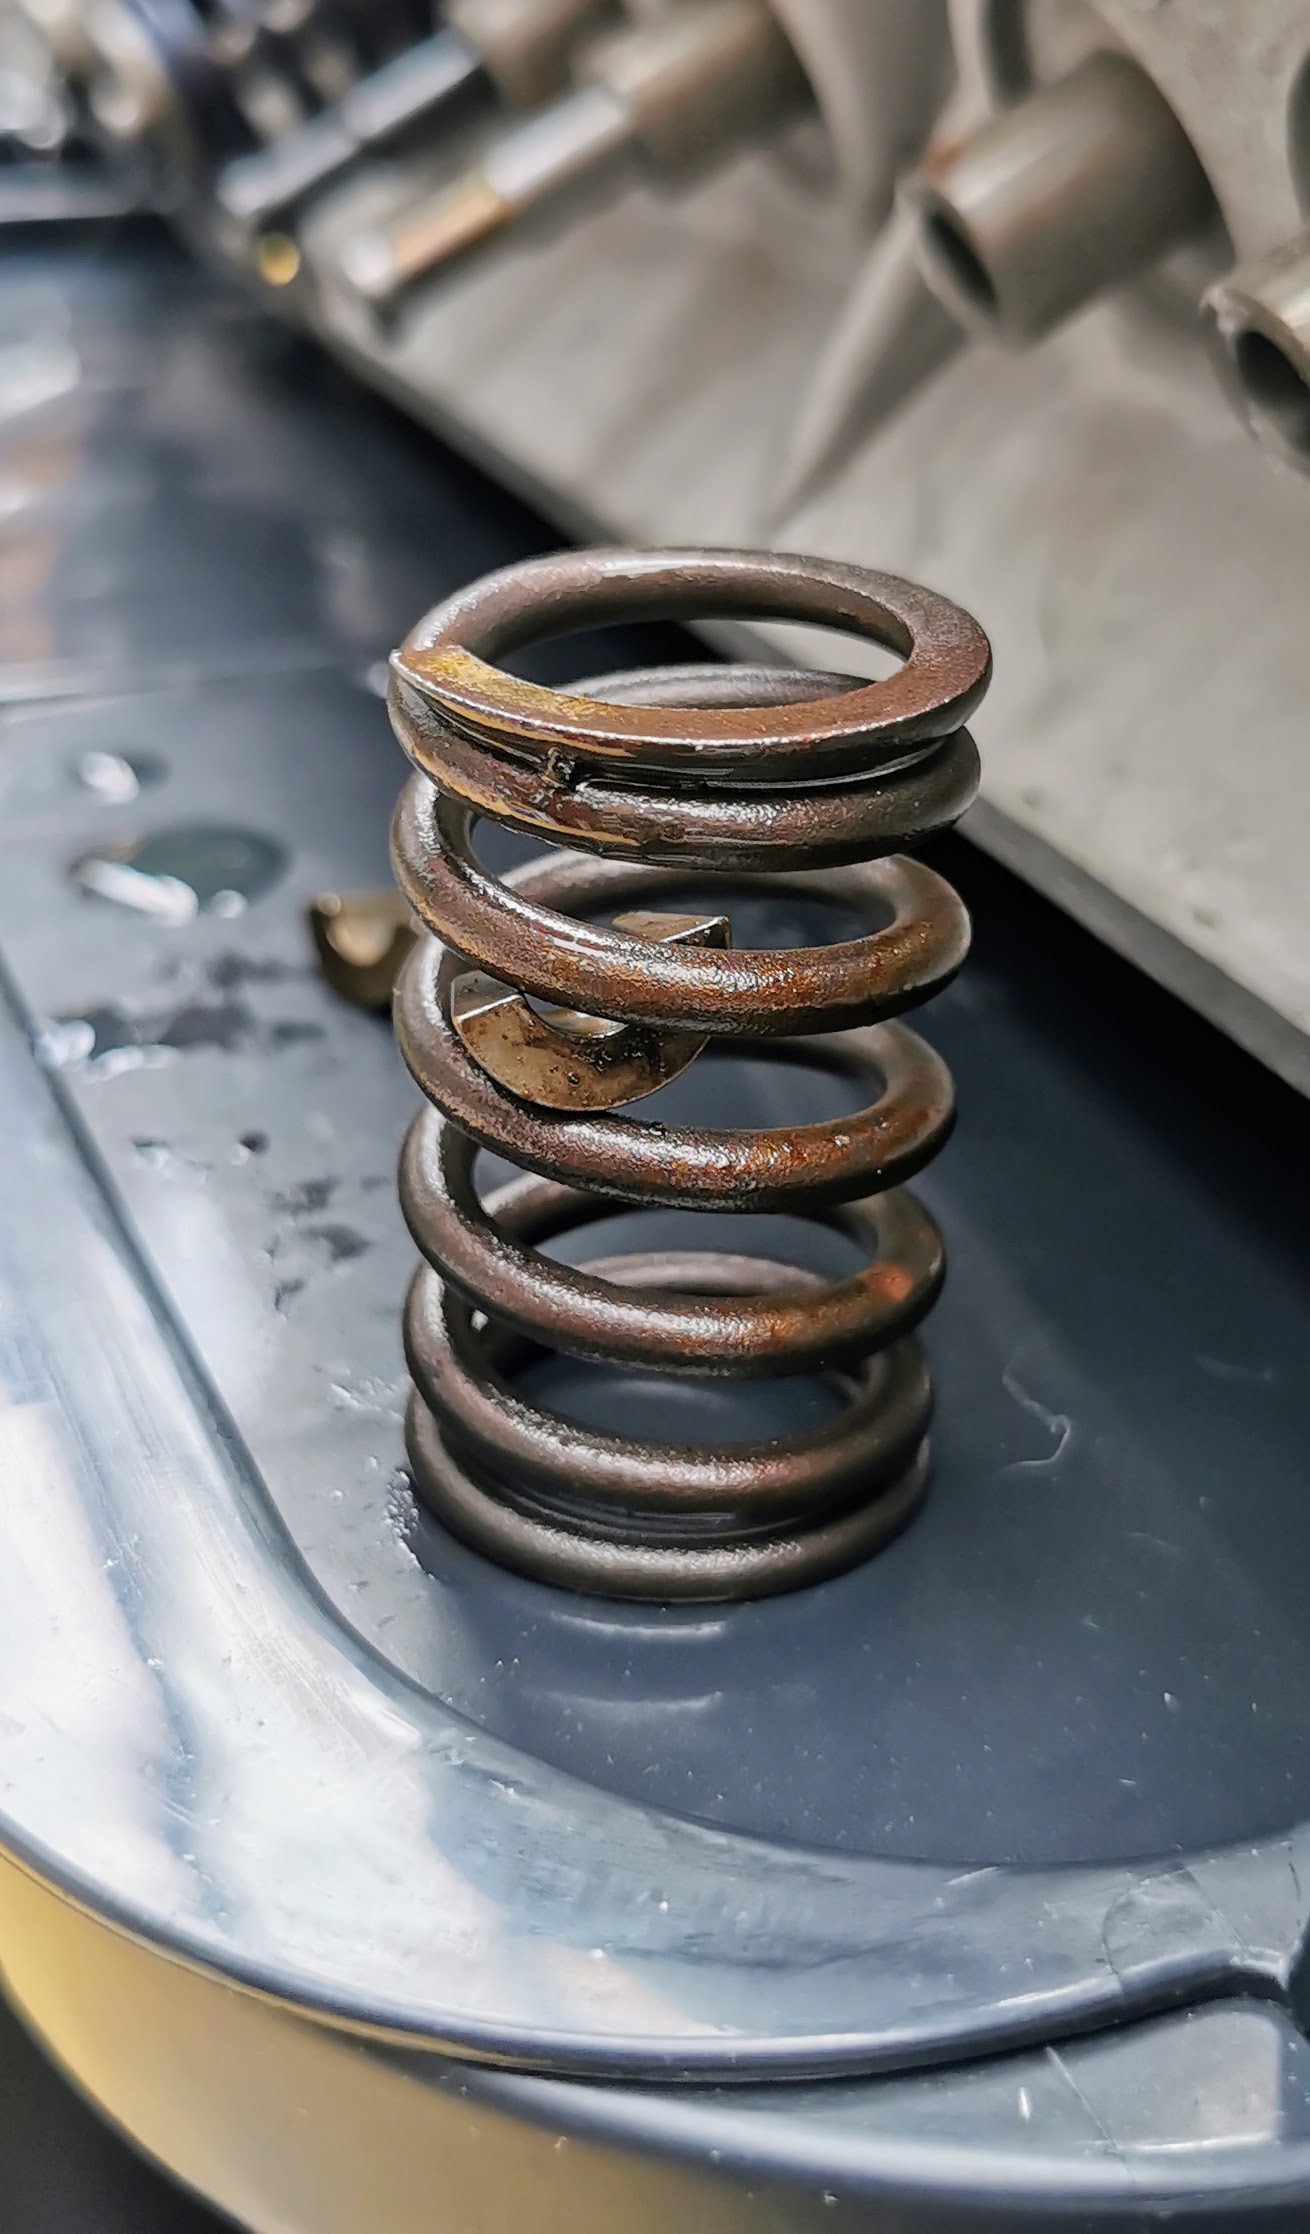
The valve spring on the number 2 intake valve definitely wouldn't have been helping anything. It turned out on closer inspection to actually be broken into three pieces.
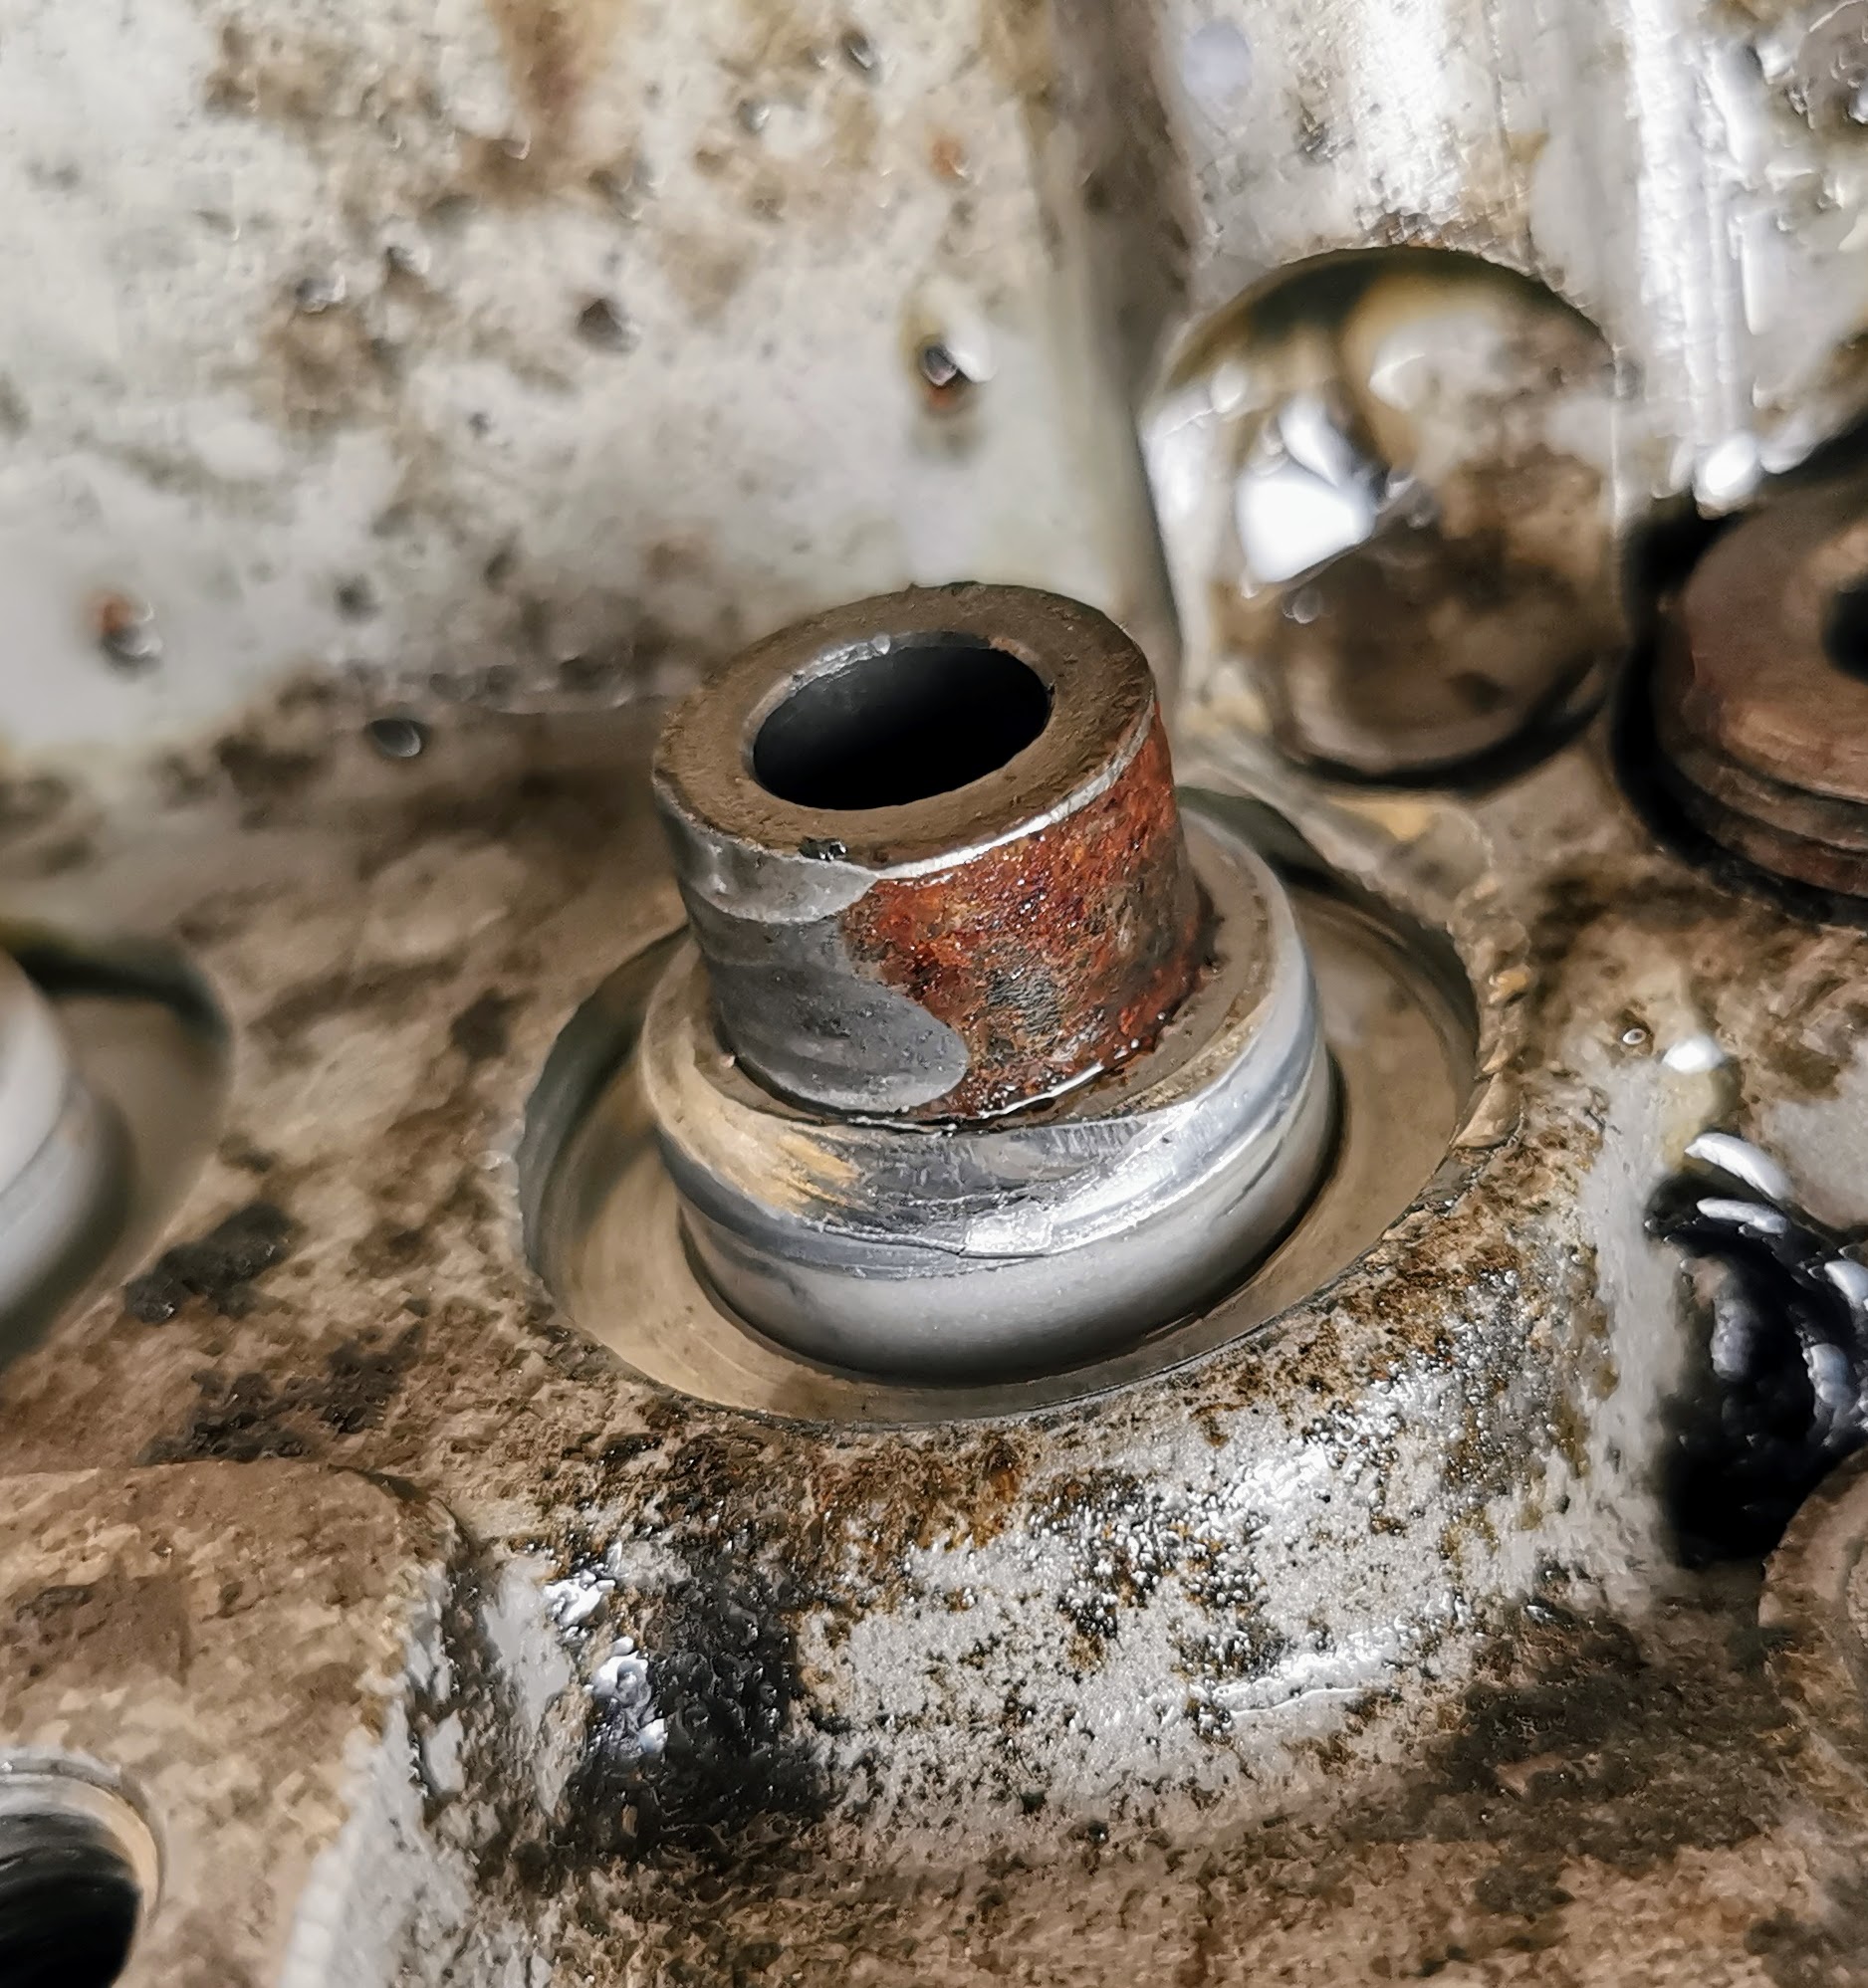
There was absolutely no tension on the valve spring whatsoever - so I count myself extremely lucky that the keepers didn't get shaken out and the valve end up getting dropped into the cylinder. Especially as the damage to the area around the valve guide shows that the engine had clearly been running like this for at least some time - this isn't something which had just happened.
Thankfully while this looks bad it's essentially just superficial damage and shouldn't affect the operation of the guide at all.
The interesting thing is that this cylinder while showing somewhat low compression, was firing. I can only surmise that the flow of gases out of the cylinder through the valve as the piston was rising was sufficient to push the valve closed - a behaviour used deliberately on some very early engines, but not how the Rover V8 was meant to work! I couldn't see any witness marks suggesting that the piston and valve had ever had a coming together, nor could I see any signs of the valve being bent - however I simply didn't trust it to be reused.
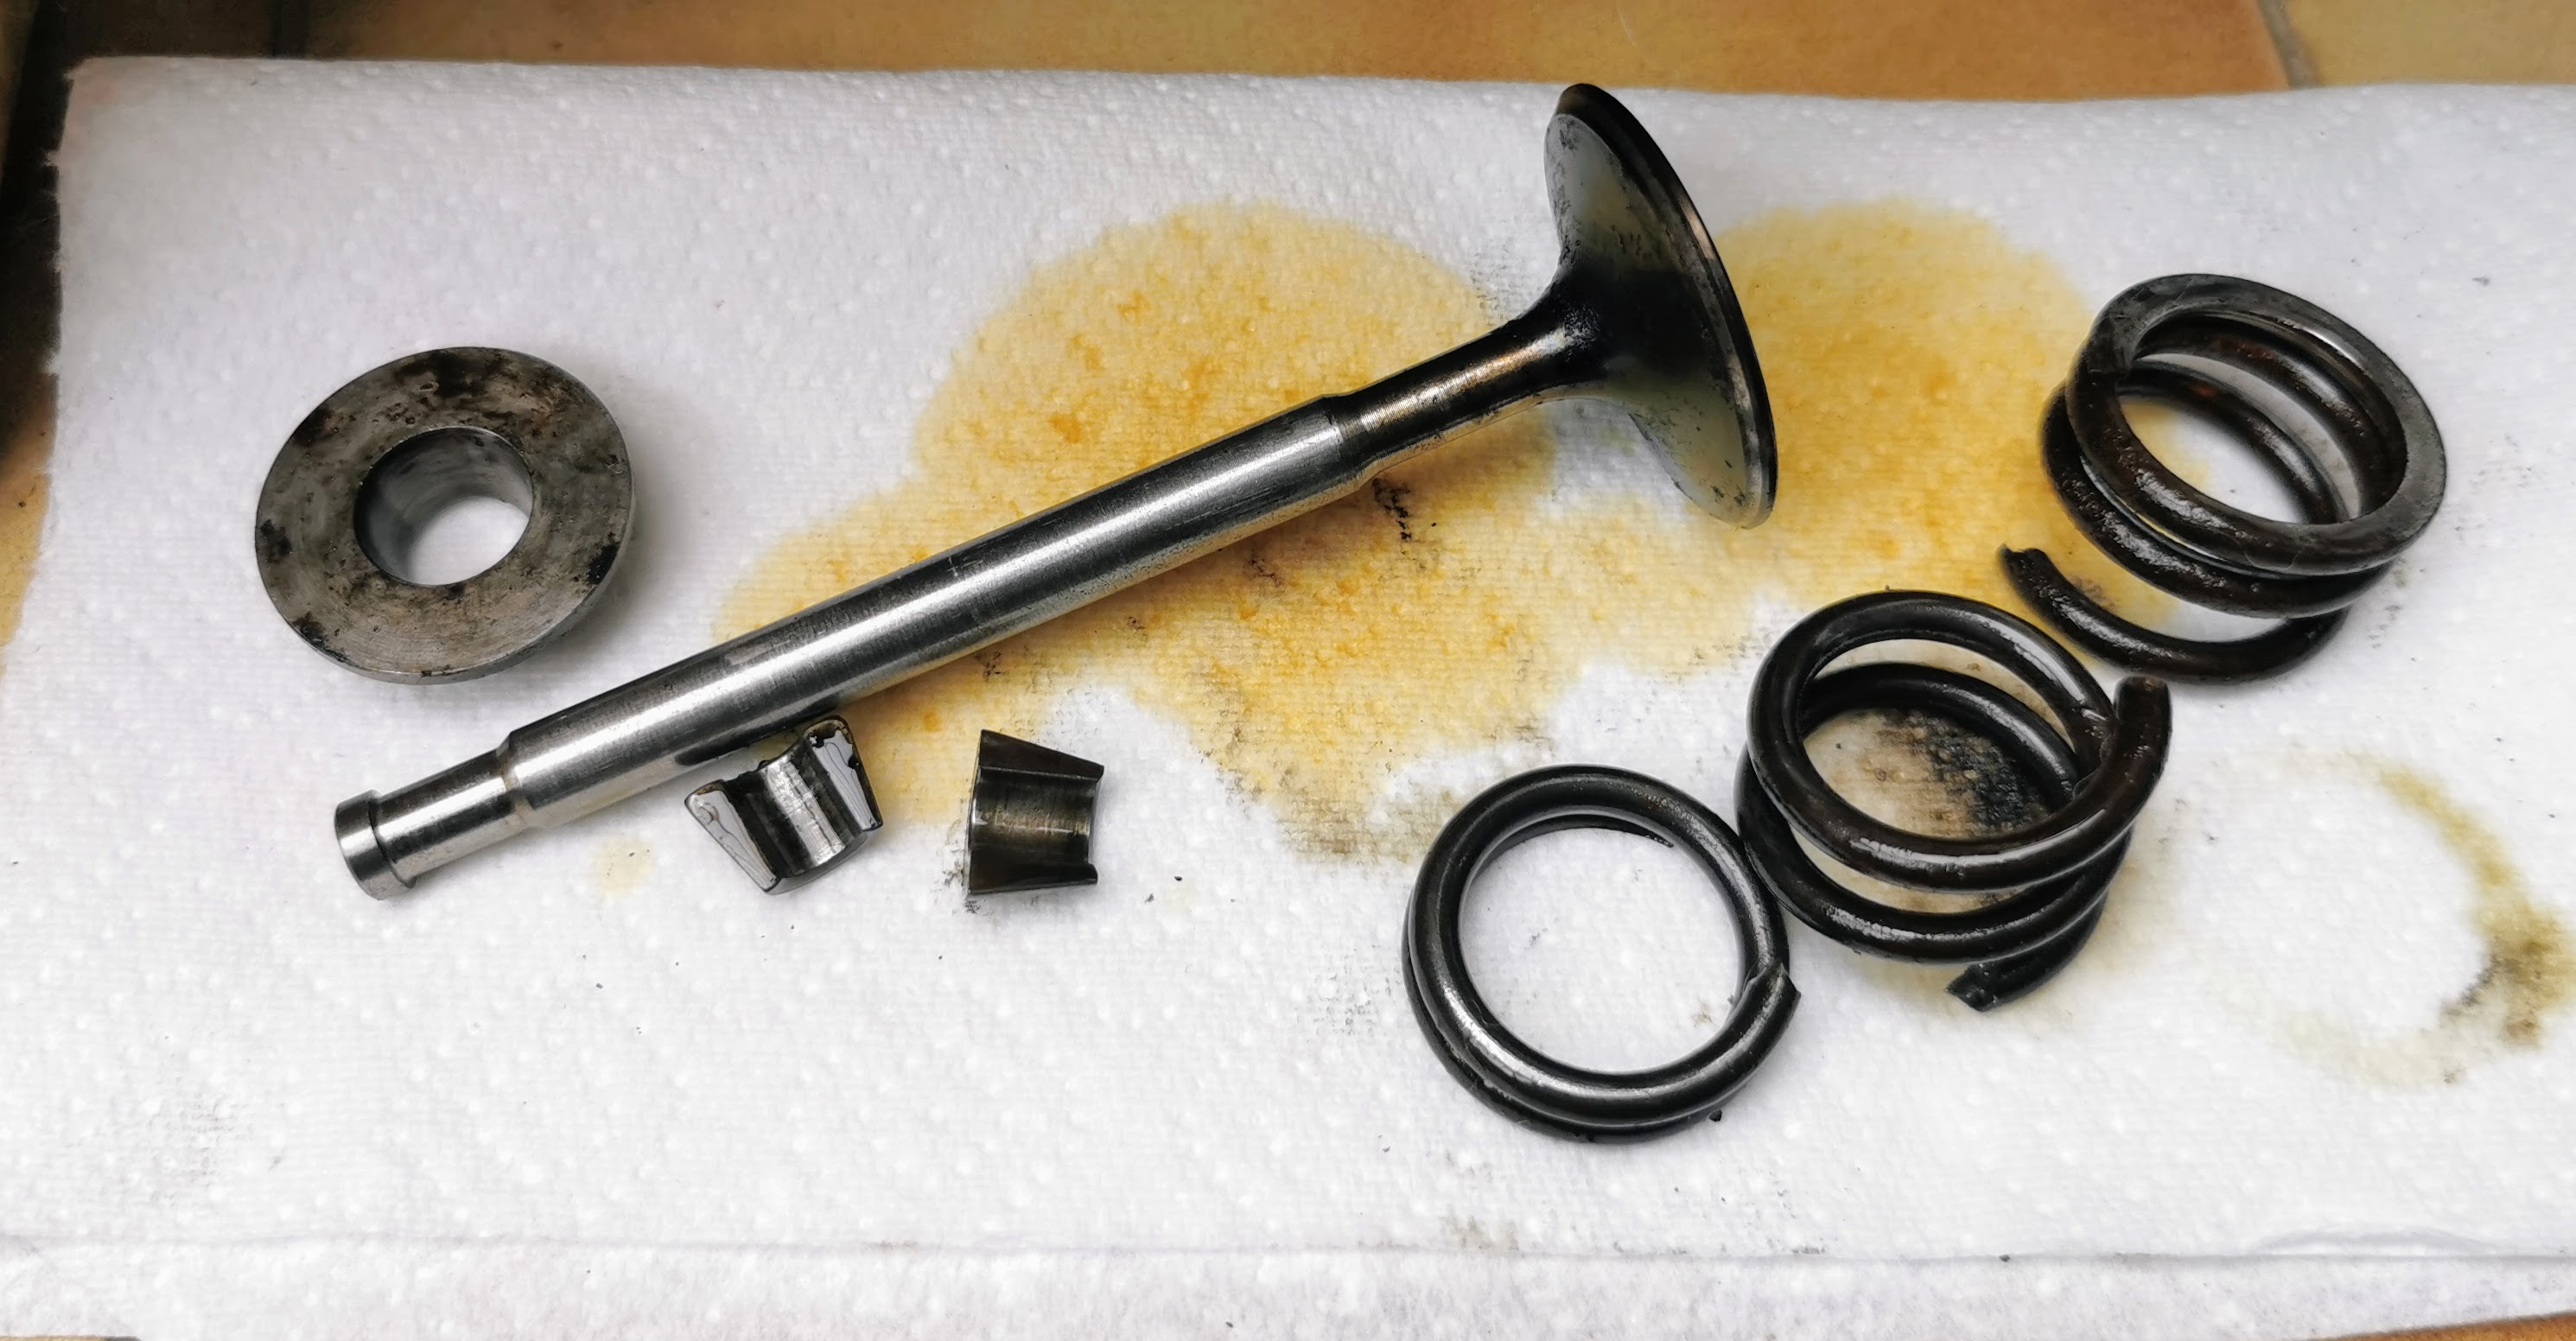
I never really found a smoking gun for the issues with number 5. The exhaust valve (as they all were) definitely had a fair amount of pitting on it and the seat was a little dirty, but nothing severe enough that I would have expected it to result in a reading of zero on test. My best guess is that there was a chunk of carbon in there or something which was dislodged when things were disturbed as the head was removed. I flipped and flopped a bunch of times over whether there was a really tiny bend to the stem of the intake valve, as it seemed like the head was slightly off concentric - though think that's just an imperfection of how the head was ground as the actual contact area looked to be uniform. As with the intake valve from number 2, I didn't trust it so had decided that it was getting replaced right from the outset. It didn't take me long to come to the decision that in the interests of long term reliability that a whole new set of valves was going in. All of the exhaust valves were quite badly pitted and were just at or nearing the end of their lives. By the time I was in that far and had already replaced two intake valves as well...It seemed a bit daft not to just change the remainder as well while I was already in there.
I couldn't see any issues with any of the other valve springs, so just chalked that one that had broken up to being one of those random failures that just happen sometimes so they were left alone.
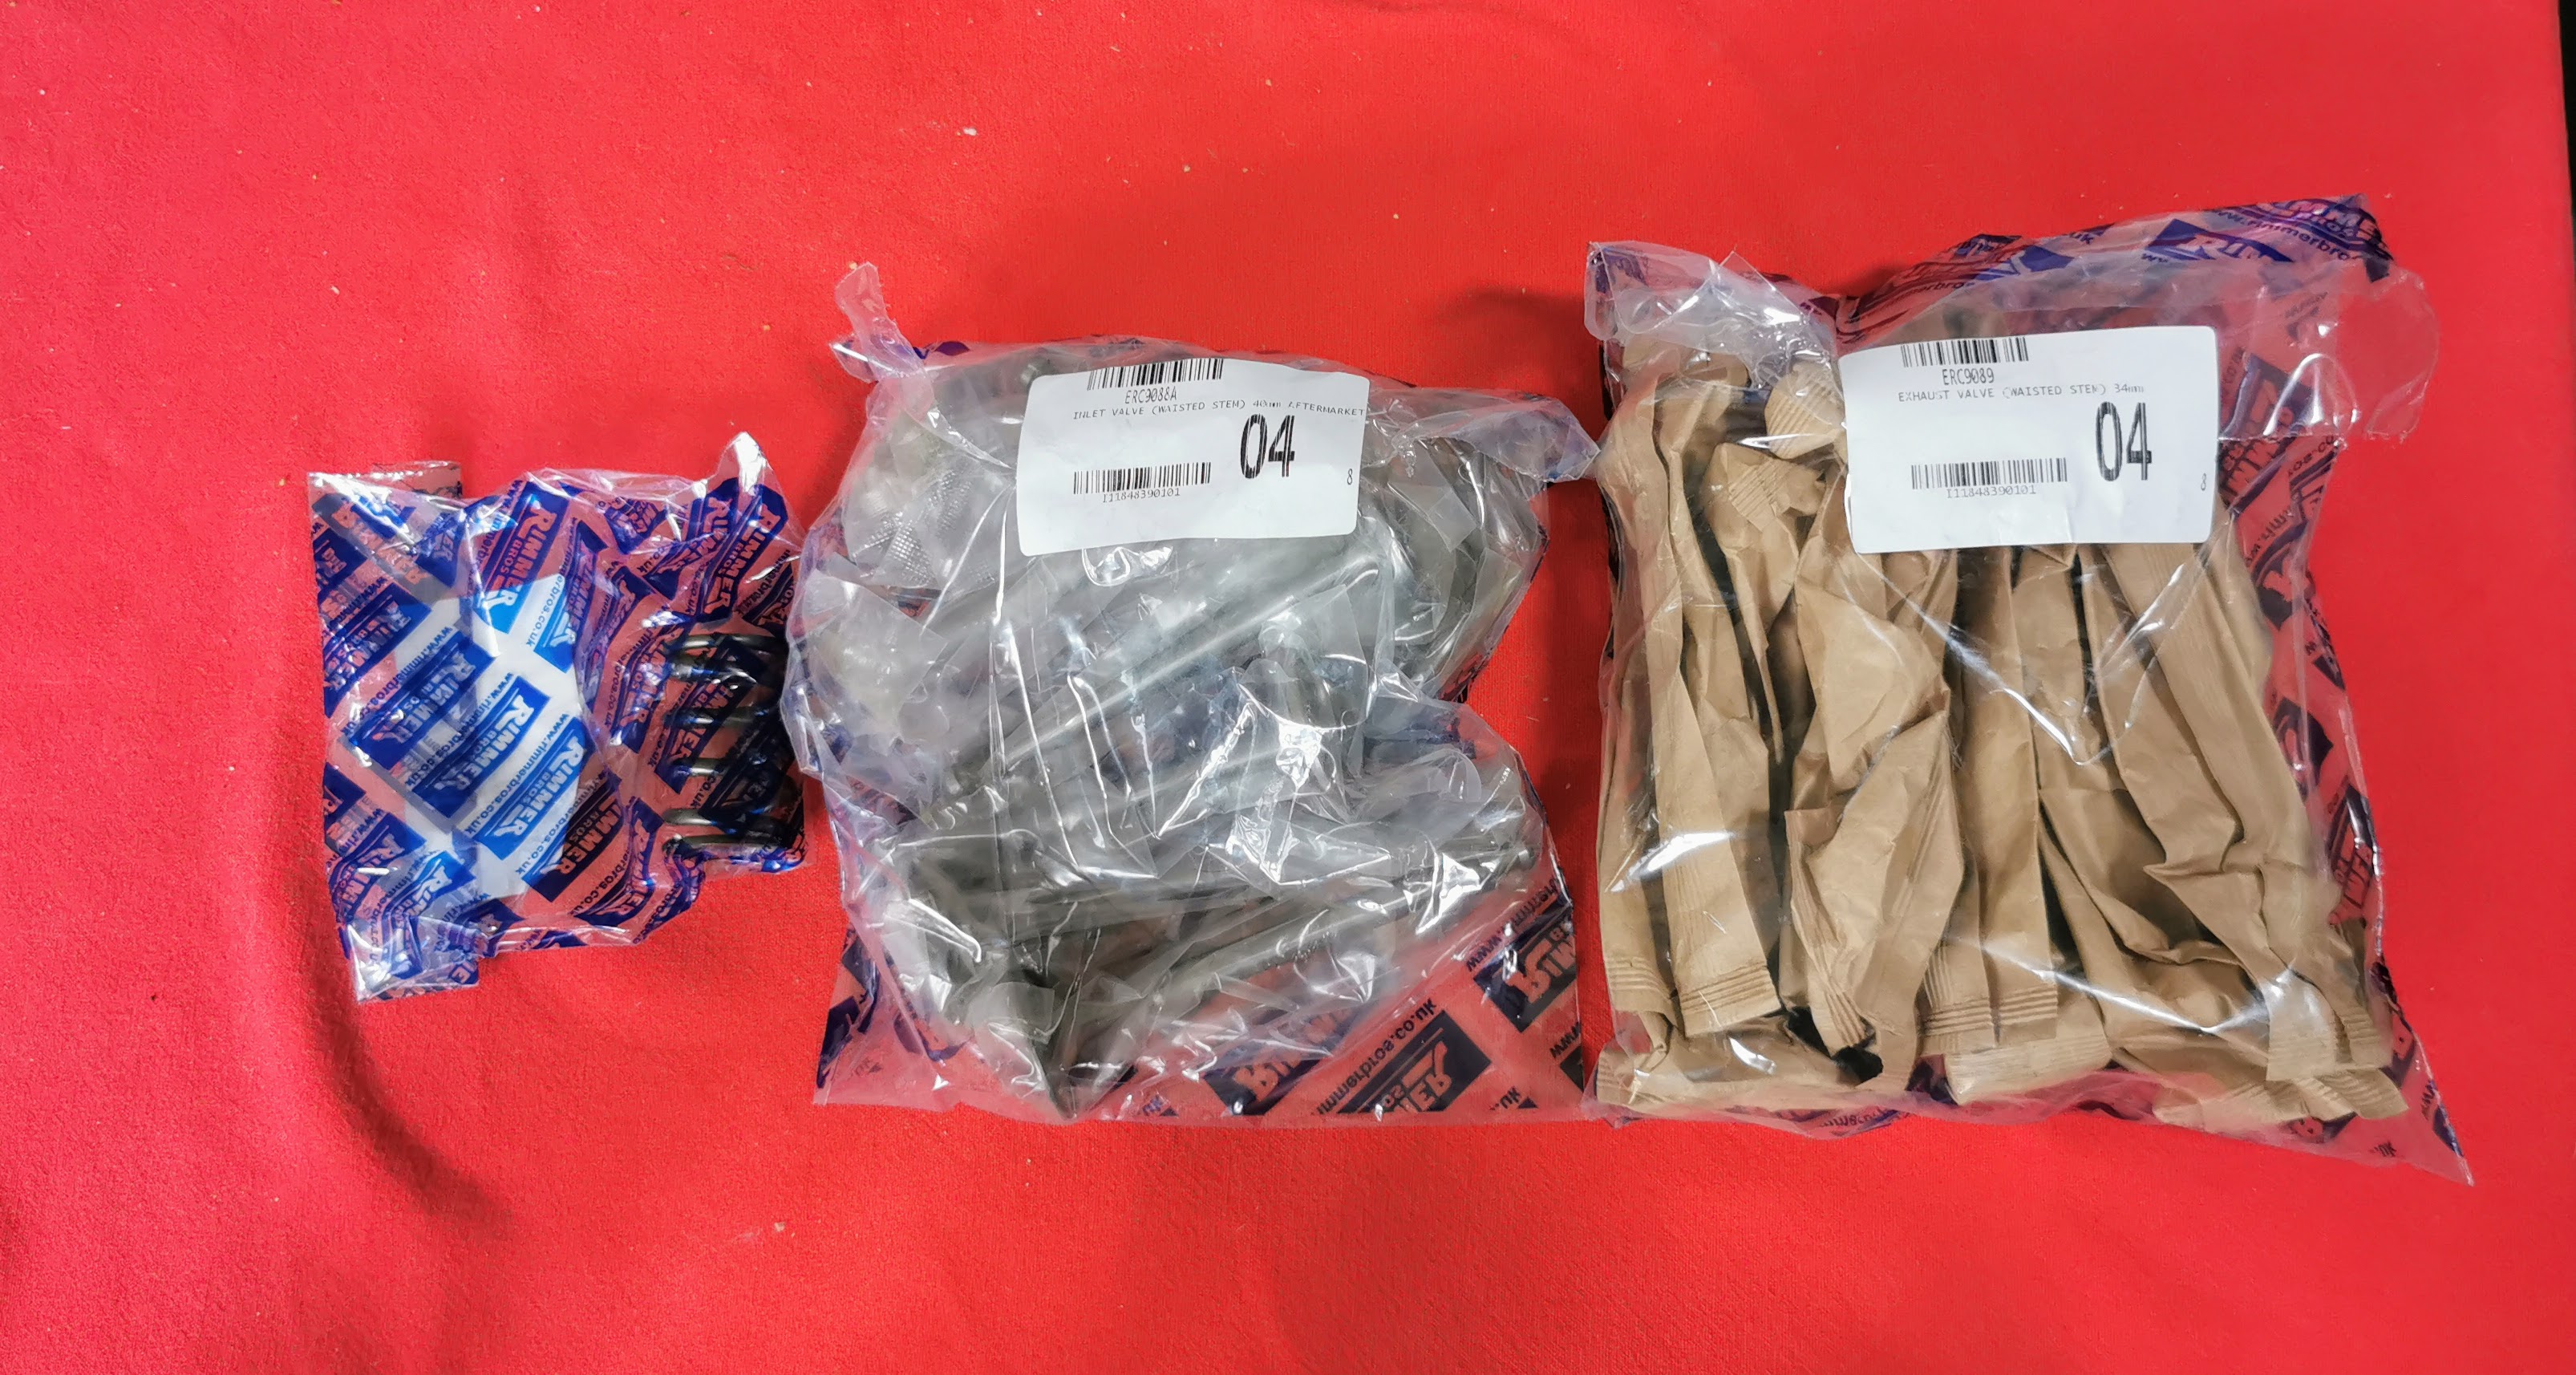
Given that finding parts for a lot of the oddball cars I own or have owned has tended to involve a lot of detective work, just being able to go to one website and order literally every component I've needed for this job has been quite a refreshing change. One new set of valves and a replacement for the broken spring ready to be fitted.
The heads were dropped off with Headline MK to be cleaned up and given a minimum skim to ensure they were properly flat ready for reassembly. I was really impressed with their service there, polite, efficient and very reasonably priced. Only a couple of days later the heads were back with me and ready to put back together.
I did have one brief panic during that process when I couldn't seemingly find one of the valve keepers - despite having gone to painstaking lengths to keep everything together, with all of the bits of each valve in its own clearly labelled, sealed zip-lock bag. Eventually I discovered that the aforementioned keeper was in fact staring me in the face.
After what felt like about three and a half years of lapping in valves, we eventually had two nicely reassembled heads with shiny new valves.
Goes without saying that those spark plugs were changed as well before we finished the reassembly process - just leaving them in place seemed a good bit of insurance against getting crud in the threads while I was doing this sort of work and they weren't in the way in any way.
Reassembly as the Haynes manuals so enjoy saying, is the reverse of disassembly. The target torque rating for the head bolts by the way is 65-70 lb ft, and it's recommended to increase to that in three stages.
After an hour or two the engine started to look a lot more like an engine again.
My old oil can was quite extensively used during this process to ensure that all of the valve gear, lifters, camshaft itself - basically everything - was thoroughly oiled up during reassembly.
I got to this stage before making the seemingly obligatory foul up in any job.
You see these little metal plates which clamp down on the valley pan cover, one at each end?
Yeah...I realised that I had managed to forget to fit those. Major facepalm moment right there. I can vouch for the fact however that it is possible, but REALLY awkward to install them after the inlet manifold. If I hadn't been so worried about damaging the gasket I would have just removed the manifold again - and to be honest with how much faffing about was involved if I were doing the job again now I would definitely have just pulled the manifold again. Lessons learned and all that.
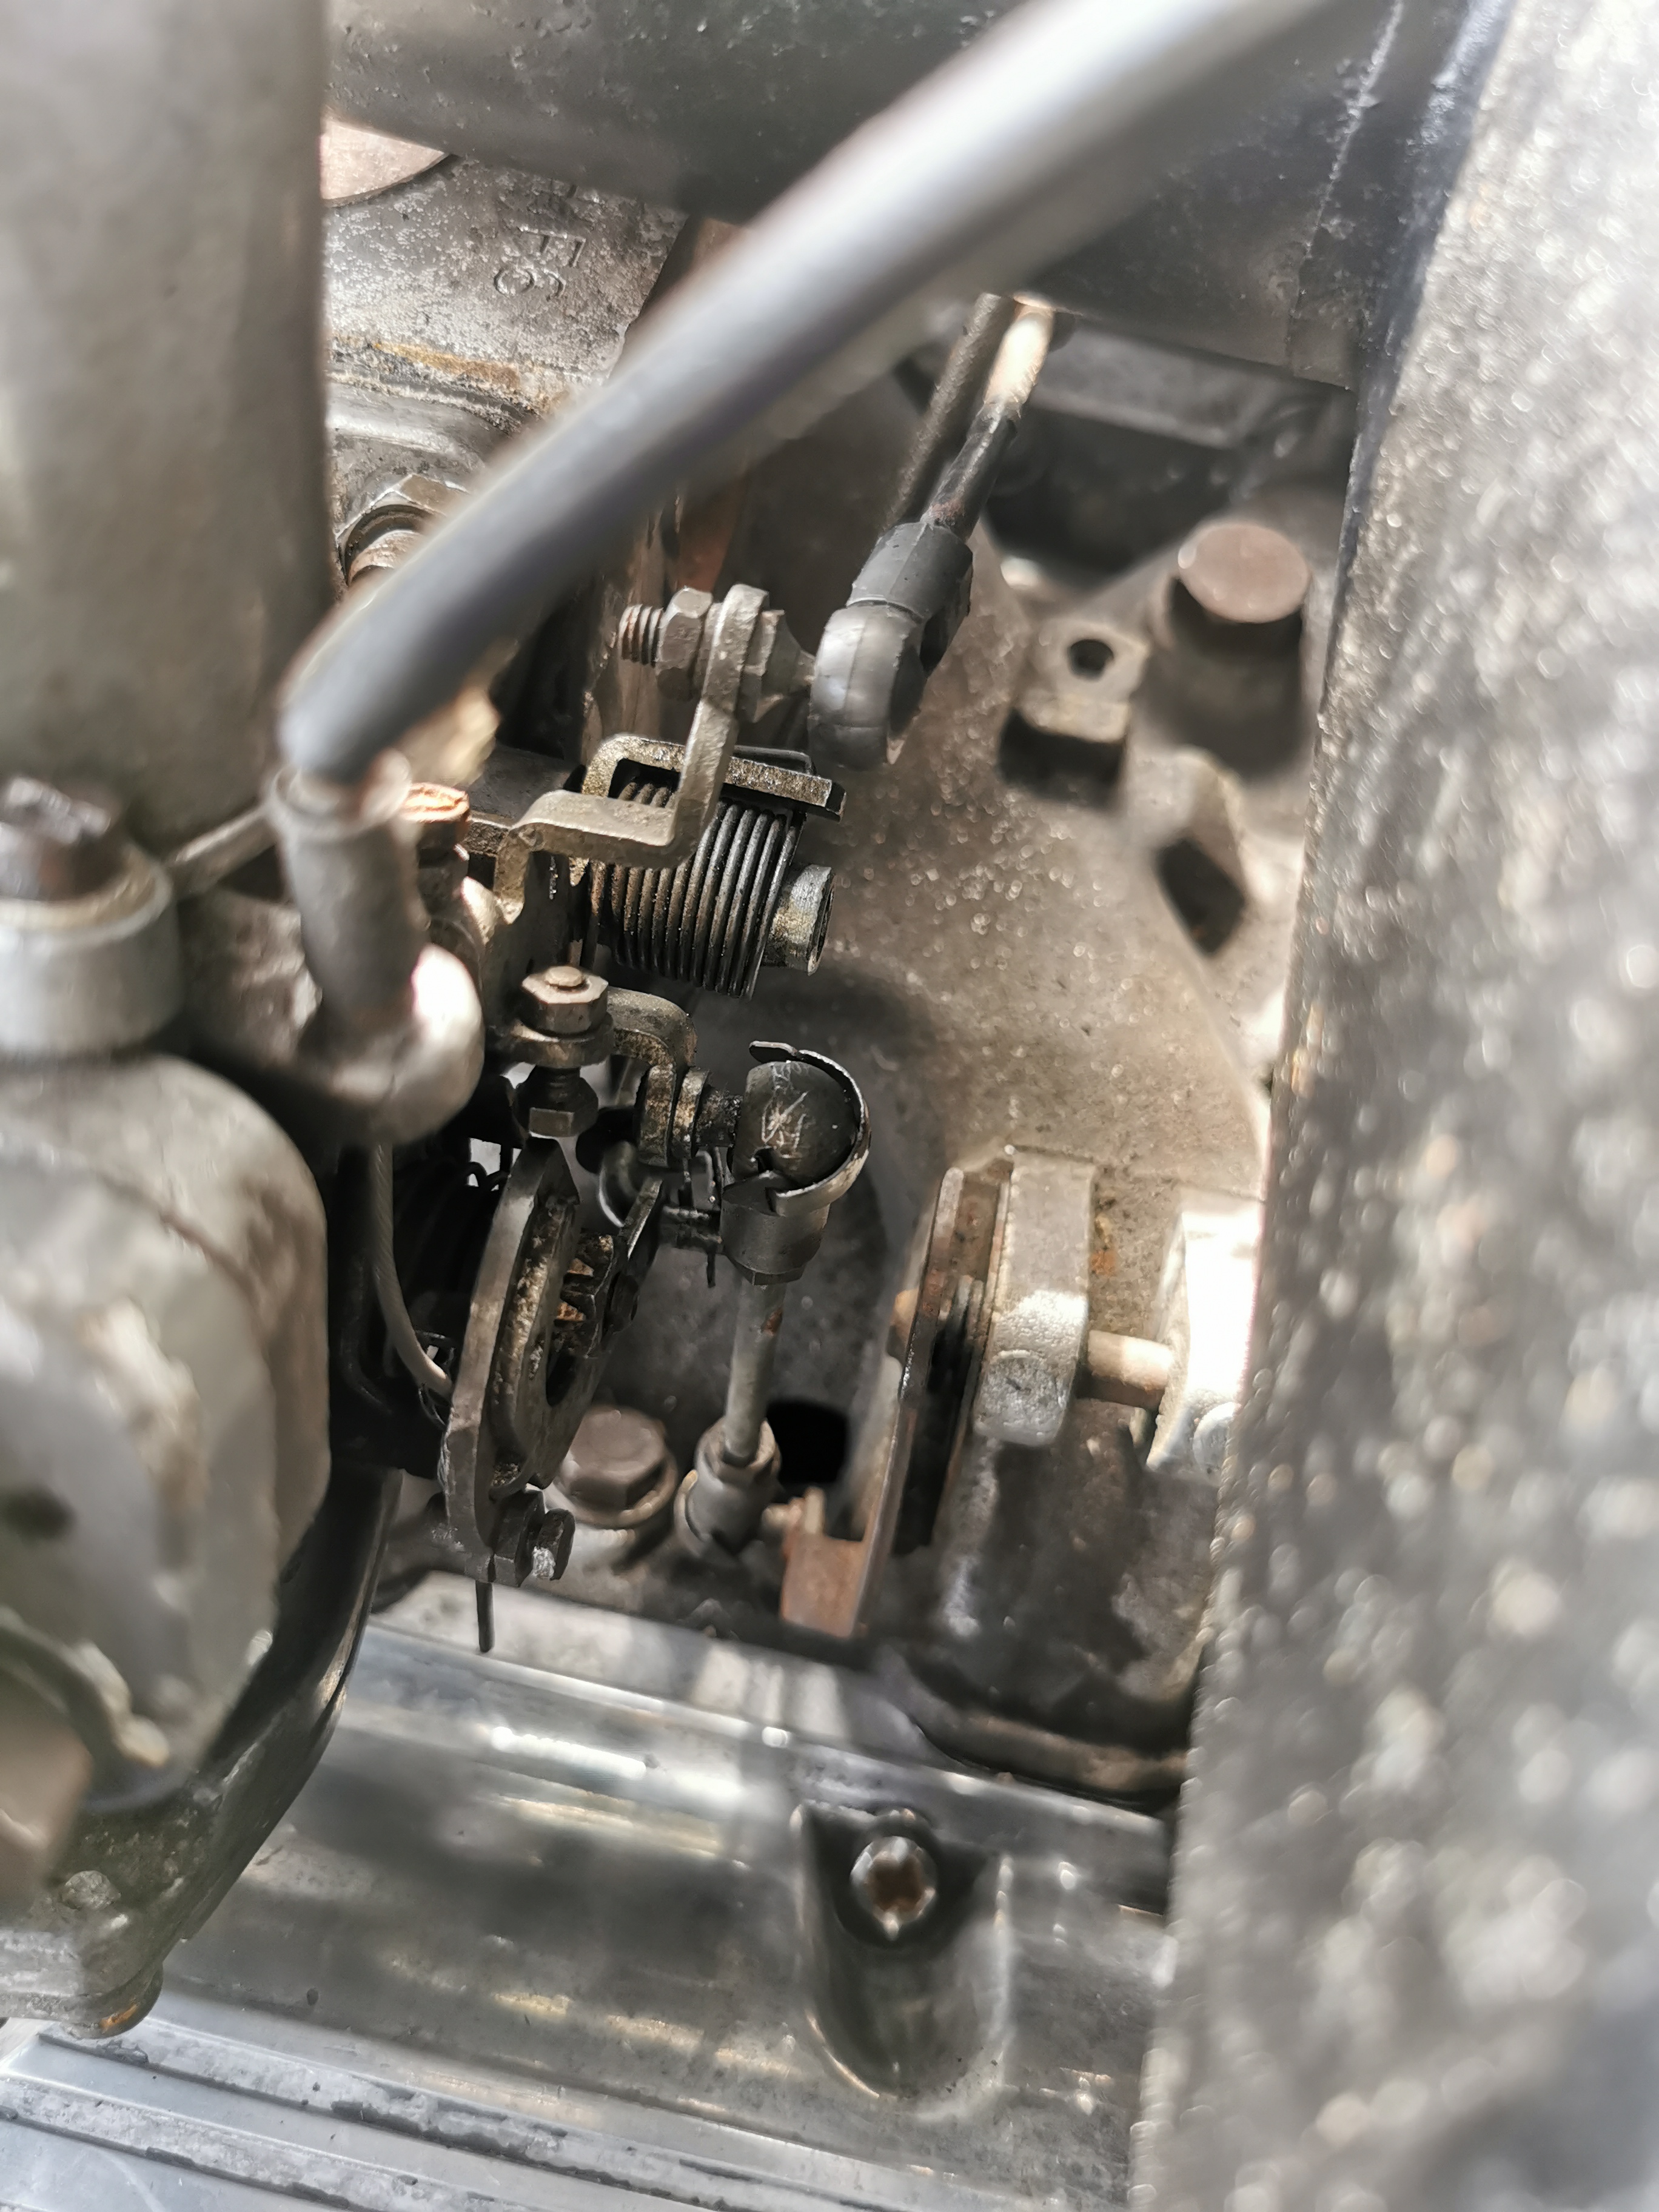
A not insignificant amount of swearing was involved in reassembling the throttle linkage assembly and getting the kickdown cable properly reattached. Nothing about it is particularly complicated - it's just fiddly and awkward to get to because the whole car is in the way - I do kind of wish Rover had just gone with a conventional cable rather than this Rube Goldberg nonsense. It's not the most unnecessarily overcomplicated throttle linkage design I've come across, but it's definitely in the top ten.
Soon enough, it looked like I'd never happened to it...which actually took a surprisingly short amount of time all things considered.
After that the coolant was refilled, oil and filter changed and I was ready to see whether I had made things better or worse. Initially I cranked the engine over by hand with the plugs out to make sure nothing was hitting anything it shouldn't nor making alarming clanking noises, and after that was successful span it over on the starter until we had oil pressure registering. Then the plugs were put back in and we went for an actual start to see what happened.
The results of that quick test can be found over here in a short video on YouTube.
That's actually not the very first start - as I was trying to keep tabs on watching and listening for a lot of things at the time and didn't have anyone I could borrow as a cameraman I decided to concentrate on just getting the car started safely - it had probably run for about a minute prior to that video being started.
It was a definite improvement - we had eight functioning cylinders for a start which was a definite step in the right direction. Still work to be done, the idle was far too high, we had a couple of coolant leaks from where hoses hadn't seated quite properly (the coolant lines are all quite old and will be getting replaced in due course), and the was a pretty biblical smoke show from the right hand exhaust manifold while the oil I'd spilled on it burned off...but it was at a point where I was safely able to move the car under its own power again and allow me to pull it forward and find out how many things I'd dropped underneath it.

Very little was actually the answer. One washer from a carb fastening nut (which I knew I'd dropped), the bolt from the dipstick support which I had also been aware of dropping, other than that just what felt like about a thousand old exhaust manifold gaskets. Not a bad result really!
A quick bumble around the block followed. Definitely running far, far smoother initially, though the car after a few minutes started to become very hesitant on light throttle openings, so we dived back onto the driveway to investigate.
Hmm...Well that doesn't look ideal...

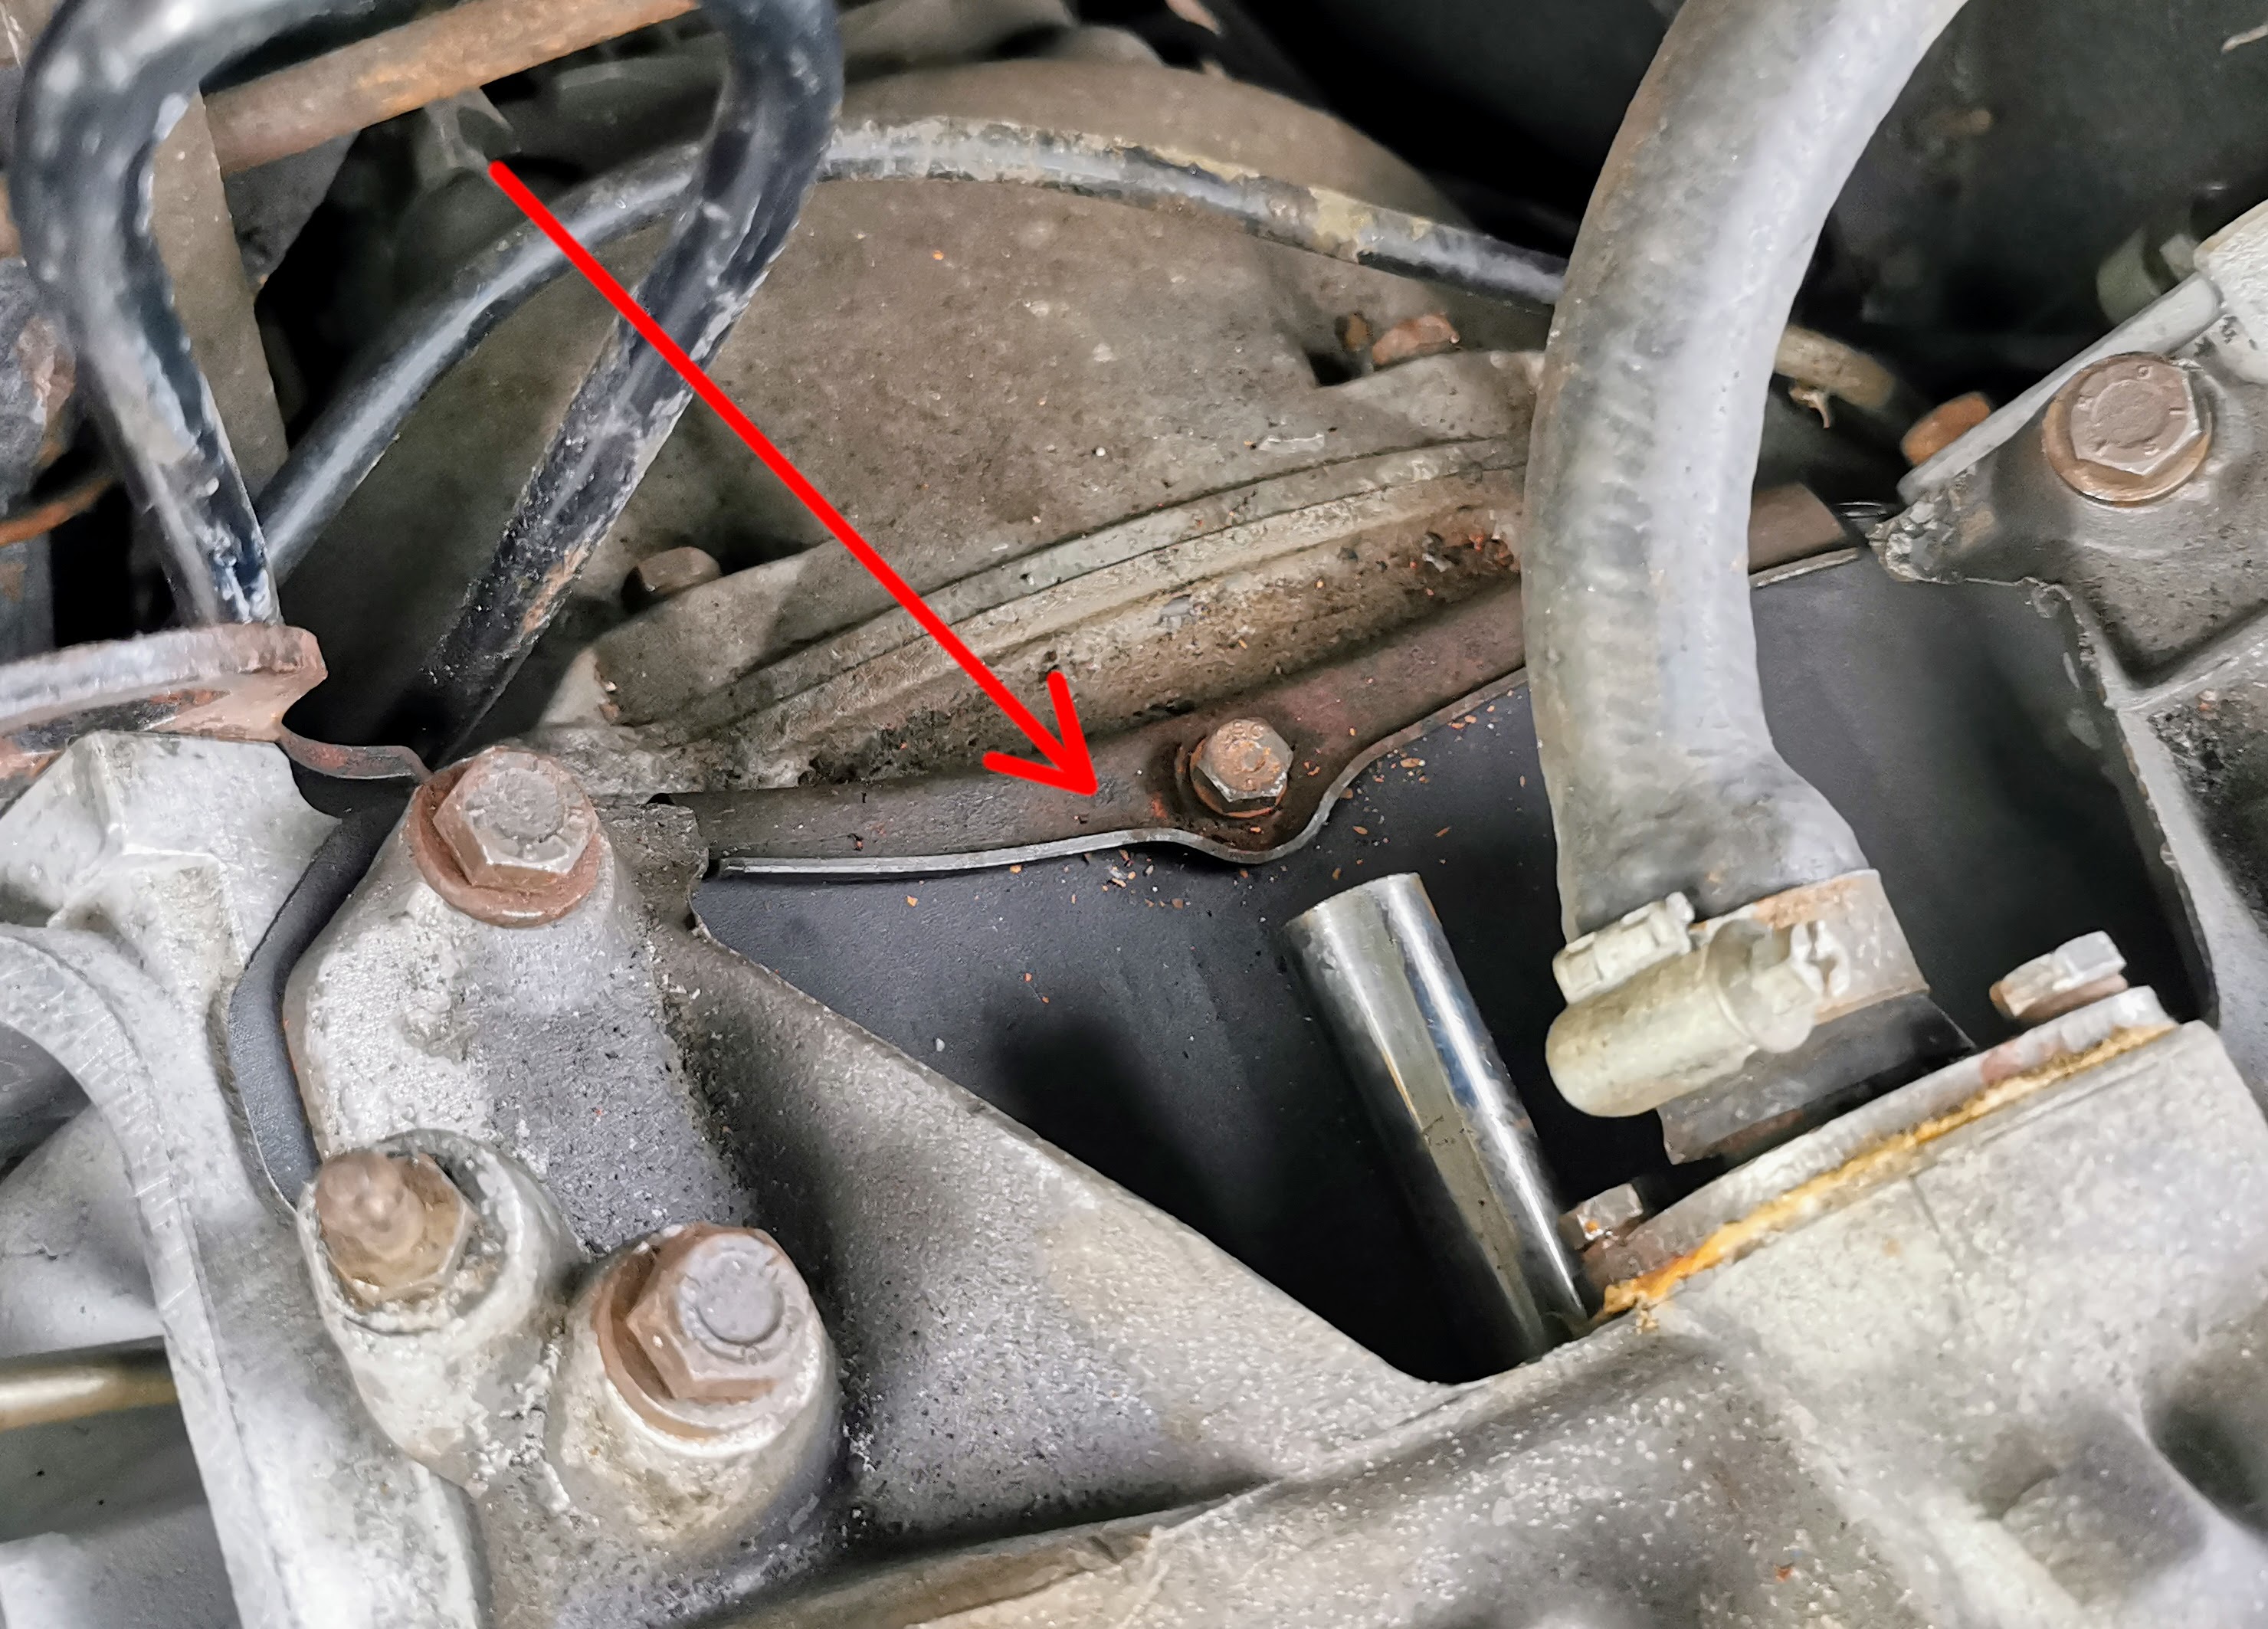
Initially I figured this was my leak from the top coolant hose having returned, but quickly realised it was actually petrol pouring out of the bowl vent from the offside carb. Yep, that would explain the lumpy running as it would also have been dumping quite a lot of excess fuel straight into the intake. This is why it's really important to ensure the drain tubes on those ports are properly fitted as it meant this harmlessly drained down onto the ground rather than dumping it over the top of the hot engine.
The photos below highlight the lines that I am referring to. These lines being missing will not impact the running of the engine, but they are an important safety device.

Gently tapping the fuel inlet to the carb in a highly technical manner with a screwdriver handle restored it's continence at least temporarily. In fairness that poor carb had been sitting upside down in the boot for the last couple of weeks so it was very well within its rights to be a bit grumpy with me.
The above work was sufficient to get the car into a state where I was able to take it for its first run actually to a destination - albeit about two miles away - to get the tracking properly set. There was clearly far too much toe-out applied which made the car incredibly wayward. The guys over at The Garage in Wolverton got that sorted out in their usual efficient manner.
![]()
The only immediate issues which presented themselves were a slightly sticky thermostat initially from cold, and a tendency to stutter under any real throttle pointing at possible fuel starvation.
I immediately changed the engine oil and filter again as soon as I got back from that trip based on the disgusting state of what was originally drained. This was still slightly cloudy which led me to believe that was the right call, but had remained orders of magnitude better than what was originally drained. I will probably change it again once a couple of hundred miles have been covered.
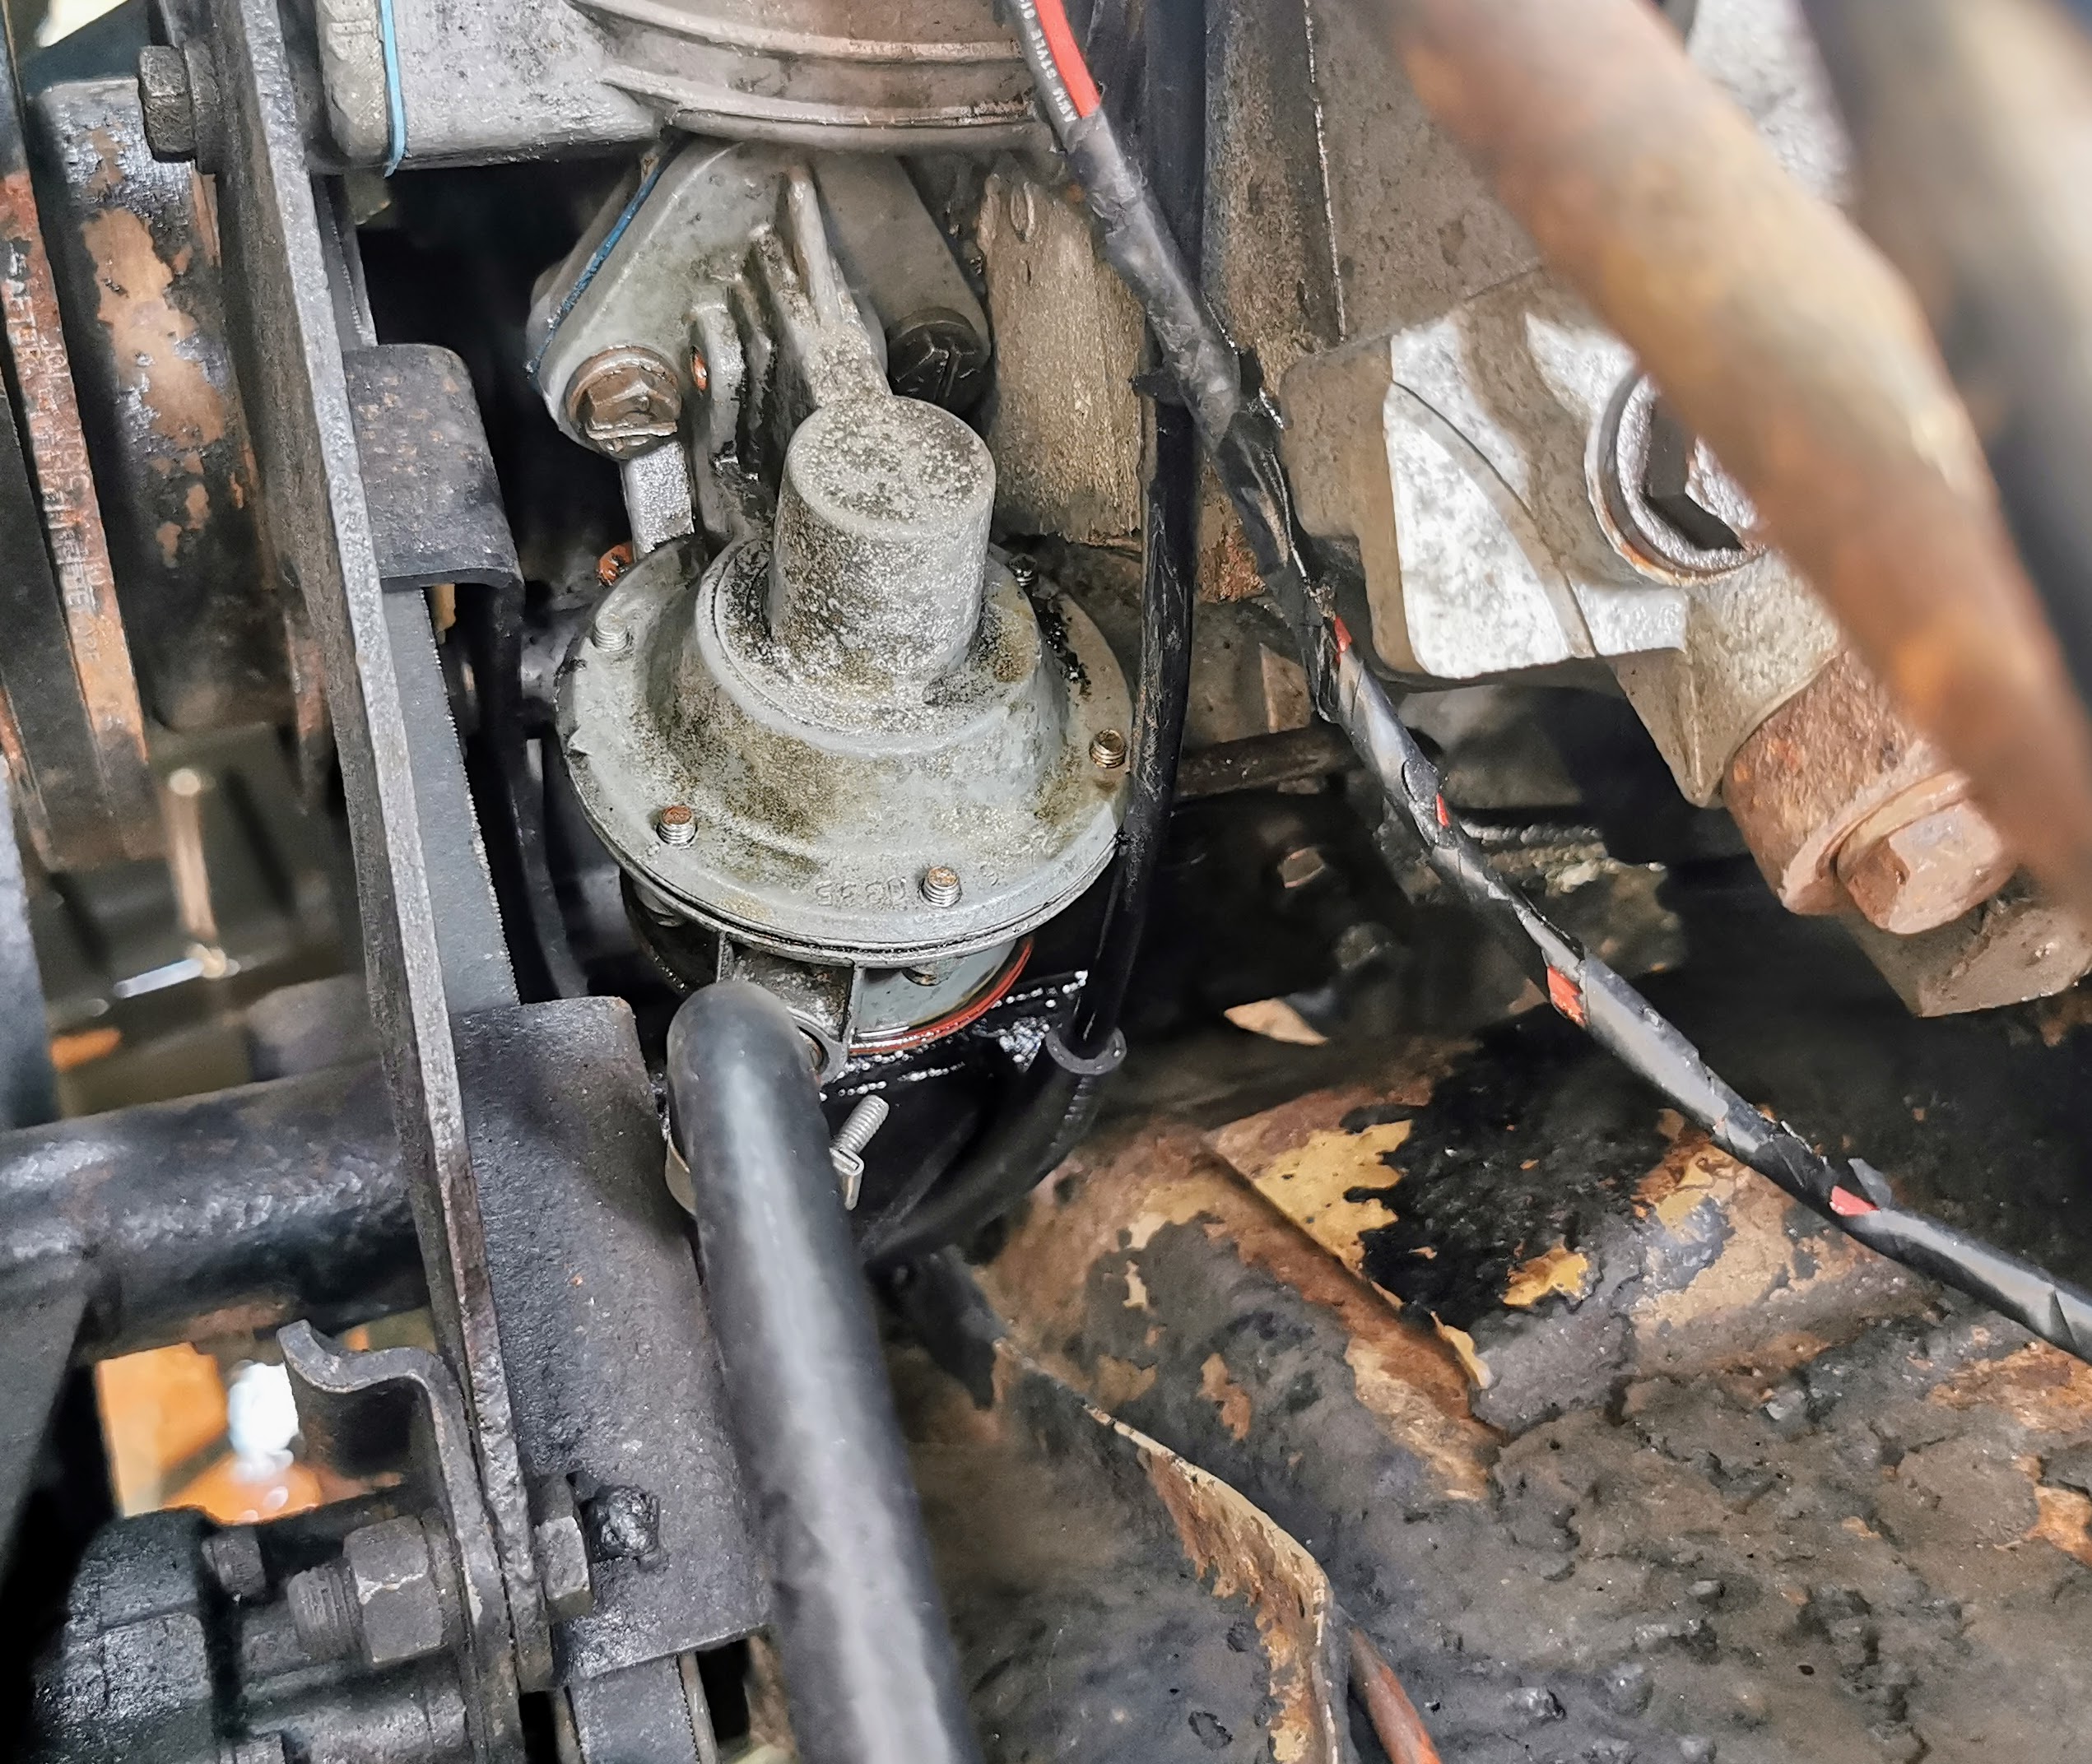
The fuel system (unsurprisingly) has so far proven the most grumpy component of the car about being awoken from its slumber.
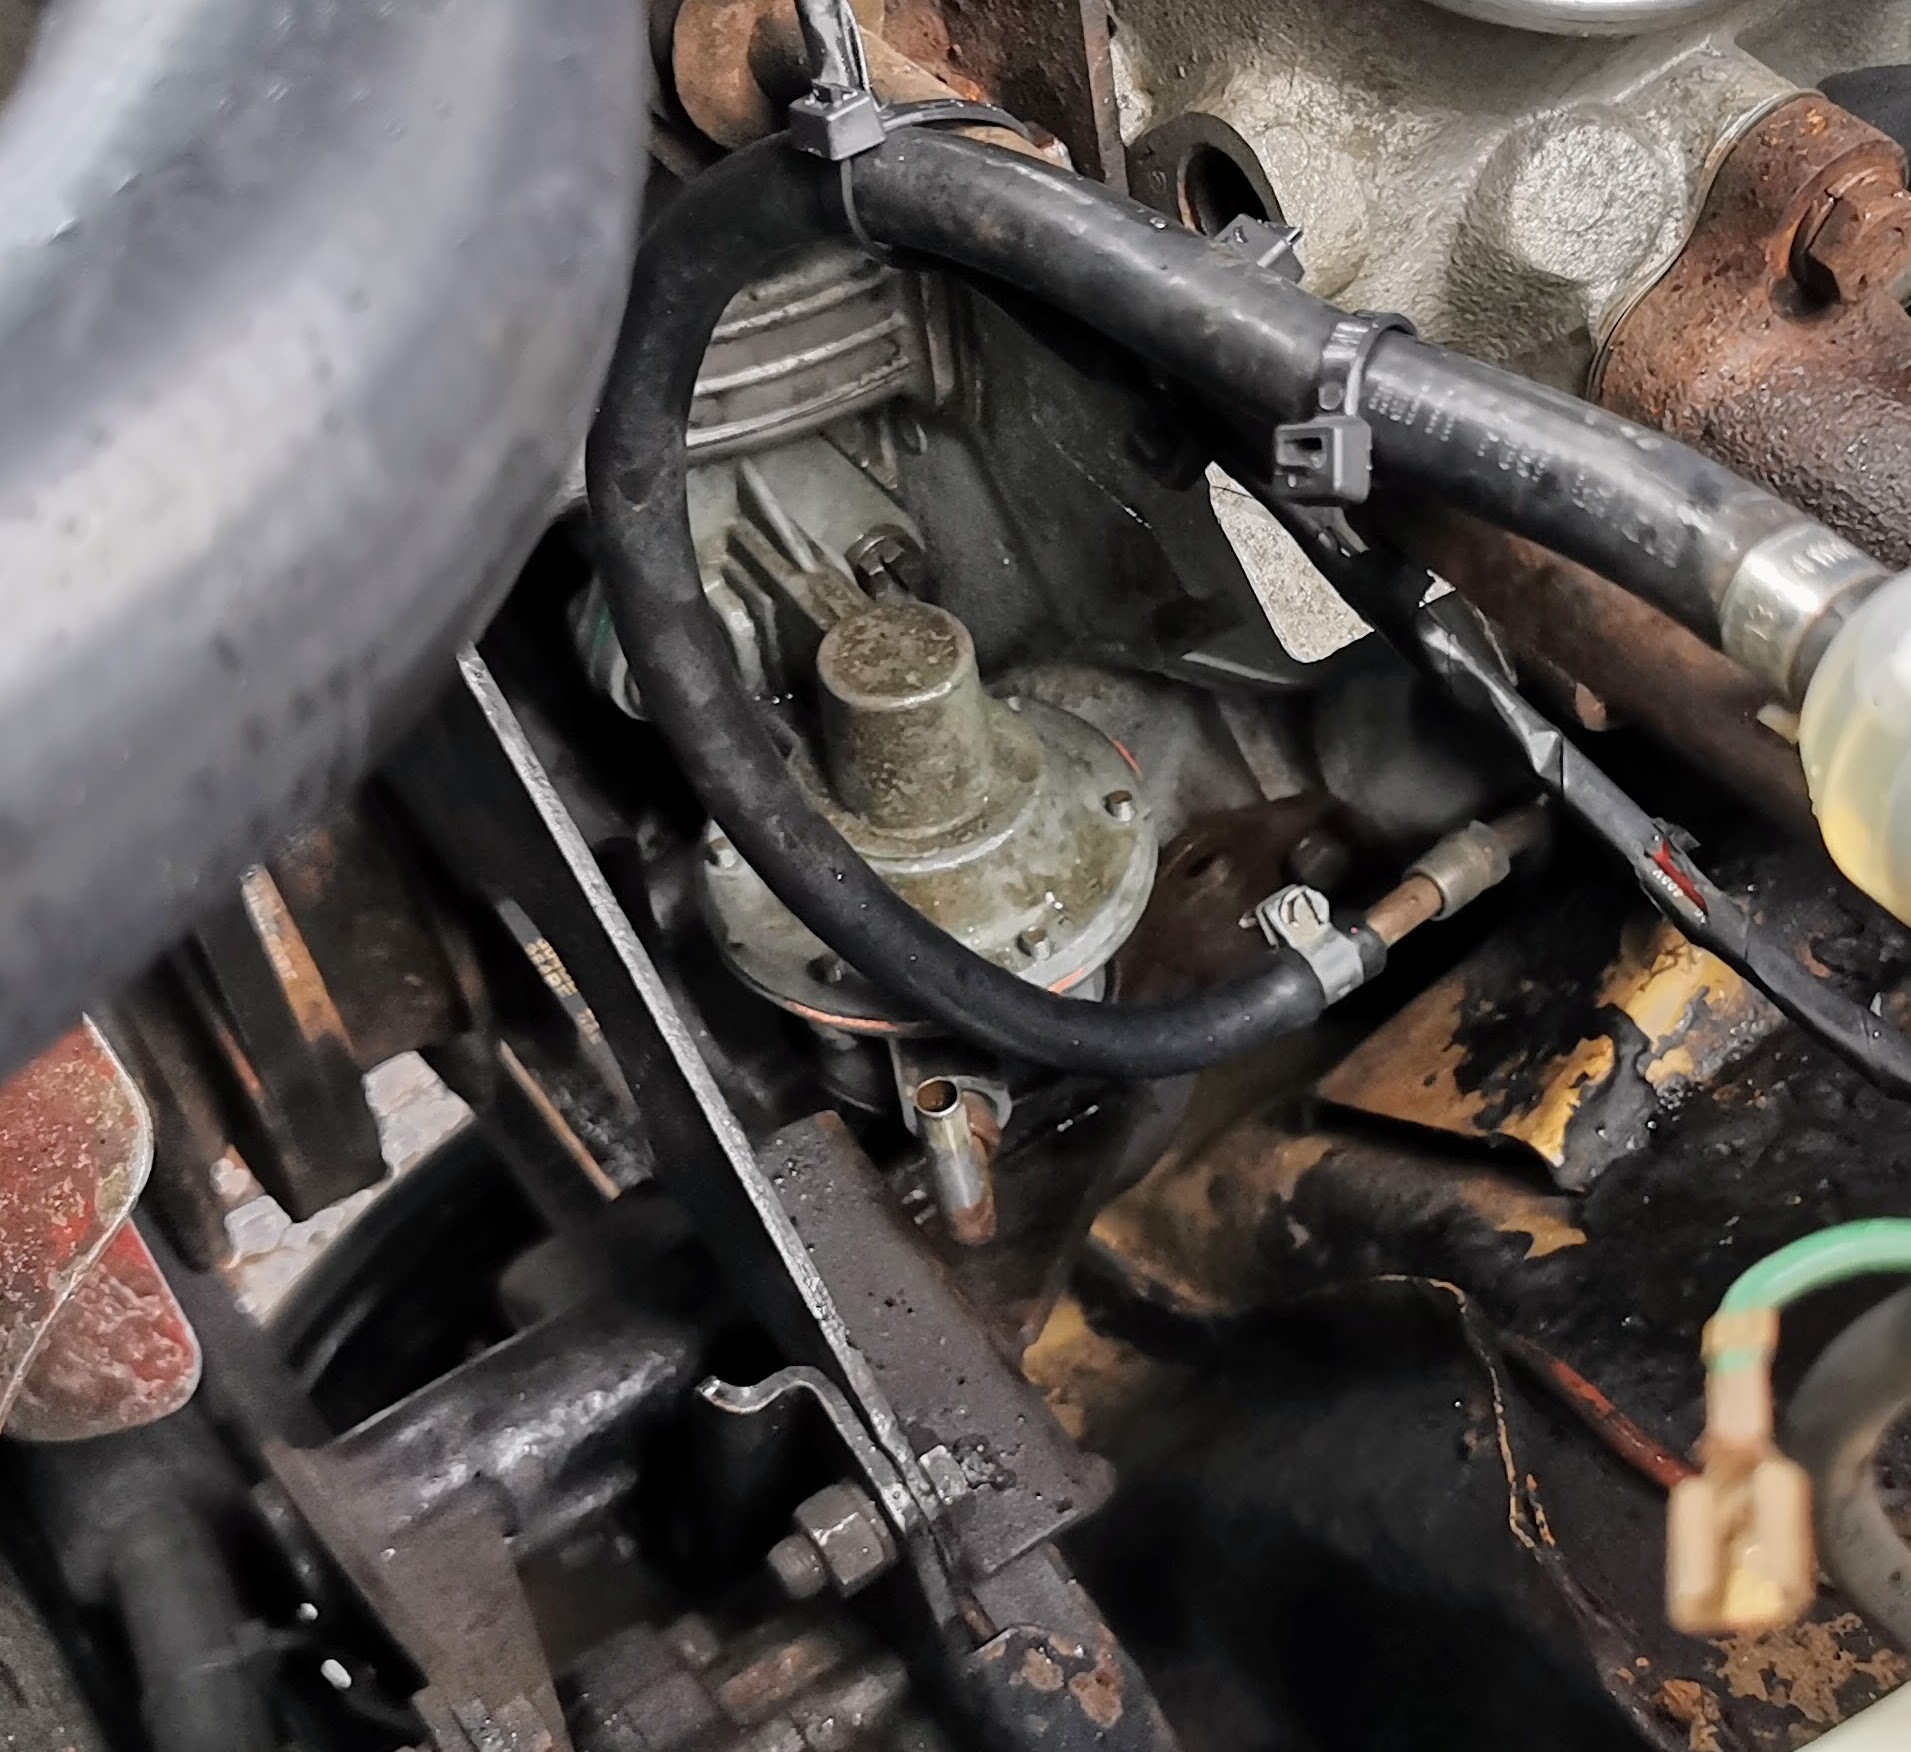
I ordered a rebuild kit for the mechanical fuel pump very early on as I knew that it would need the diaphragm replacing to ensure future compatibility with the now omnipresent ethanol content on UK fuels irrespective of what condition it was actually in. That was definitely a wise call as once the pump was dismantled it became very obvious that the original diaphragm was imminently about to fail.
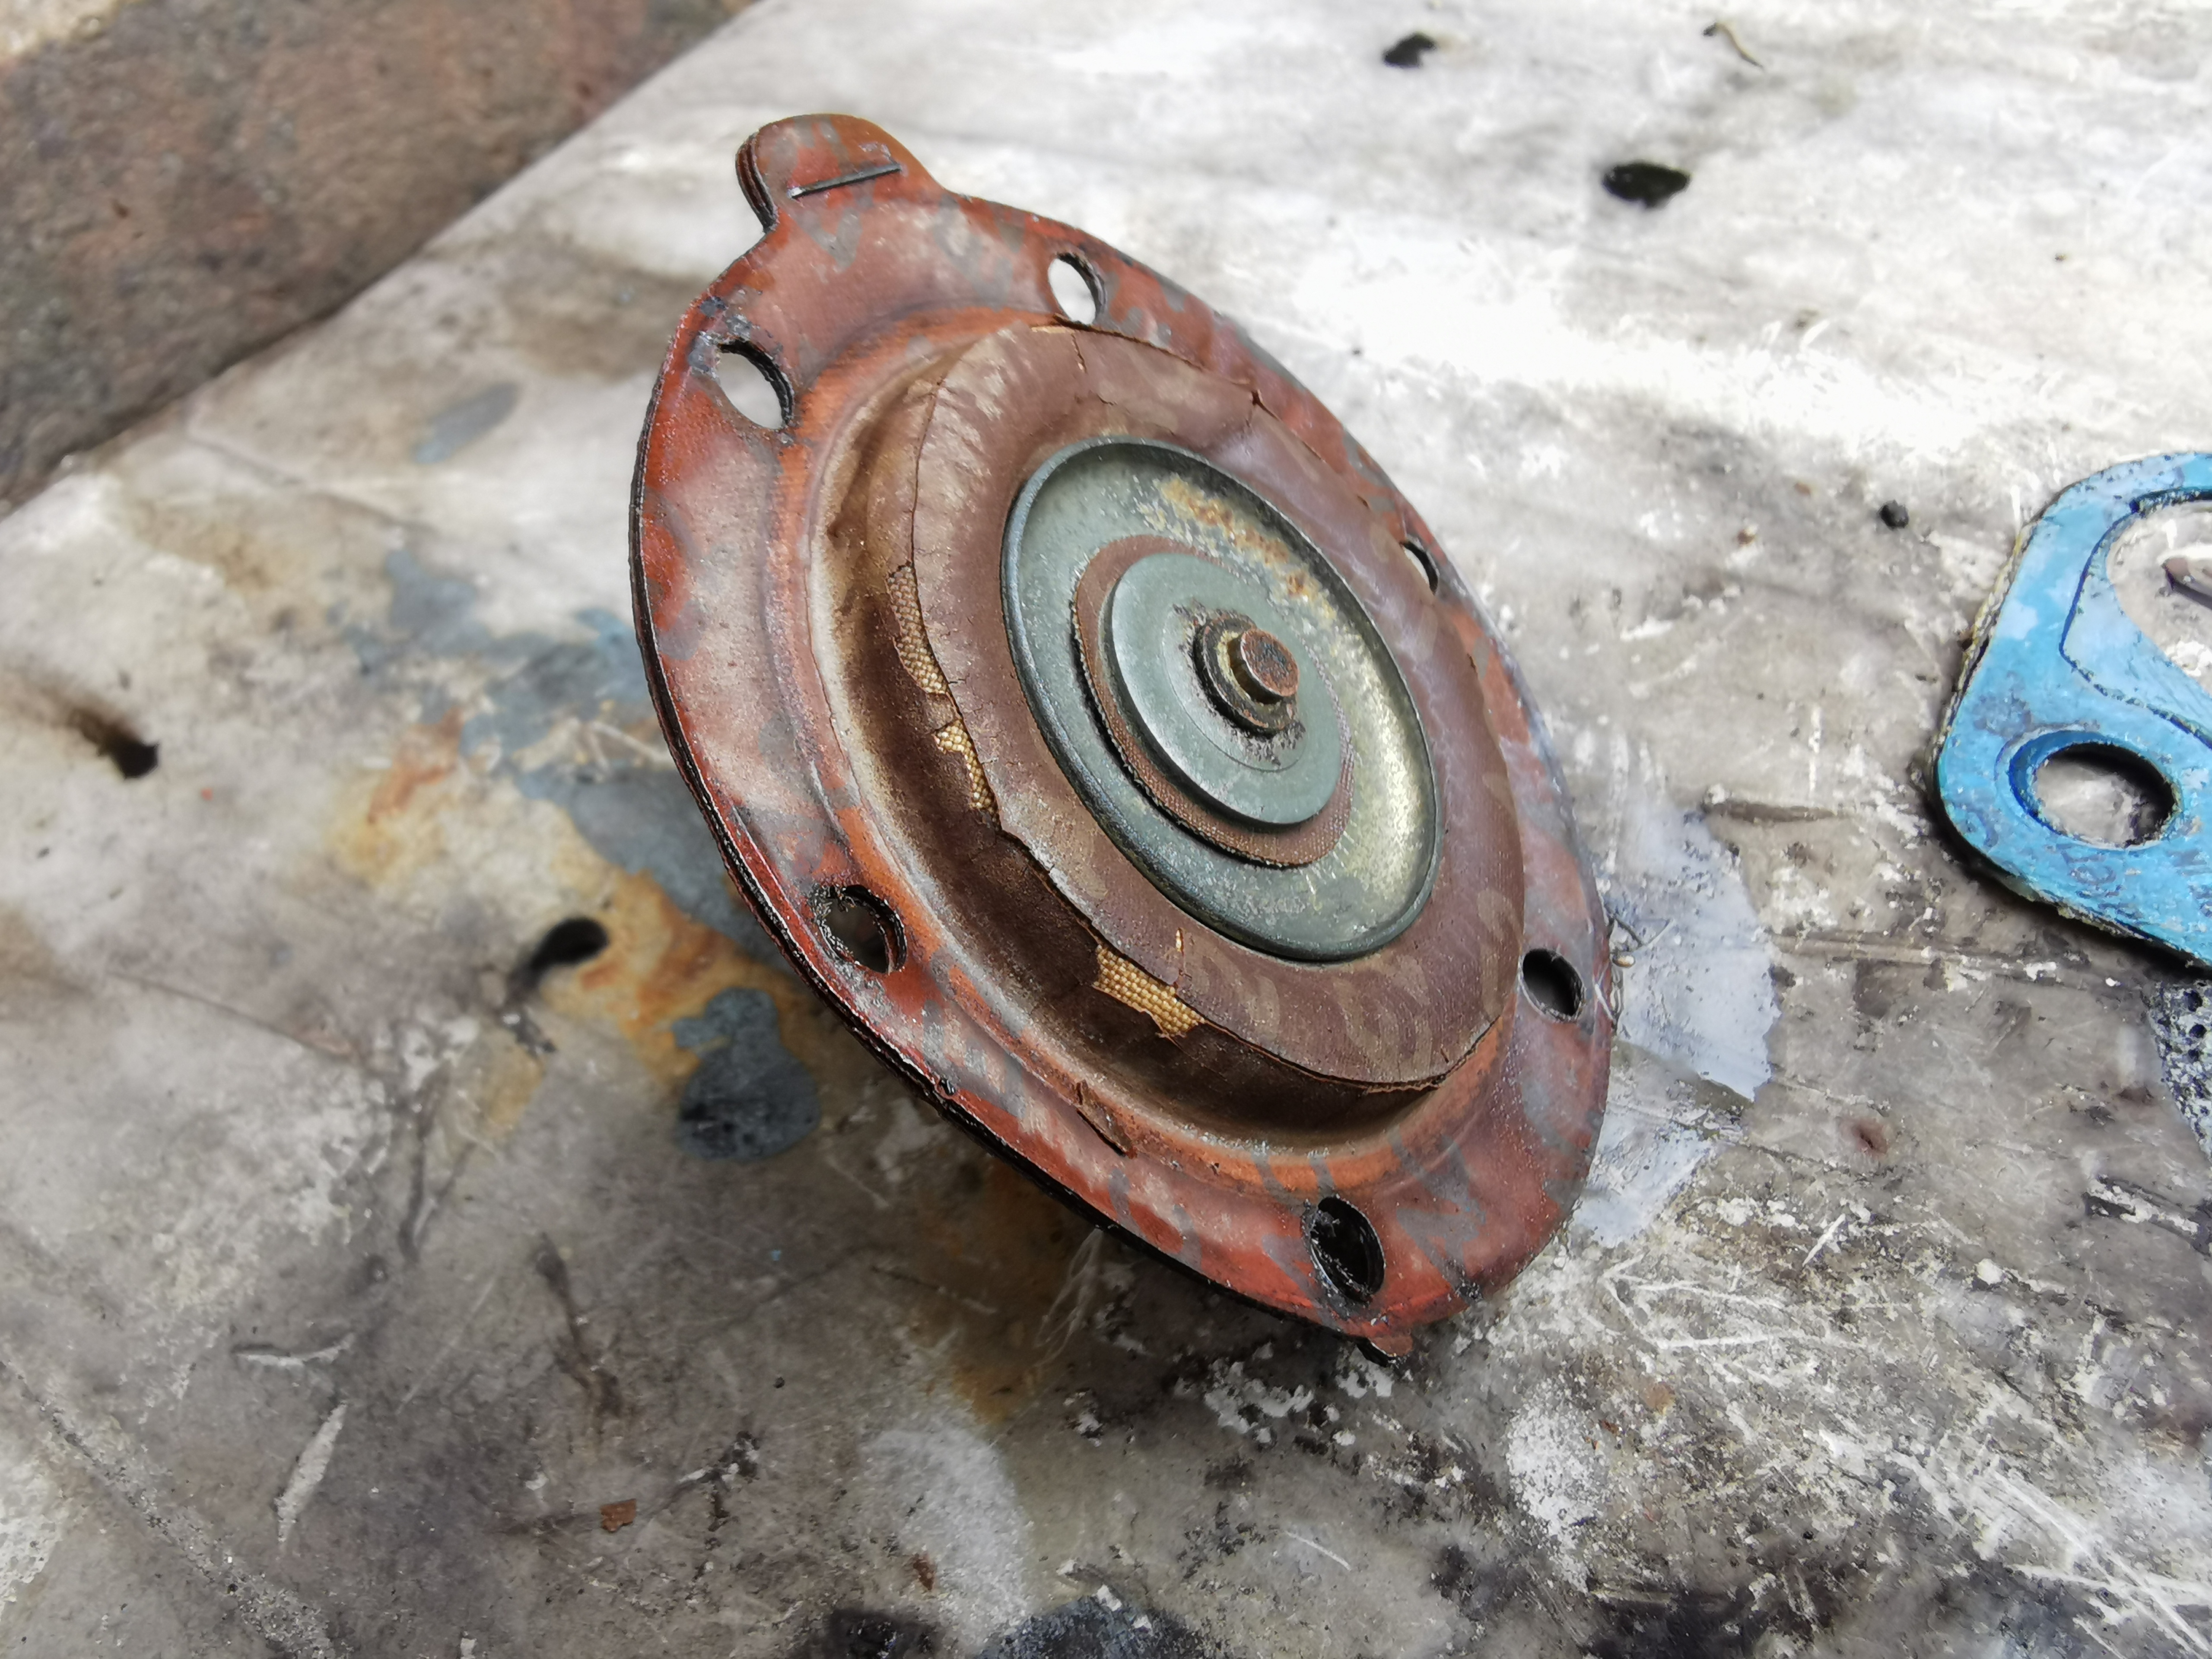
The valves were also replaced, along with the oil seal on the rocker shaft as these parts were all supplied in the kit.
The pump worked well after that...for about an hour of run time, at which point it ceased to provide any meaningful pressure whatsoever or move any volume of fuel. This clearly wasn't going to be able to keep up with the thirst of a 3.5 litre V8.
The pump was removed (again) and taken apart (again) to try to figure out why it was playing up. The likely problem was traced when I discovered a single strand of dog hair firmly wedged through the middle of the suction side check valve. I blame my "helper" who was watching with great interest while I was rebuilding the pump.

Yes, she is precisely as much an agent of chaos as that expression would suggest.
The fuel pump was reassembled (free of dog hair this time) and refitted (again) and seemed to be performing well. Though it did become apparent after sitting overnight that it was weeping from the lower cover.
I was able to get a stubby wrench in there to tighten it up just a little which (at least appeared) to stop the leak. With renewed enthusiasm and confidence I set out on another short run.
That went well...
Which was quickly traced to - you guessed it - the fuel pump having completely lost interest in pumping at all. Previously even when it was playing up it had still been providing a trickle and you could nurse the car along, however it had now completely and utterly died.
Thankfully a friend lives locally and was able to be on scene to assist me in less than ten minutes - we pushed the car around the corner into a convenient supermarket car park (which nearly killed me!), and we then made a dash the five minute drive back home to grab an electric pump, throwing together an extremely sketchy get-me-home solution.
Power was grabbed from the starter solenoid connector (there are surprisingly few readily accessible sources of 12V under a P6 bonnet I found!), requiring a six-step starting process - Run pump to fill the float bowls, disconnect pump, reconnect starter, start engine, disconnect starter and reconnect fuel pump.
The ground was hooked up by the highly technical solution of loosening the ignition coil mounting bracket a bit, smooshing the wire under it and tightening it back down.
While it looks kind of precarious, the pump itself was actually pretty firmly wedged in place where it was. If I had been slightly less rushed I would have grabbed some zip ties so I could have secured it better, but I was in a hurry for obvious reasons - which is also why the wiring used was literally just random bits that were laying around in the garage used as they were, without any real thought to routing or anything behind making sure things were going to stay clear of the exhaust. It should be noted that this was literally intended for a five minute drive back to base. I had called recovery, and they were estimating a 2-4 hour wait. If I'd known they would actually have been on site in less than 45 minutes I'd just have waited for them. Big thanks to the guy for being so good about it though - we'd literally just got the engine running as they turned up - I'd asked for the dispatcher to contact us before anyone was actually sent to us as we were going to see if we could get the car restarted - they never called back.
Anyhow, we made it home without bursting into flames just fine. Just before the heavens opened as well.
Suffice to say, with it having caused trouble yet again the decision was made that this mechanical fuel pump was to be permanently relieved of duty given the number of hours of my time it had wasted by that point, and the fact that it just apparently did not want to live.
These cars are quite prone to issues with fuel vaporisation especially with modern fuels, so upgrading to an electric pump is a very common modification done by a lot of owners. To that extent Rimmer Bros have an all in one kit containing a suitable pump and blanking plate to replace the original pump available off the shelf.
Here the fuel pump has been removed and the blanking plate installed.
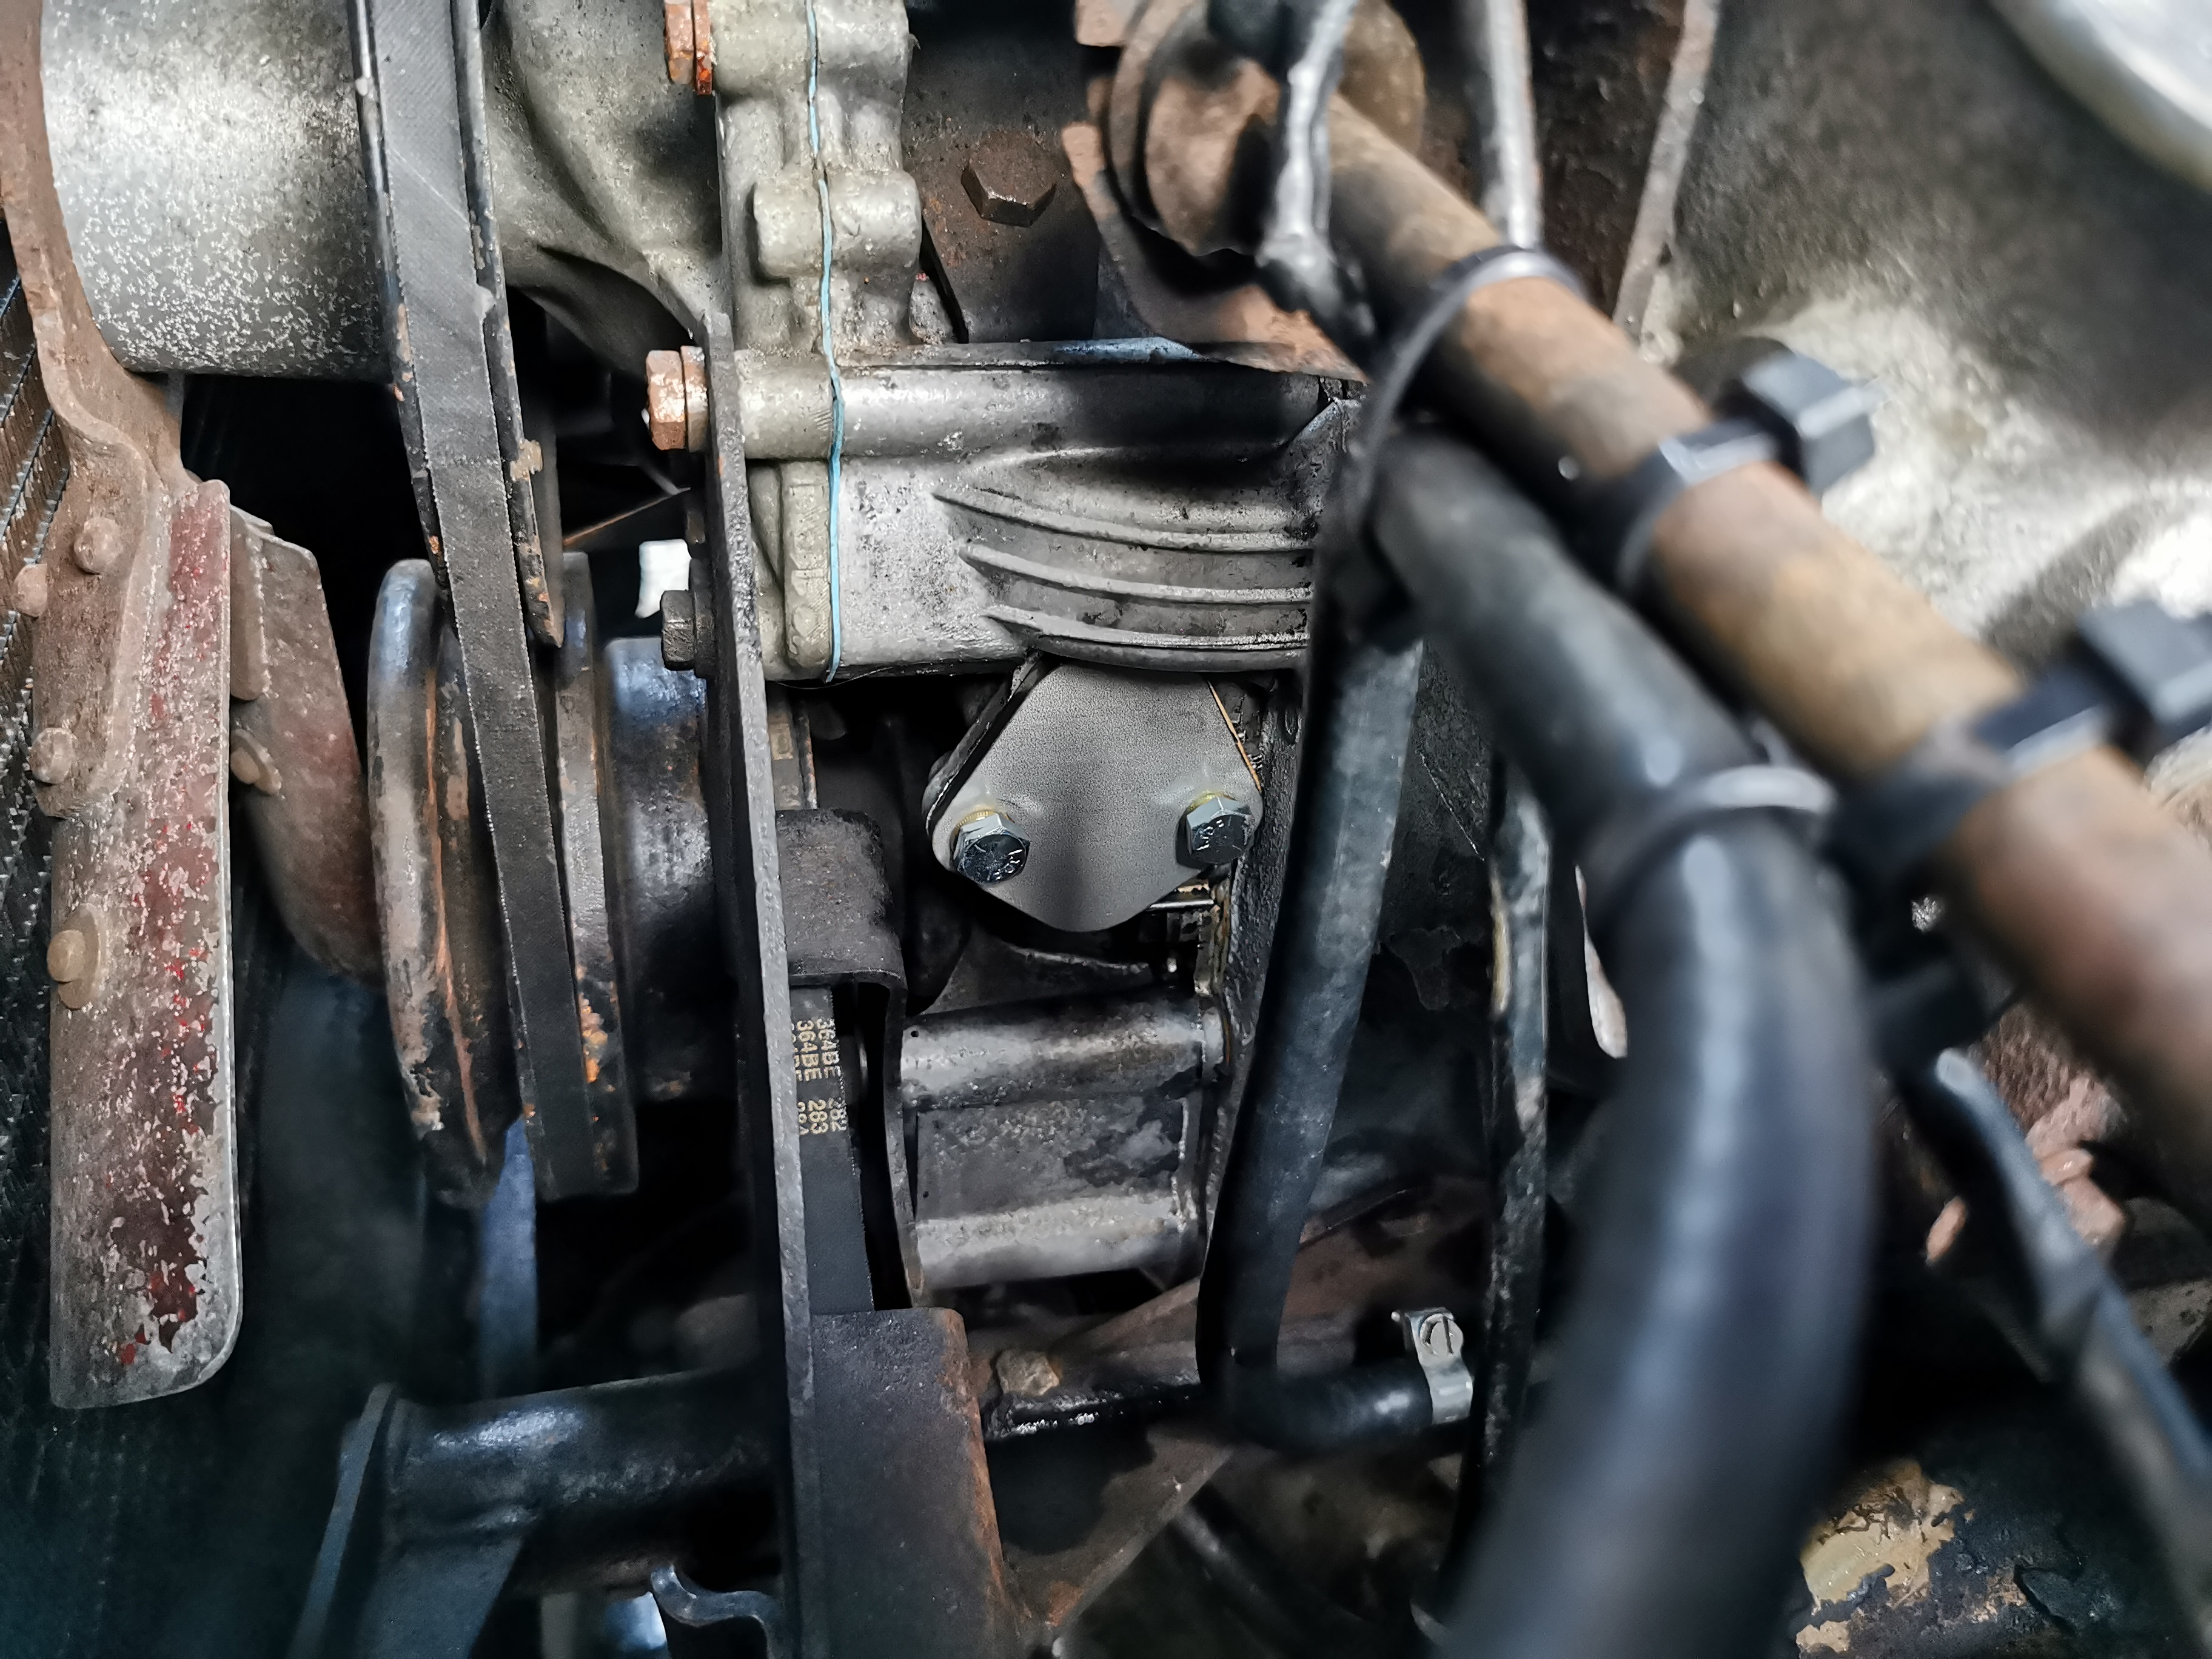
I still need to re-route the lines and wire the pump in, but it is shown physically in place here behind the nearside headlight. There's a conveniently shaped void in there which is otherwise unused. This also puts the pump about as far as possible away from the heat of the engine.
The power will be run from a dedicated fused ignition switched circuit, and very importantly an inertia switch will also be installed to ensure that in an accident that power is cut to the pump. This is a cheap and simple component to install and really should be installed on any car that an electric pump is being fitted to. There will actually be a few electrical issues bundled into doing that as there is evidence of some wiring hackery in the vicinity of the fuse box, and I've had recurring issues with a few intermittent connections in the fuse box itself, so that will probably be replaced shortly.
This pump is specifically rated as being suitable for front mounting as well. Most electric pumps want to be installed as close as possible to the tank and don't do so well having to draw over any distance. This one is appropriately rated though which is nice as it saves having to make any modifications to the plumbing at the back of the car and ensures that the fuel reserve tap can still work as designed.
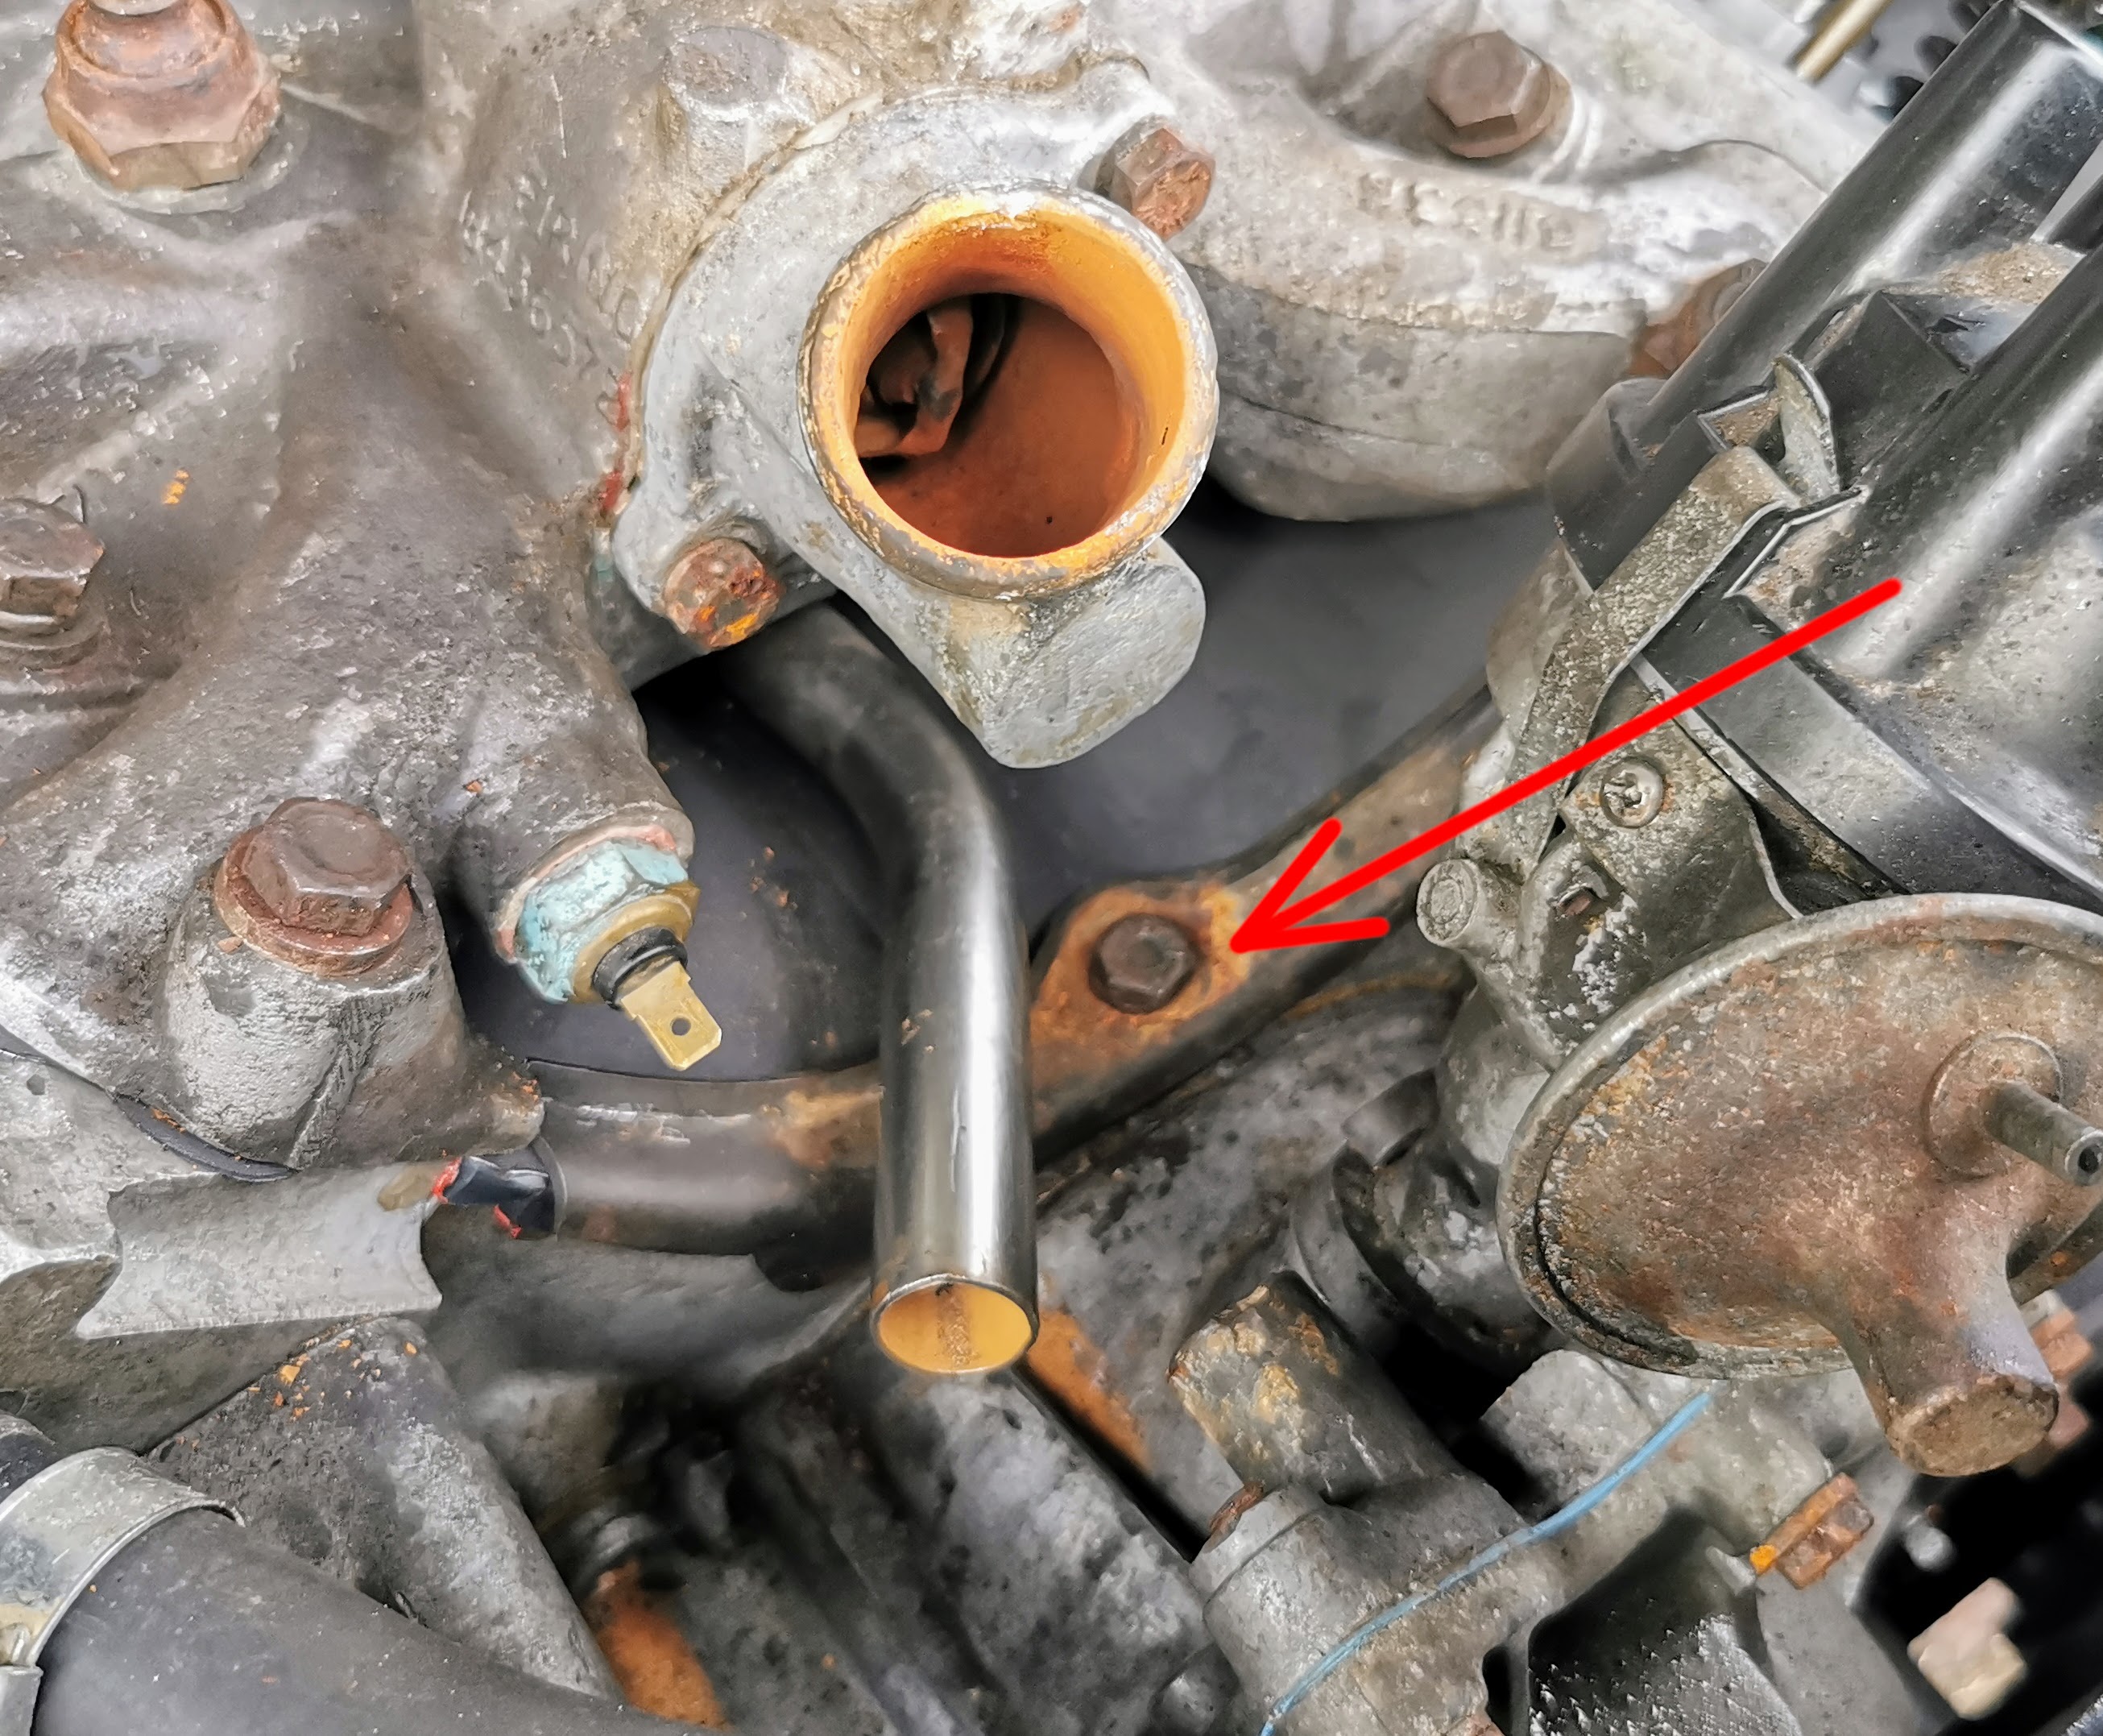
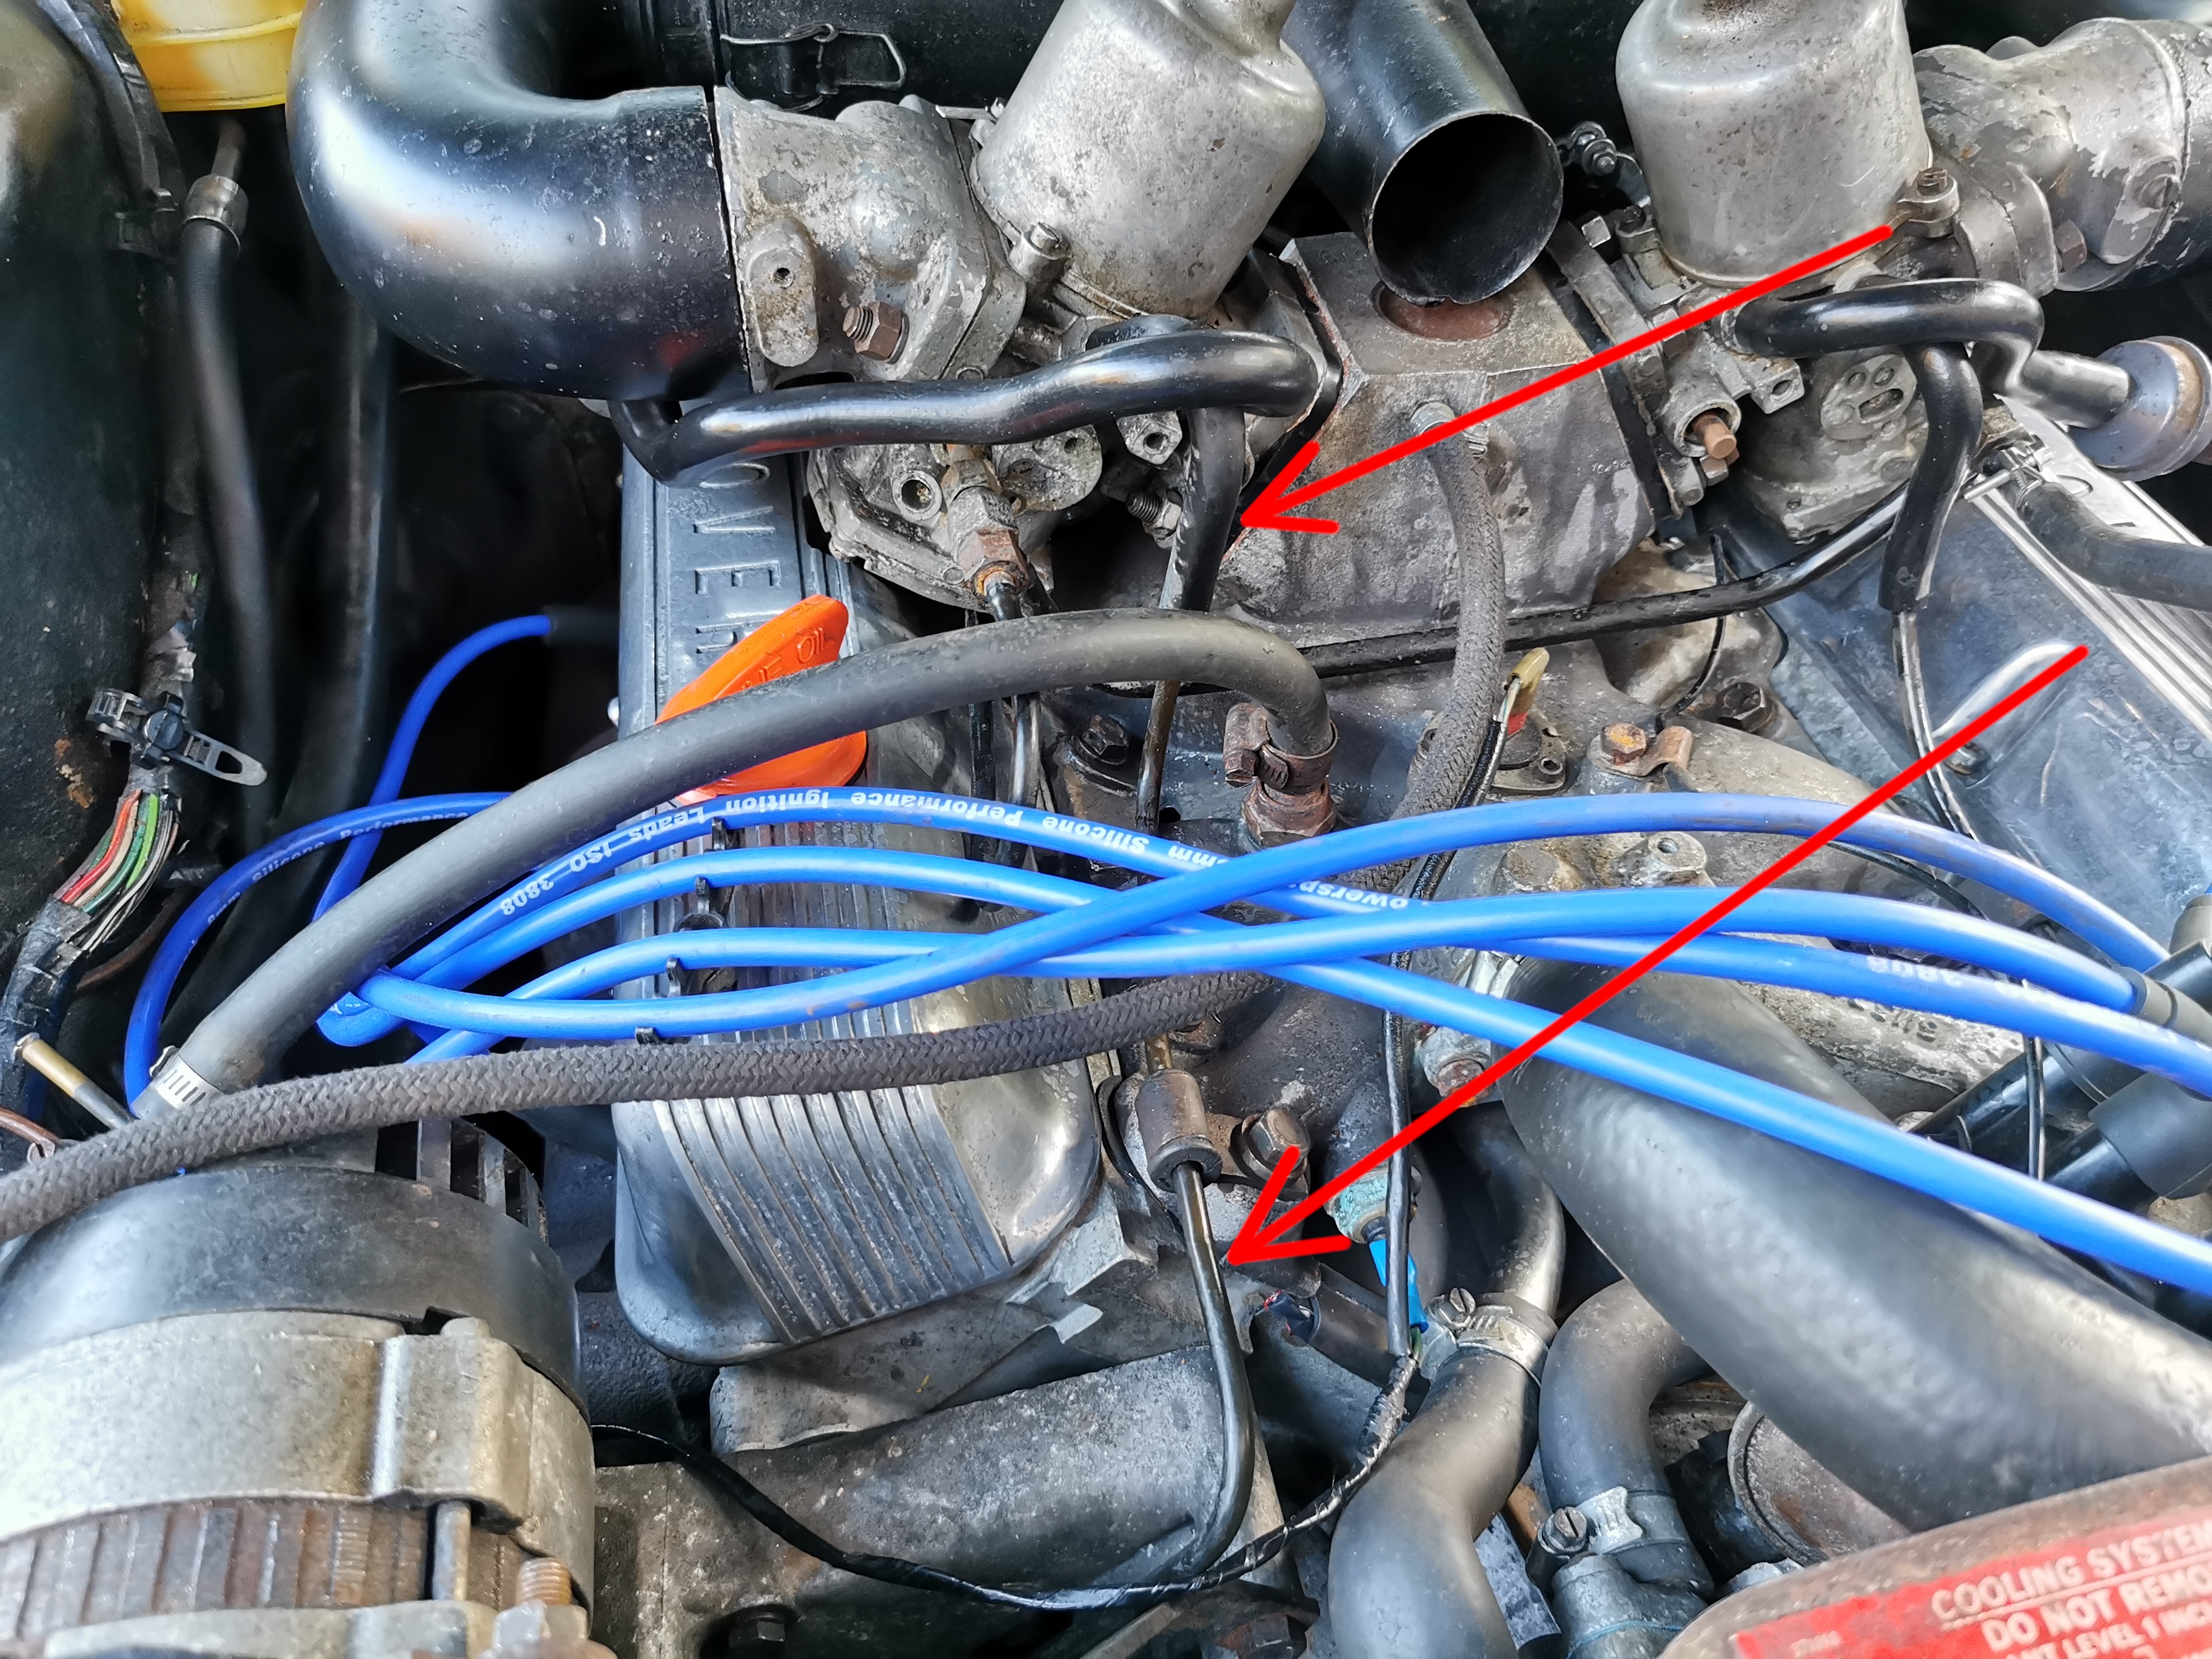
Even with an electric pump in place though I seemed to be getting a lot of fuel vaporisation problems. The pump was audibly unhappy and bubbles were clearly visible in the fuel filter if the car had been idling for any period of time at all once fully up to temperature. It took me longer than it probably should have, but I have figured out why this is happening. One of the ways vaporisation is combat in the P6 is by having a spill line which returns unused fuel to the tank. This ensures that the fuel circulating in the engine bay is moving sufficiently quickly that it never has time to boil off - if that line is blocked though this obviously won't work. It really is necessary, as aside from the fact that the presence of a V8 in a not all that huge engine bay chucks out a lot of heat, the fuel line routing doesn't really do itself any favours. The fuel main/reserve tap is bolted to the bulkhead only a couple of inches away from the rear of the right hand exhaust manifold, and the line then runs from there up over the bell housing behind the engine before running along the left hand lower edge of the block to the mechanical pump, so tucked between the block and left hand exhaust. So the fuel is given plenty of opportunity to get plenty toasty, especially when the car is idling.
A cropped image below from an ancient Autobooks manual shows how the return line feeds back to the pickup assembly in the tank - actually feeding into the fitting from which the reserve fuel feed is drawn from.
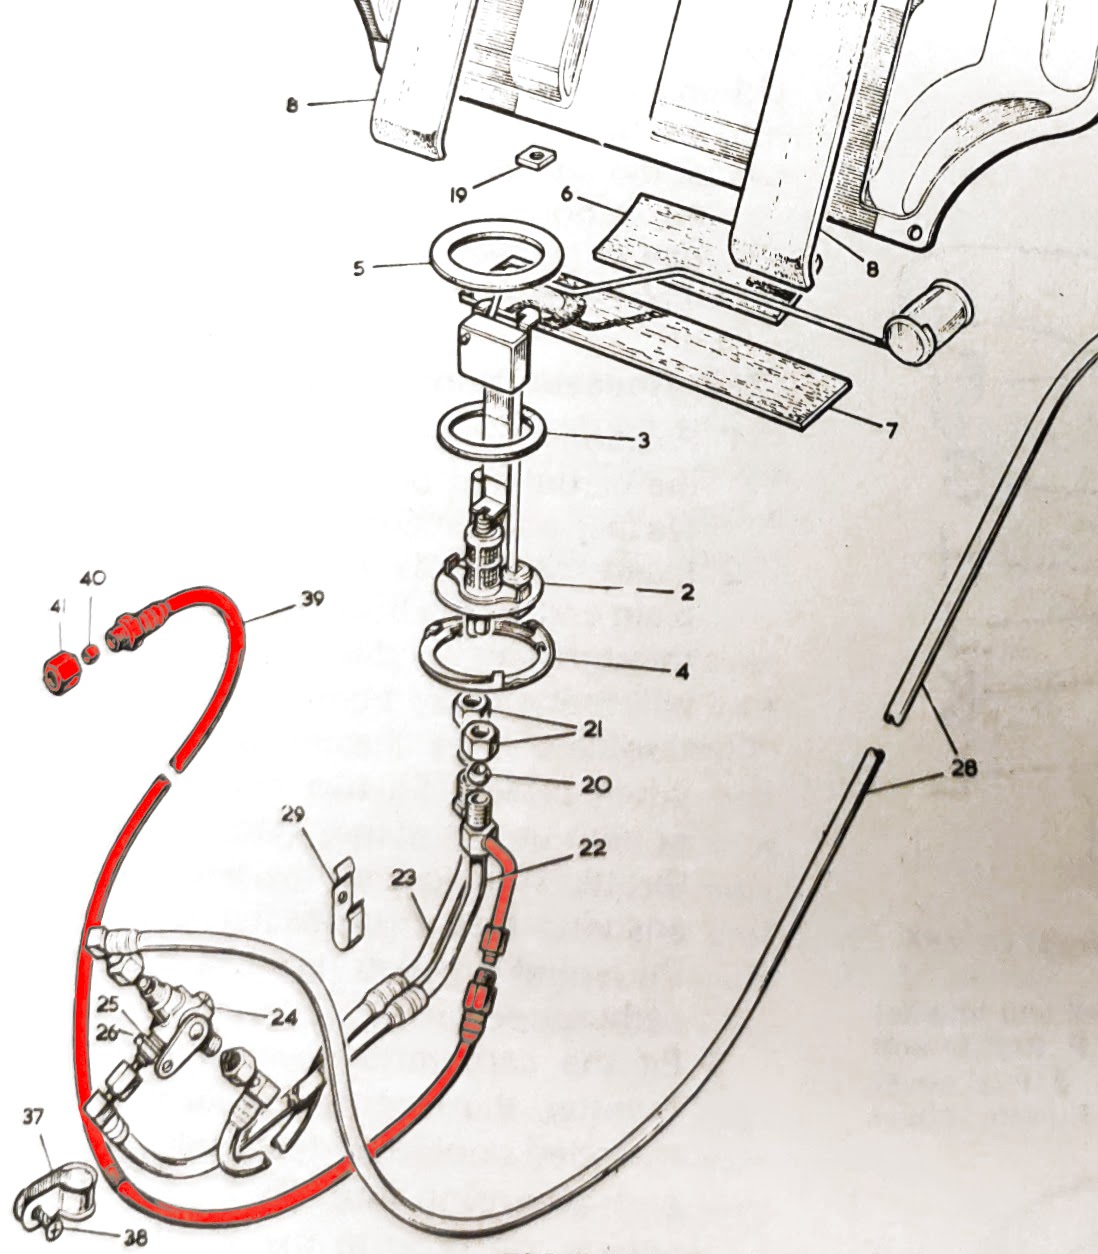
There must be an orifice somewhere in this arrangement to ensure that sufficient pressure is fed to the carburettors to keep the bowls full rather than the fuel all simply spilling back to the tank. My suspicion is that said orifice is incorporated into the fitting numbered 22 in the diagram, and that this is very likely to be where the clog is. Unfortunately this is going to be quite awkward to look into as said fitting is fastened into the bottom of the fuel tank (so has somewhere in the region of 14 gallons of fuel currently sitting on top of it) and is only accessible from underneath the car.
I have tried the obvious things of attempting to blow the line clear with compressed air and likewise to apply a vacuum to it to see if the clog could be pulled back down the line, sadly without any success. So this is something I will need to continue digging in to in the coming days.
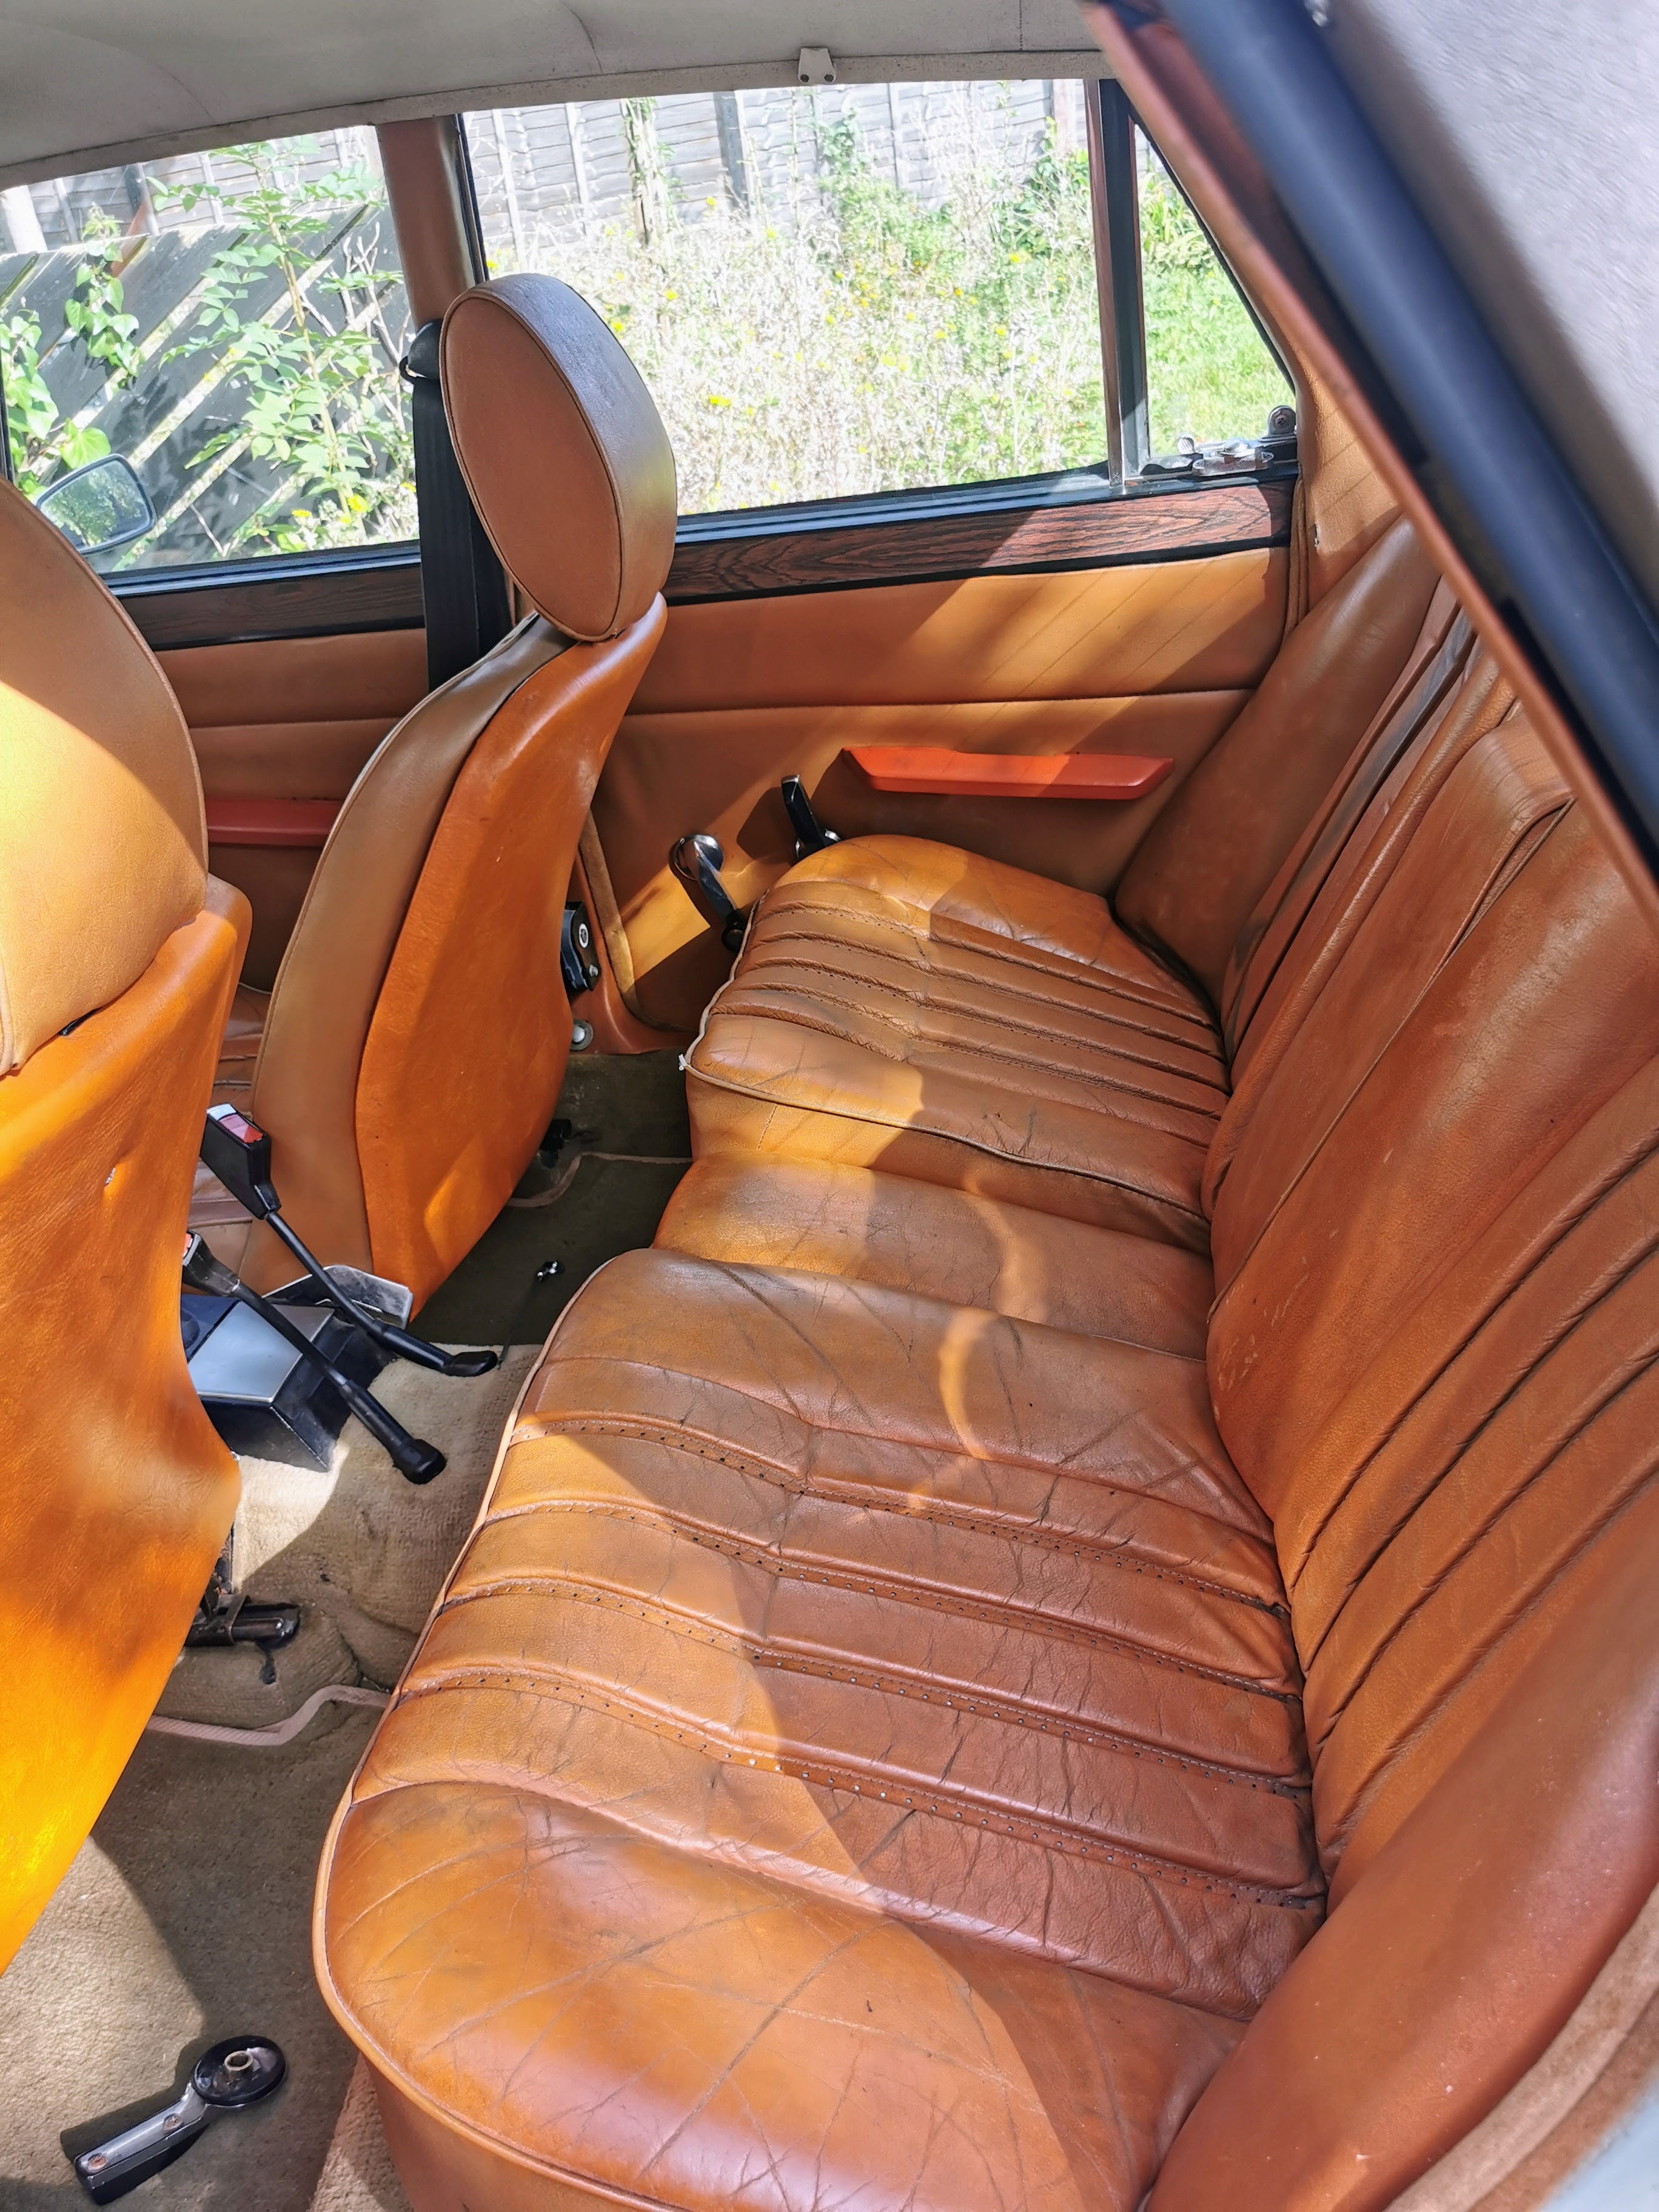
Since the car arrived here I have mostly been concentrating on the mechanical side of things, with the interior having really only had a preliminary clean and the seats given a few runs over with the leather conditioner as they were very dry. It's a bit grubby in a few places and careworn as you would expect from a 100K mile car that's knocking on the door of 50 years old but is entirely presentable I think.
There were a handful of really minor but annoying niggles which I was quite quickly able to tick off as sorted.
In the overview of the front of the interior you can clearly see that the finish on the metal end plate of the instrument panel was flaking off. Given that this brackets your view of the dash it's something that is really noticeable from the driver's seat.
This was a nicely simple one to resolve, simply requiring those parts to be removed, given a sand back and then a fresh coat of paint. It looks like they were powder coated with a satin finish originally, but I've opted for a semi-gloss black hammered finish for the repaint. Partly because I think it will look at home there, but also because it's what I had on hand in the garage.
While I'm sure that this will anger some of the purists out there I think it looks quite smart - definitely a lot better than flaky paint and rust anyway.
A closer look at the right hand edge. The whole instrument panel needs to come apart in due course to clean up some of the rust staining behind the window and underneath where the binnacle sits (there's clearly been an issue of water ingress into this area before), but it's definitely an improvement.
The biggest difference though is visible on the left hand side where this used to draw the eye immediately from either the driver or passenger's seats.
While the interior by and large had held up quite well to its mileage one area definitely showing some wear was the pedal rubbers.
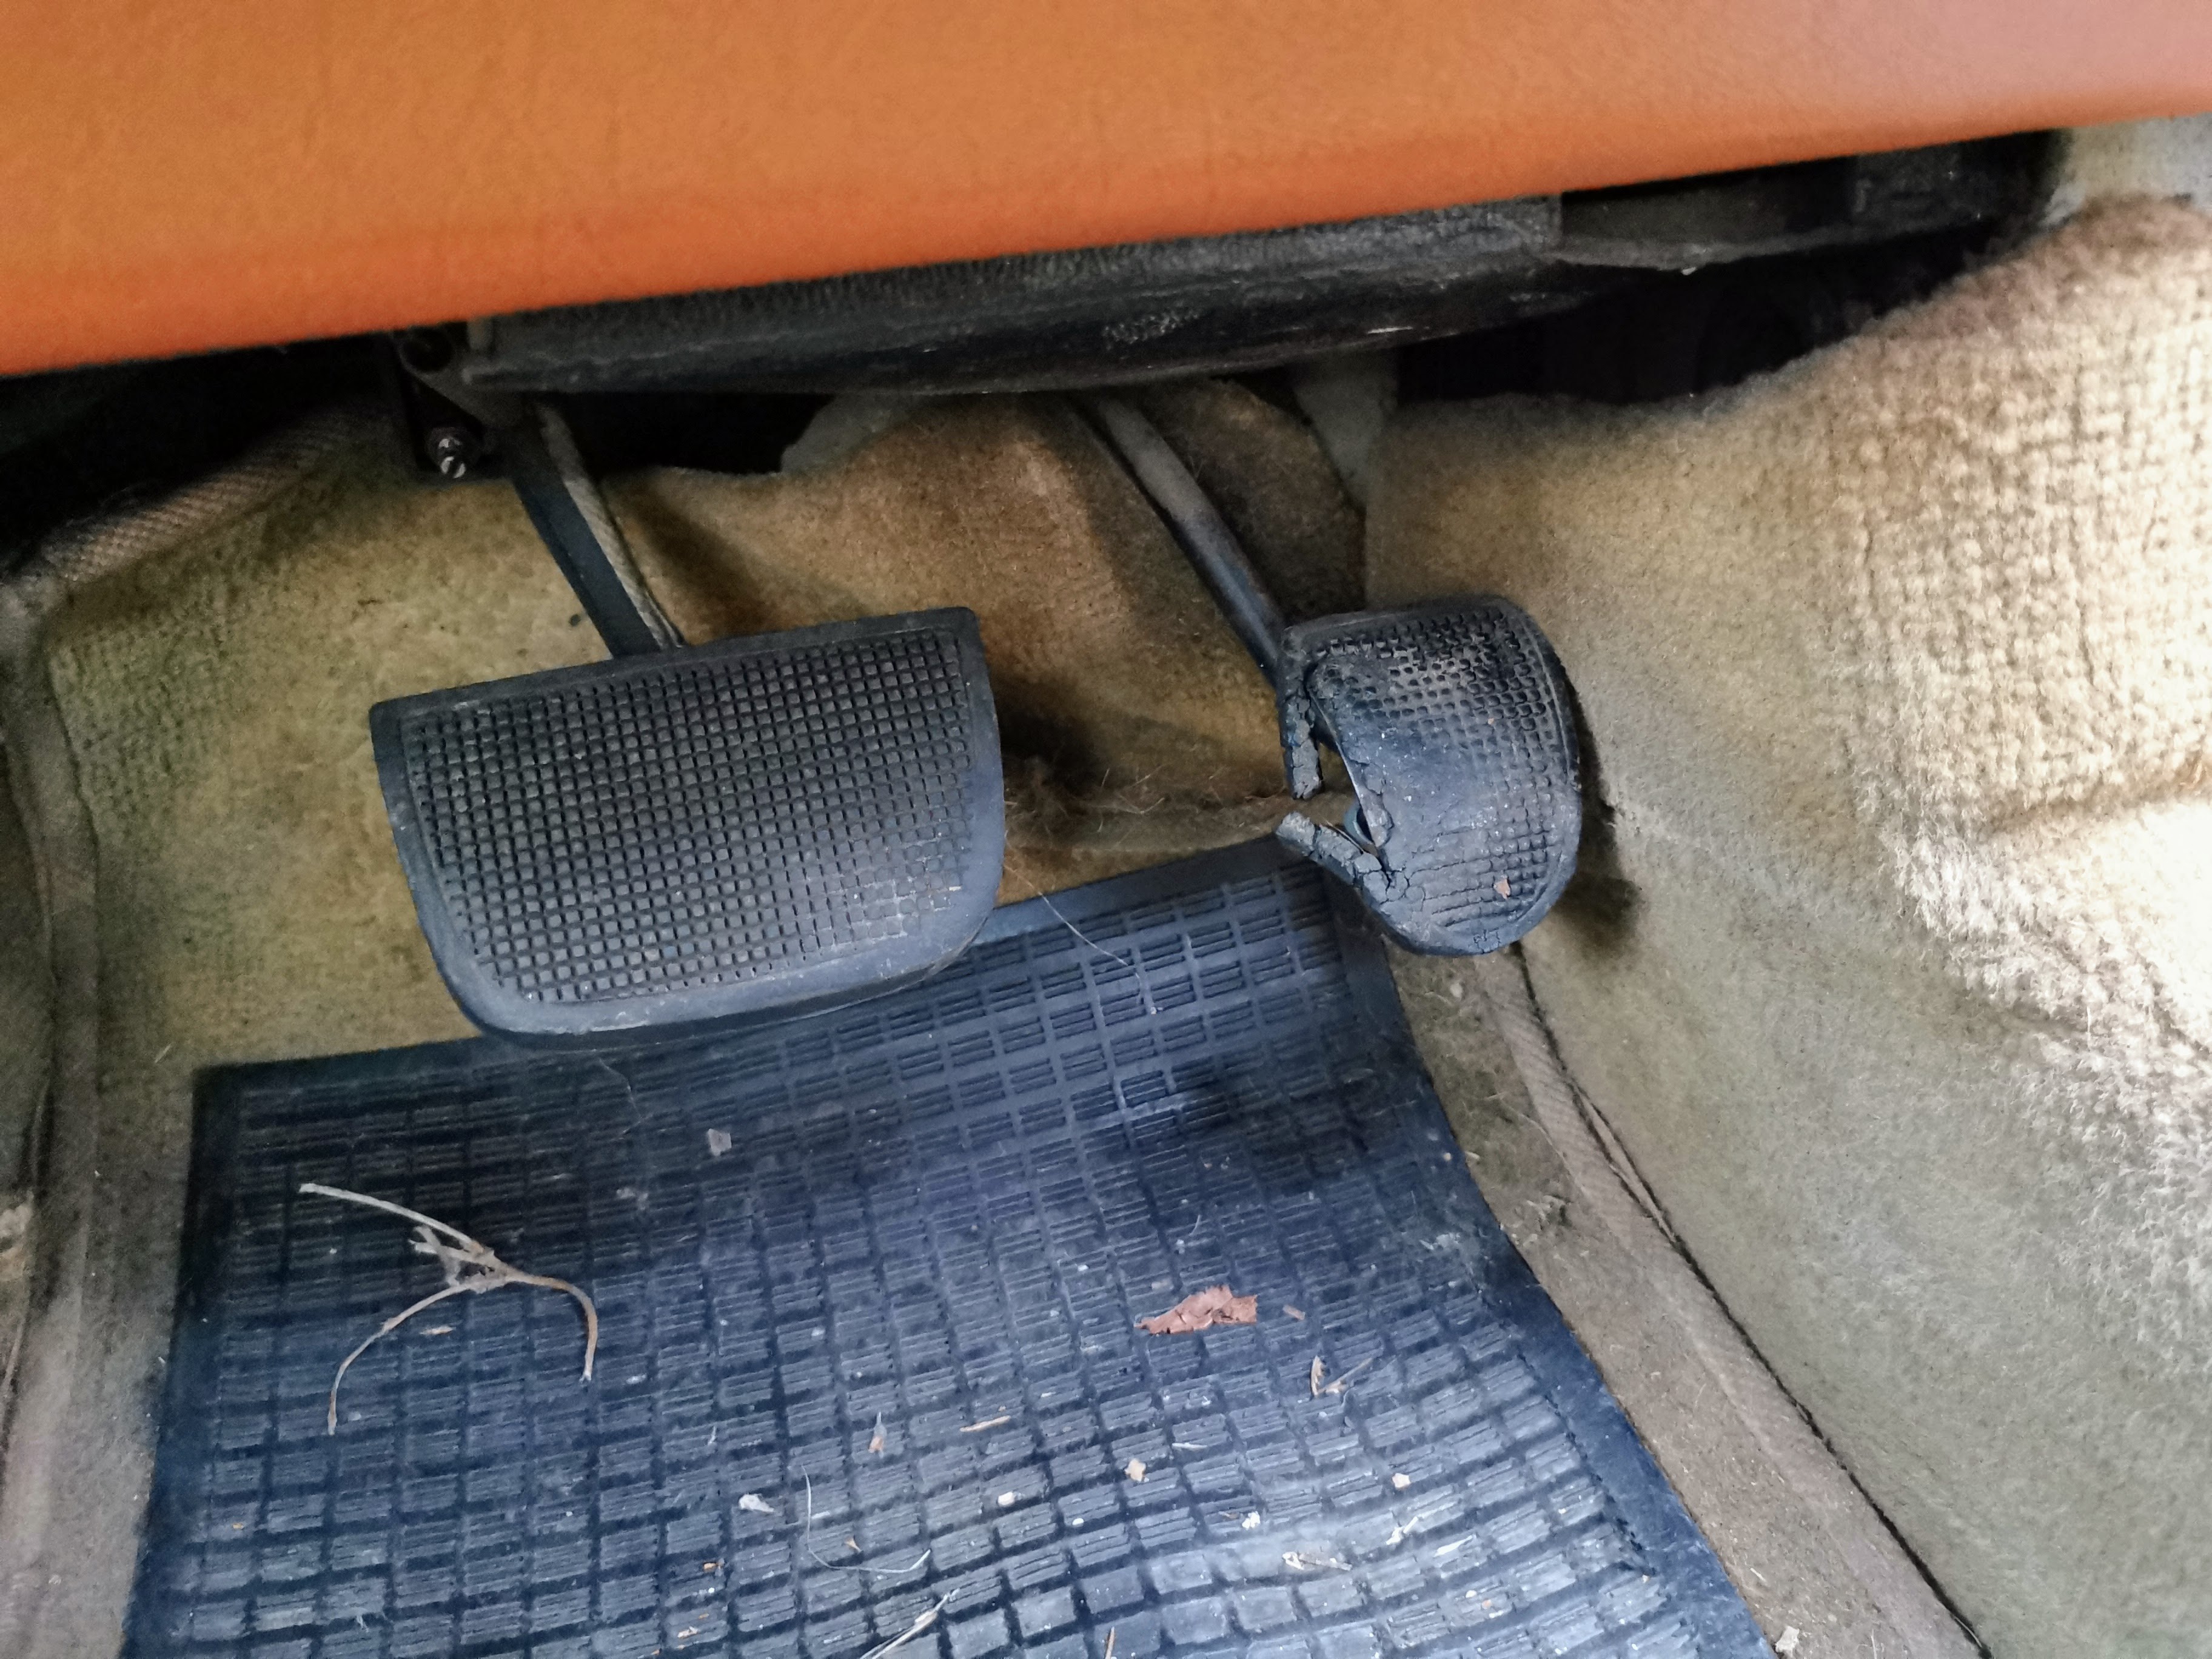
As reproduction parts to replace these were cheaply and readily available it seemed silly not to change those while I was already ordering in other parts anyway.
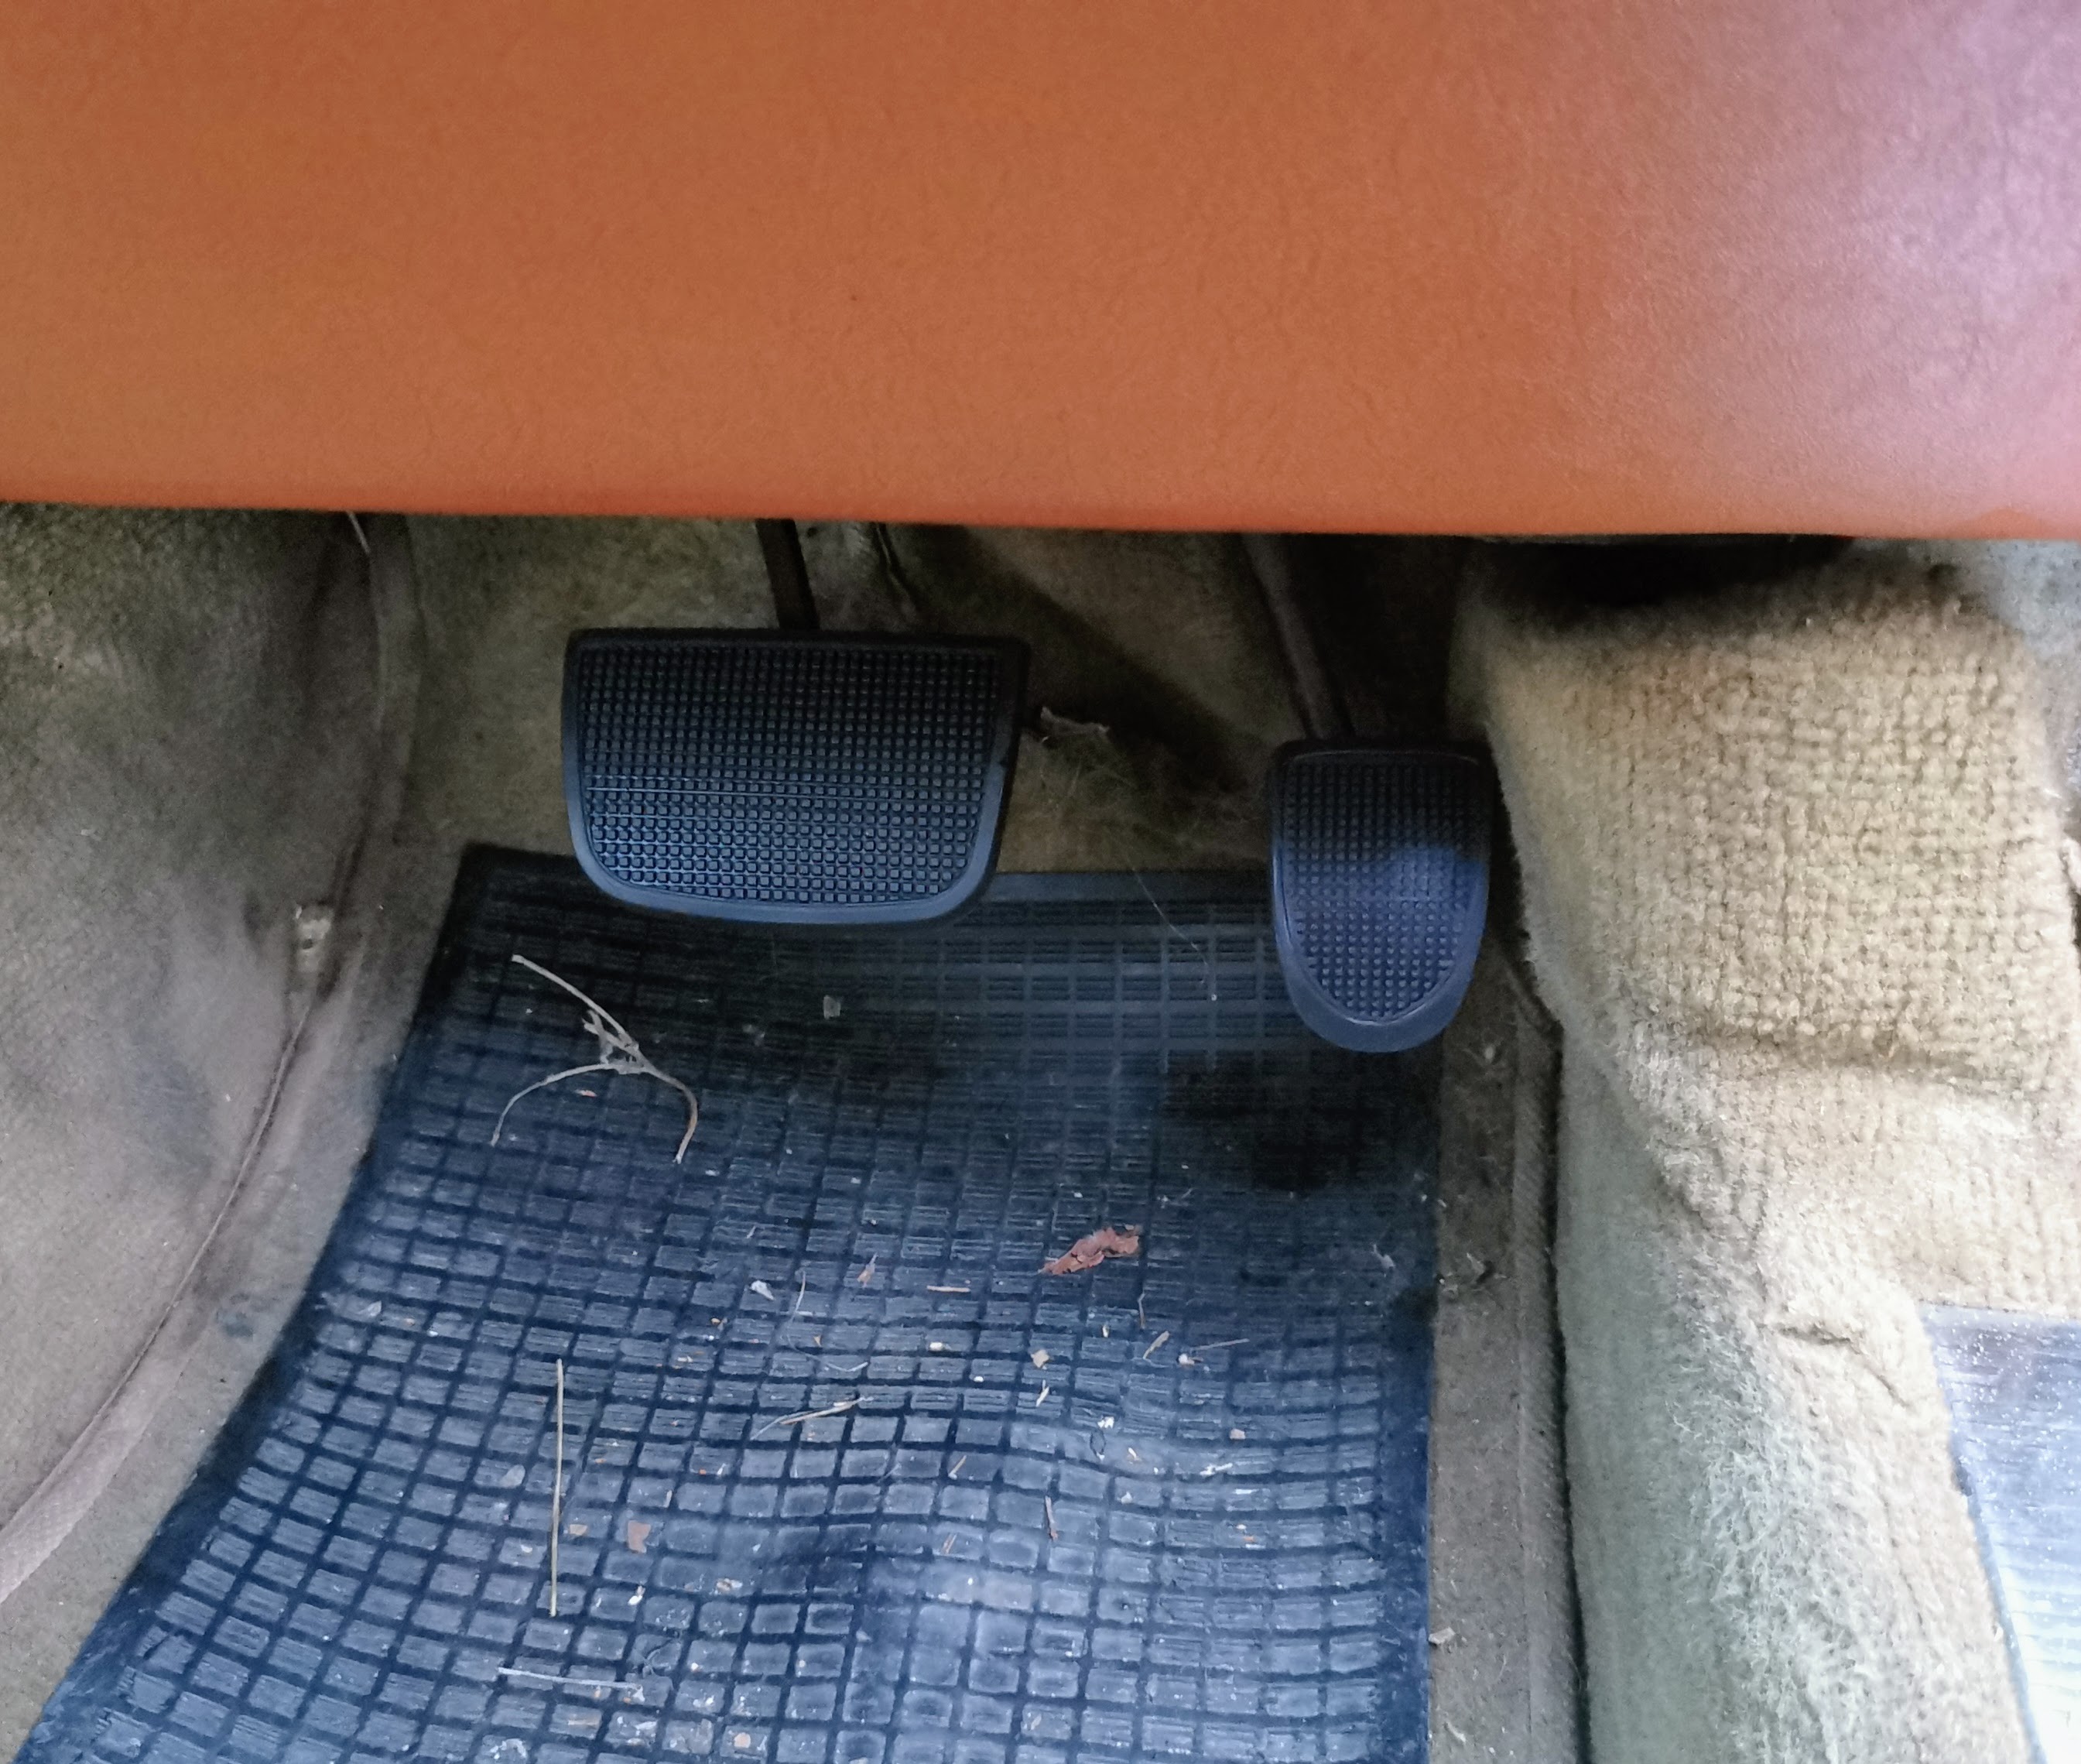
For less than five minutes of work I think that's a reasonable improvement. Again it's just removing something which would immediately draw your eye as soon as you opened the driver's door.
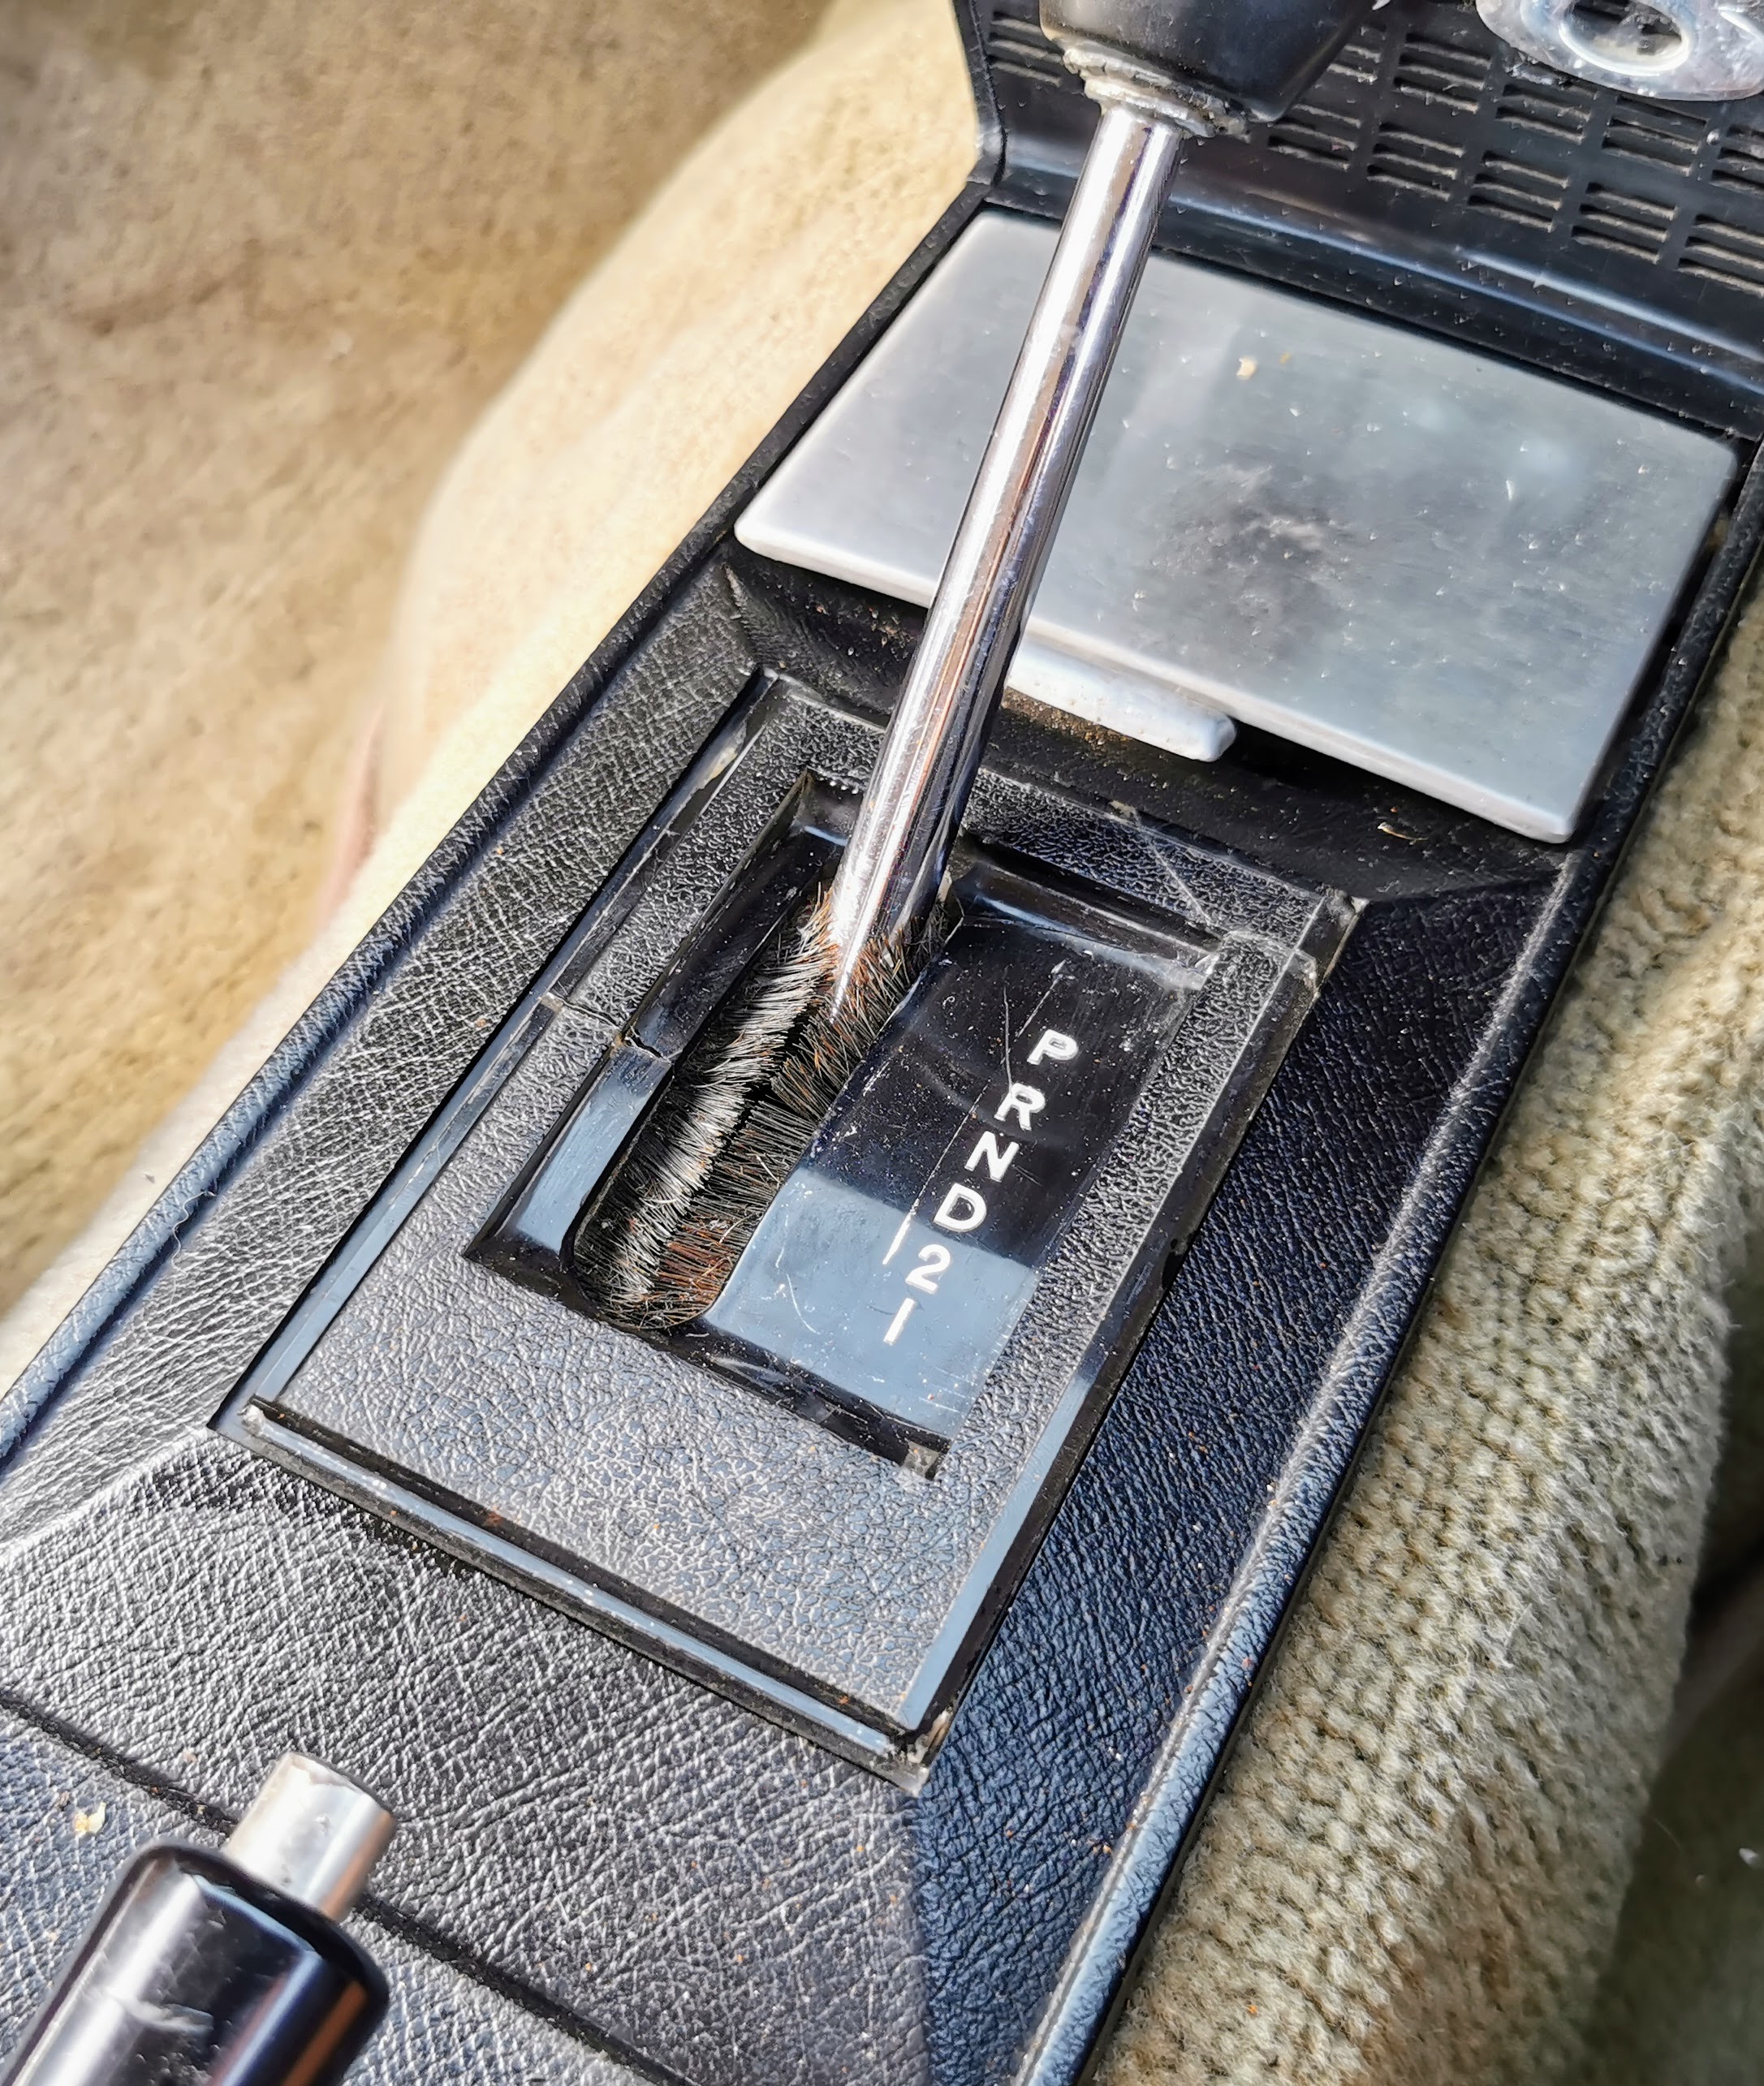
Something has clearly happened to the gear selector cover in the past as it came with the car in three separate pieces. While the damage is still visible, it's now been glued back together so it doesn't fall to bits every time you select park any more.
This brings us pretty much up to date with where things are with this car now. Still quite a laundry list of things to be ticked off - not least the ongoing battle with the fuel system. The tyres, despite being in better shape than some I've seen that are only a few years old are ancient so will want to be replaced. I fully expect to have to overhaul the rear brakes (I'm sure that will be a barrel of laughs, I remember enjoying the massively overcomplicated caliper design last time I touched one about 20 years ago), and all of the brake flexible lines will be replaced as a matter of course as there is some perishing visible on the front ones. The radiator will be getting removed and re-cored shortly as it has a couple of leaks and the fins are failing along the bottom edge. While that's out I'll take the opportunity to reverse flush the rest of the system, replace the remaining coolant hoses, and swap the car back to the correct type of coolant. While the fuel system on these cars is actually relatively ethanol safe as all of the lines with the exception of the bit between the fuel pump and the carb inlet are either metal or nylon, that remaining tail will need to be replaced with good quality ethanol proof hose - as will the O-ring in the fuel reserve tap. A few bits of wiring bodgery need to be investigated and corrected. I'll likely replace the fuse box as part of that work, also allowing me to run a dedicated circuit for the newly fitted fuel pump. A non-ballasted ignition feed also needs to be run to the distributor as someone has fitted a Pertronix Ignitor electronic ignition module in the past, and that should be fed a direct 12V feed, whereas it is currently only seeing around 7V via the original ignition coil ballast resistor. Likewise I'll take a closer look at the non-functional ammeter and fuel gauge. Plus obviously going over all the standard service items like grease points, changing the remaining fluids that I've not already done etc.
That should at least get us to a reasonable point where I should be able to start covering a few tentative miles and start to shake the rest of the bugs out of the works. Expect to see periodic updates here as these things happen, and hopefully the car will be seen out and about both in the real world and some shows going into 2024.
This isn't really a car I ever expected to be covering on this website, its arrival was very much a surprise. Even though it definitely needs a bit of elbow grease here and there it seems a decent base to start from at least.
This page was created on 9th November 2023 and last updated on that same day.
![]()
![]()