A
very simply styled and very well put together set dating from 1948 from
Marconi. The case alone weighs more than many modern radios even
without the chassis fitted!
This
is a set which I recently completed electrical restoration of, it's not
my set, so I can't provide any photographs beyond those on this page.
I didn't do any work on the cabinet aside from giving it a good
clean.
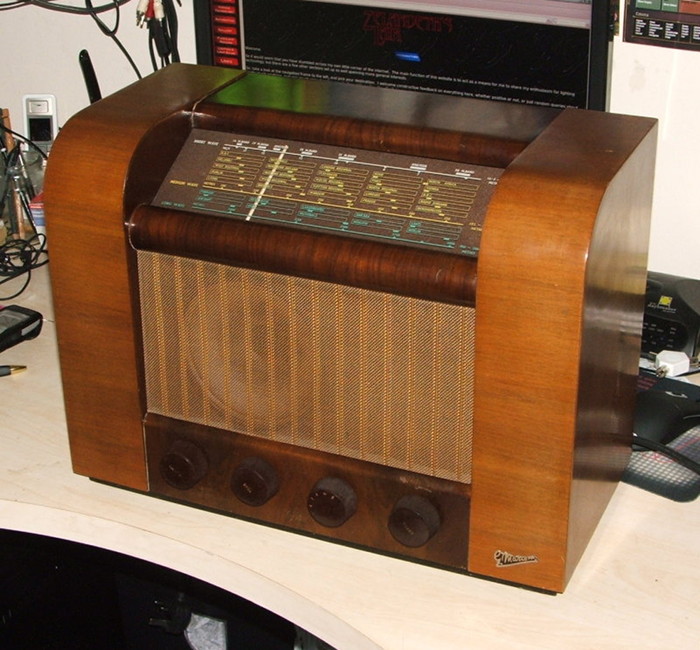
The completed set, the case having been french polished by the owner while I was working on the chassis.
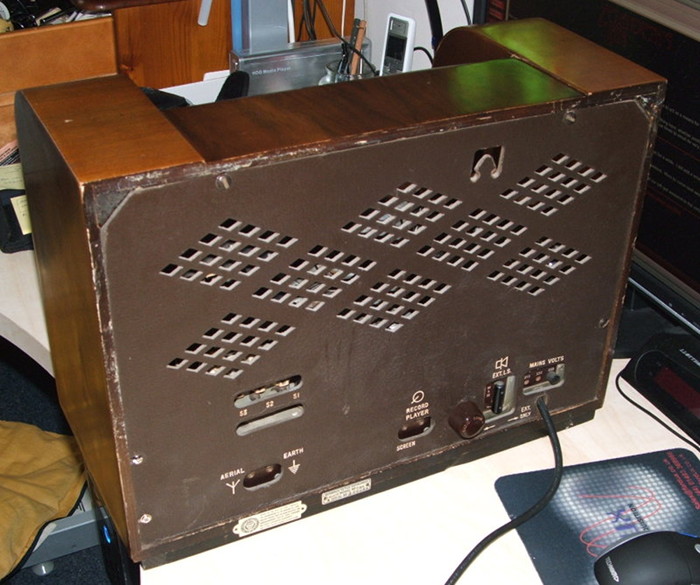
The
same shot, but from the back. The back panel is like new on this
set. The mains voltage selector in this case has been left in
place for the sake of originality, but has been disconnected. You
can clearly see the new mains cable here, which has been correctly
clamped in place and has allowed the chassis to be earthed for safety.
I realise that a couple of the screws holding the back on are
non-original. Unfortunately a couple were missing - and I didn't
have any which perfectly matched, the owner was not concerned about
this though, and as the restoration had already taken me considerably
longer than I would have liked, I decided to settle for function over
form in terms of what held the back panel on!
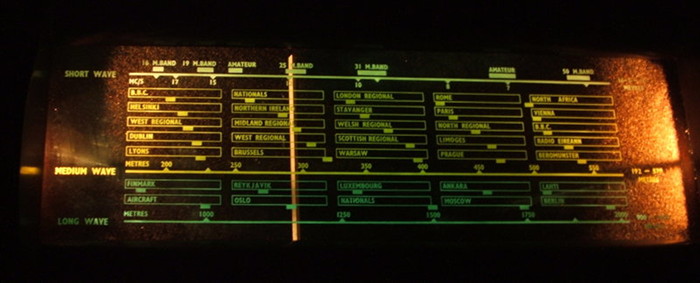
One
thing I particularly like about this set is the illumination on the
tuning scale. Rather than being back, front of side lit, the
scale itself is actually lit by light being injected into the glass of
the scale itself from the sides, making it glow brightly, "floating" in
front of the dark brown background. That background is actually
an unusual fuzzy texture, which reminds me somewhat of the backing card
from a set of Fuzzy Felts (anyone else remember having them as a
kid? The little felt letters/pictures you used to stick to a
background). The light reflecting off the background itself is
far less obvious than the camera makes it look.
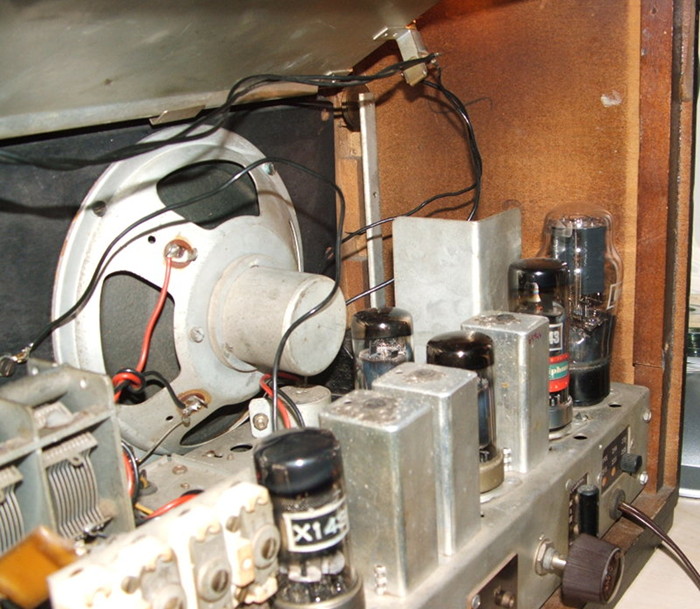
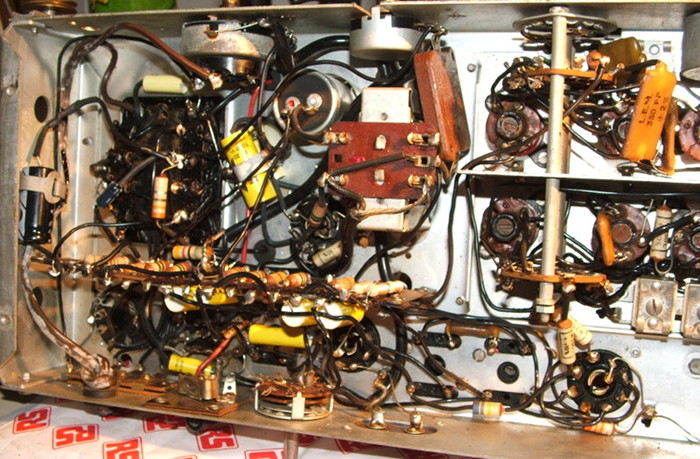
A
quick look in the back - hardly the best angle, but it gives you a
general idea of the layout. It's worth noting that it was given a
general clean and the wires tidied up a bit after this shot was taken.
You can clearly see the red Marconiphone label on the NOS DN143
output valve which was fitted to get this set up and running.
First valve I've ever had to replace in anything so far!
Finally,
what's underneath the chassis. This was taken quite early on in
the restoration, when quite a number of components still had to be
replaced - it was intended as a quick snap to email the owner to show
that progress was actually taking place (as it was taking me longer
than I'd anticipated by an order of magnitude!).
This
was the first set that I ever restored for someone besides myself.
Natrually - as a result of this, it put up a huge fight compared
to anything I'd worked on before!
So...what happened?
When
I first got the set, it looked beautifully untouched. The only
obvious repair being a replacement smoothing cap which looked to have
been replaced in the 70s - which by this point was leaking severely and
starting to evolve into a new lifeform - the cause of the white
substance you can see growing on the mains cable above. Aside
from that though, everything looked okay. A meter proved the
output transformer to be intact, the mains transformer to look okay,
and there to be no shorts. That disintegrating smoother was
replaced on sight - it was easy to get to as well, so took about a
minute to do. The seemingly obligatory 13A fuse in the plug was
also replaced with a slightly more appropriate 3A version.
I
don't yet own a variac - so the lamp limiter was employed, starting
with a 25W bulb, then moving up in steps to give the smoothing caps at
least some chance to reform. They appeared to behave themselves
pretty well, so the lamp rating was increased. Very soon a
significant positive voltage appeared on the grid of the output valve,
so I gave up on that approach, and set about replacing all of the
wax-paper capacitors. There aren't a huge amount in this set, and
they're all pretty easy to get to, the one exception behind somewhat
buried under the internal/external speaker switch - but that comes with
the saving grace of having very long leads, so even that's quite easy.
The only real gripe is that whoever assembled this set was
obsessed with wire-wrapping all solder tags before soldering them!
So removing components from the tagstrip was a bit of a challenge.
Having
replaced all the waxies, power was again applied...and I was greeted
with complete silence, aside from a soft hum from the mains
transformer. A bit offputting really. Out with the meter,
and some scribbles on the service data (obtained from Service-data.com).
These measurements showed that the anode voltage of the output
valve (DN143) was higher than it should be, hence wasn't pulling any
current. This was despite the fact that the valve should have
been biased to a fully on condition, hence pulling lots of current
according to the grid voltages. One new DN143 from Valve & Tube Supplies
(who now hold the record for the fastest response to an email ever - at
42 seconds from enquiry to having a quote for me!) in the set, and I
had sound. Lots of sound in fact, resulting in me nearly jumping
out of my skin, as I'd forgotten to turn the volume control down.
At least this sorted the no-audio fault.
So,
I had sound, this was a distinct improvement - the set however was very
unstable, and seemed quite insensitive. A quick check revealed
that every single one of the carbon film resistors (which admittedly
looked pretty tired - and I swear, I am STILL finding red paint from
them...) was between 20 and 50 percent high in value. Blanket
replacement of them improved performance hugely, though there was a
distinct hum now audible. Replacement of the remaining smoothing
electrolytic (new replacement was mounted beneath the chassis with the
can left in place for aesthetics) cured that in short order.
At
this point, the mains lead was replaced with a modern 3-core lead, and
the chassis earthed, ensuring of course that the positive side of the
mains was switched. The original lead was actually in good order,
but was of course non-polarised and only 2-core - so in the interests
of safety had to be replaced.
At
this point, the set was reassembled, and surprise surprise, actually
worked! It was left running all evening every evening for a week,
without any problems - and then returned to its owner. Since
then, the only problem has been a blown scale lamp. If that
happens again, I'll have to look into it in case there's actually a
problem, though I think it may just have been a duff lamp, as they seem
to be running within spec.
If there are any further developments, they'll be listed here.
The sound from this set is truly impressive, both in terms of tone and overall volume - it can really fill a room!
Updates:
25th January 2021: Minor page
formatting changes to improve mobile usability.
28th April 2023: Revised Statcounter code to
allow for HTTPS operation.