This set has a lot to answer for! Primarily because it was THE piece of equipment which got me into valve technology.
It was retired from active service 20 or so years ago, before disappearing into the loft of a friend's holiday home. Only unearthed again when the house was sold - at which point it came under my care, because he knew I'd always had a soft spot for all things old and unusual. Needless to say, I wasn't going to turn it down.
At this point in time, I didn't know the first thing about vintage electronic restoration, didn't even know what a live chassis was or that capacitors should be reformed. The fact that the set was plugged in with only a few tertiary checks for short circuits and miss-wired mains cables would send any experienced restorers running for the hills - me included now! As it was though, the result was rather anticlimactic - it did absolutely nothing. It was at this point that I decided to seek help. Trawling the internet for information on the set proved that in my usual style, I'd picked up somewhat of an oddball. Luckily however, the extremely helpful people over at the Vintage Radio forums proved that the chassis used by the set was a relatively common one, and managed to dig out information for me. They also advised me of the foolishness of simply plugging in something like this, needless to say, lesson has been learned.
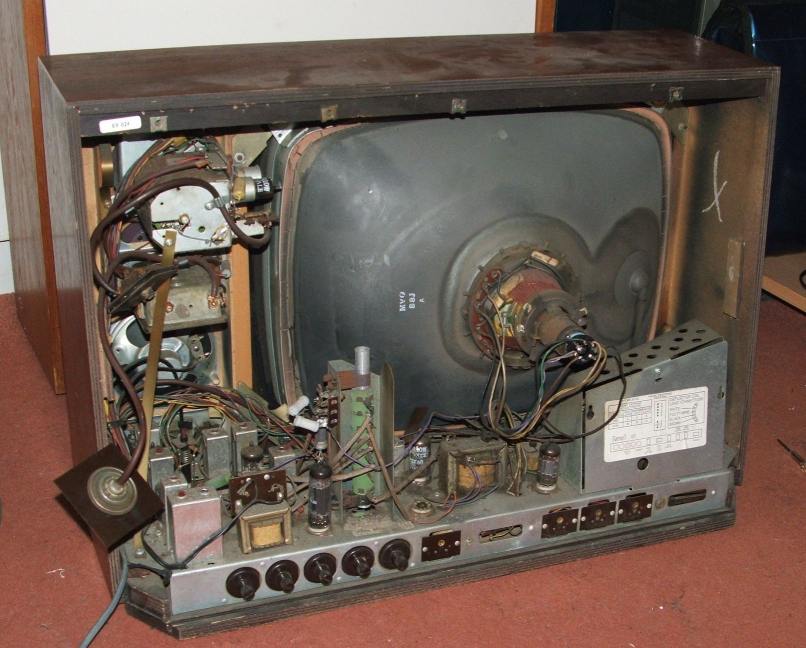
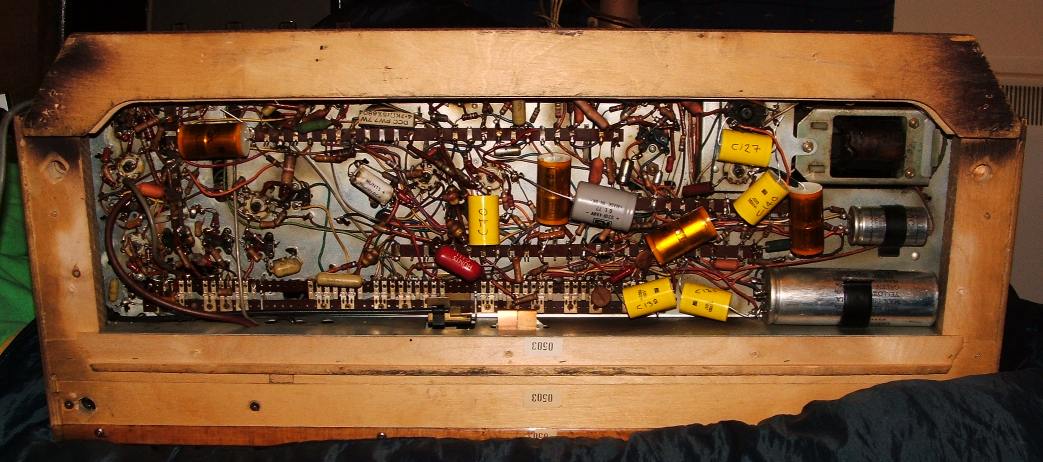
Getting the set "functioning" - I won't say working - required an astonishingly small amount of work to be done, merely the replacement of a single resistor, as a section of the dropper had gone open circuit and one missing, very common valve to be replaced. That done, I was presented with a horizontal line across the screen, and sound. LOTS of sound. Attempting to turn the volume down, the control came off in my hand - wonderful. Cue me yanking the plug out of the socket to shut it off. Having stubbed my toe on the height control (my toe came off nearly as badly) in the middle of the night, shattering the bakelite pot easily explained the vertical frame collapse. Astonishingly, a bit of tinfoil wrapped around a toothpick wedged under the spring clip restored operation. I'll fix it properly when I do the rest of the "snagging" works. A blanket replacement of the moldseal capacitors was done, as all that I checked were horrendously leaky. The rest are those mustard coloured ones which seem to usually be reliable, so were left alone. The electrolytic capacitors, despite their rude awakening, seem to have reformed perfectly fine.
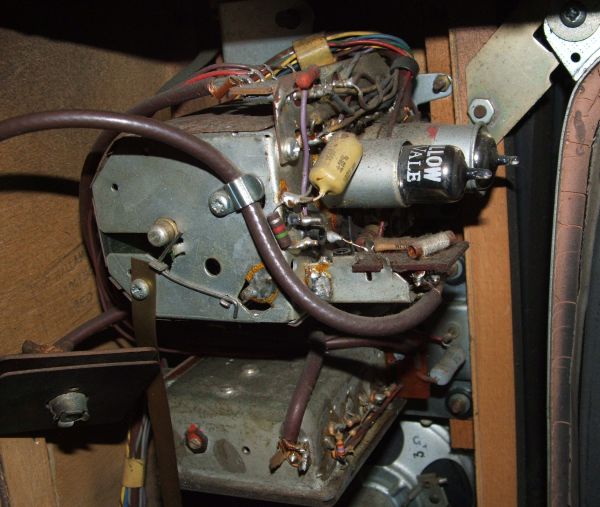
This led to a set which operated in a perfectly stable manner, with good geometry even. About at the point I said that, one of the resistors tacked onto the side of the dropper frame expired in a puff of smoke. Further investigation revealed that this wasn't original, but was a later add on with wires disappearing into the rats nest under the chassis. This turned out to be a previous owner's attempt to boost the voltage to the tube heater to compensate for a low emission tube - while it has helped, it hasn't helped enough. The CRT has, to be totally honest, had it. I am going to build a booster to see if I can give the tube a kick to get some more life out of it, this isn't something that's likely to happen overnight though. Further progress on this set is on hold until I either get around to trying that - or a CRT in better shape turns up.
The dark "Oraglass" screen on these sets mean that low emission CRTs were a common problem, as the higher than average brightness levels required to compensate for the dark screen makes an even slightly weak CRT immediately obvious. Even in less demanding applications, they're not renowned for being particularly long lived anyway.
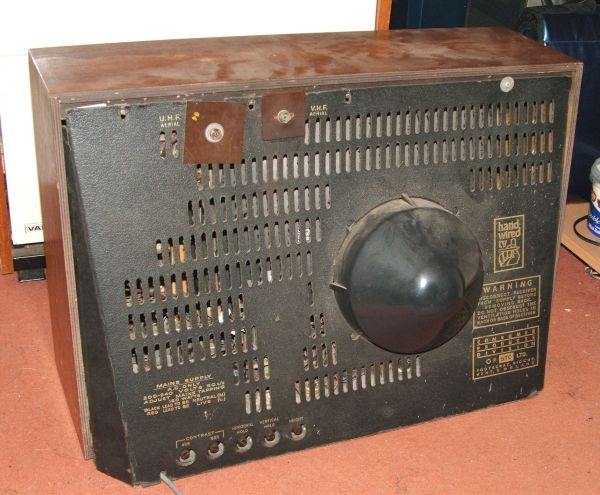
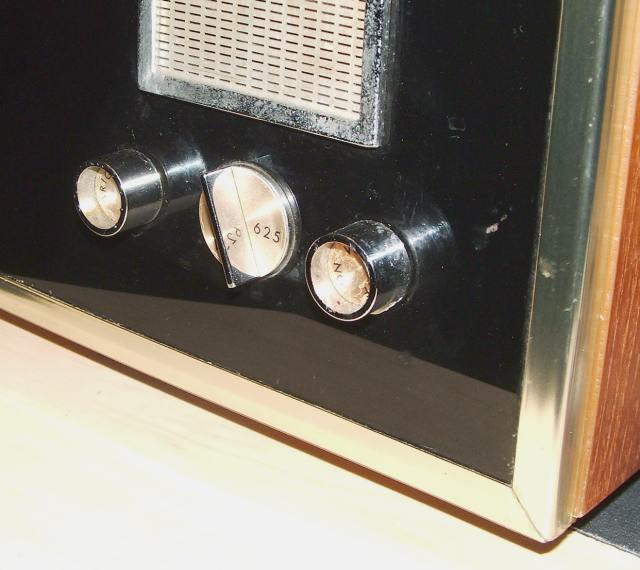
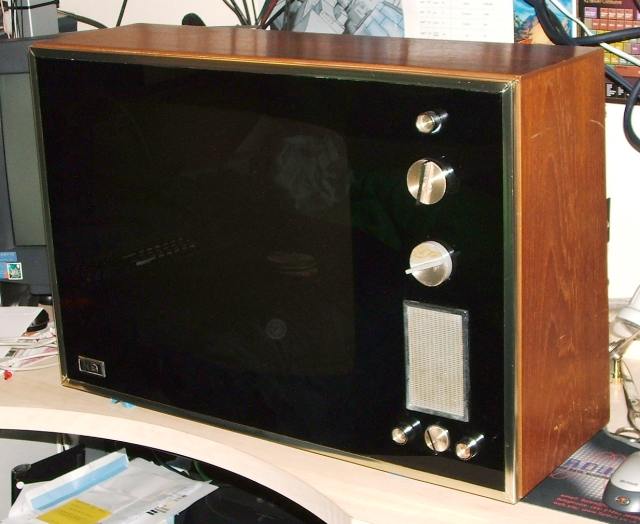
The work required to the cabinet is minimal to be honest. Just a few scratches on the sides, which are not even deep to sort out, and some missing feet to either source or manufacture. I've got some rubber blocks which are exactly the right thickness to make it sit level (you can just see one of them in the photograph below), which I may simply paint black and mount far enough back that you can't see them. Not original I know, but at least it would stop me from getting my fingers crushed every time I move the thing. I count myself very, very lucky that the screen is completely scratch and crack free. You don't need me to tell you how paranoid I am about scratching it! I do need to replace several broken spindles on the controls though - the power/volume control is broken, the 405 fine tune control is broken, and one of the tuning knobs is half broken - luckily in that case it's just a little loose, so I'm just careful with it. Replacing those is going to require removal of the chassis from the cabinet, which will be a right fiddle as the tuners are mounted to the cabinet rather than the chassis. Fingers crossed the wires are long enough to actually get it to bits without having to desolder anything though.
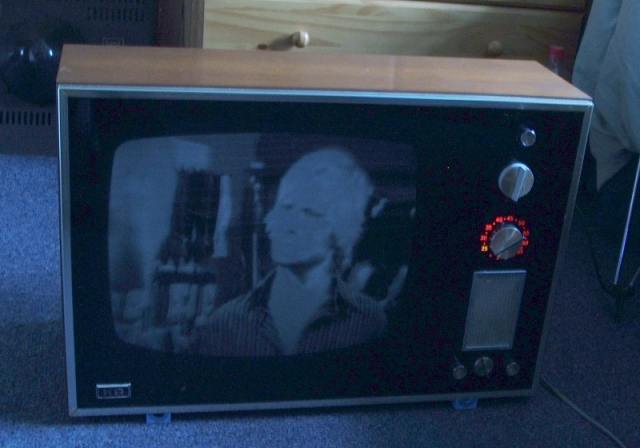
The flat, black screen in conjunction with some very bright chromed controls, tuning indicators which shine through the controls and a relatively slim profile give an impression that this must have been quite a high end set. One which appears to have quite a low survival rate, as I've yet to see another. If you do have a KV024, I'd love to hear from you, some photos of another actually up and running properly would be great too.
This restoration is very much ongoing. Electrically there are just couple of minor tweaks still needed. One electrolytic cap to replace, which I need to get either the chassis or the tube out to get to, tidying my repair to the dropper, and removal of the previous owner's tube heater bodge. Oh...and replacing the height control pot...These are all things which can wait until such time as the CRT problem is sorted though. Once that's done, it'll be put on display at my parents place, and used occasionally. Watching Dr. Who for one thing...
It's a lovely looking set, and at least a bit of a rarity. Not maybe the first thing you should tackle though! I heartily recommend starting with radios...rather than doing it backwards like I did, and ending up getting into those afterward.